Prepare your paper
One square and space to open the layers
- One 25 × 25 cm square of thin, uncoated origami paper. This is a proposed practice size; its handling has not been physically tested.
- Two contrasting faces help you follow the sequence. Terracotta represents the coloured front and cream the reverse in these diagrams.
- A flat, clean surface and good light for identifying the separate lower points. No scissors, glue, wire or inflation are required.
- Optional ruler and a very light pencil mark for dividing the neck into five equal lengths at the head step. This is a shaping reference, not a cut.
- Dashed line: New valley fold or its temporary rehearsal
- Thin line: Existing crease or edge of a separate layer
- Curved arrow: Move only the stated flap; a loop turns the whole model over
- A and B: References identified in the current step
Left and right are your own. Start with the coloured front up. Turn over only when the text says so; keep the same top edge during a turn over. The square is rotated on the table in step 7. Later views are resized to show the layers, without an additional rotation. The final two views explicitly change to an oblique camera to show the opened wings.
Read the complete paper & materials guide ↗Prepare the bases, then reverse the narrow points
Step 1: Position the square
Place the square with its coloured front facing up and its edges horizontal and vertical.
Orientation: Terracotta front up; cream reverse against the table.
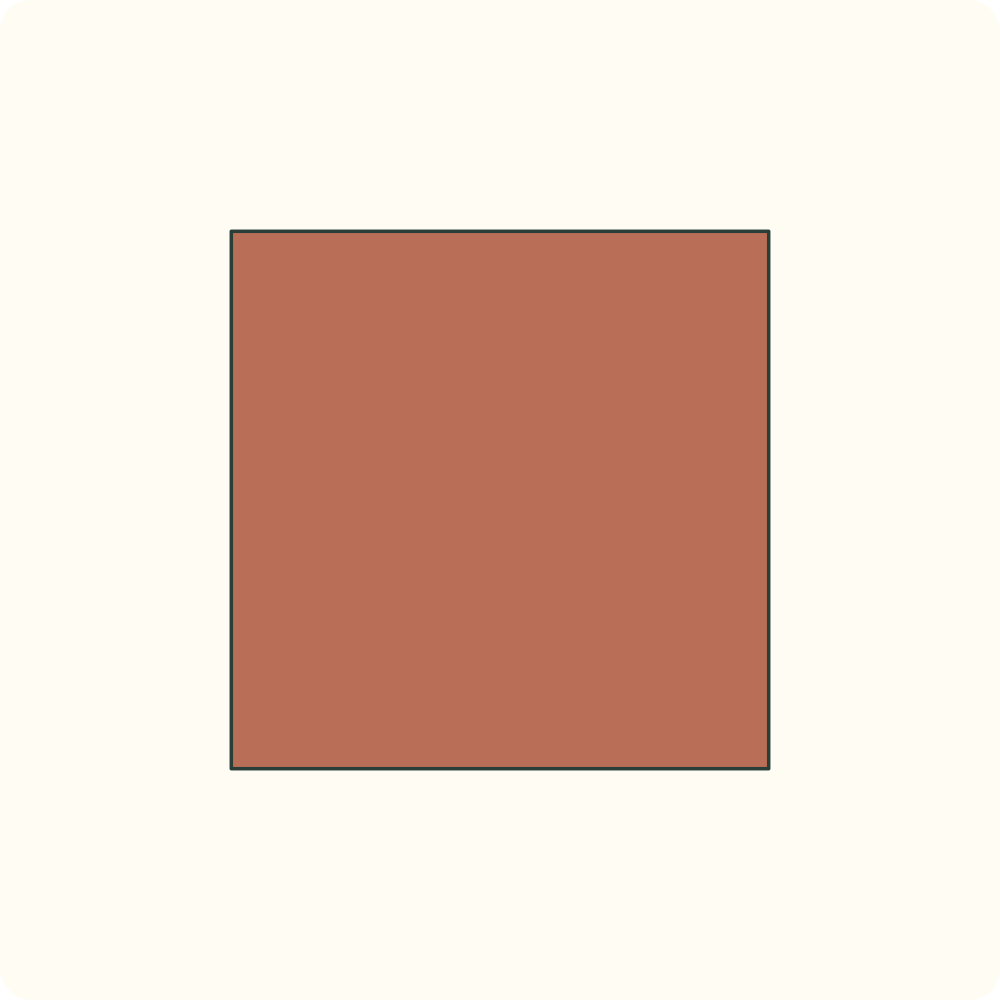
An unfolded square has four straight edges.
Step 2: Precrease the first diagonal
Bring the bottom-right corner to the top-left corner, press the diagonal, then reopen fully.
Orientation: Coloured front up again after reopening.
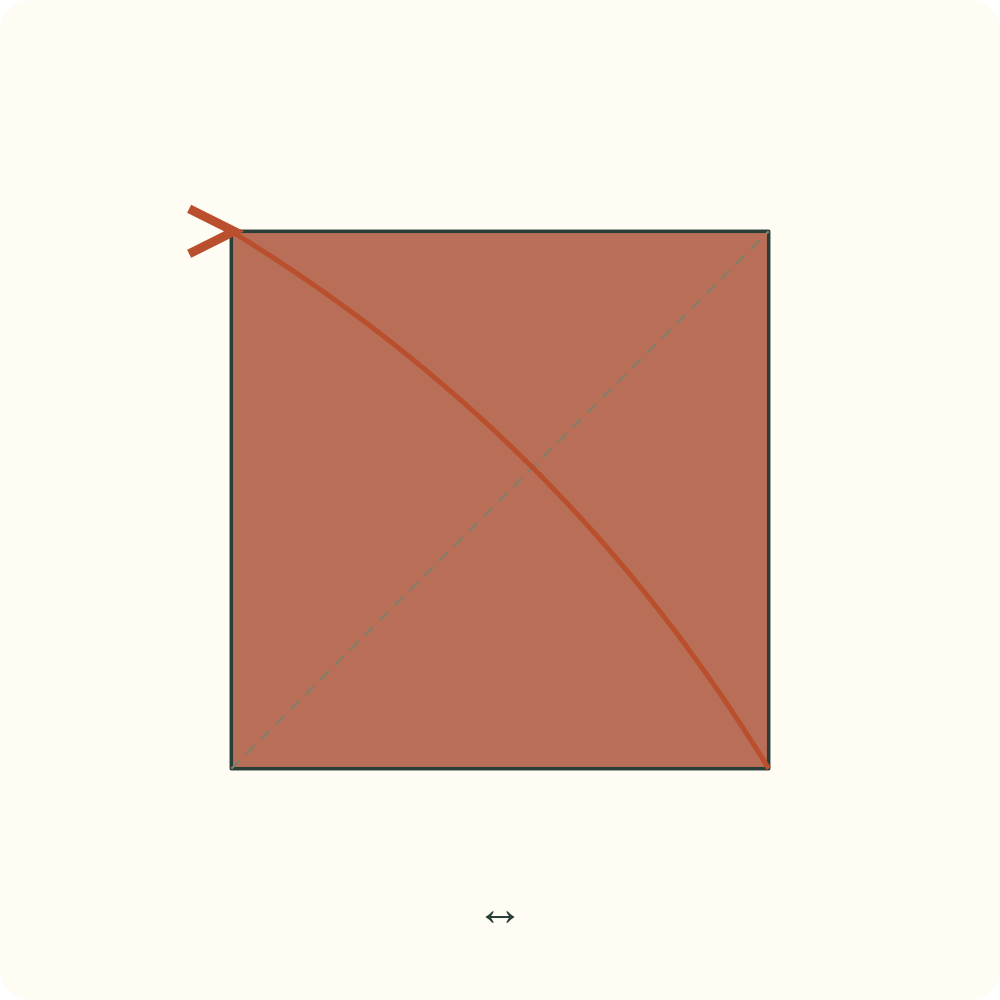
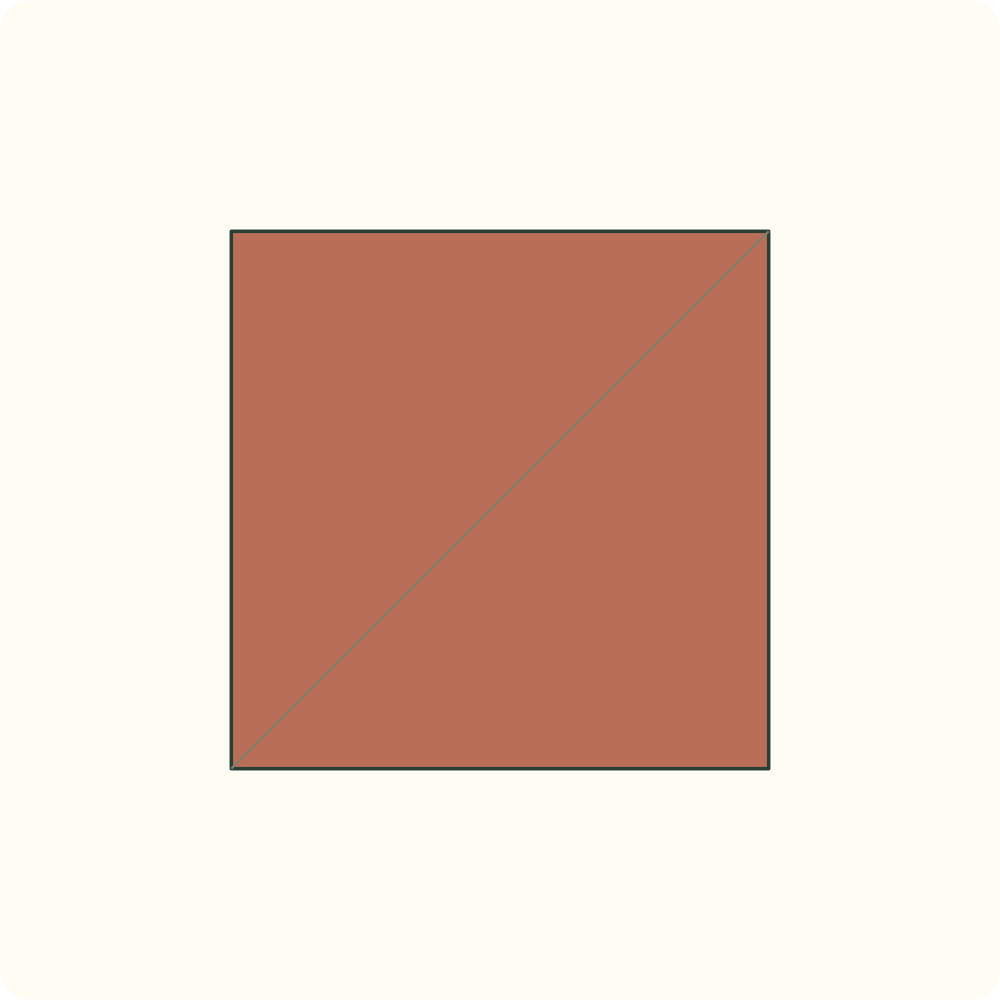
A crease joins the bottom-left and top-right corners.
Step 3: Precrease the other diagonal
Bring the bottom-left corner to the top-right corner, press and reopen.
Orientation: Keep the same coloured front up; do not rotate the sheet.
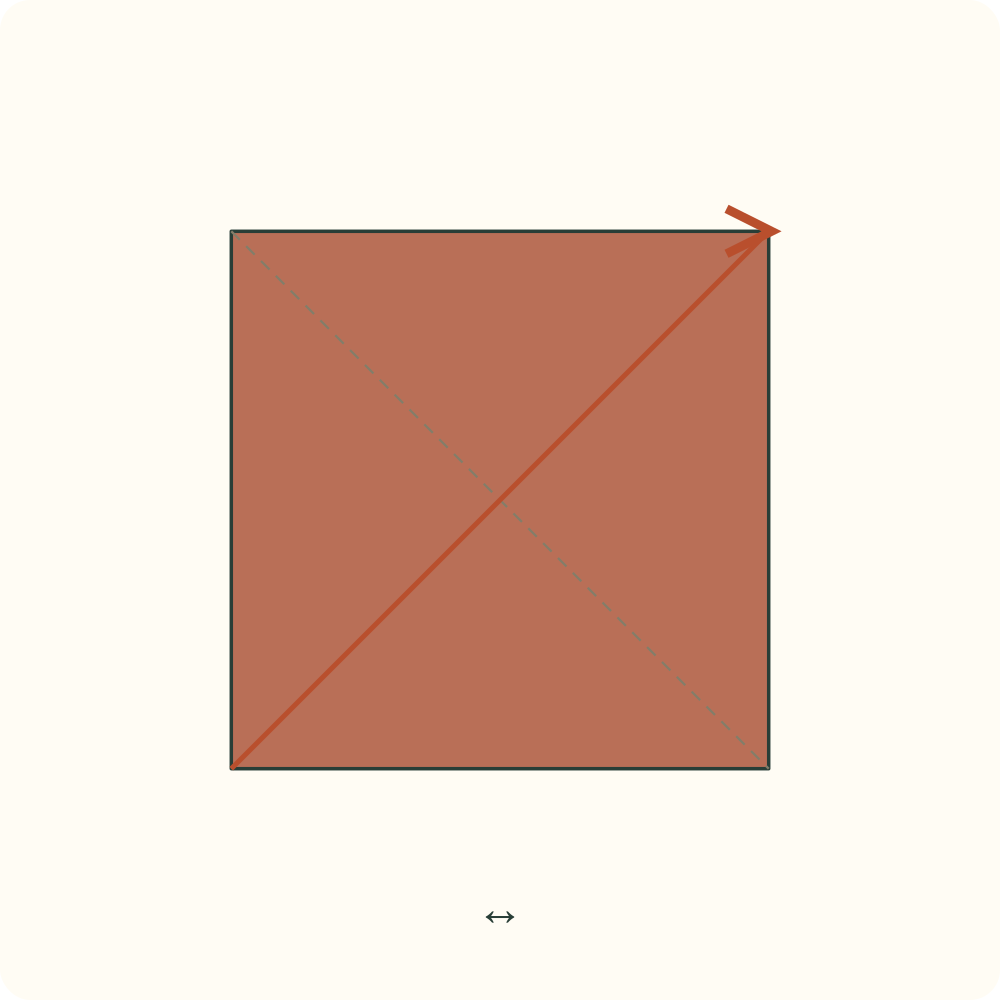
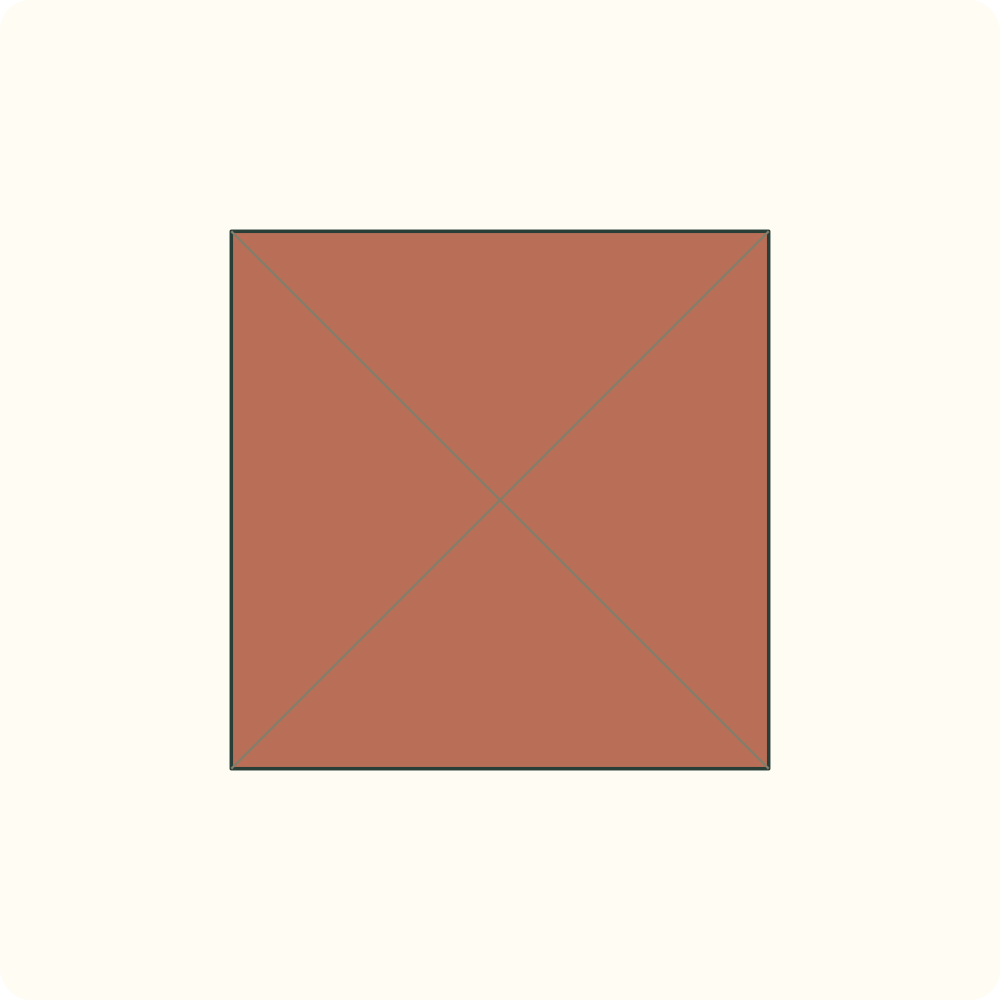
Both diagonals cross at the centre.
Step 4: Turn the sheet over
Turn the entire open square over from left to right.
Orientation: Keep the top edge at the top; the cream reverse now faces you.
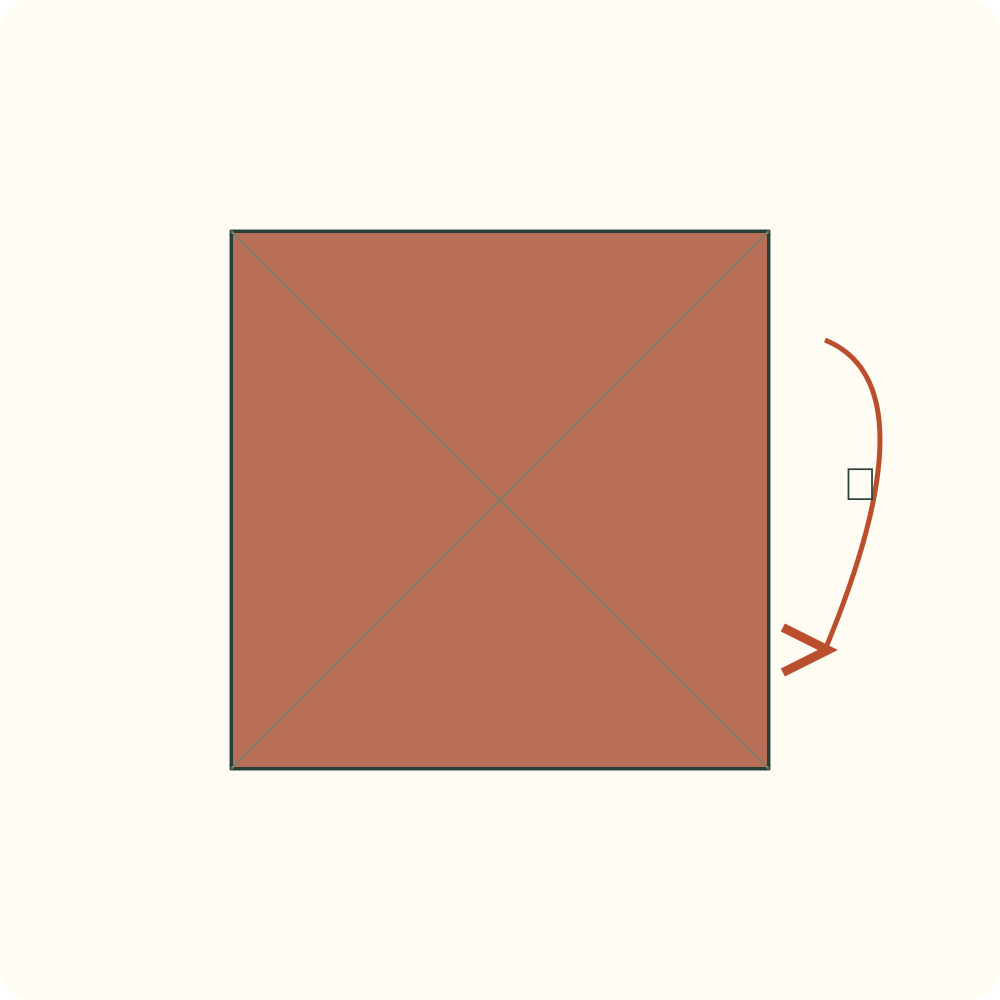
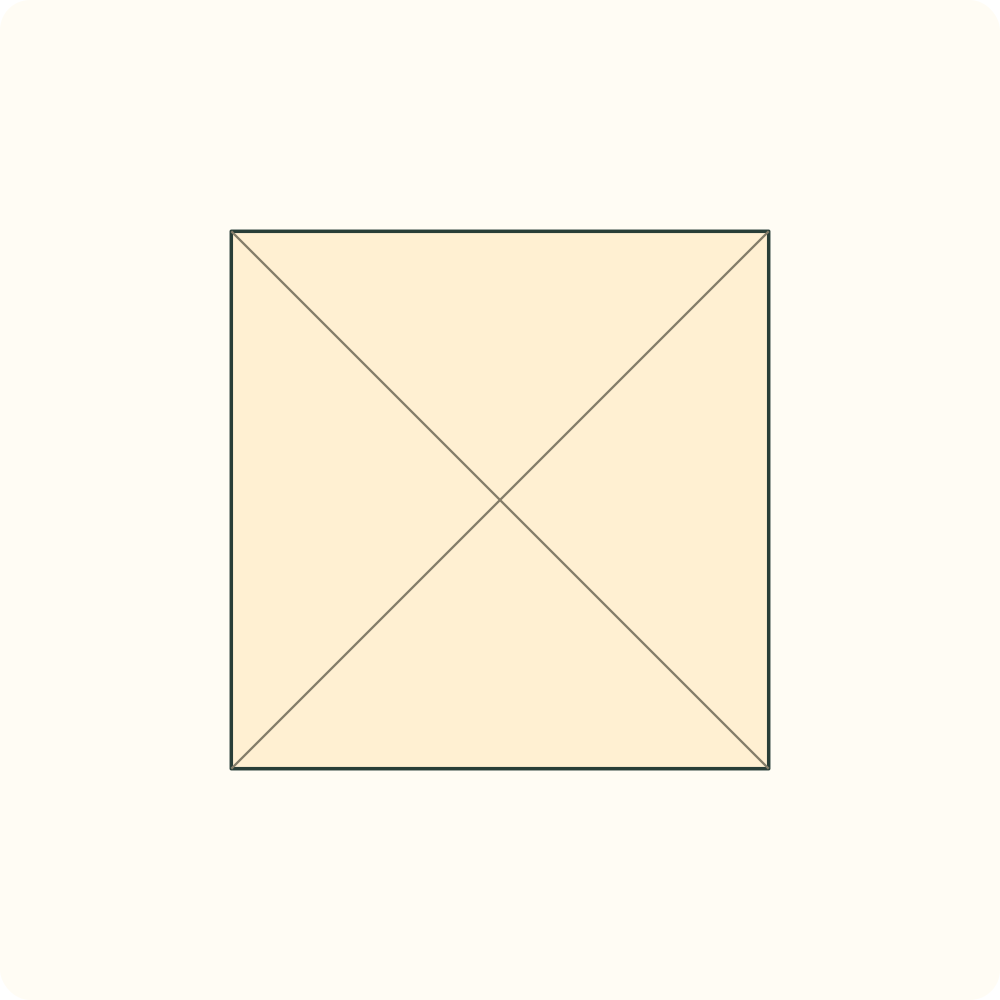
The reverse shows the same two diagonal creases.
Step 5: Precrease the vertical centre
Bring the left edge to the right edge, press and reopen.
Orientation: Cream reverse remains up after reopening.
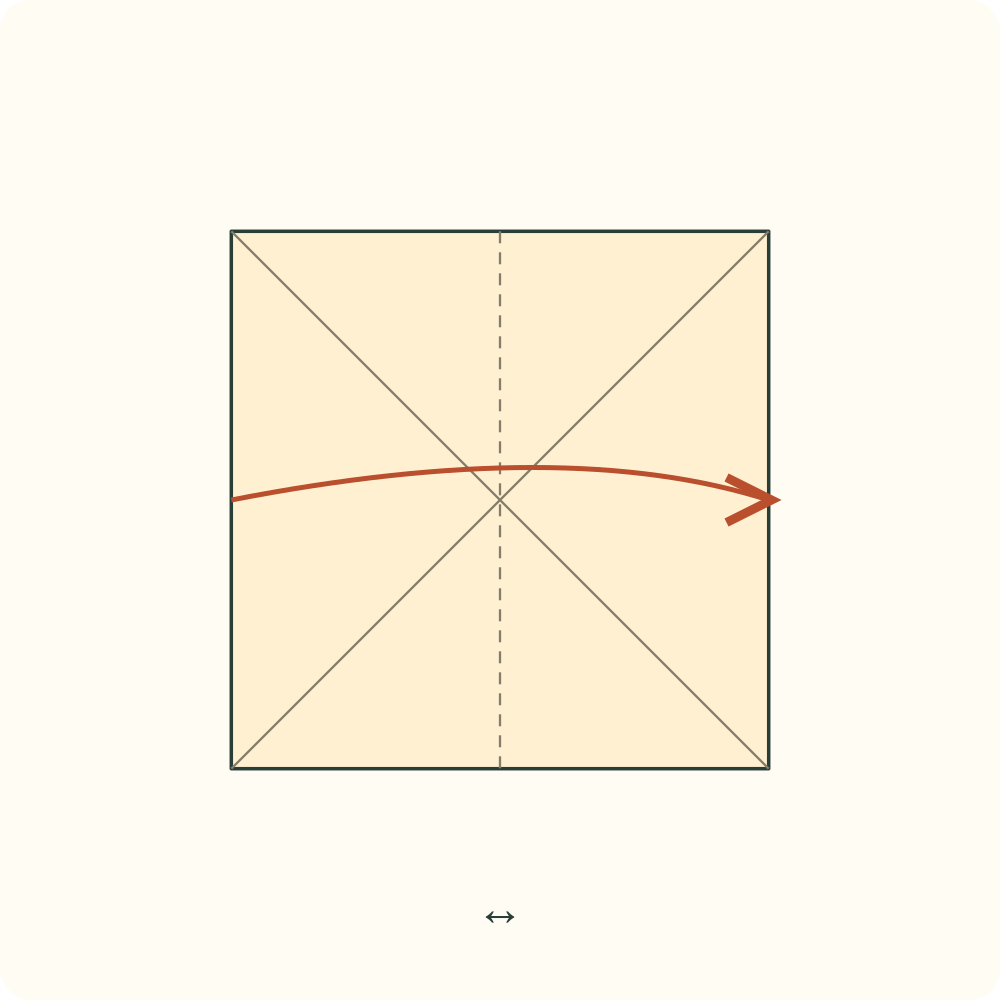
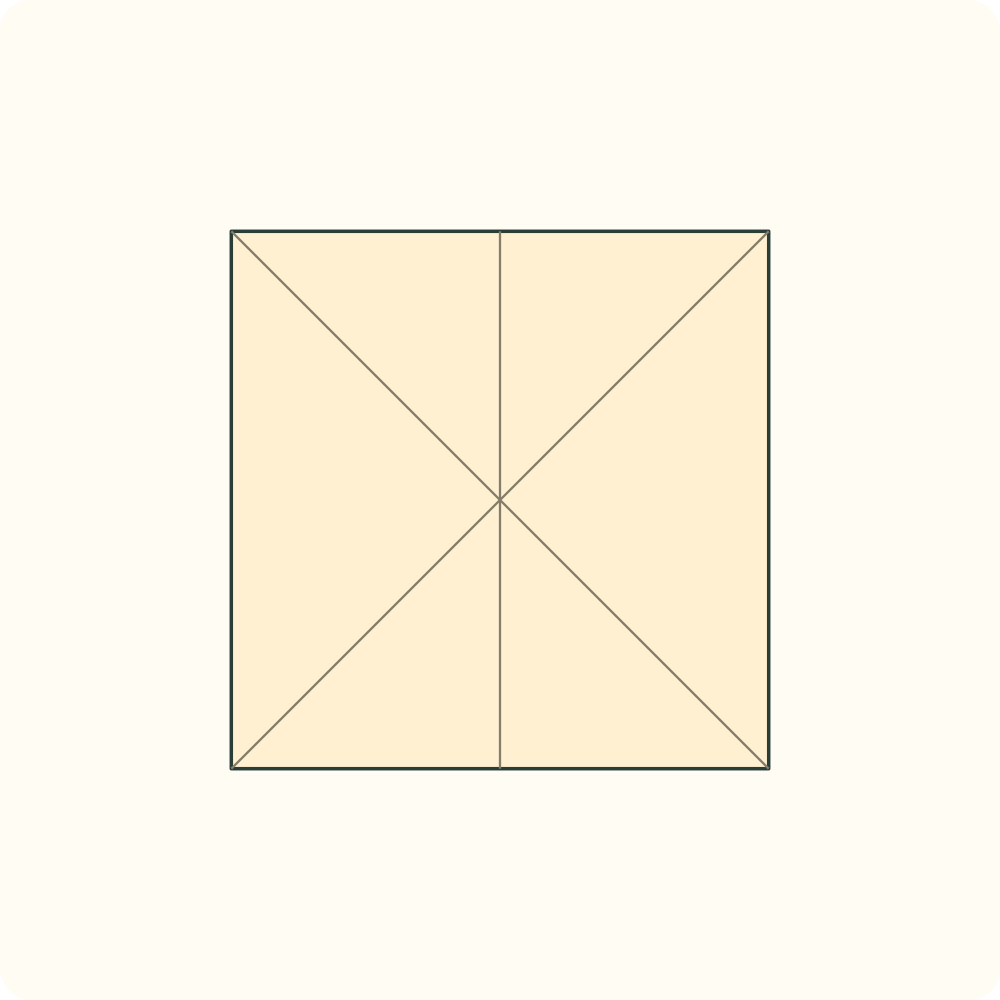
A vertical crease crosses the two diagonals.
Step 6: Precrease the horizontal centre
Bring the bottom edge to the top edge, press and reopen completely.
Orientation: Cream reverse up; this pair of creases is made from the opposite face to the diagonals.
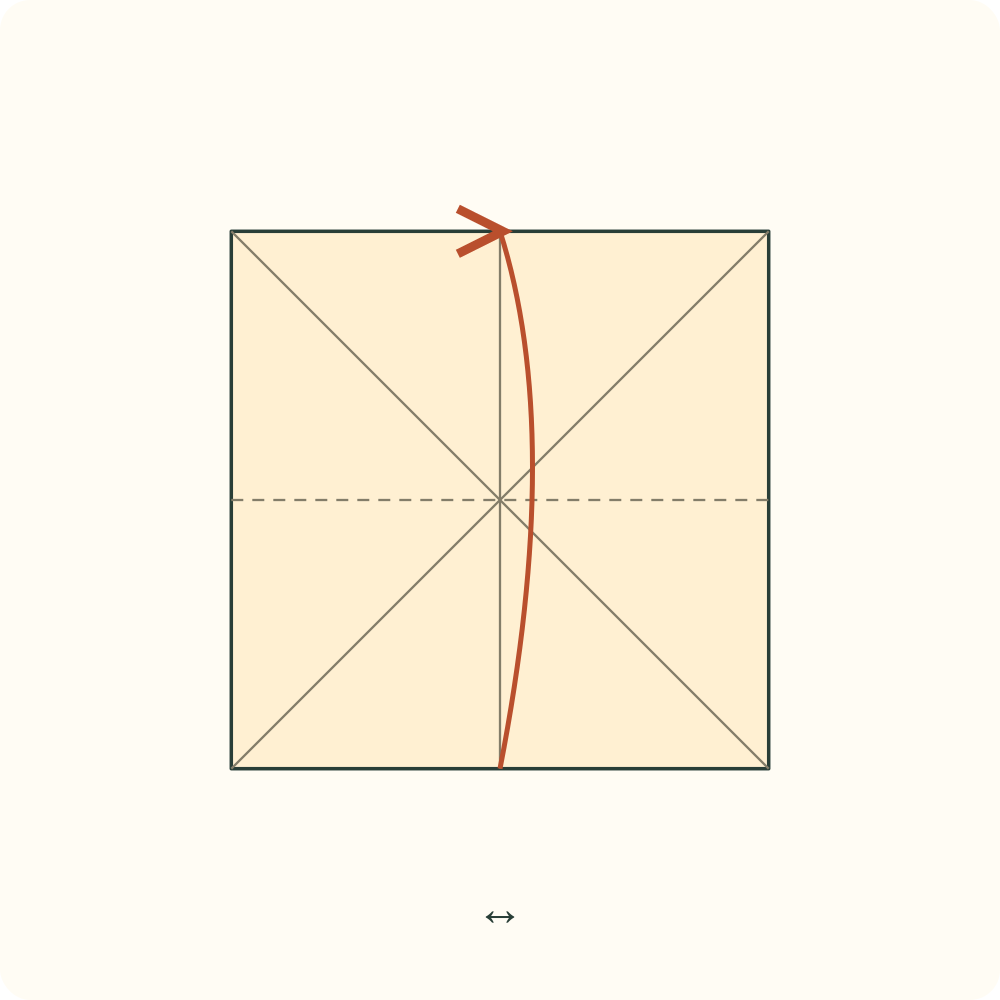
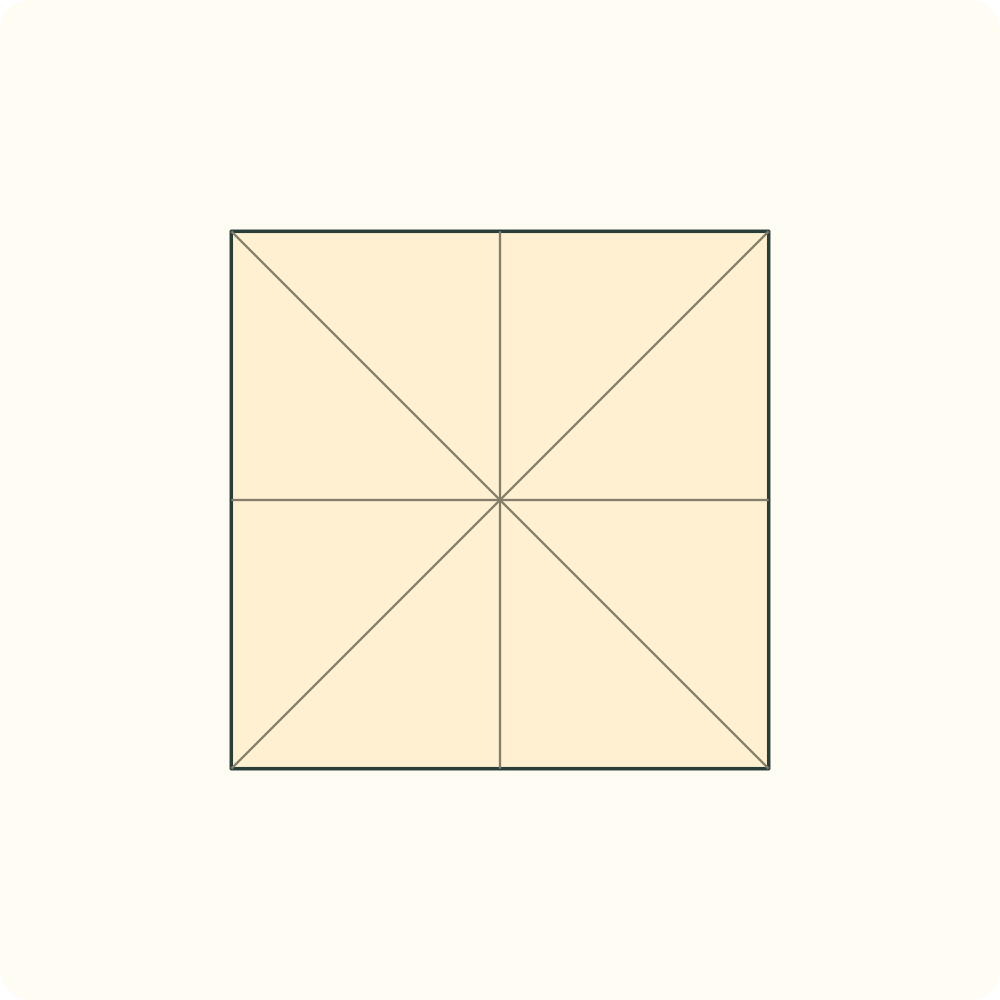
Two centre creases and two diagonals meet at one point.
Step 7: Rotate the open square on the table
Rotate the sheet 45 degrees clockwise, without turning it over, so that its corners point up, down, left and right.
Orientation: Cream reverse still up. A is the bottom corner and B the top corner.
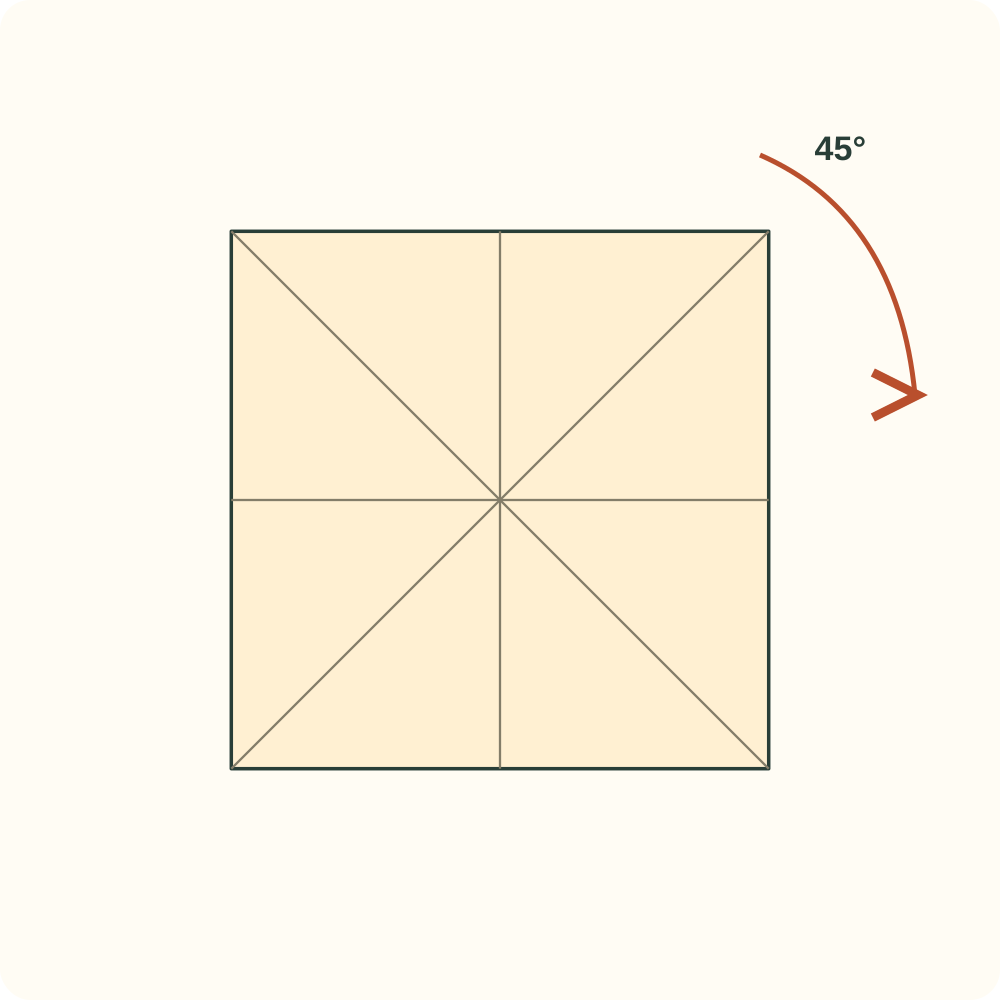
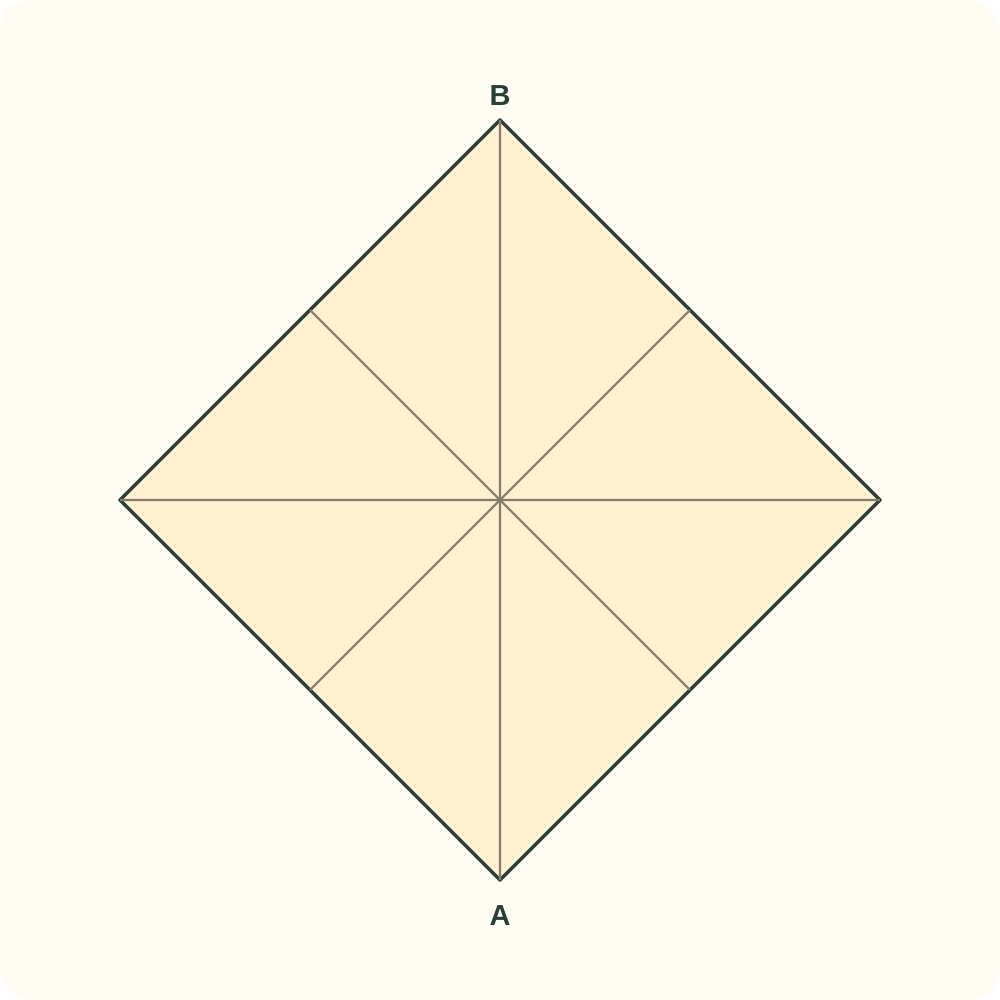
The square is now a diamond, with a crease from A to B.
Step 8: Begin the square-base collapse
Lift the left and right corners and bring both towards bottom corner A, letting the upper half rise along the existing creases.
Orientation: A remains below. Do not force the sheet flat while the side corners are still outside.
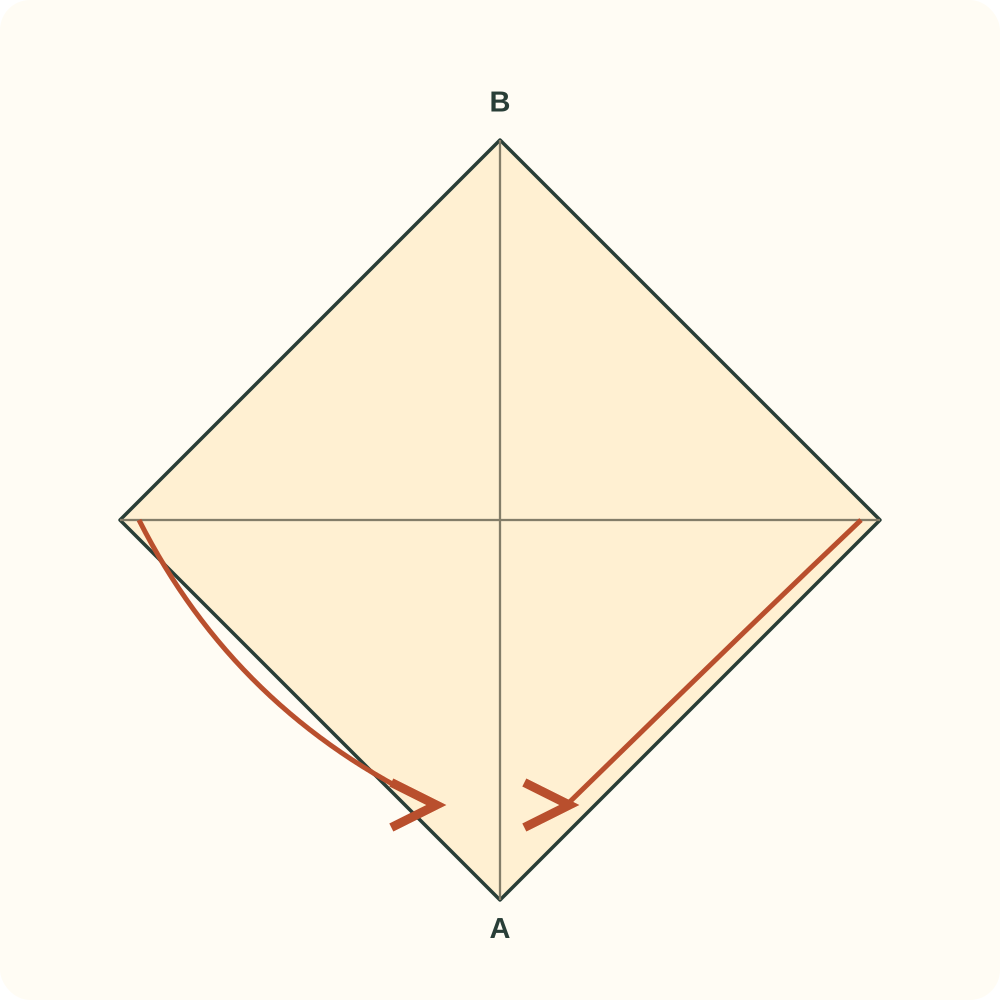
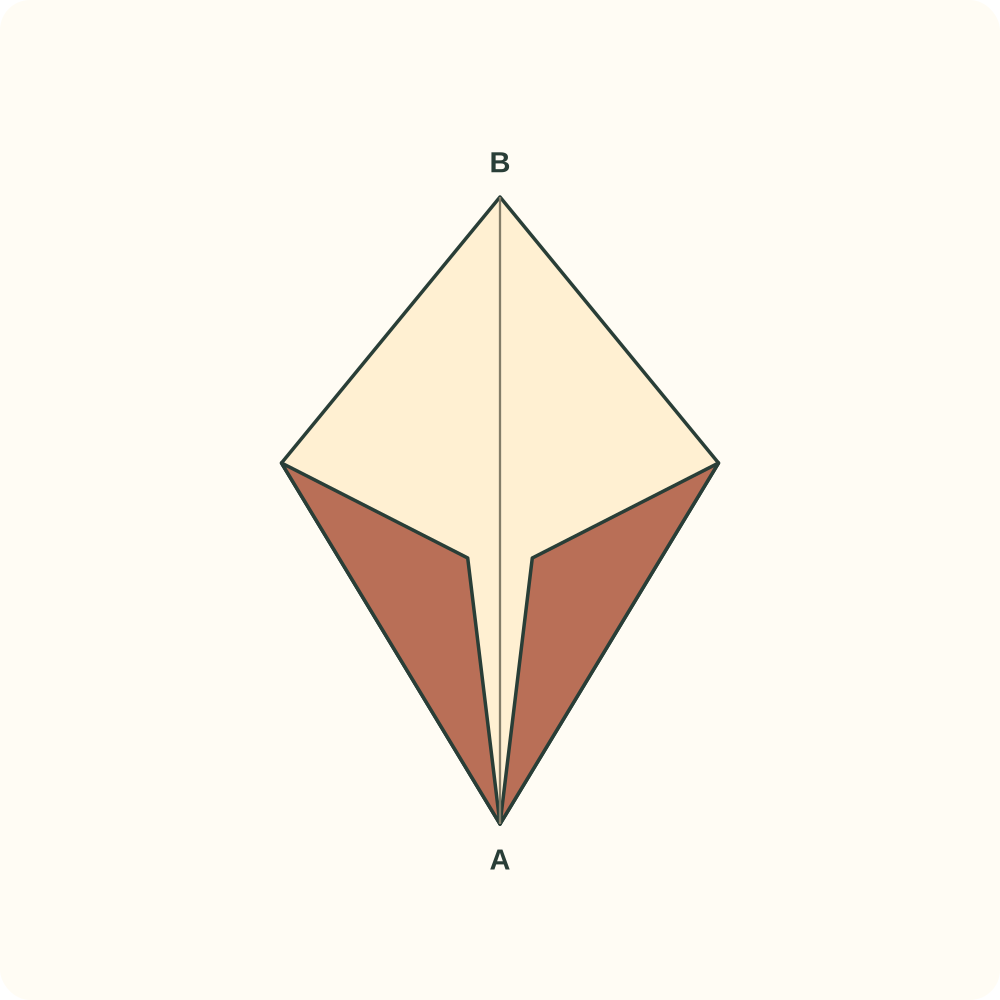
A partly open tent has the side corners approaching A and top corner B above them.
Step 9: Flatten the square base
Lower top corner B onto A, with the left and right corners already between them, then flatten the packet.
Orientation: The closed point is now above and the four original corners meet at the open bottom. The view is enlarged.
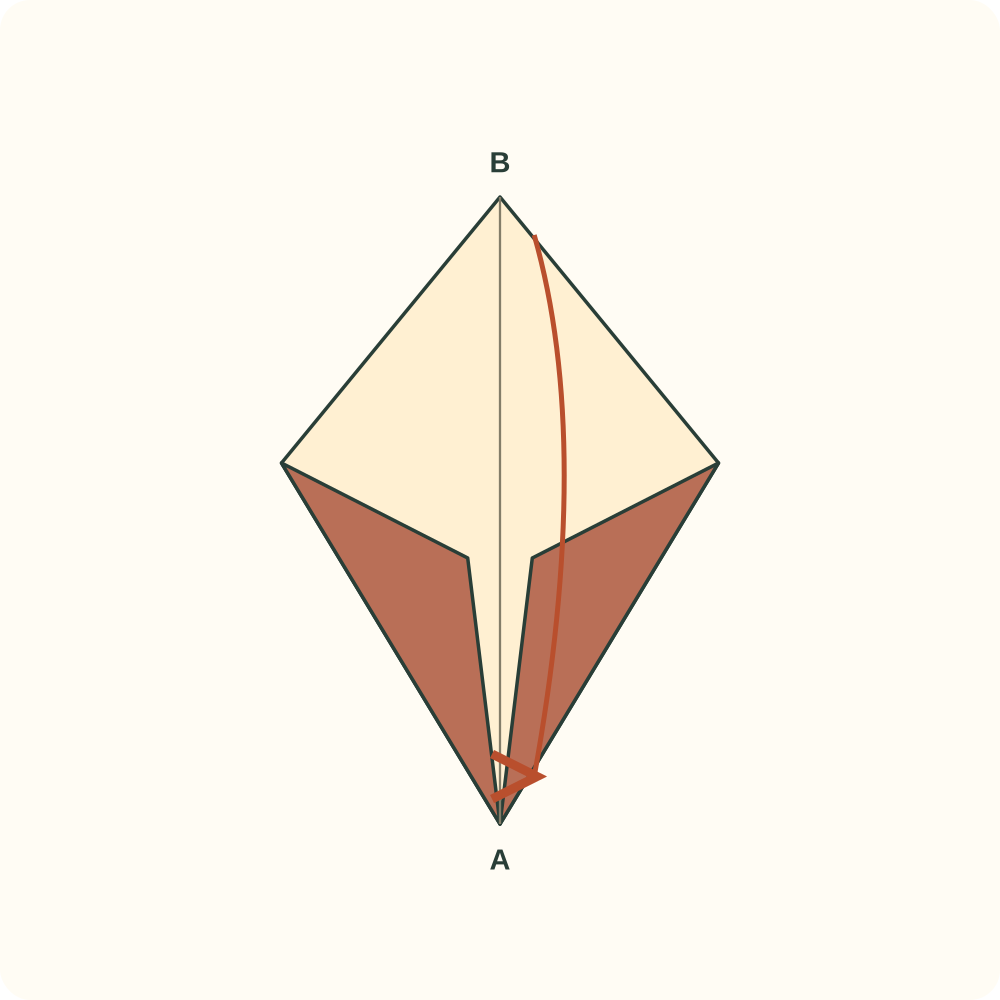
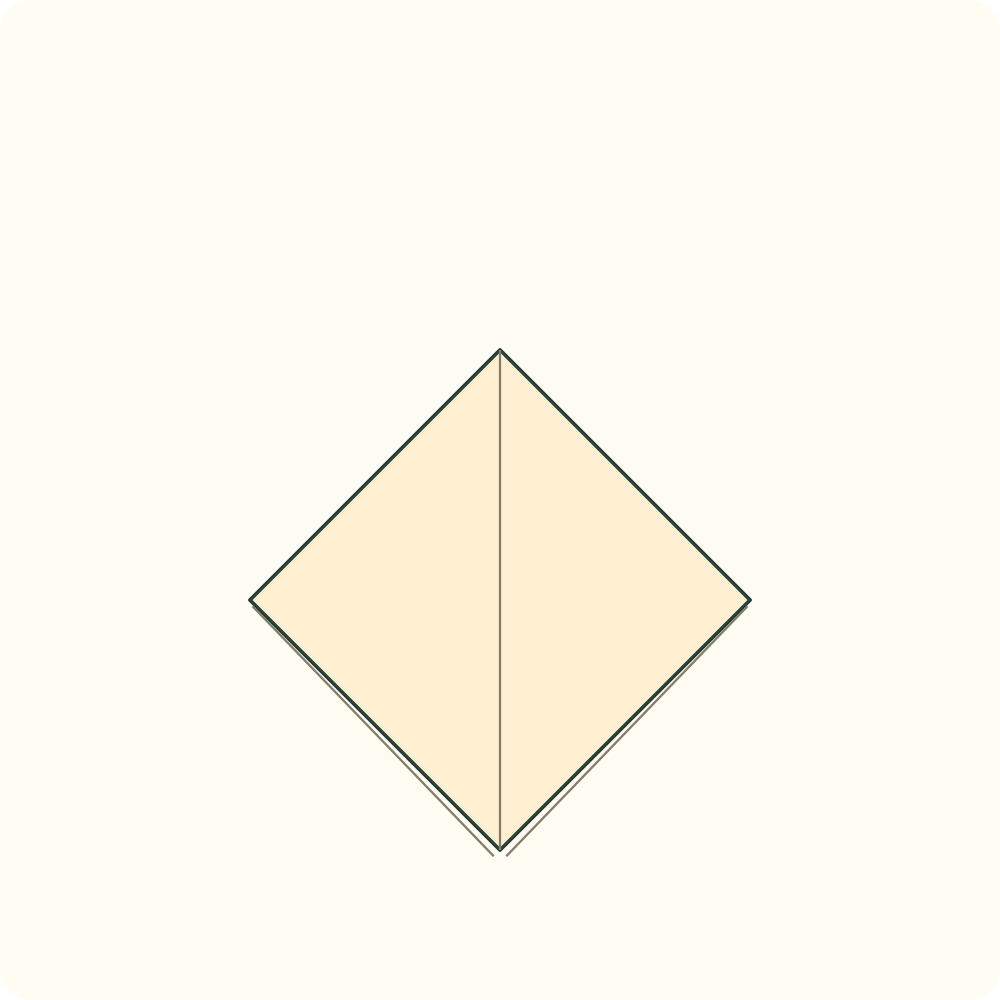
A cream square base has a central line and separate open layers at its lower point.
Step 10: Precrease the front left edge
Fold only the lower-left edge of the front diamond onto the vertical centre crease. Keep the fold closed for the next step.
Orientation: The back diamond stays flat; move only the front lower flap.
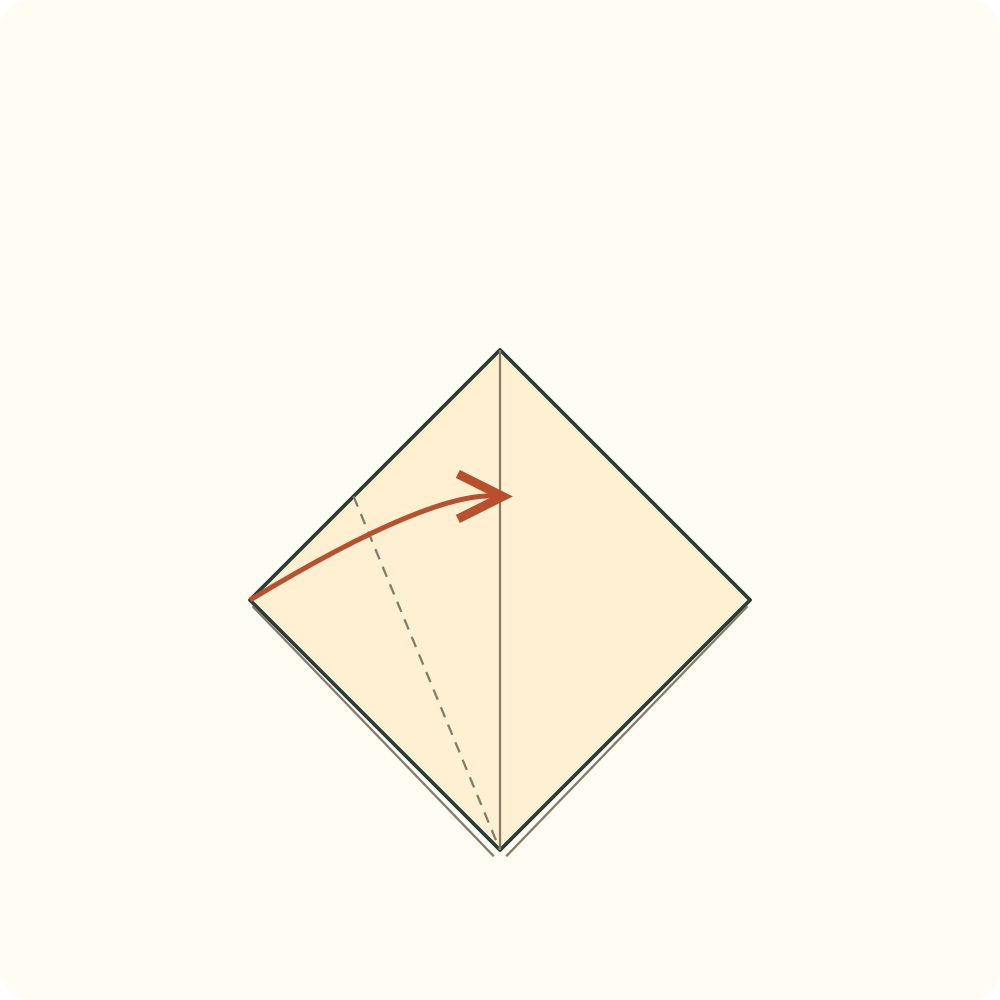
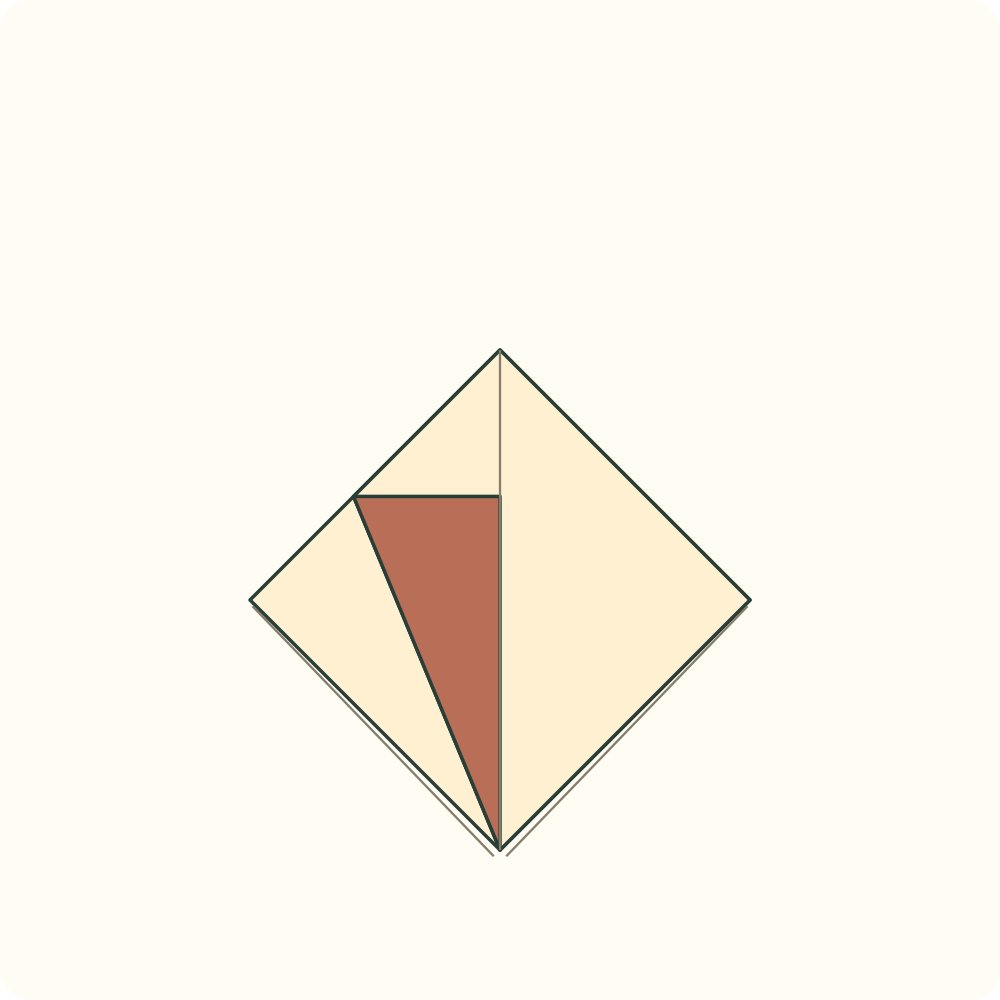
The left lower edge meets the centre; a narrow coloured flap faces you.
Step 11: Precrease the front right edge
Fold only the lower-right edge of the front diamond onto the same vertical centre. Keep both side folds closed.
Orientation: The lower open point stays below; the closed short point stays above.
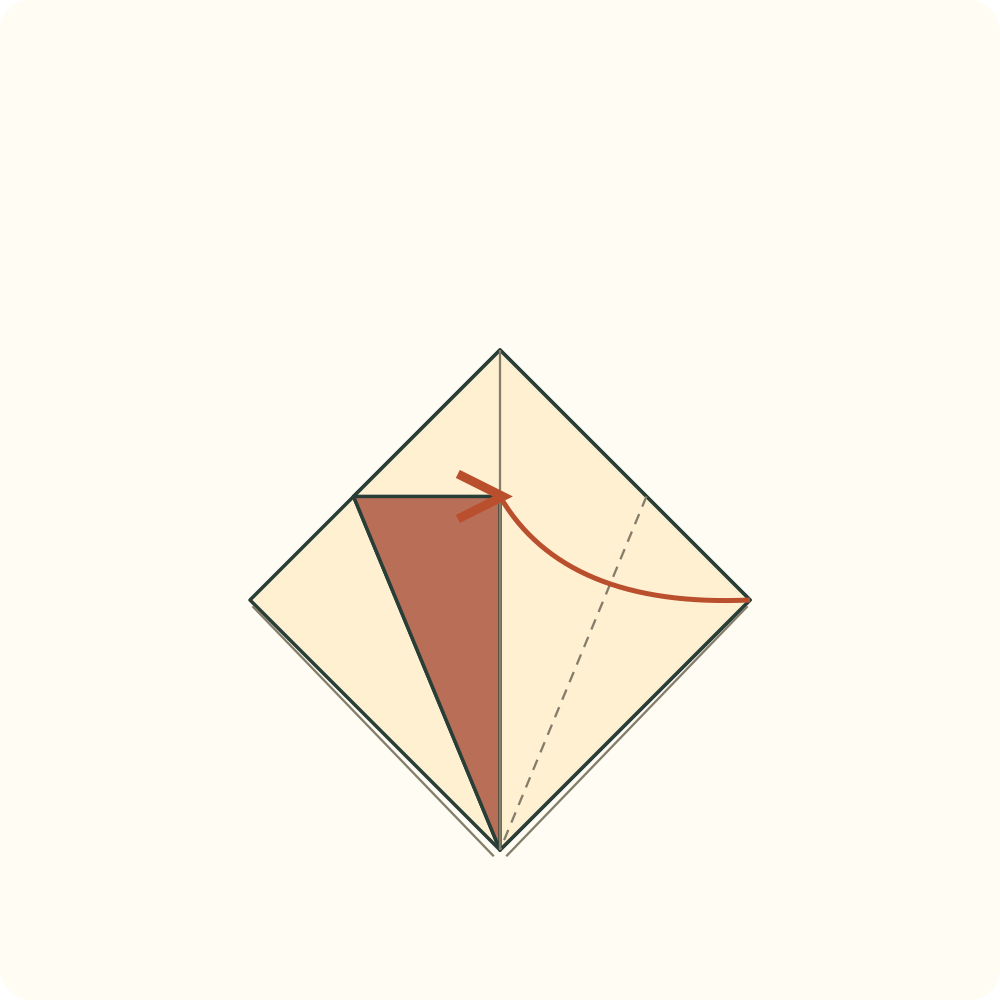
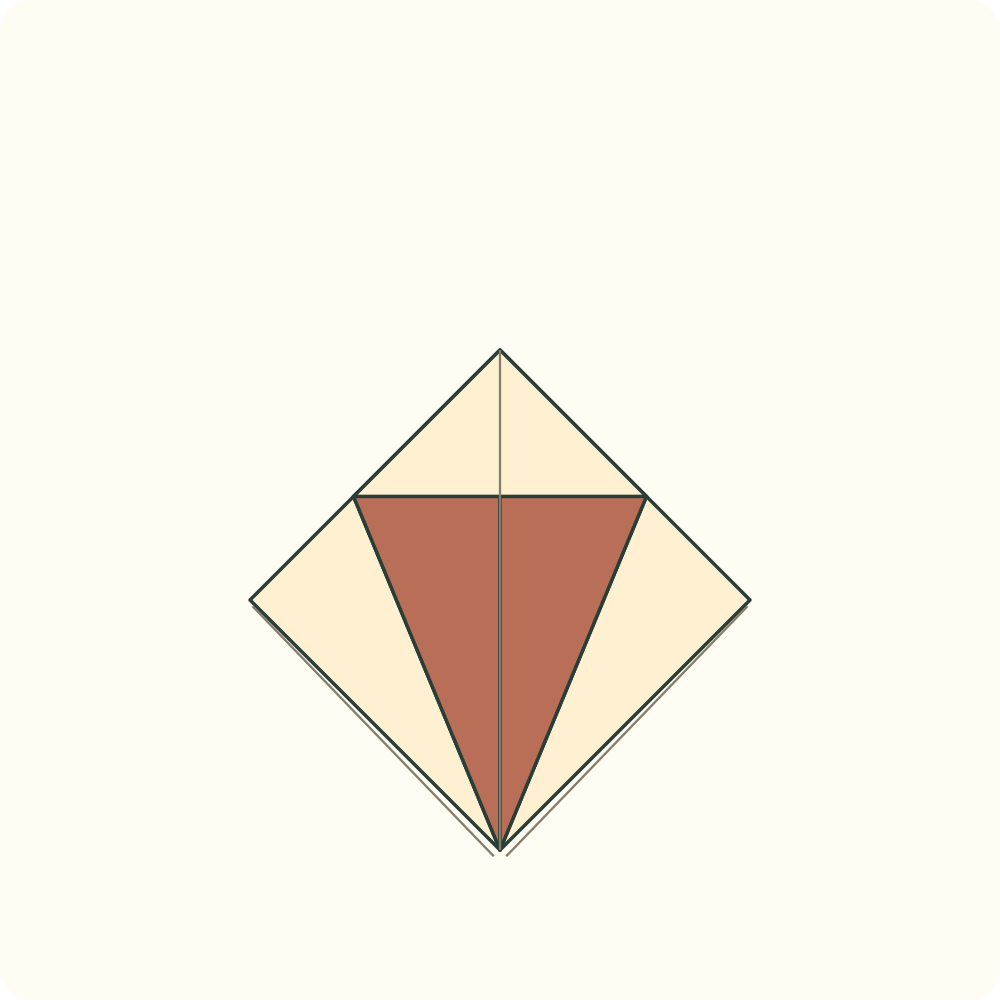
Two coloured side flaps meet at the vertical centre without crossing.
Step 12: Rehearse the top horizontal hinge
Fold the short upper point down along the line joining the two upper ends of the side folds. Press this horizontal guide.
Orientation: Keep the two side flaps folded while locating the hinge.
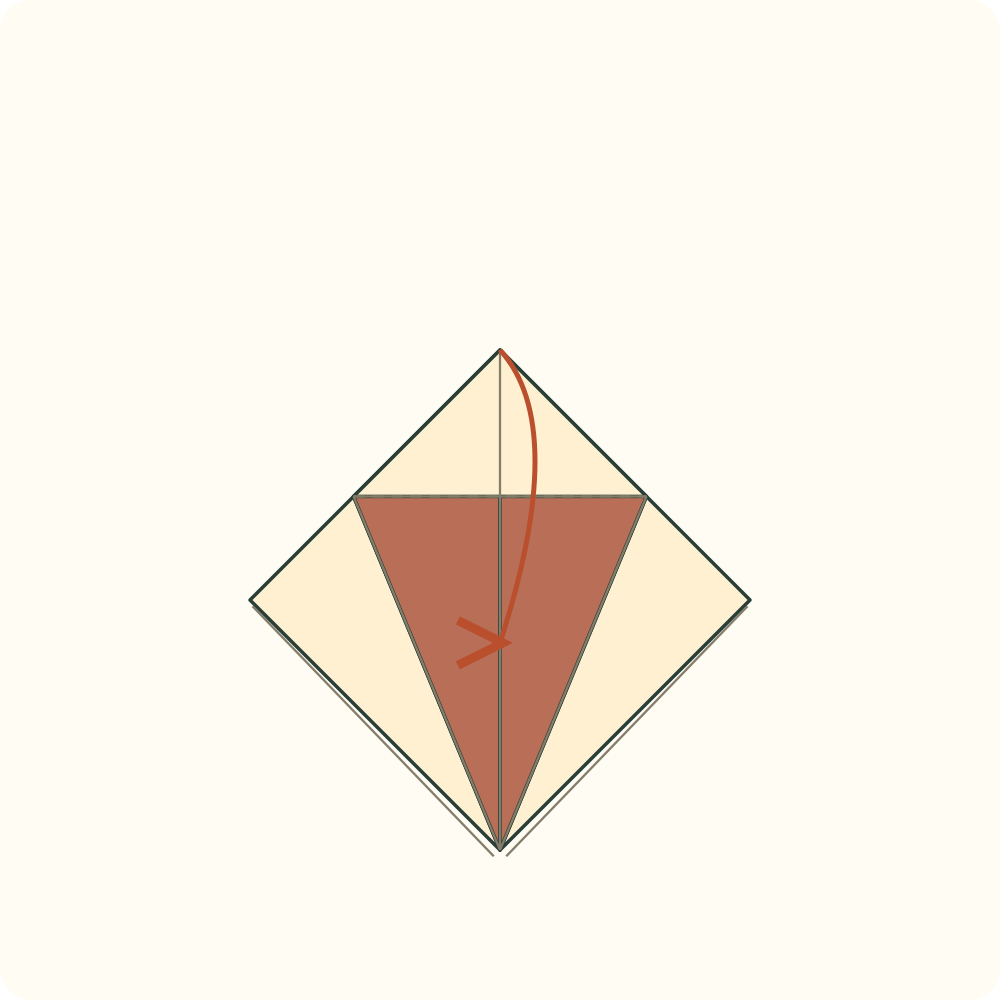
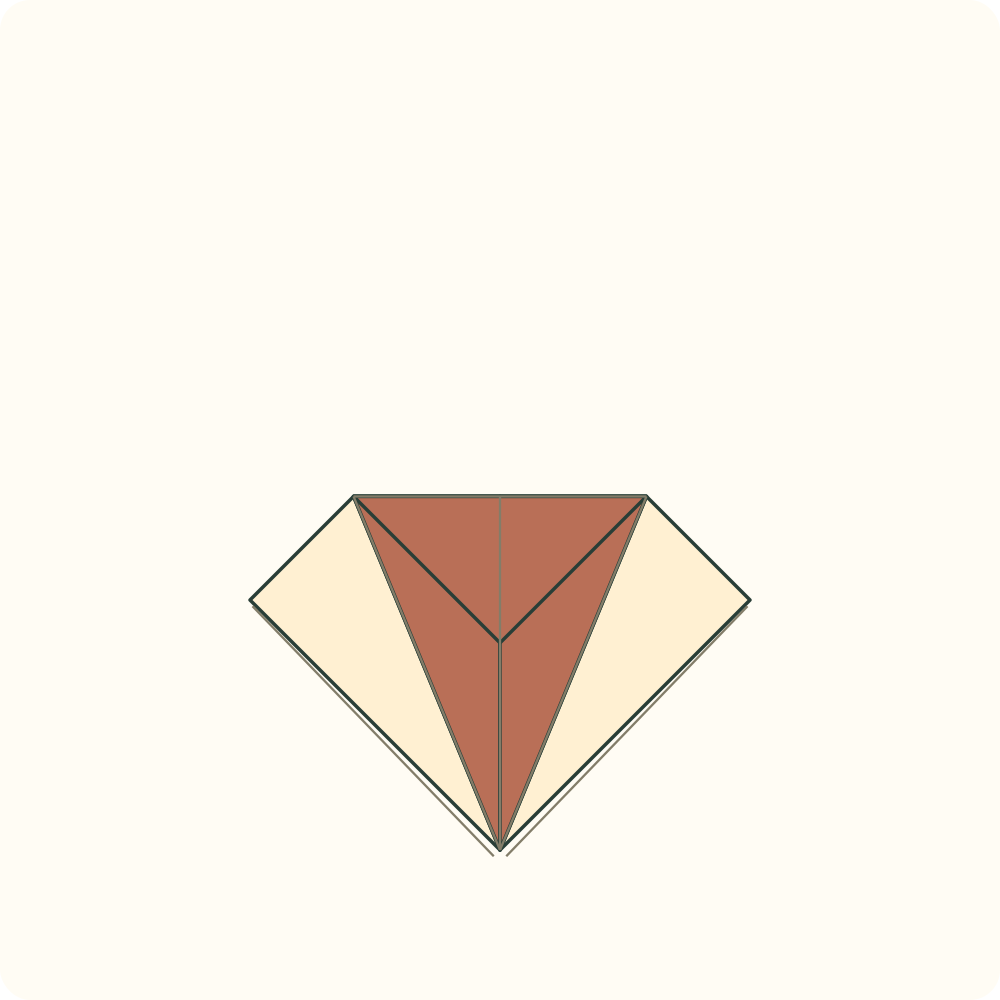
The short upper triangle points down and has a horizontal crease at its base.
Step 13: Reopen the short upper point
Return only the small upper triangle to its previous upward position.
Orientation: Leave both side folds closed.
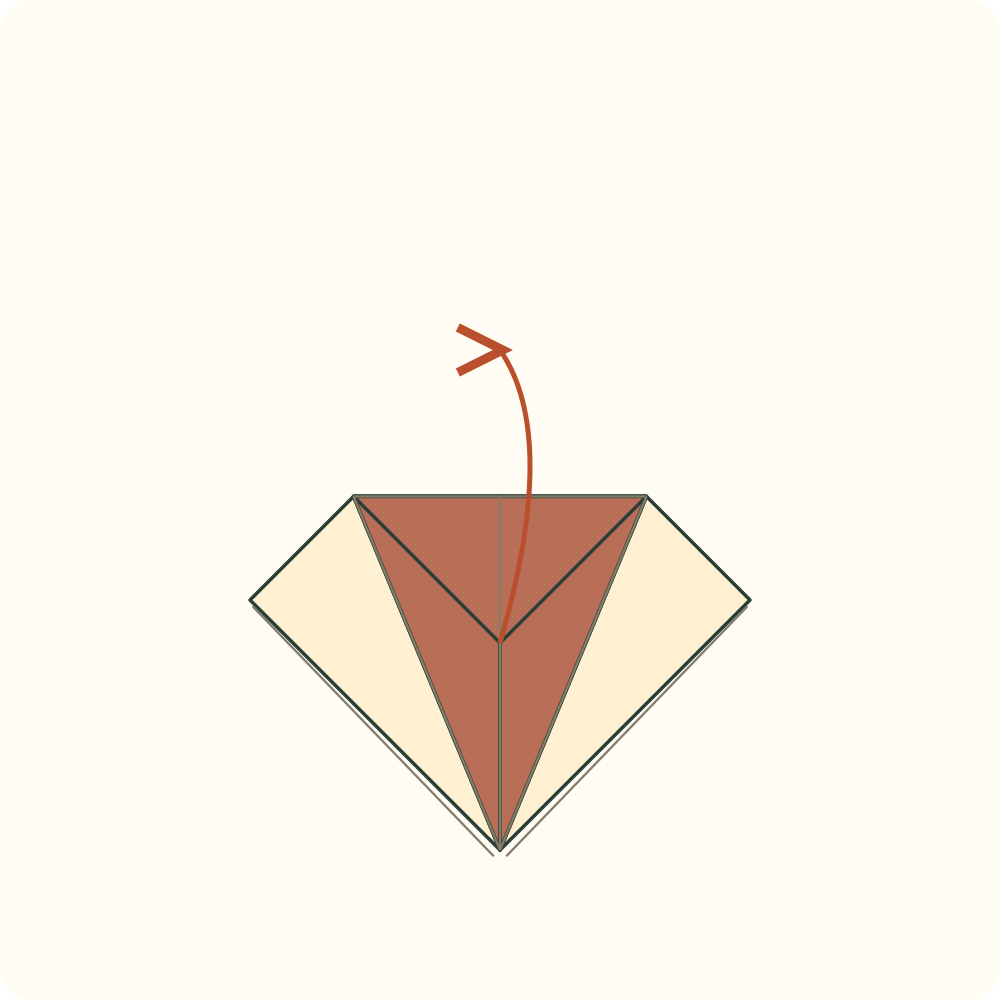
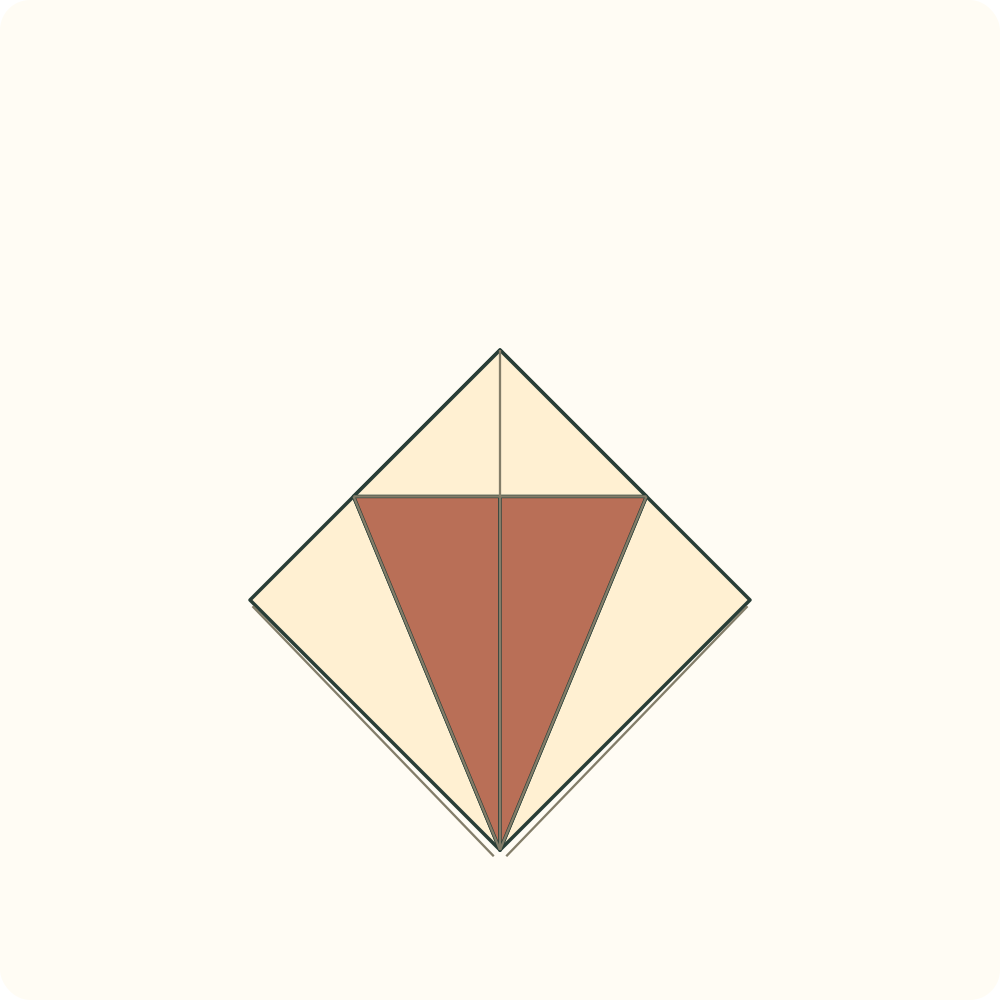
The upper point is restored and the horizontal guide remains.
Step 14: Reopen the front right flap
Return the right lower side flap to its original edge.
Orientation: The left side flap remains folded.
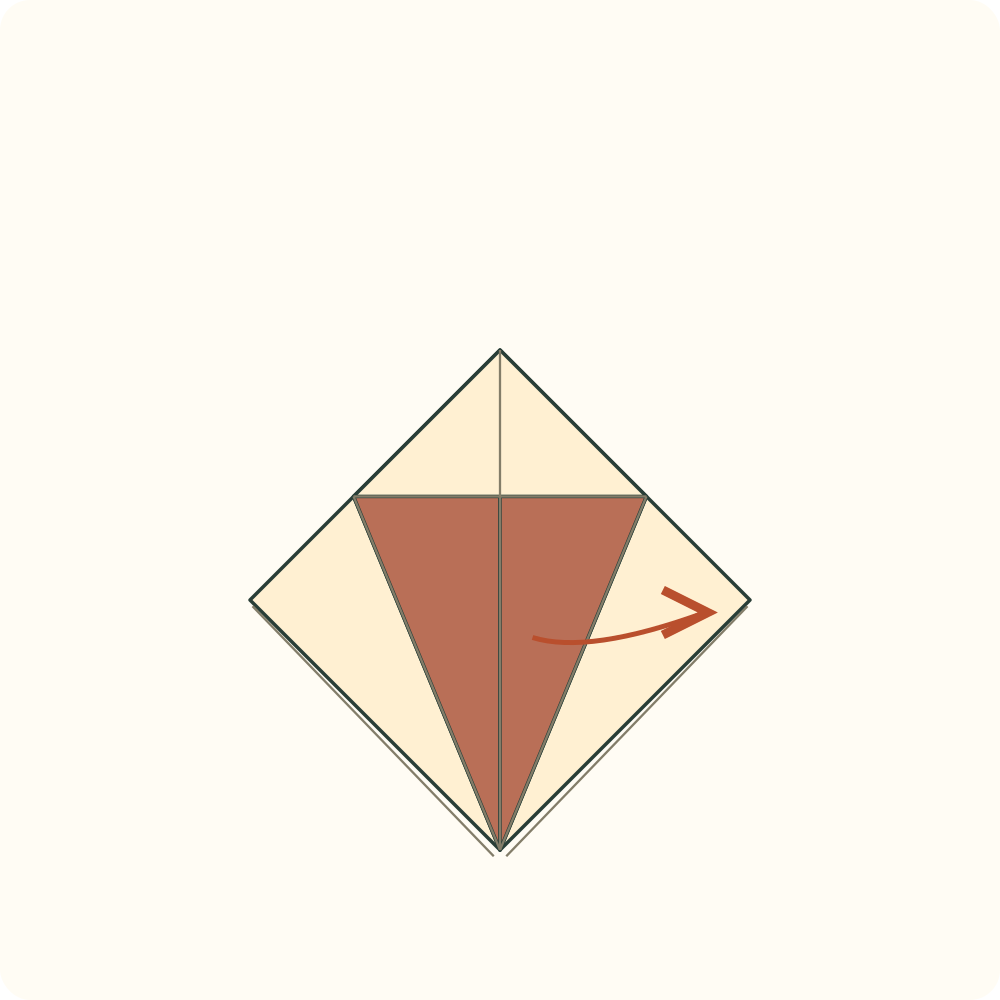
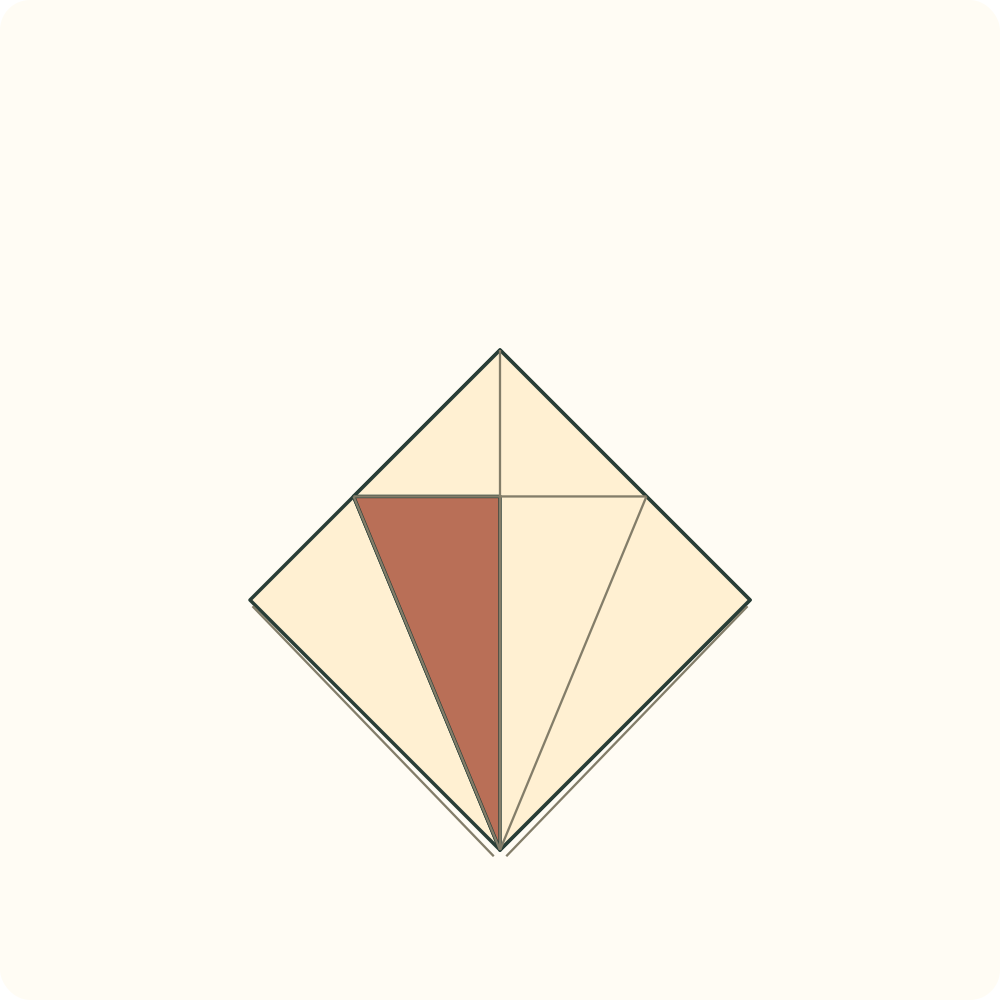
The right half of the short diamond is open, with its diagonal guide visible.
Step 15: Reopen the front left flap
Return the left lower side flap to its original edge.
Orientation: The short front diamond is fully open; keep the packet closed behind it.
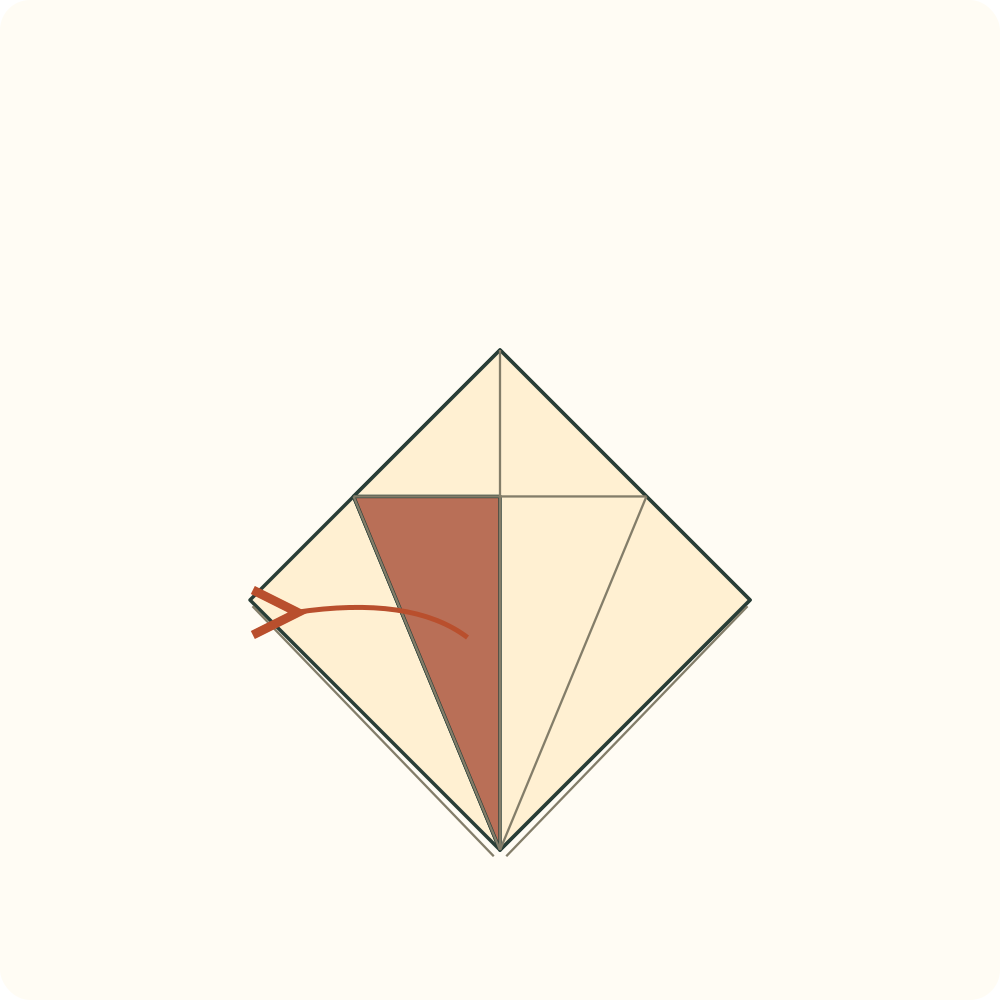
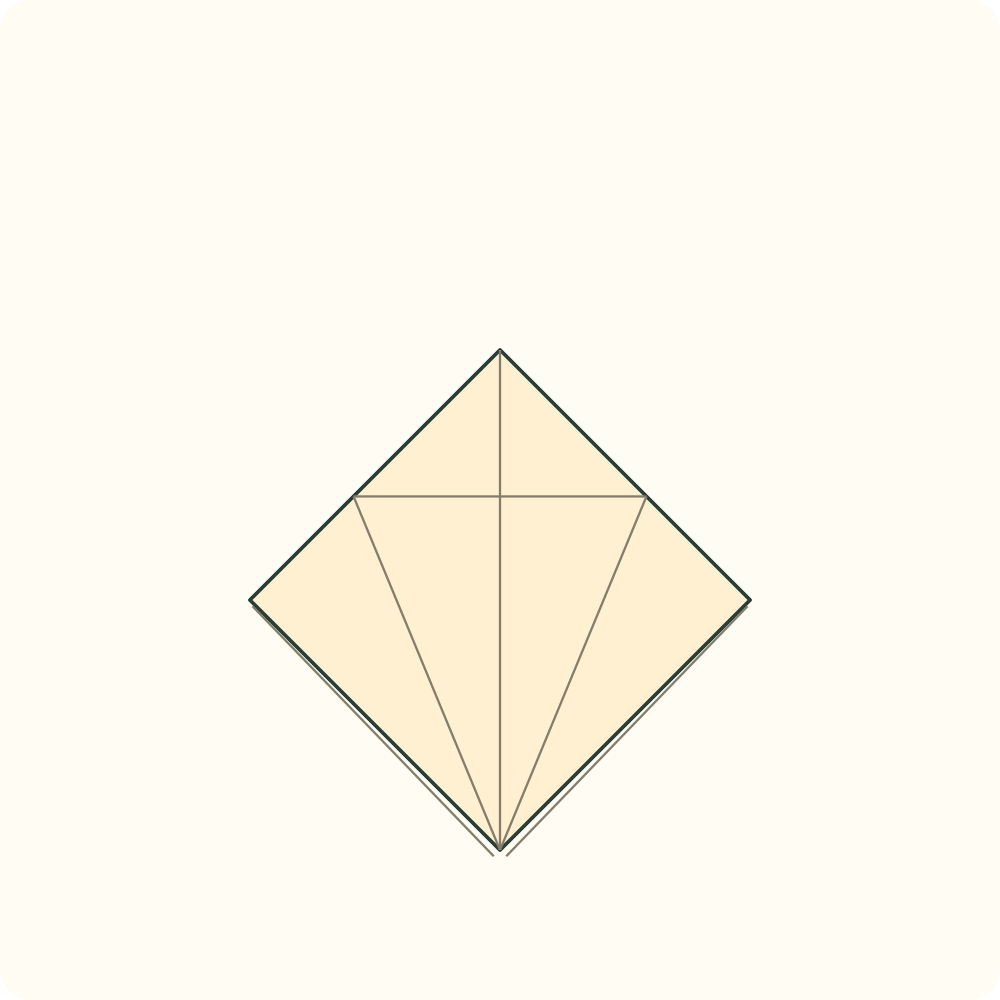
Two sloping guides and the horizontal hinge are visible on the short diamond.
Step 16: Lift the front lower flap
Ease apart the layers at the bottom point, take only the topmost lower corner and lift it towards the top. Stop with the pocket partly open.
Orientation: The horizontal guide acts as the upper hinge. The lower corners behind this flap remain below.
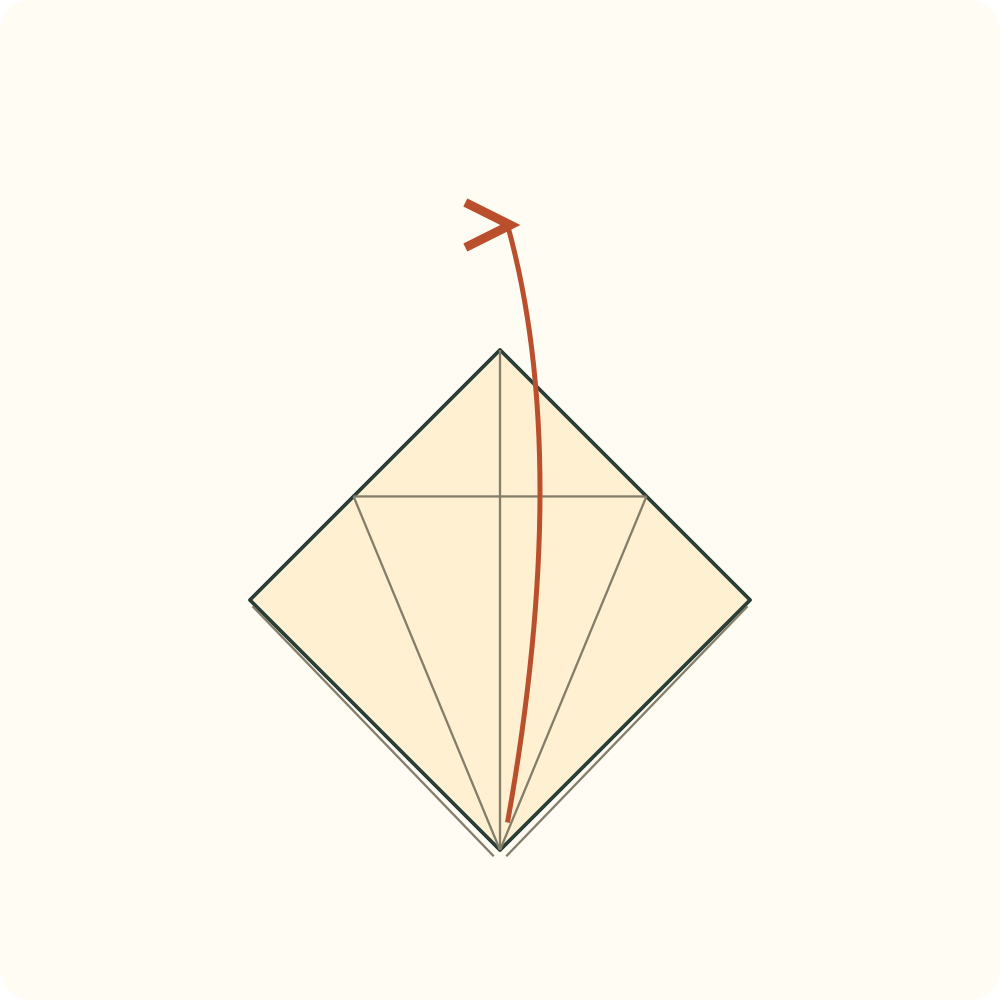
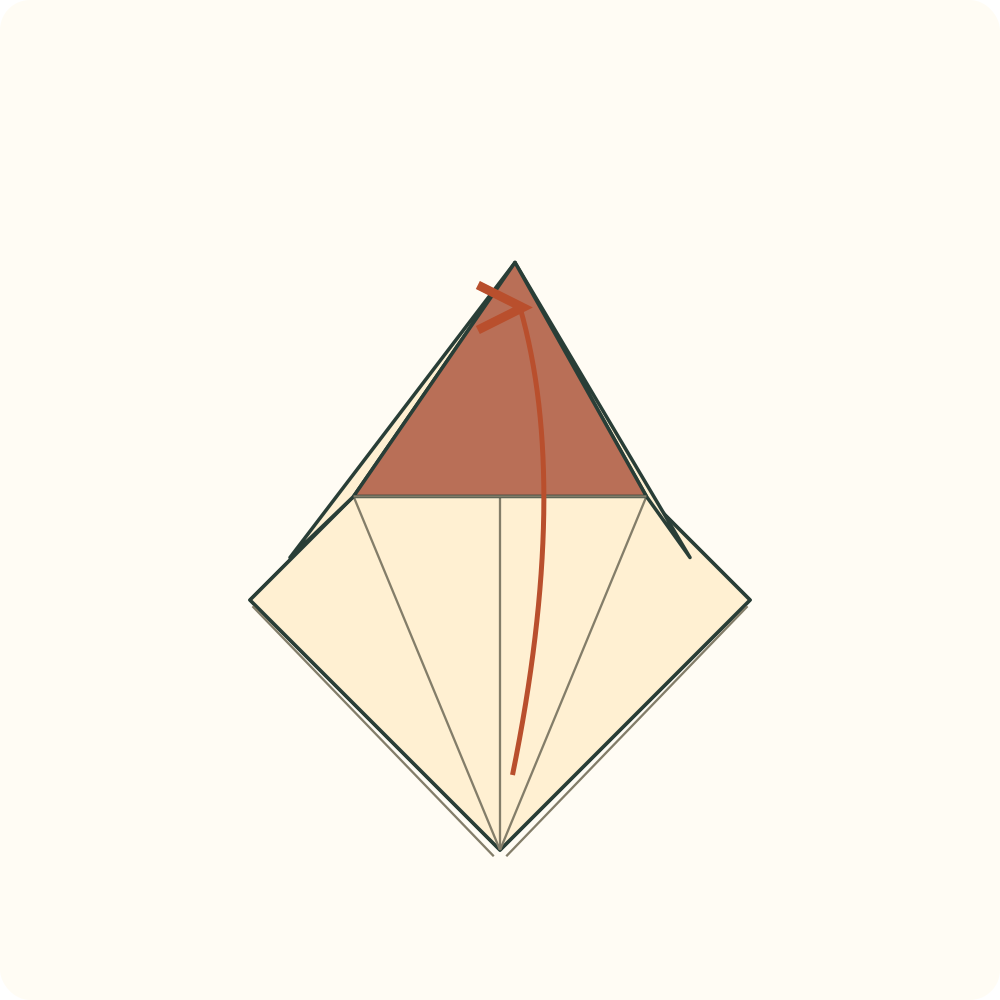
An open petal pocket exposes the coloured inside and its two sloping side panels.
Step 17: Close the first petal fold
Continue raising that one corner while bringing both side panels inward along their prepared diagonal creases. Flatten the long point upwards.
Orientation: Do not fold the back lower points up with it. The long petal is a separate flap.
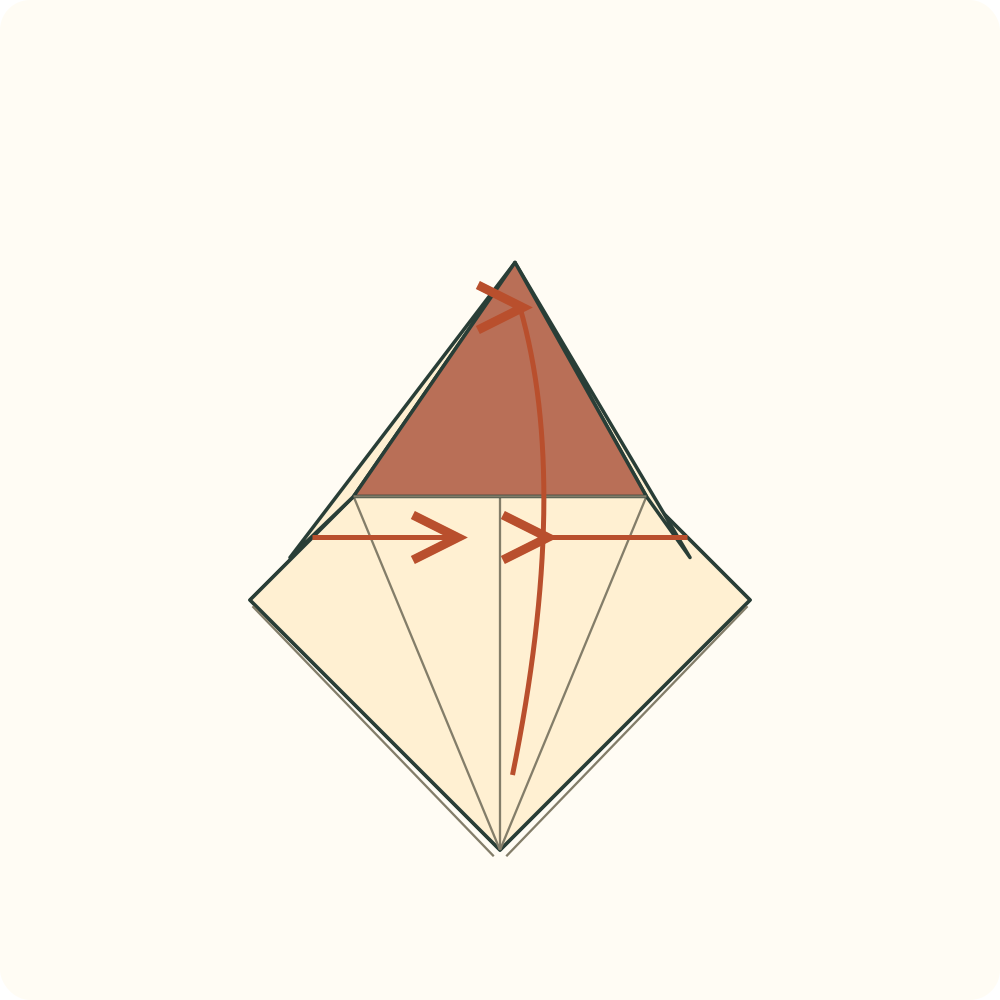
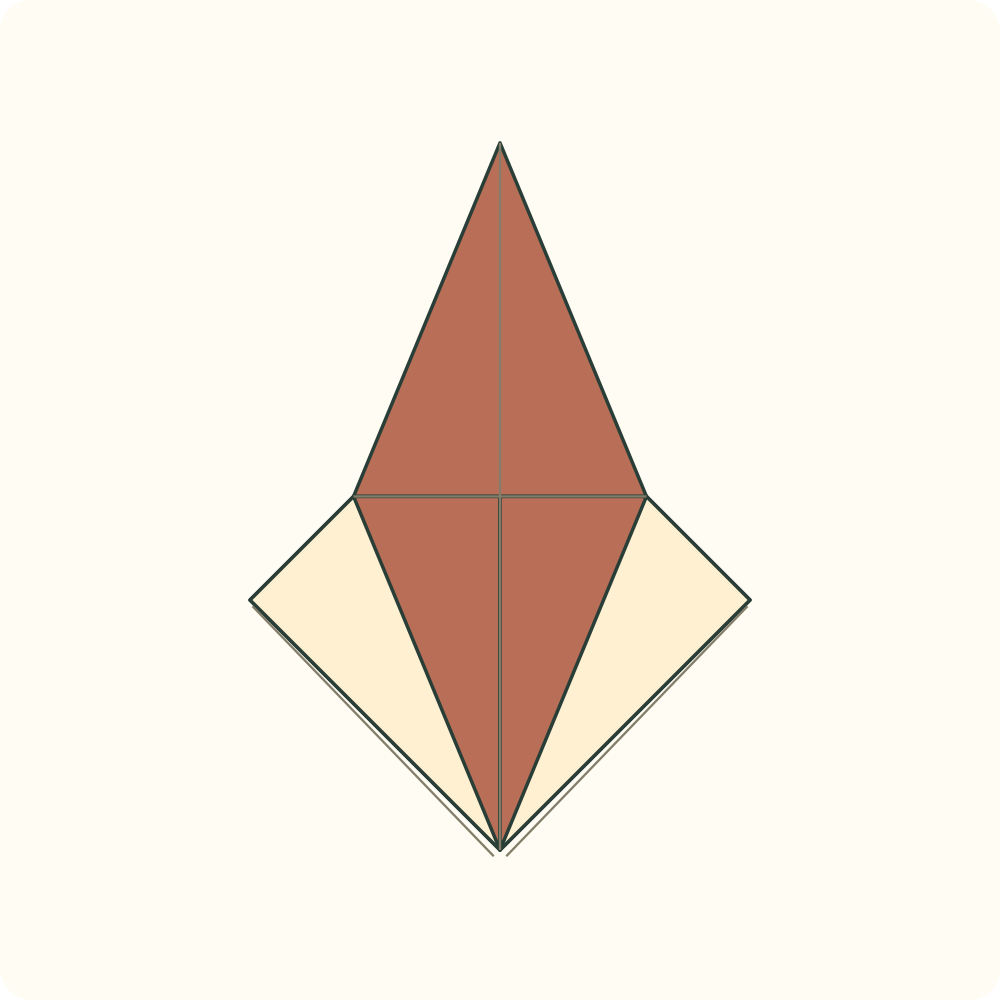
A long coloured diamond points upwards; its side edges meet at the vertical centre.
Step 18: Turn over for the second petal
Turn the whole packet over from left to right, keeping the top edge above.
Orientation: The long first petal is behind. A short cream diamond faces you, with its open point below.
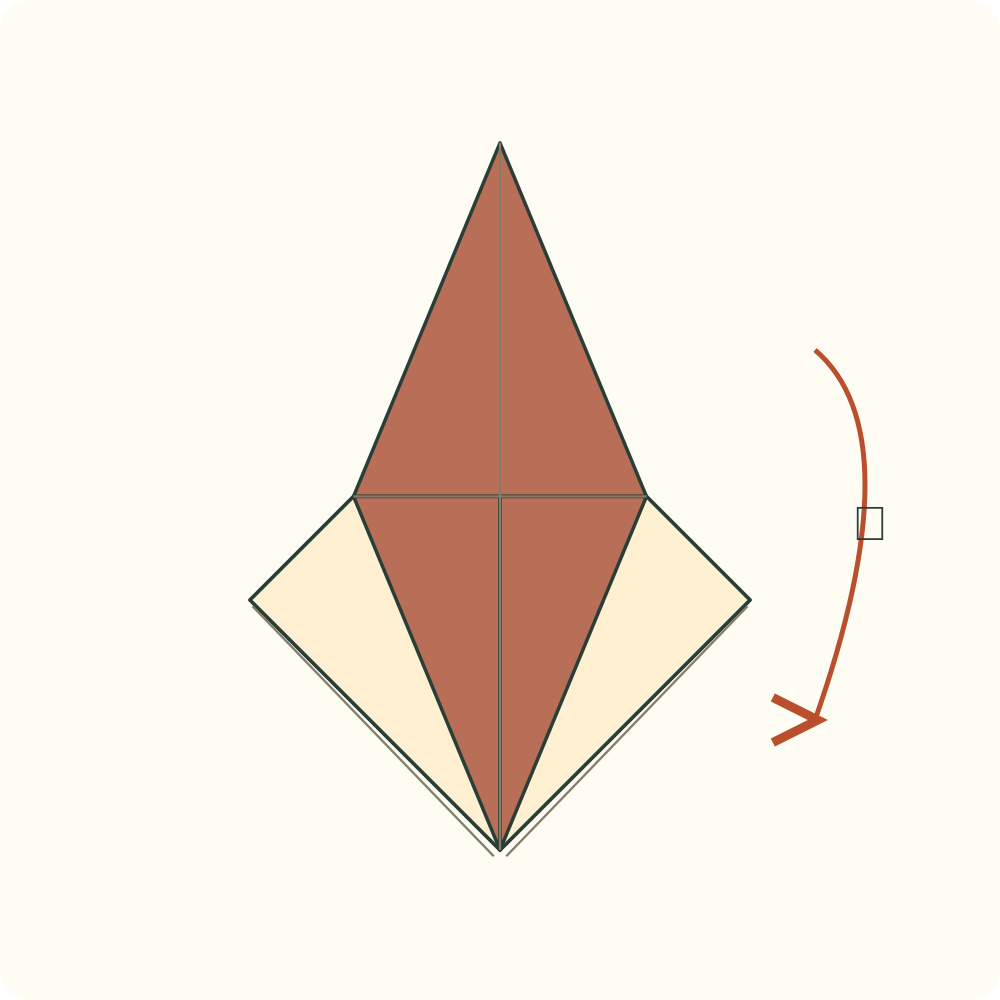
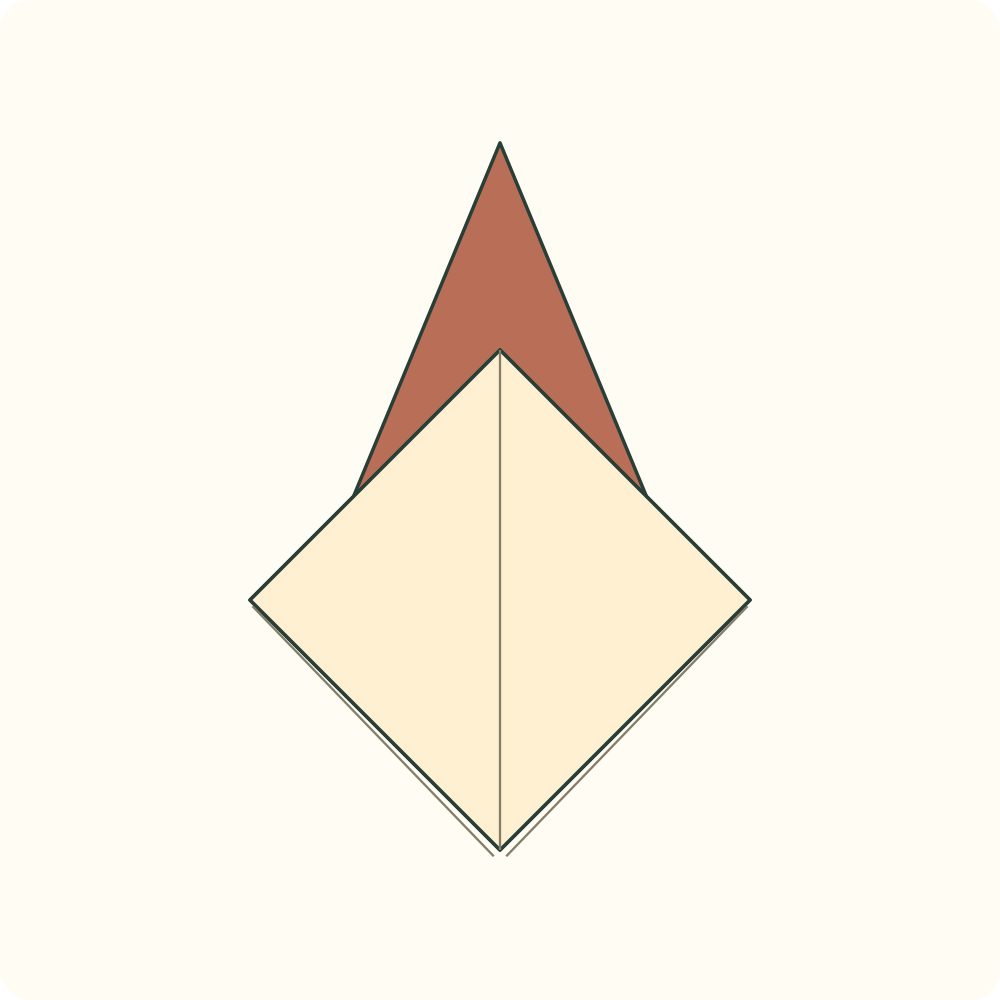
The short diamond can now receive its own side and top guide creases.
Step 19: Precrease the second side’s left edge
Fold only the lower-left edge of the short front diamond onto the vertical centre crease. Keep the fold closed for the next step.
Orientation: The first long petal remains behind and points upwards.
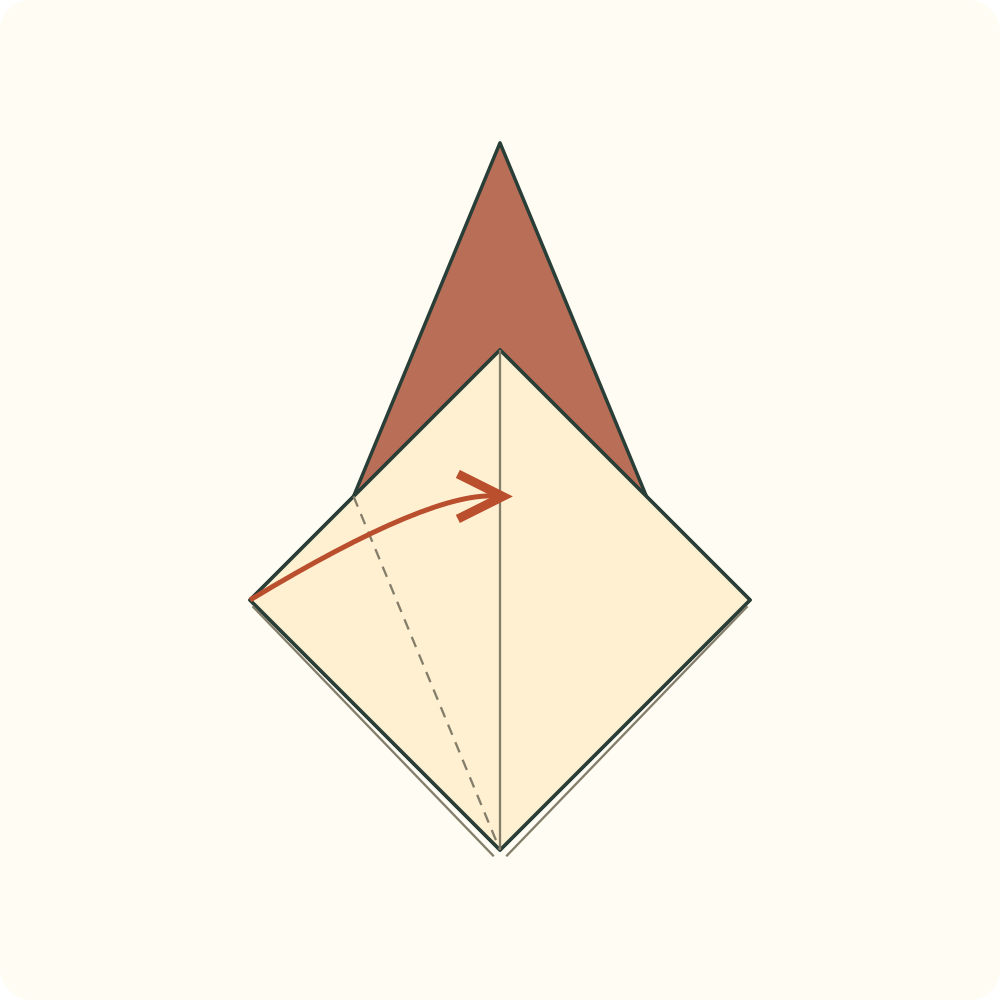
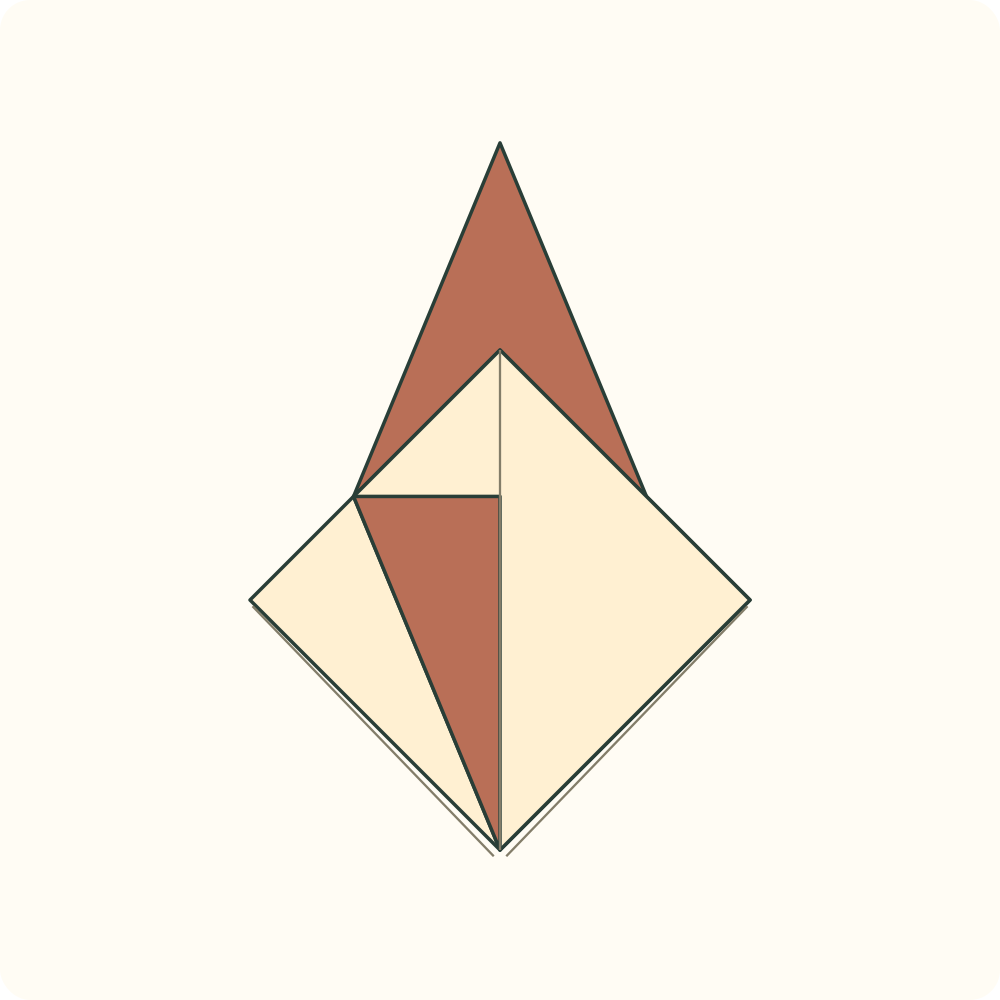
The left lower edge meets the centre; a narrow coloured flap faces you.
Step 20: Precrease the second side’s right edge
Fold only the lower-right edge of the short front diamond onto the same vertical centre. Keep both side folds closed.
Orientation: Work on the short cream diamond, not the long coloured point behind it.
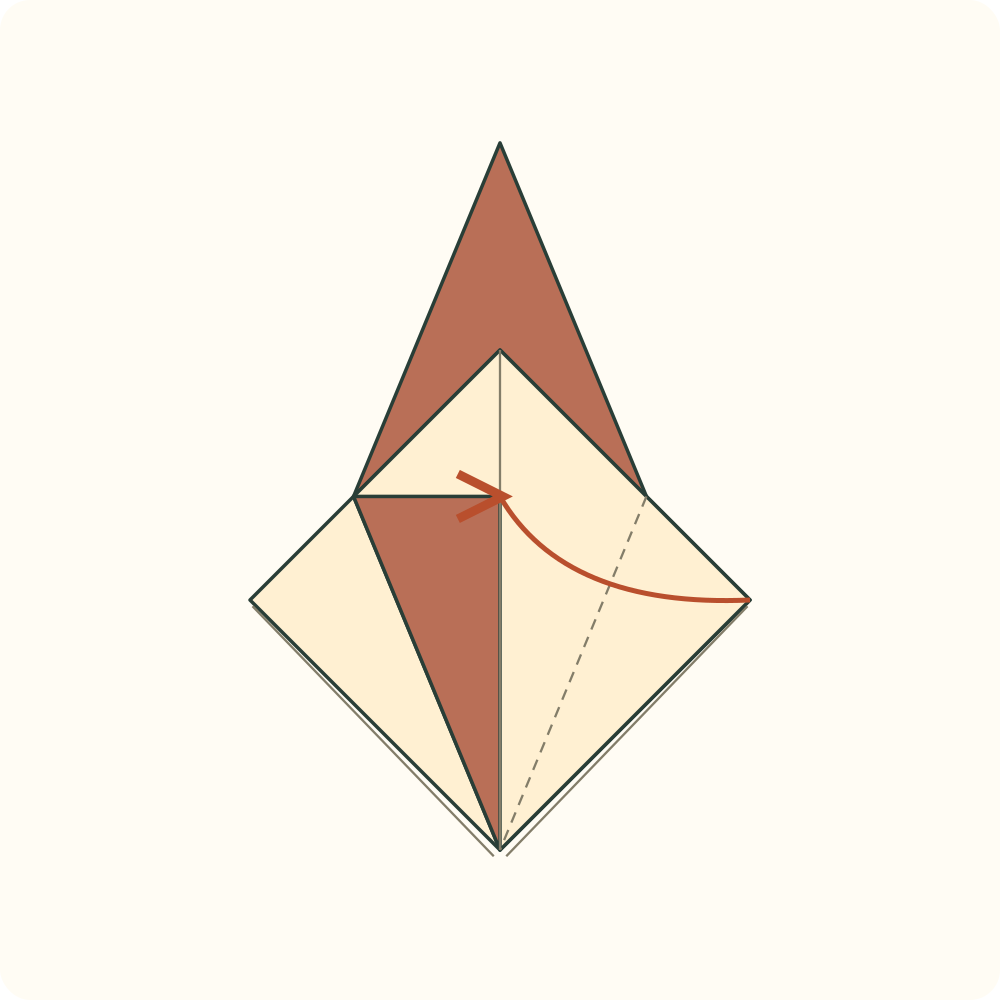
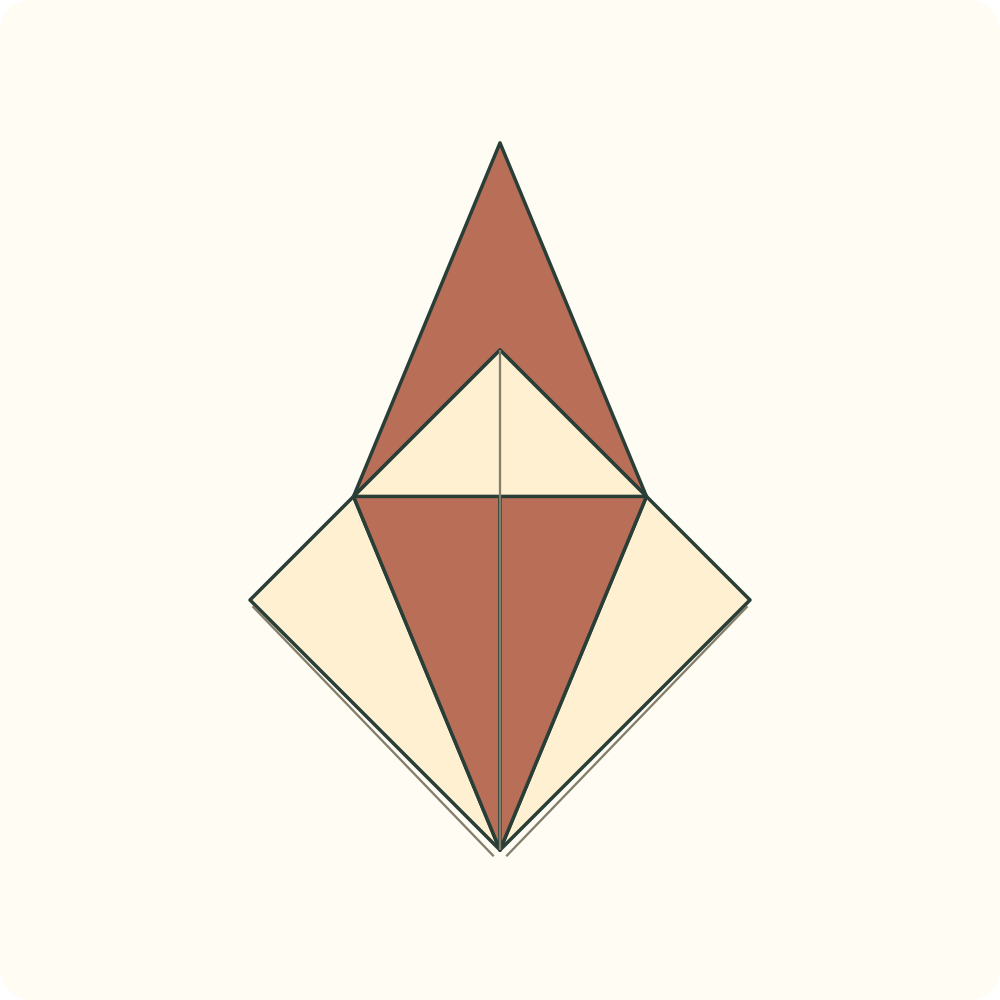
Two coloured side flaps meet at the vertical centre without crossing.
Step 21: Rehearse the second horizontal hinge
Fold the short upper point down along the line joining the two upper ends of the side folds. Press this horizontal guide.
Orientation: Only the short front point moves. Leave the first long petal standing behind it.
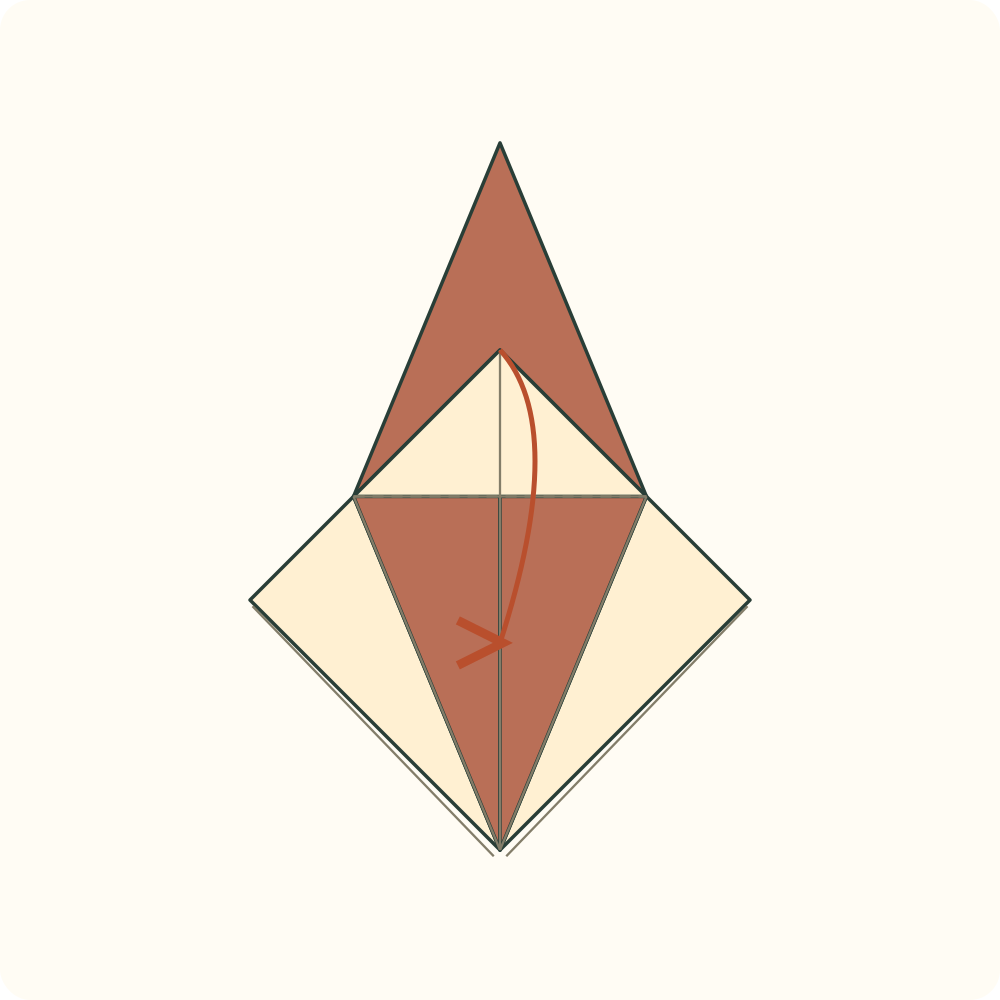
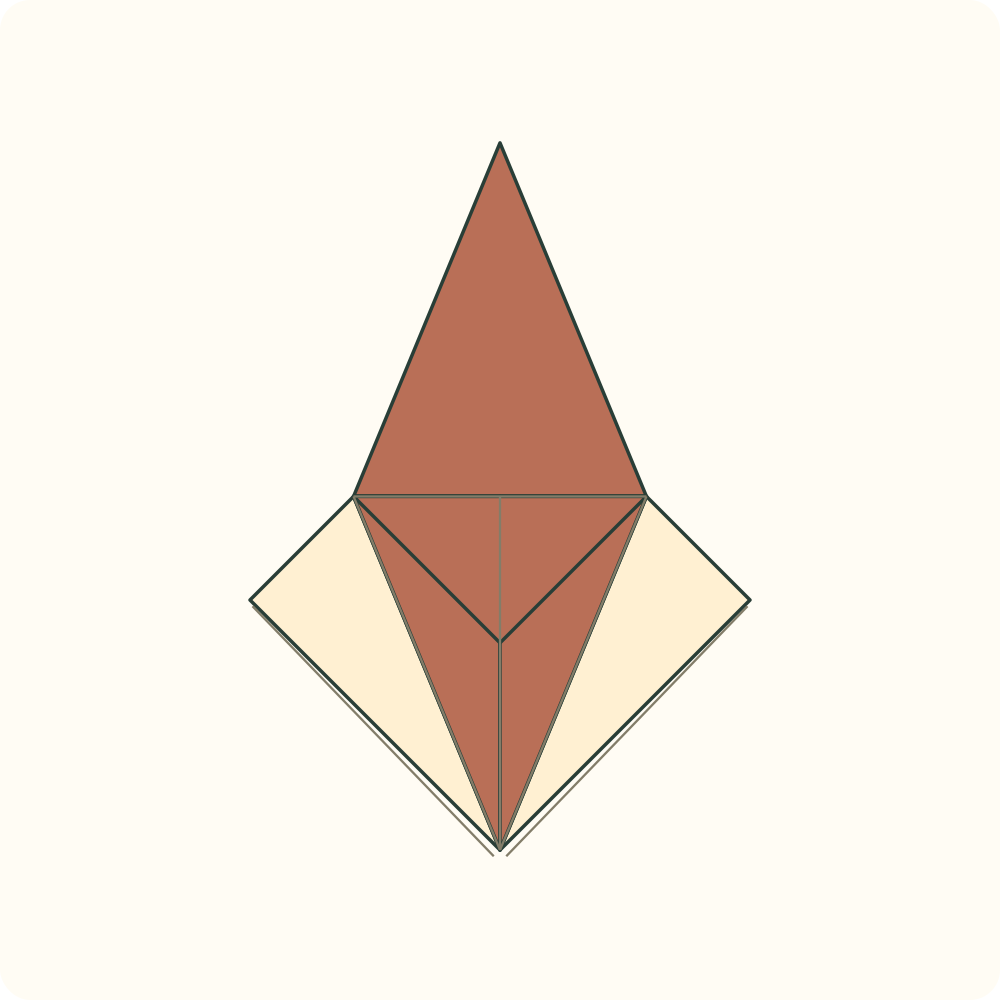
The short upper triangle points down and has a horizontal crease at its base.
Step 22: Reopen the second short upper point
Return only the small upper triangle to its previous upward position.
Orientation: Leave both side folds closed.
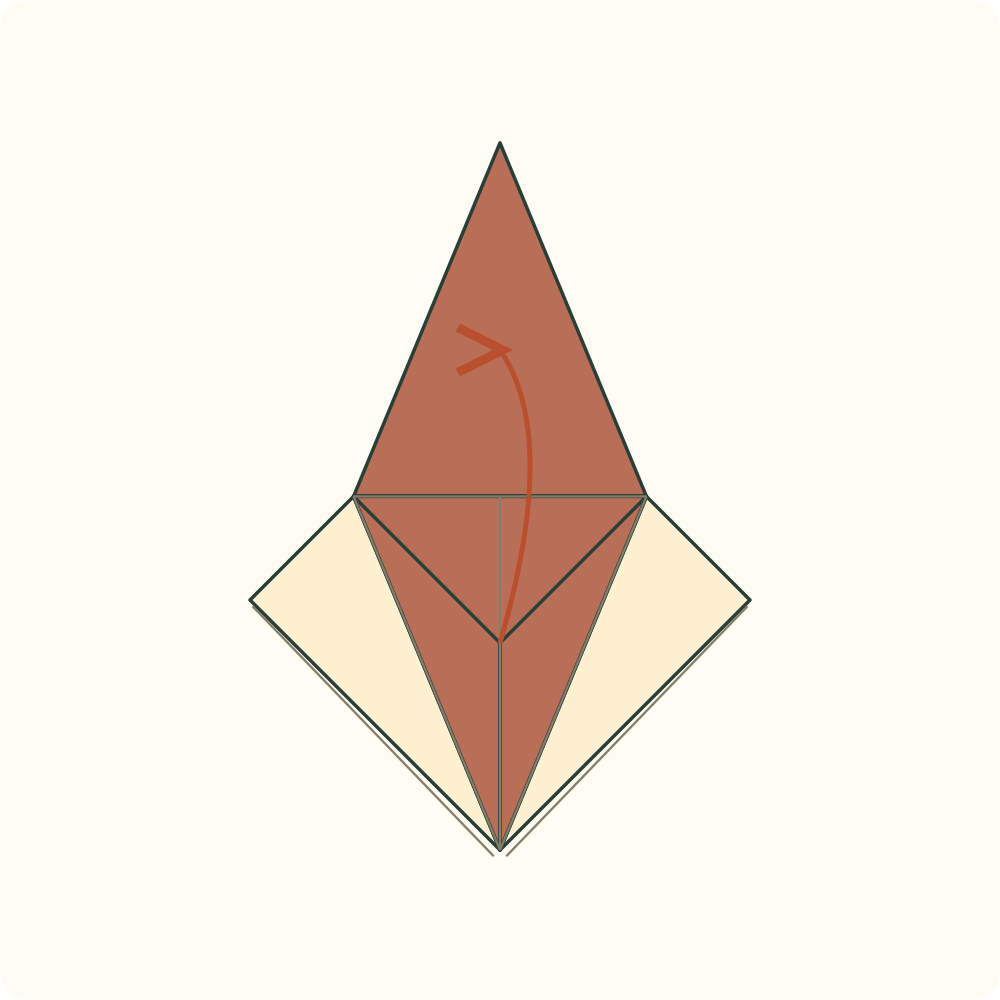
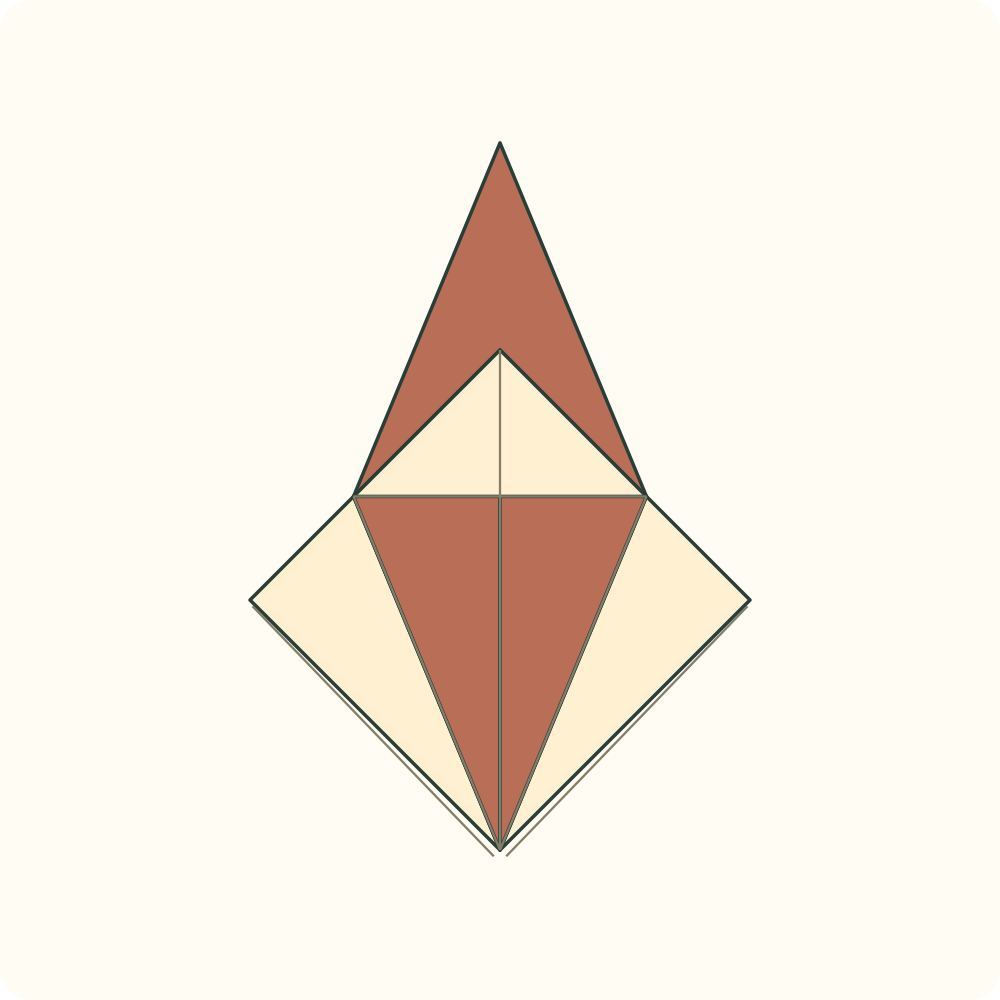
The upper point is restored and the horizontal guide remains.
Step 23: Reopen the second right flap
Return the right lower side flap to its original edge.
Orientation: The left side flap remains folded.
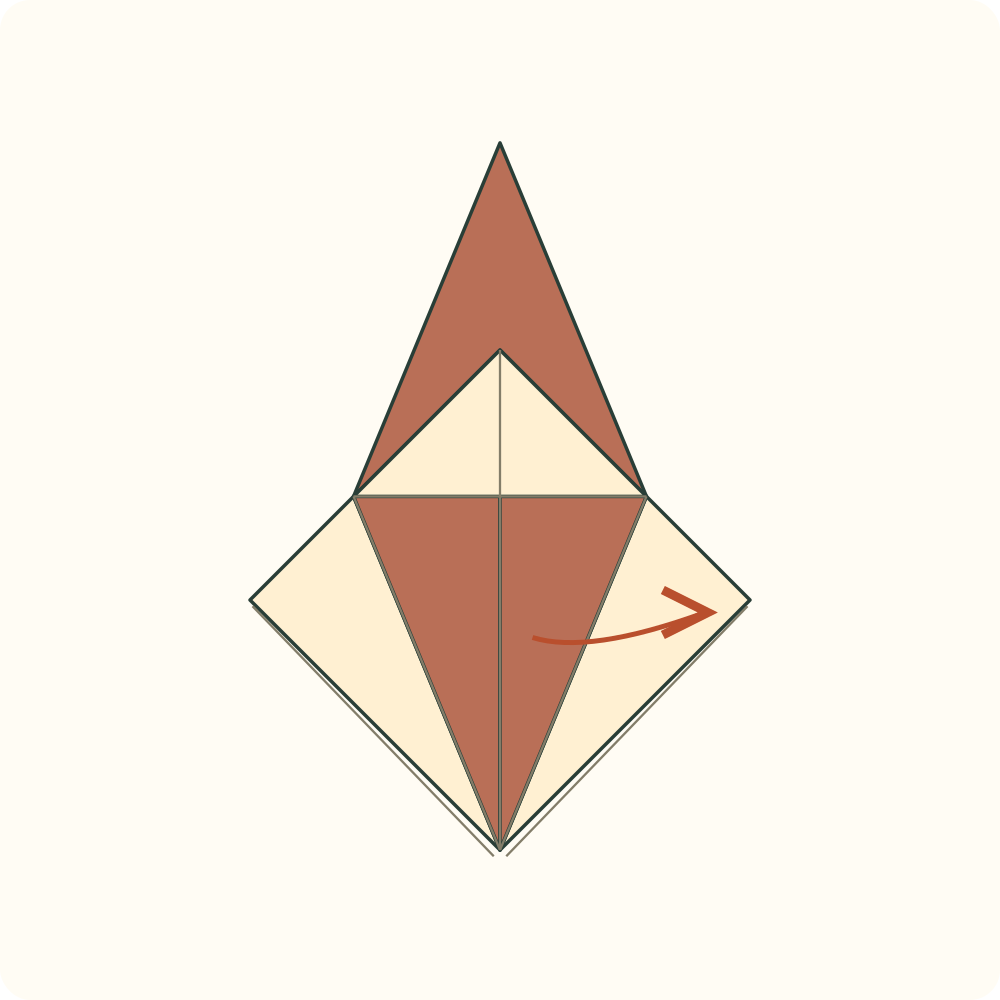
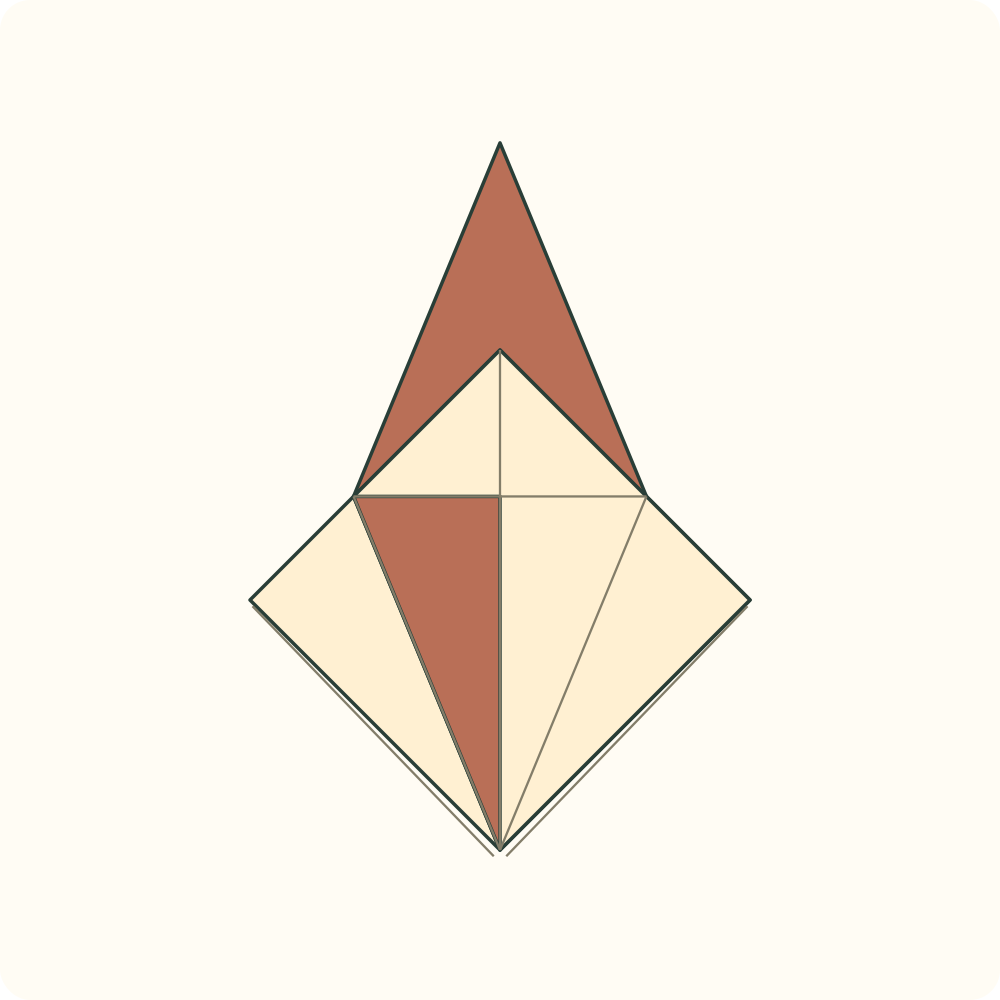
The right half of the short diamond is open, with its diagonal guide visible.
Step 24: Reopen the second left flap
Return the left lower side flap to its original edge.
Orientation: The short front diamond is fully open; keep the packet closed behind it.
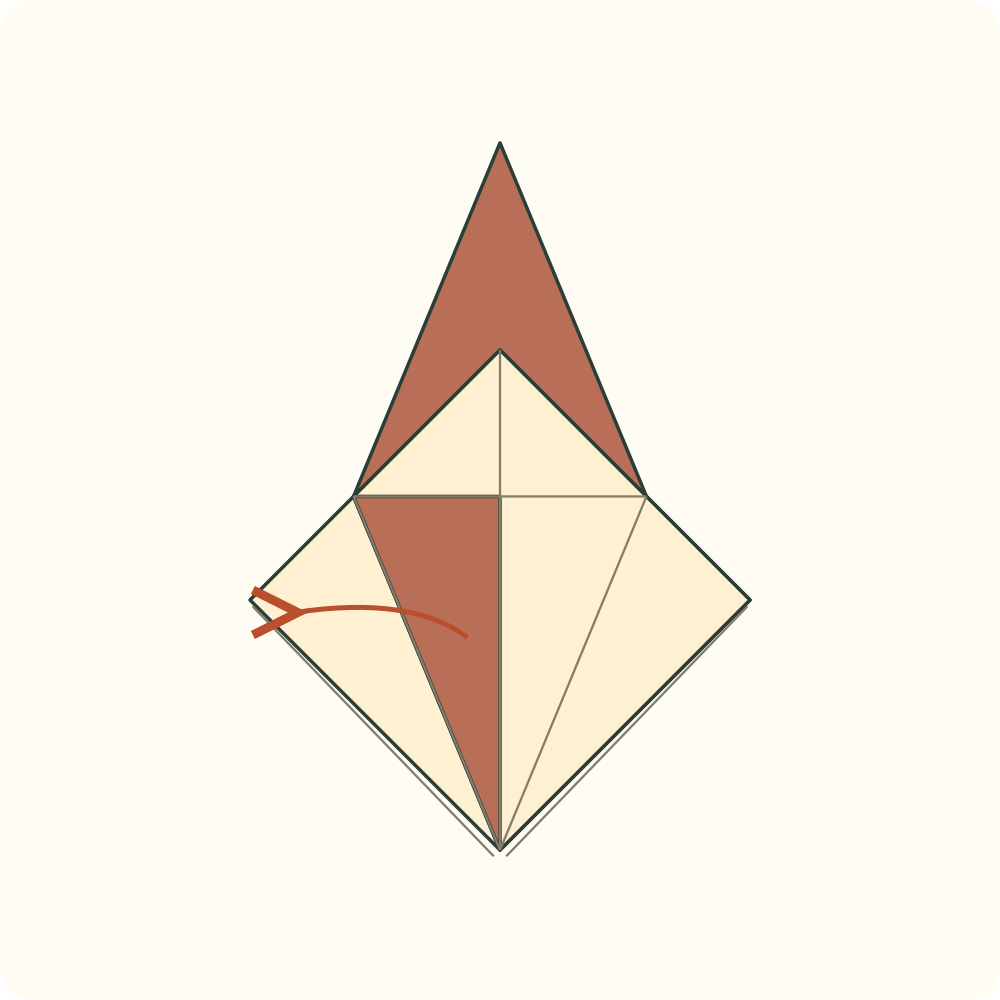
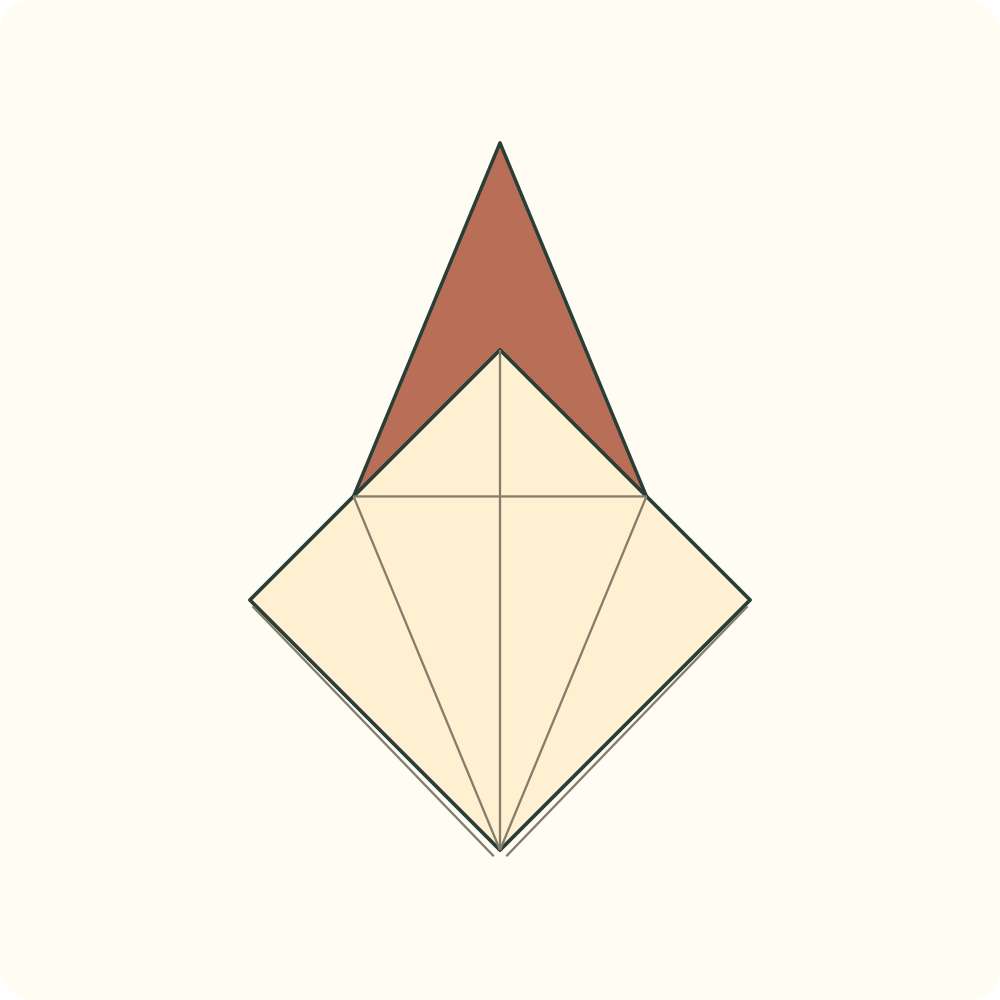
Two sloping guides and the horizontal hinge are visible on the short diamond.
Step 25: Lift the second lower flap
Ease apart the layers at the bottom point, take only the topmost lower corner and lift it towards the top. Stop with the pocket partly open.
Orientation: The horizontal guide acts as the upper hinge. The lower corners behind this flap remain below.
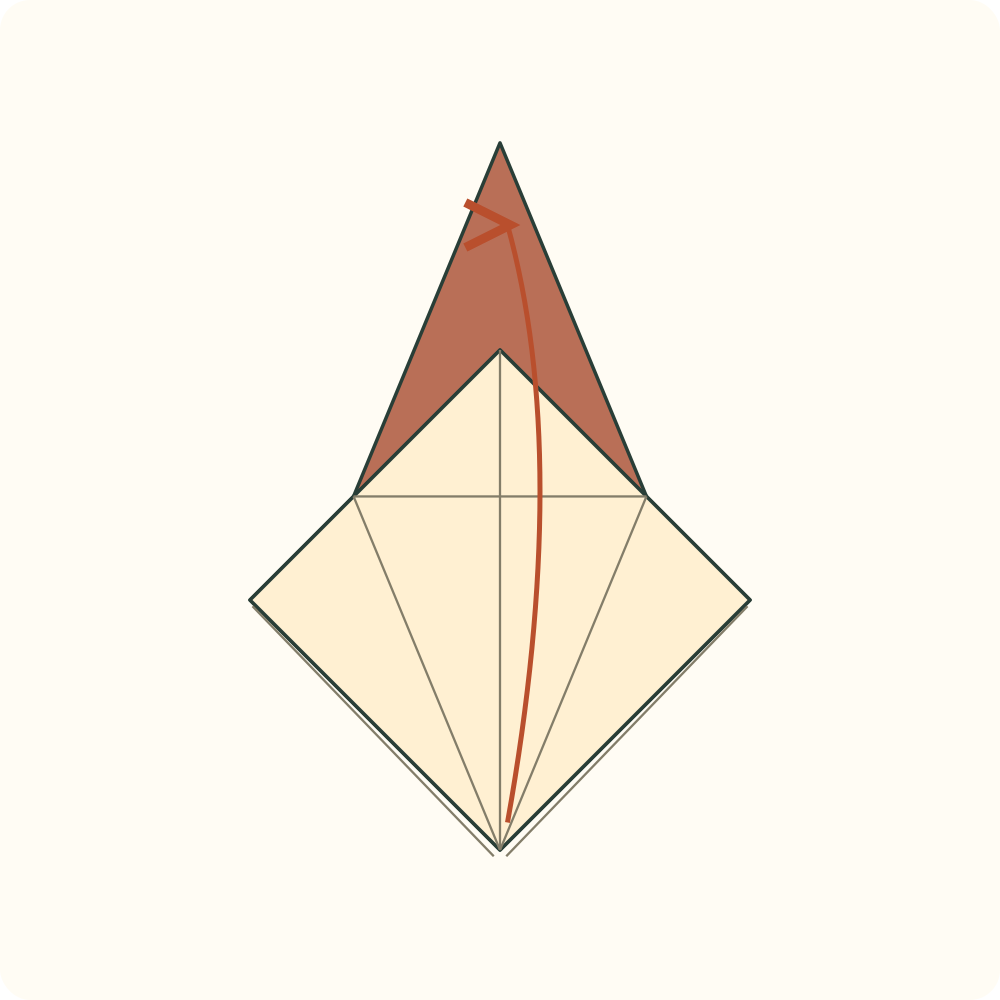
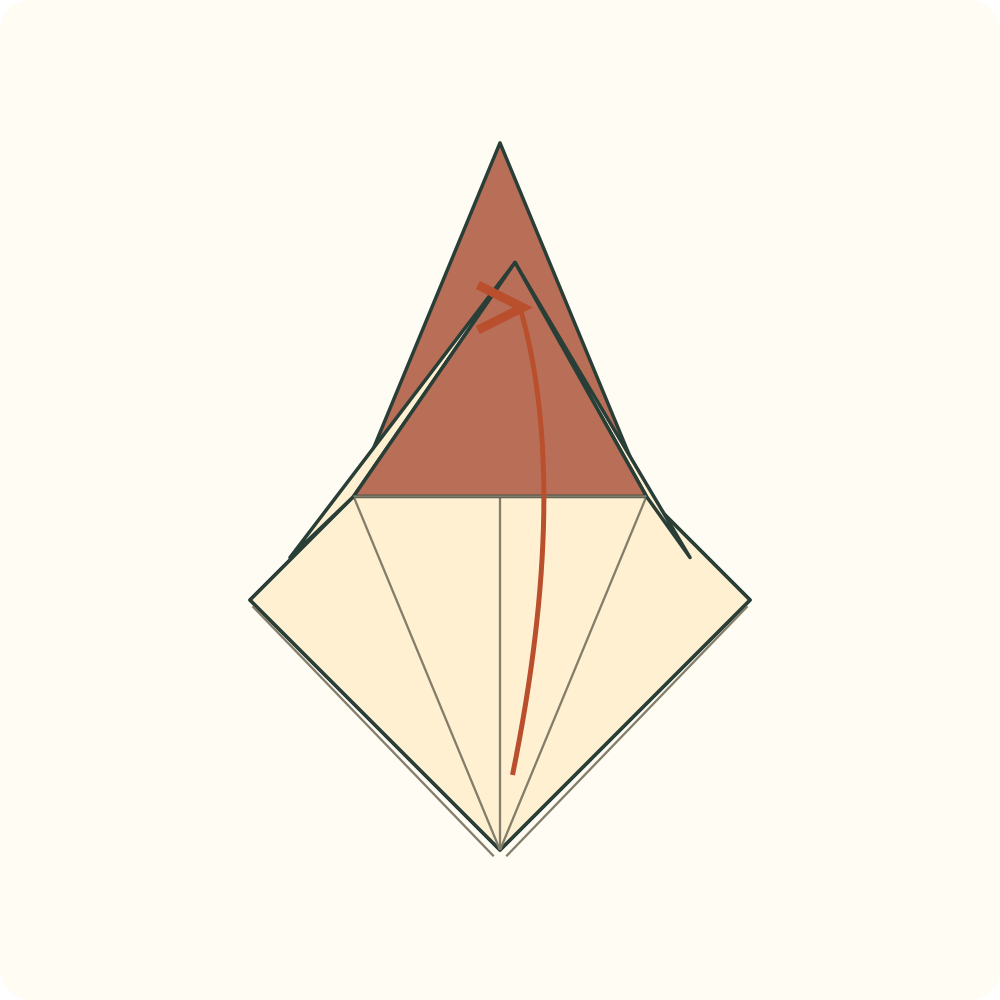
An open petal pocket exposes the coloured inside and its two sloping side panels.
Step 26: Close the second petal into the bird base
Continue raising that one corner while bringing both side panels inward along their prepared diagonal creases. Flatten the long point upwards.
Orientation: Do not fold the back lower points up with it. The long petal is a separate flap.
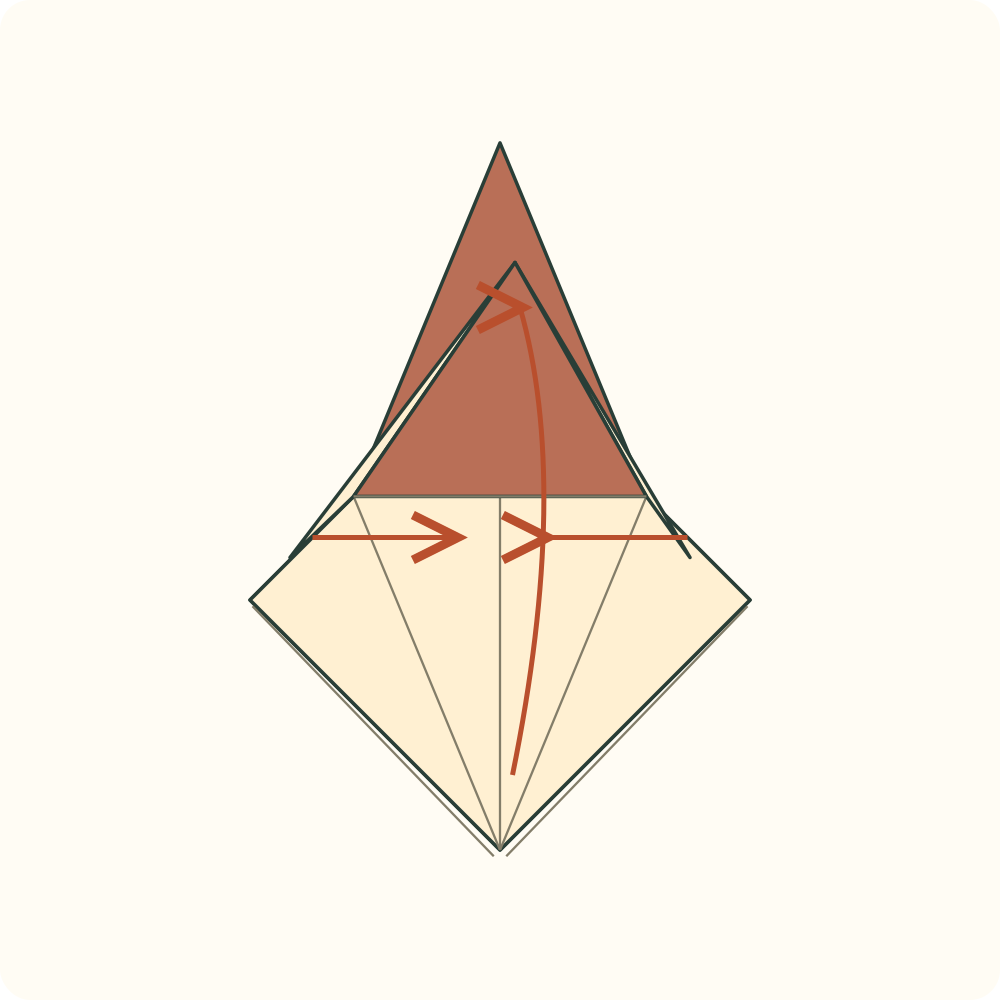
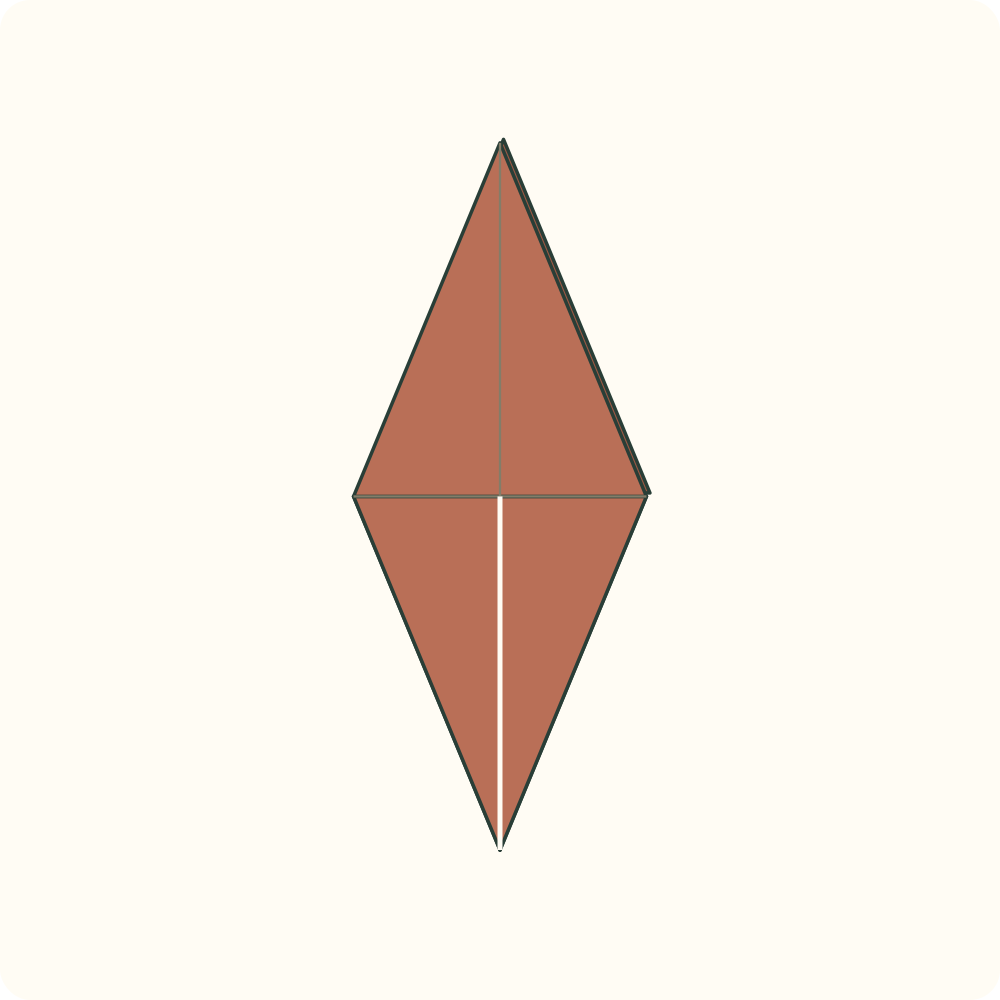
A long coloured diamond points upwards; its side edges meet at the vertical centre.
Step 27: Narrow the front lower-left edge
Take the front lower-left edge only and fold it to the vertical centre line. Stop at the central split; leave the upper wing point in place.
Orientation: The lower left point is separate from the lower right point.
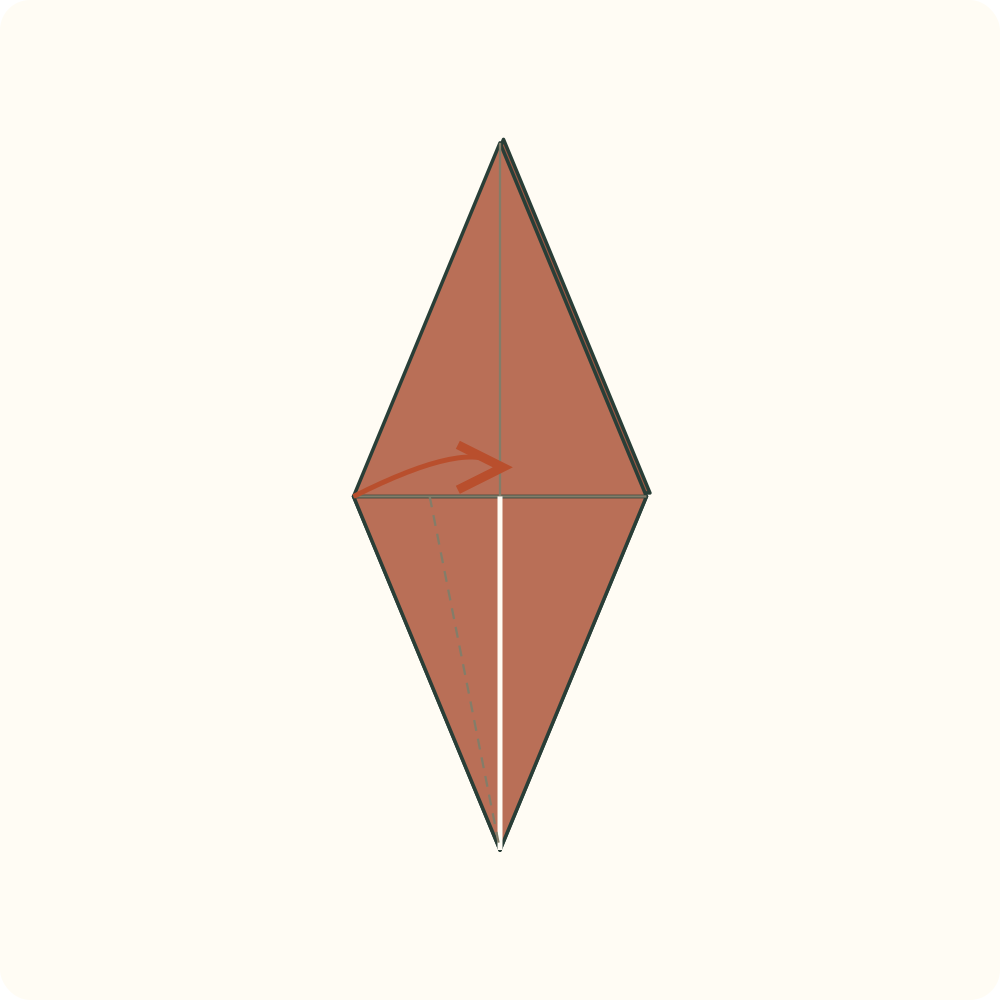
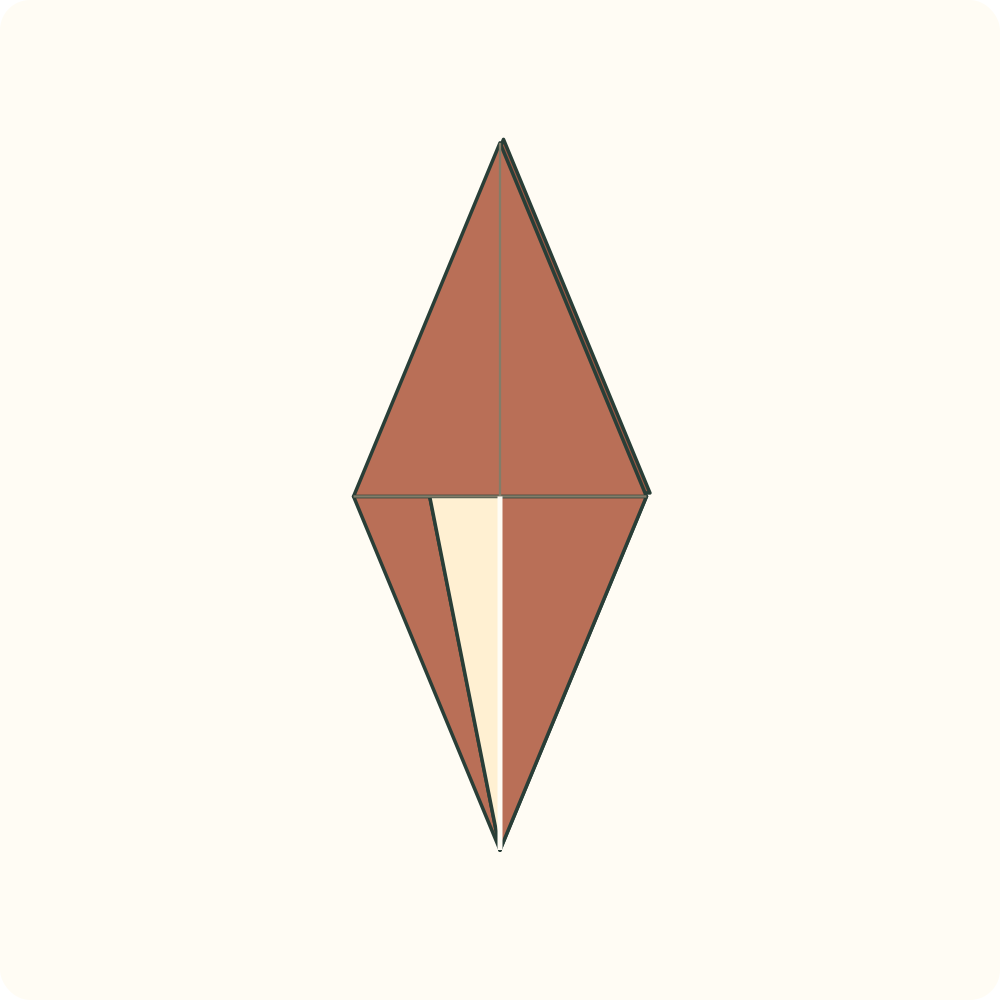
The front left lower flap becomes narrower; its folded edge lies beside the centre.
Step 28: Narrow the front lower-right edge
Fold the front lower-right edge to the centre in the same way, without catching the left point.
Orientation: Leave the two narrow lower points separate; do not force an overlap.
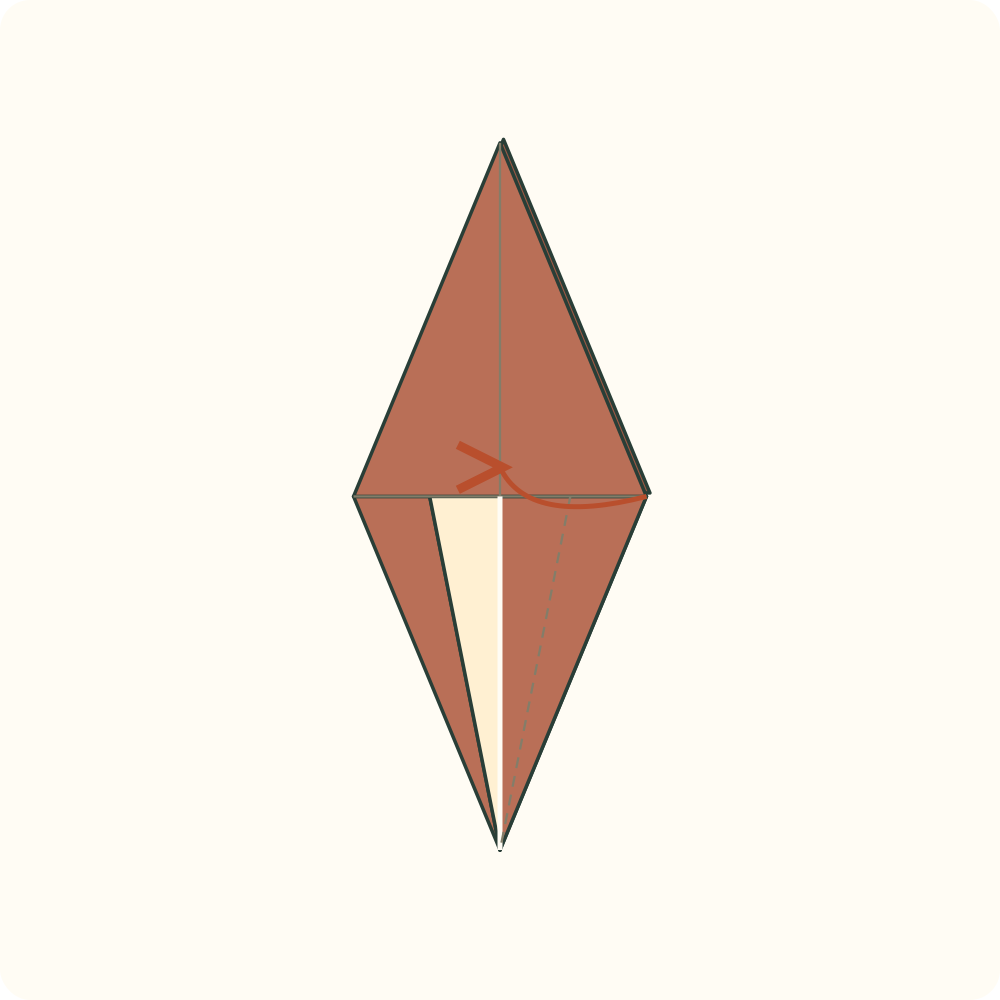
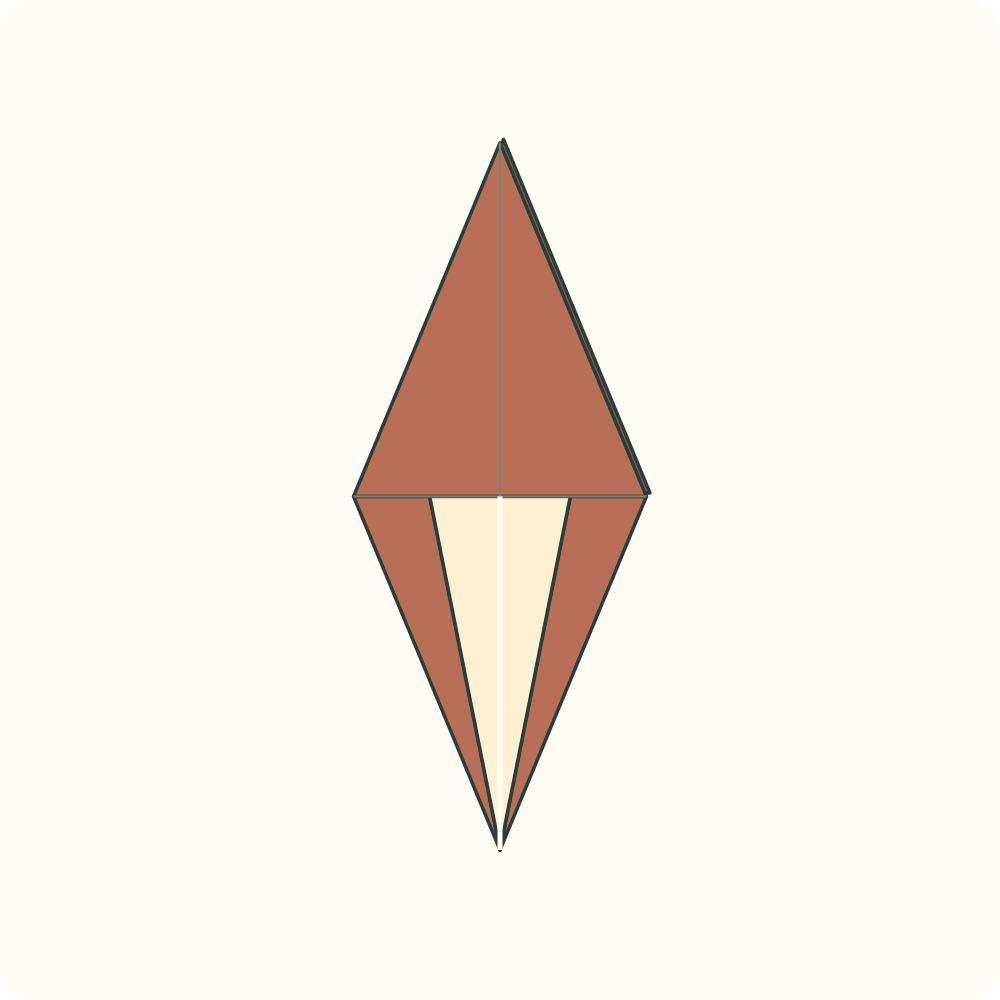
Both front lower edges are narrowed, while the broad upper point is unchanged.
Step 29: Turn over for the rear narrow folds
Turn the whole model over from left to right.
Orientation: Keep the upper wing points up and the split lower points below.
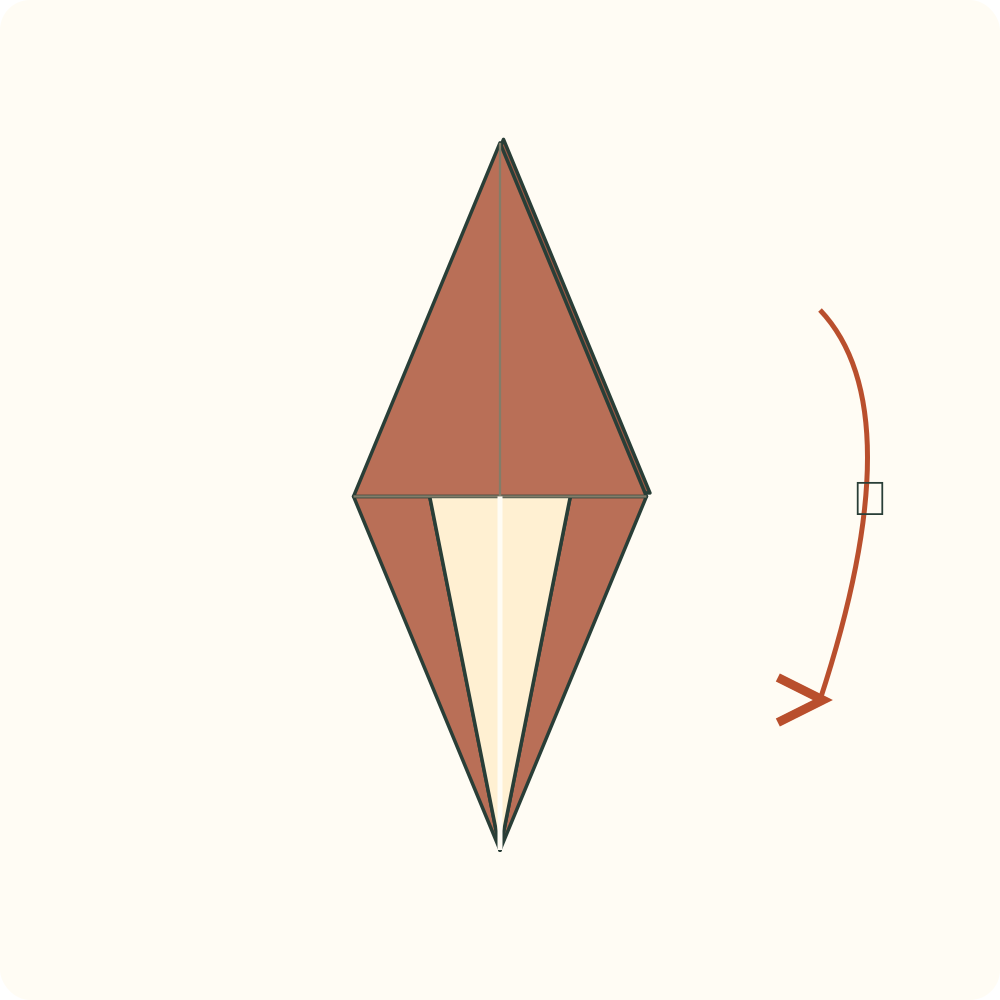
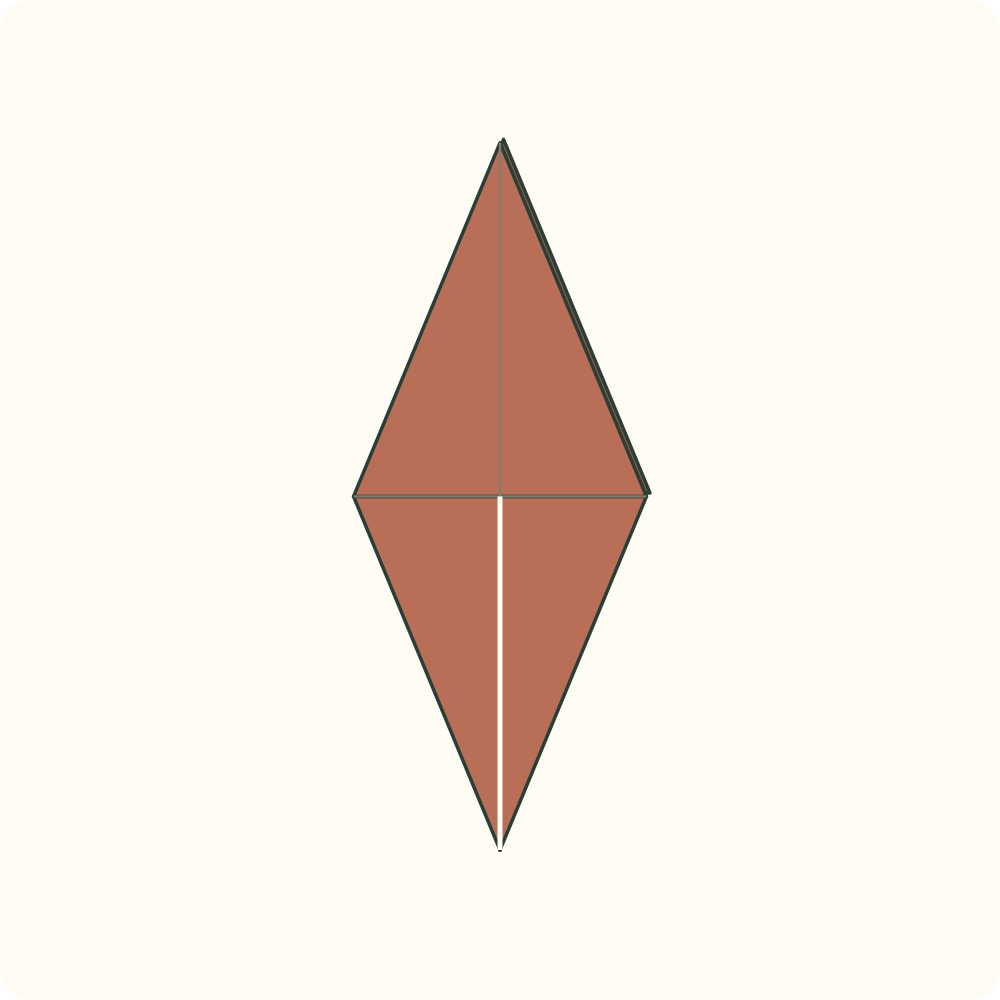
The two remaining wide lower edges face you.
Step 30: Narrow the remaining left edge
Fold only the left lower edge now facing you onto the vertical centre crease.
Orientation: The earlier narrow folds stay behind.
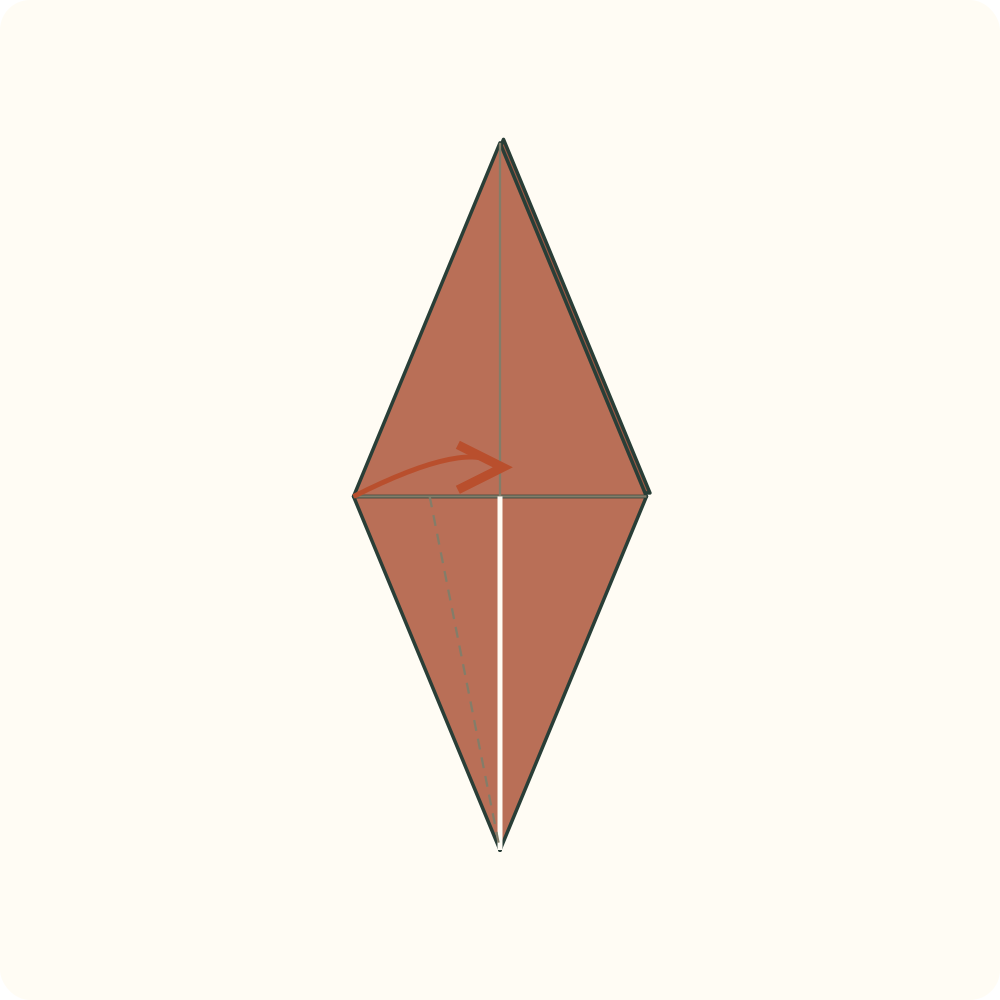
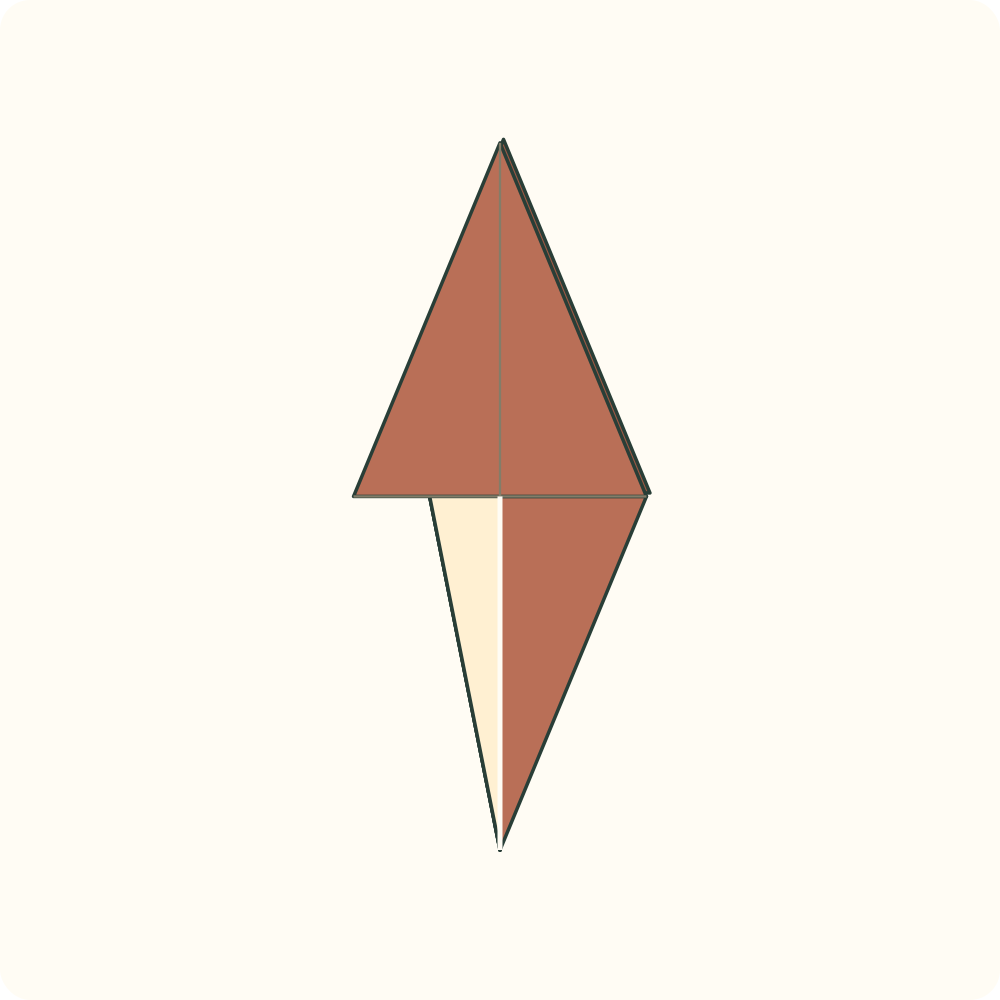
Three of the four lower side edges have been narrowed.
Step 31: Narrow the remaining right edge
Fold the final right lower edge onto the vertical centre crease.
Orientation: Keep both upper wing points upright and the two lower points separate.
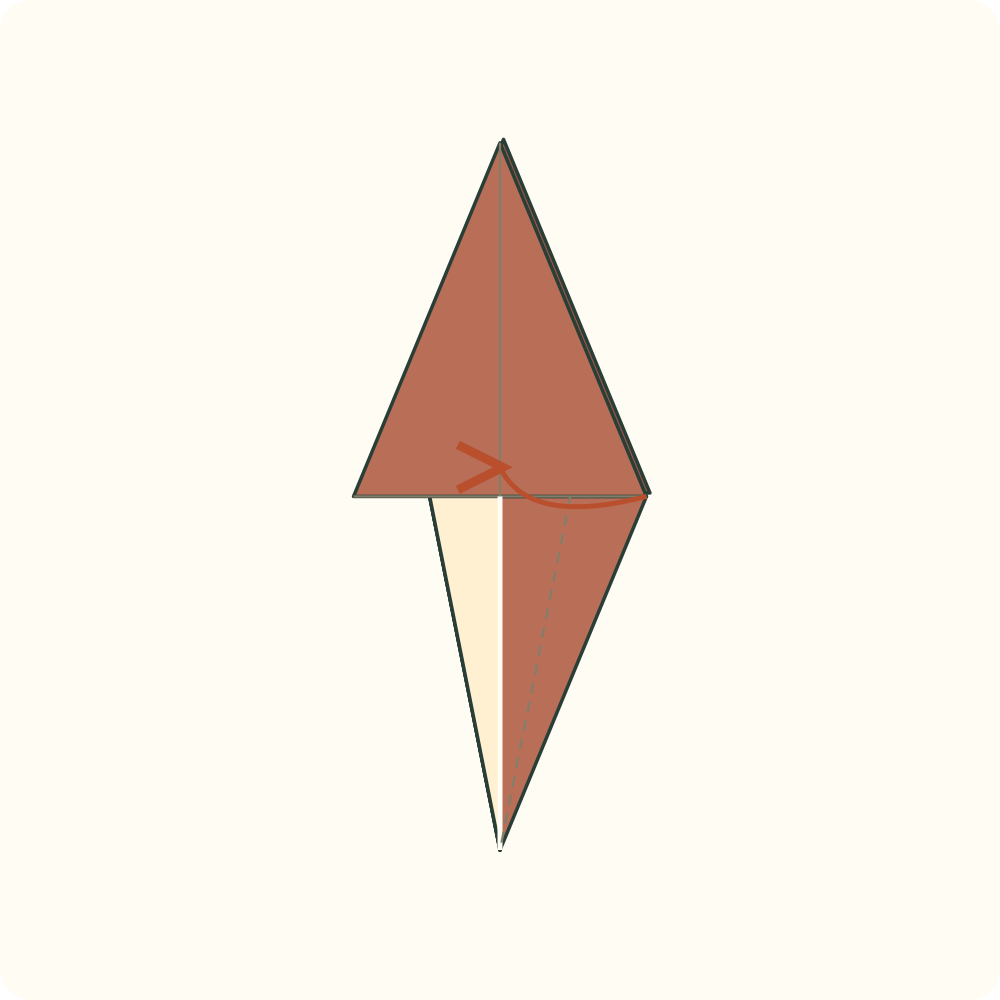
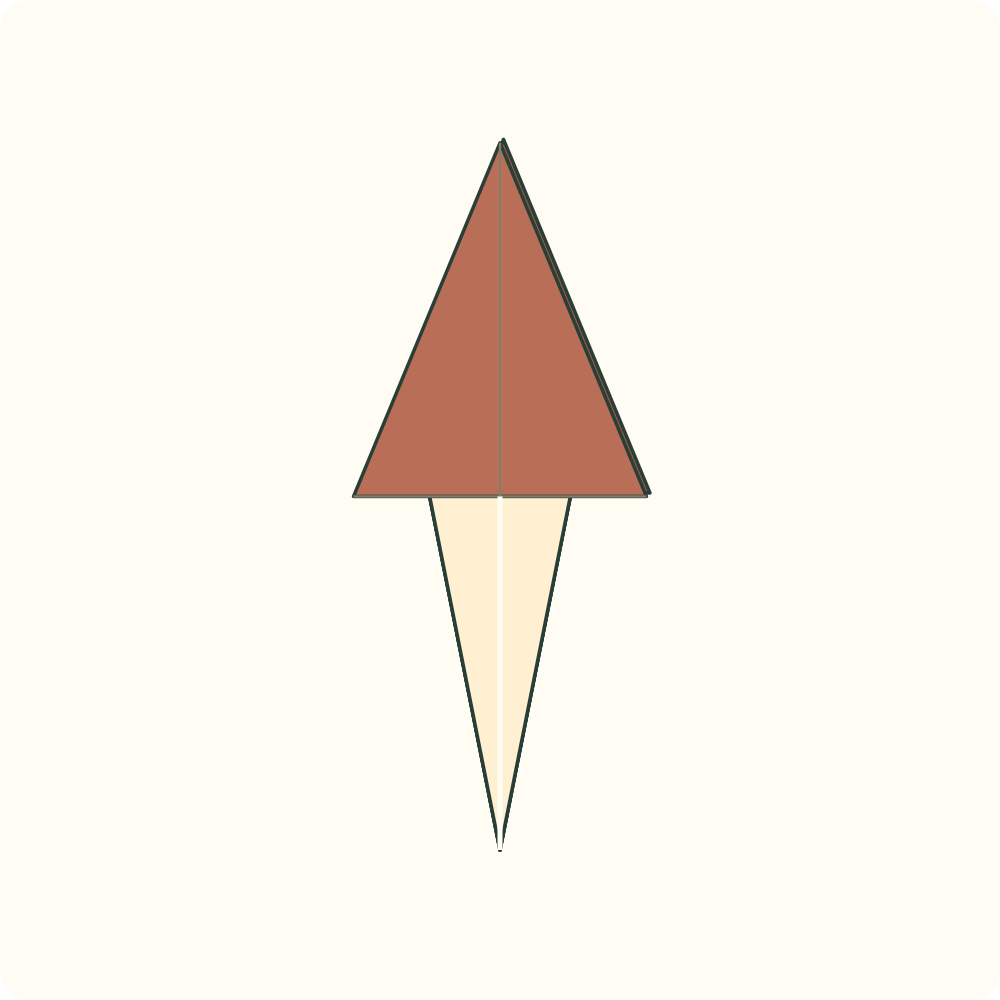
Two slim lower points are ready to become the neck and tail.
Step 32: Rehearse the neck bend
Lift the entire left narrow lower point diagonally upwards to the left. The bend starts at the central junction A where the two lower points separate; stop when its tip is below the upper wing tip.
Orientation: Move the two faces of this narrow point together. Leave the right lower point and both broad wings still.
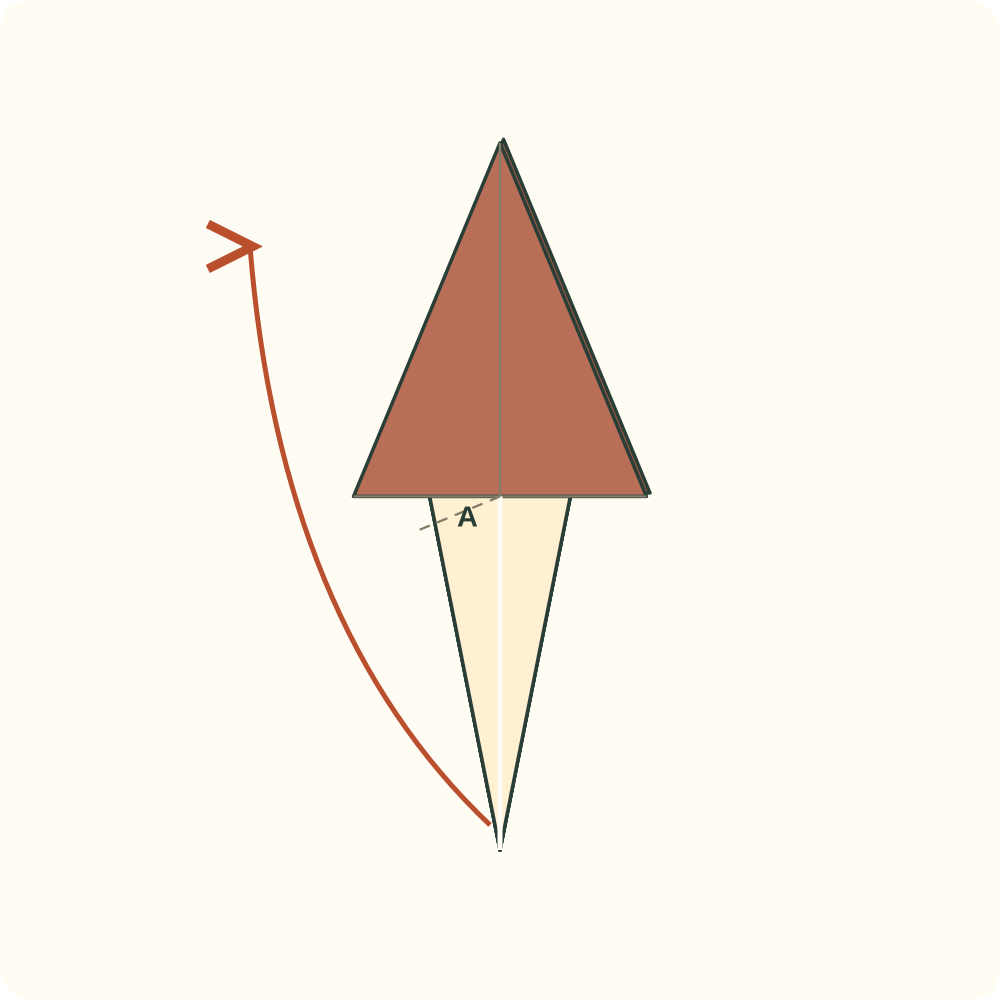
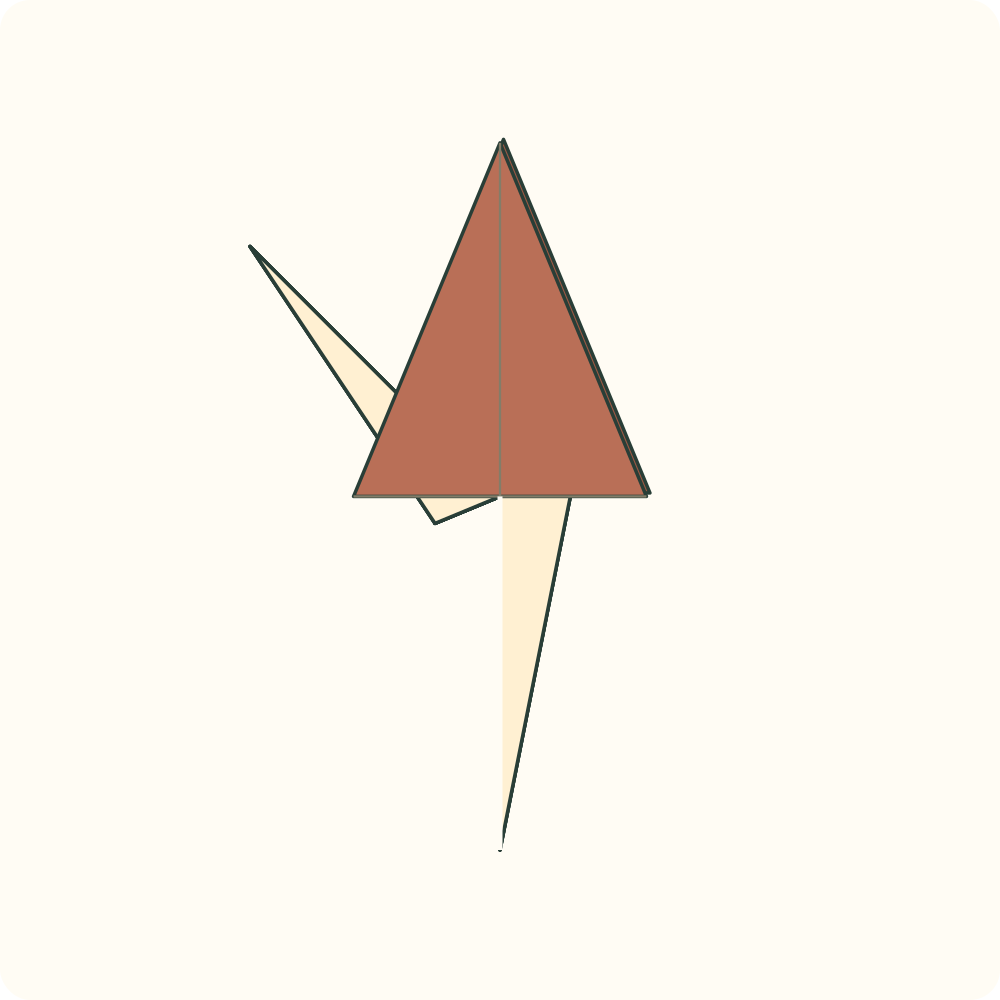
A temporary outer fold raises the left point; it has not yet been reversed inside.
Step 33: Reopen the neck rehearsal
Lower that same left point to its previous downward position, retaining its new bend crease.
Orientation: Do not open the narrow edge folds that shaped the point.
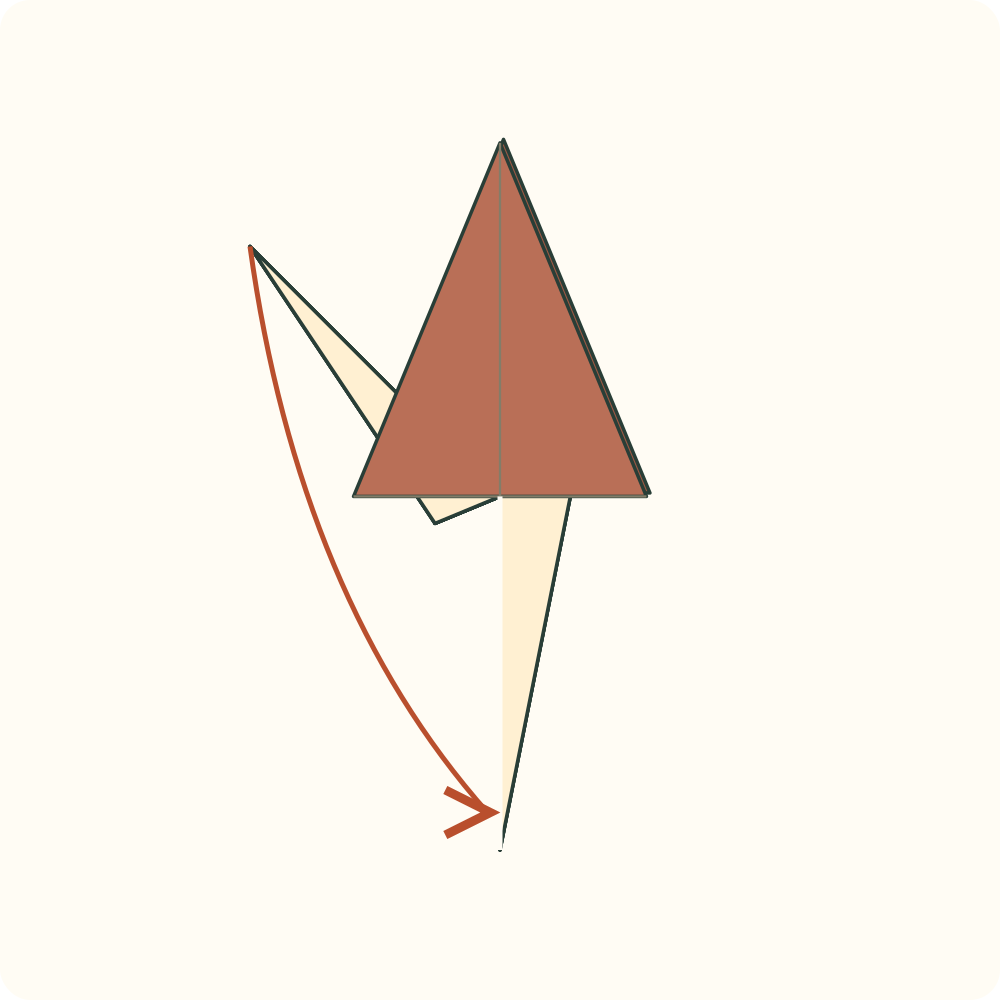
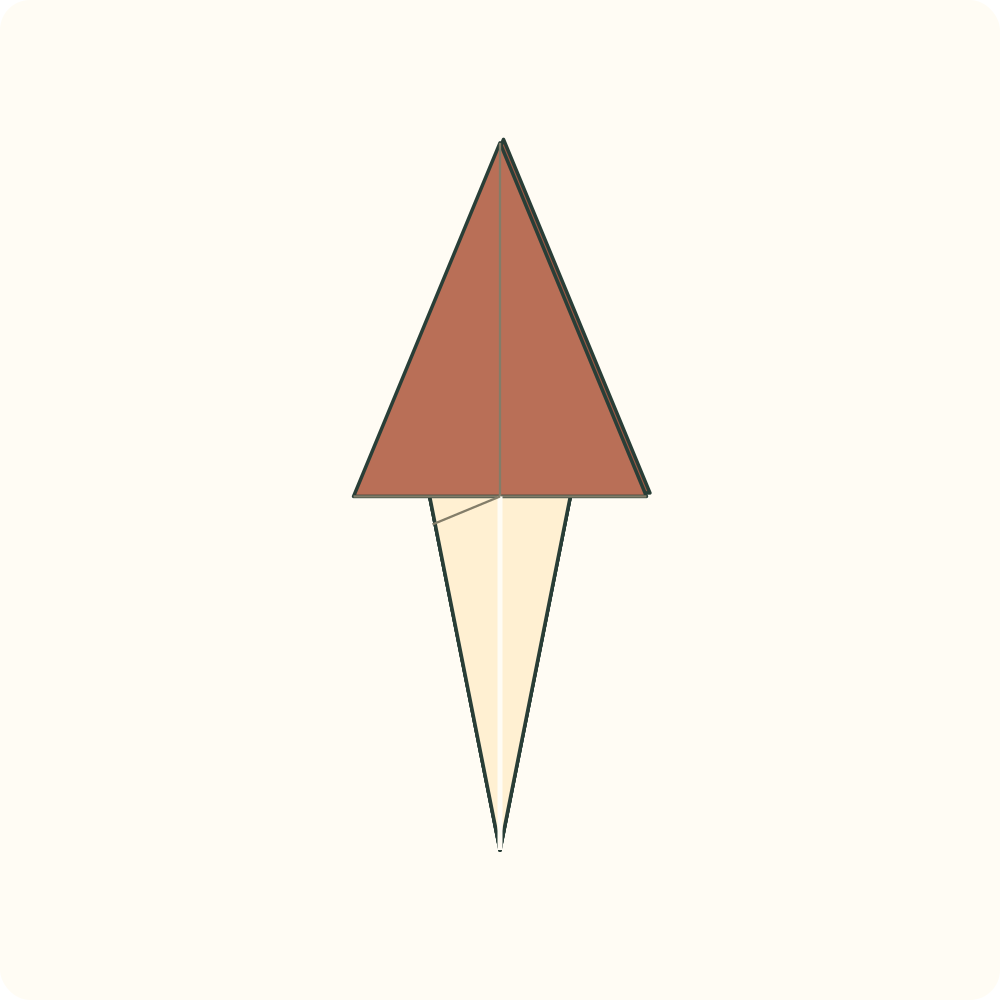
The left point hangs down again and shows its diagonal bend guide.
Step 34: Open the two faces of the neck point
Ease apart the front and back faces of the left narrow point just around the new bend. Keep its tip below while locating the centre spine inside.
Orientation: The small inset is an enlarged end view of the same two faces; it adds no new part.
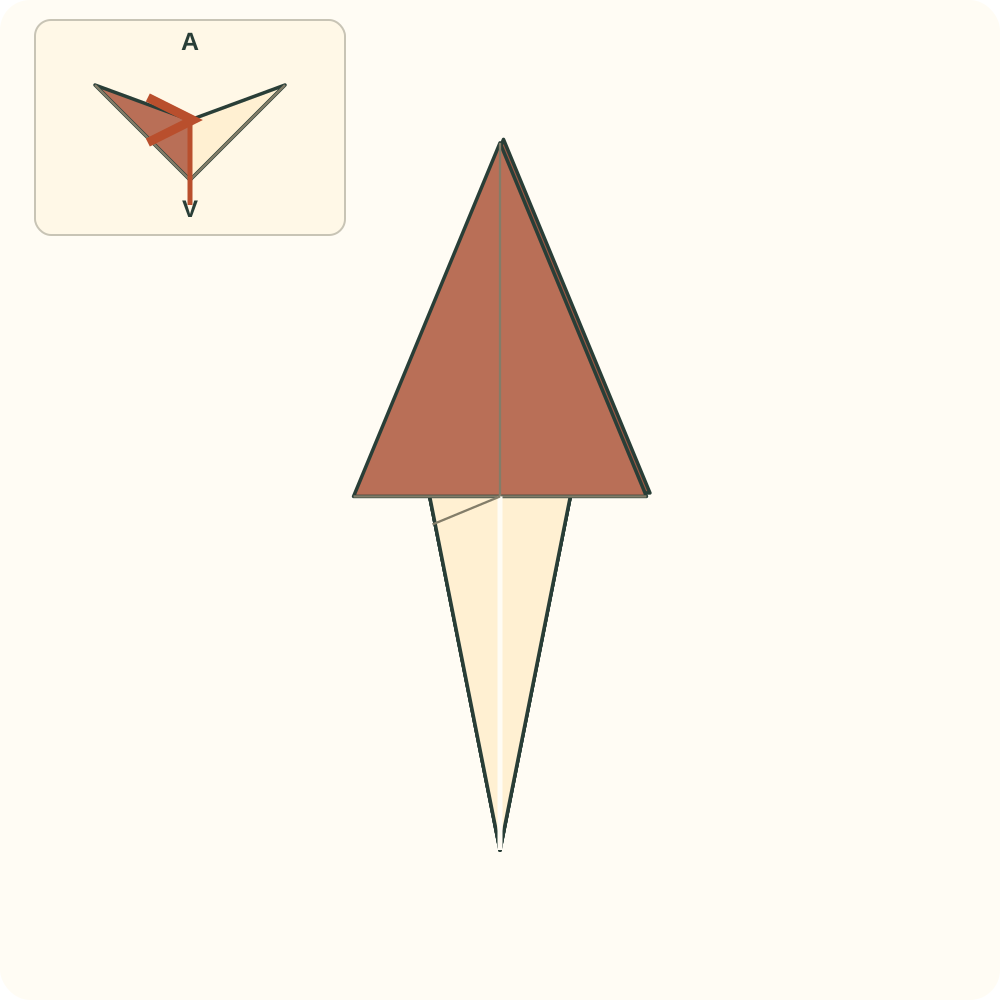
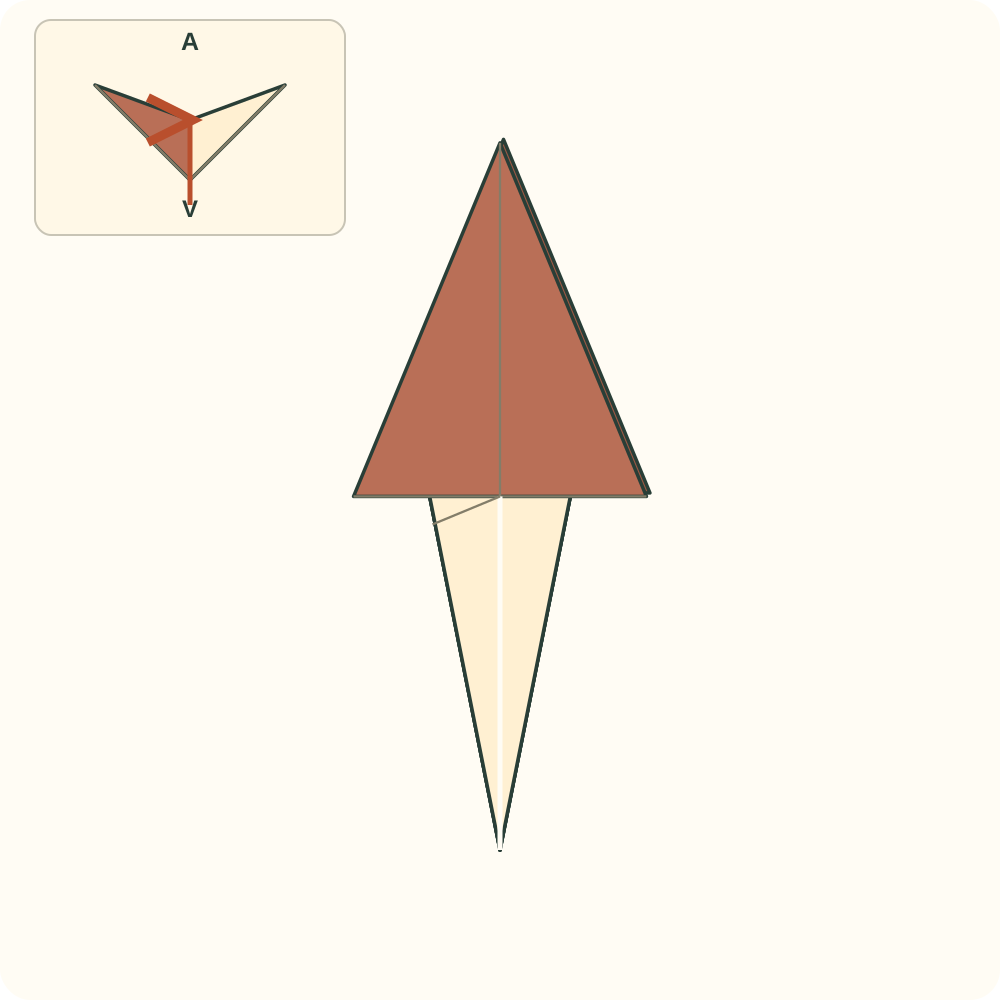
The point forms a small open V, ready for its spine crease to reverse.
Step 35: Inside reverse fold the neck
Raise the left tip along the rehearsed bend, pushing its centre spine in the opposite direction. Slide the tip between its front and back faces and close those faces around it.
Orientation: The narrow point rises to the left; it belongs between the wing layers, not on the front surface.
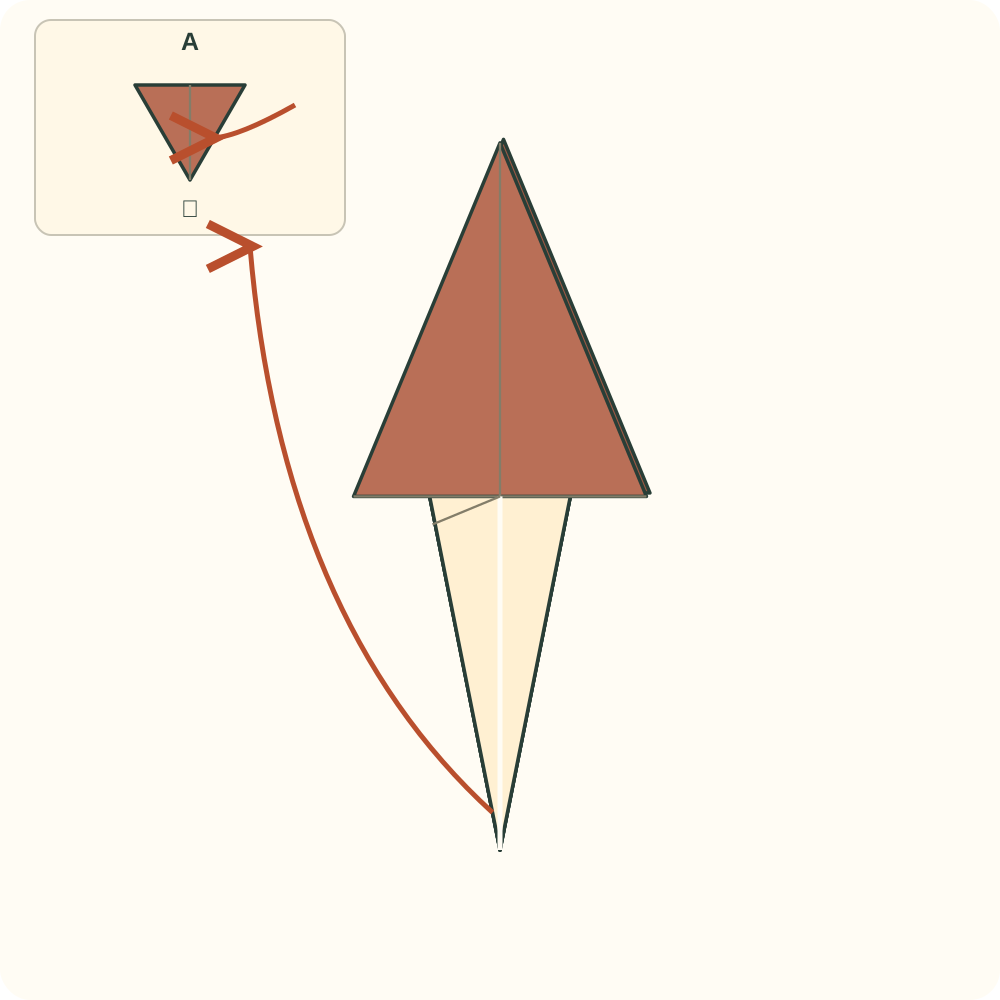
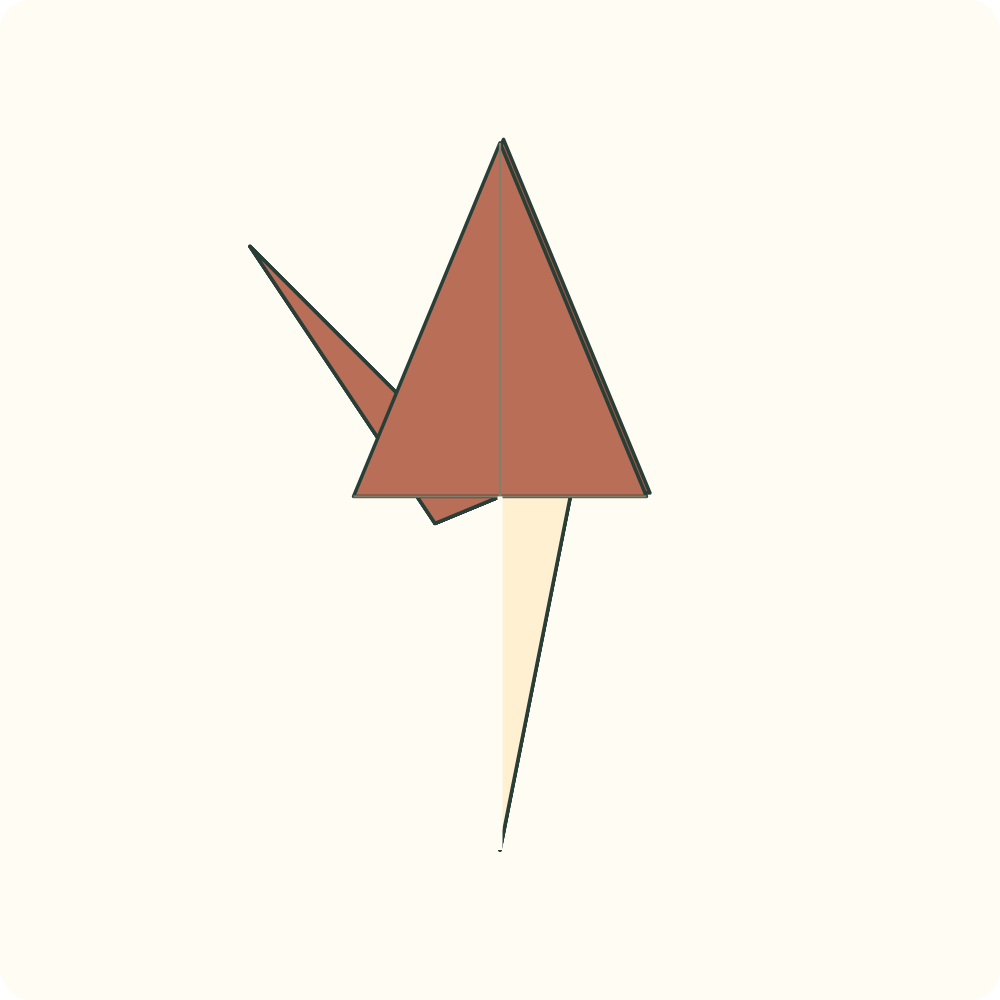
A completed inside reverse fold raises the neck; both broad wing points remain above.
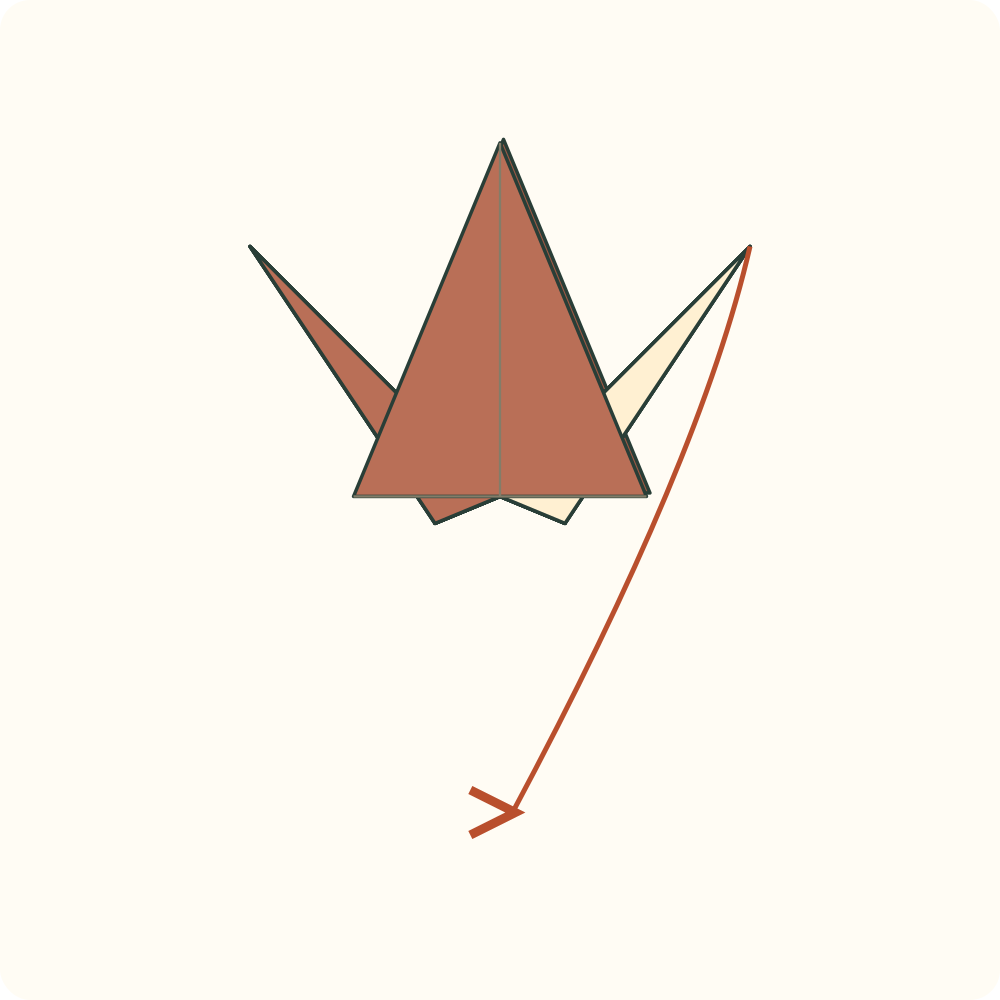
Step 36: Rehearse the tail bend
Lift the entire right narrow lower point diagonally upwards to the right. The bend starts at the central junction A where the two lower points separate; stop when its tip is below the upper wing tip.
Orientation: Move the two faces of this narrow point together. Leave the left lower point and both broad wings still.
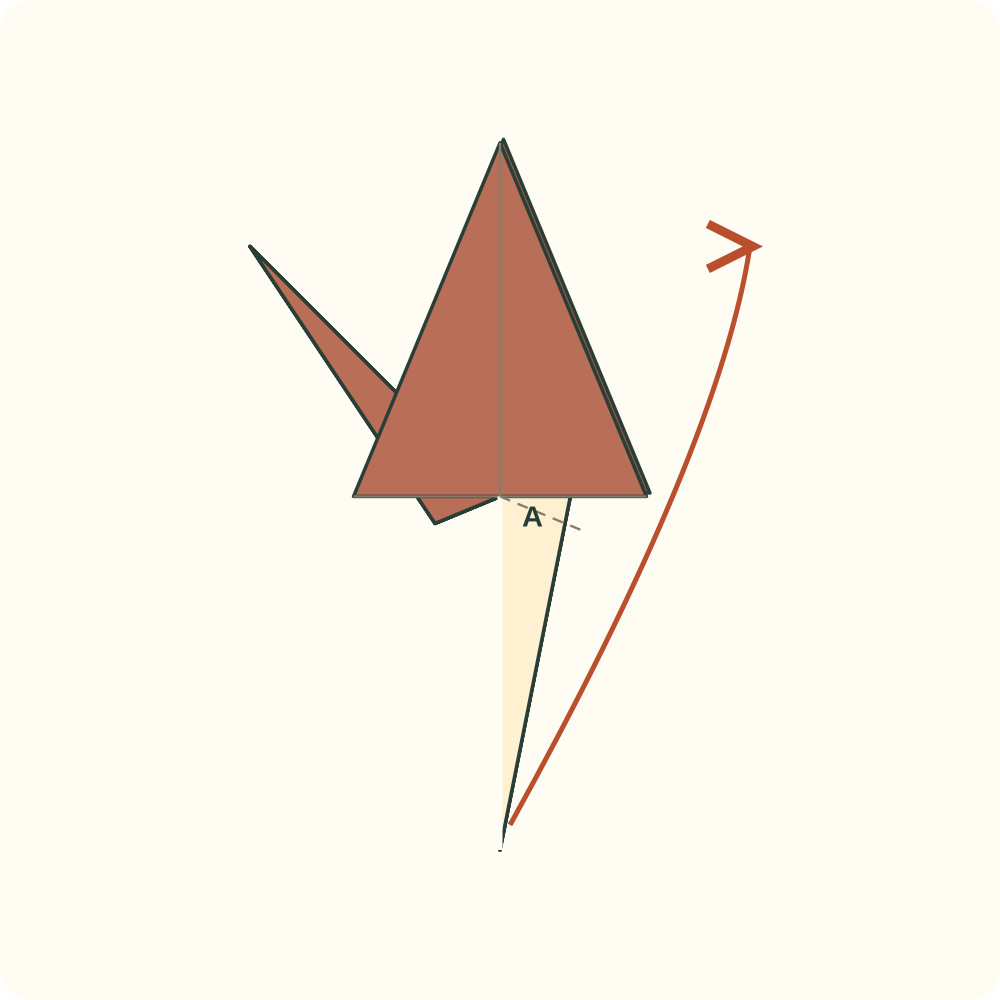
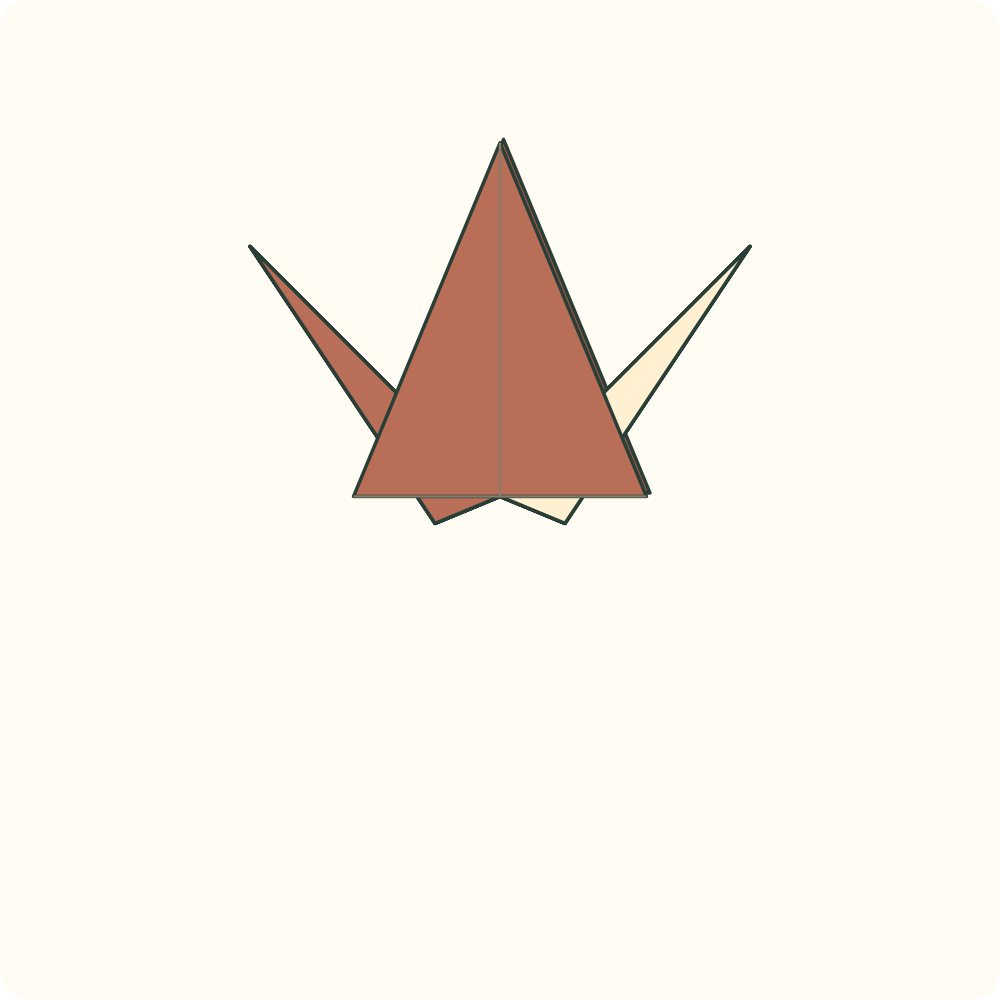
A temporary outer fold raises the right point; it has not yet been reversed inside.
Step 37: Reopen the tail rehearsal
Lower that same right point to its previous downward position, retaining its new bend crease.
Orientation: Do not open the narrow edge folds that shaped the point.
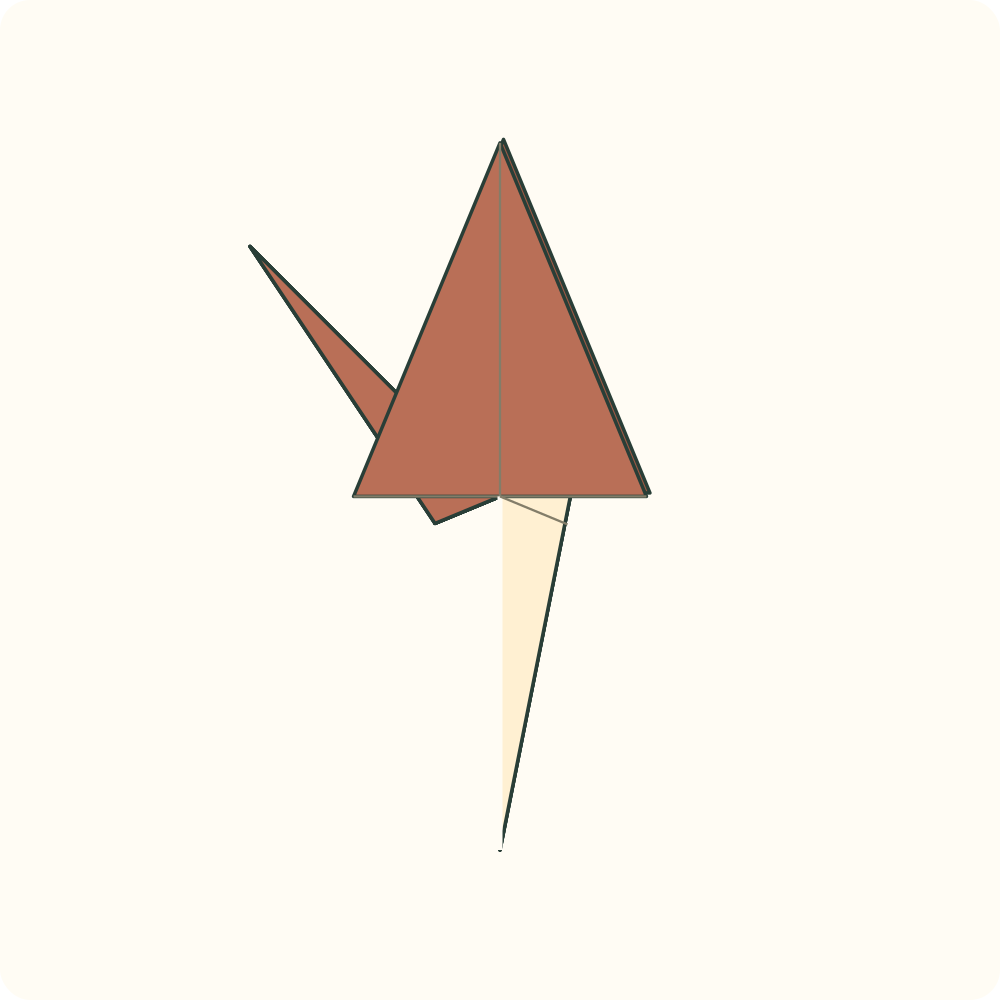
The right point hangs down again and shows its diagonal bend guide.
Step 38: Open the two faces of the tail point
Ease apart the front and back faces of the right narrow point just around the new bend. Keep its tip below while locating the centre spine inside.
Orientation: The small inset is an enlarged end view of the same two faces; it adds no new part.
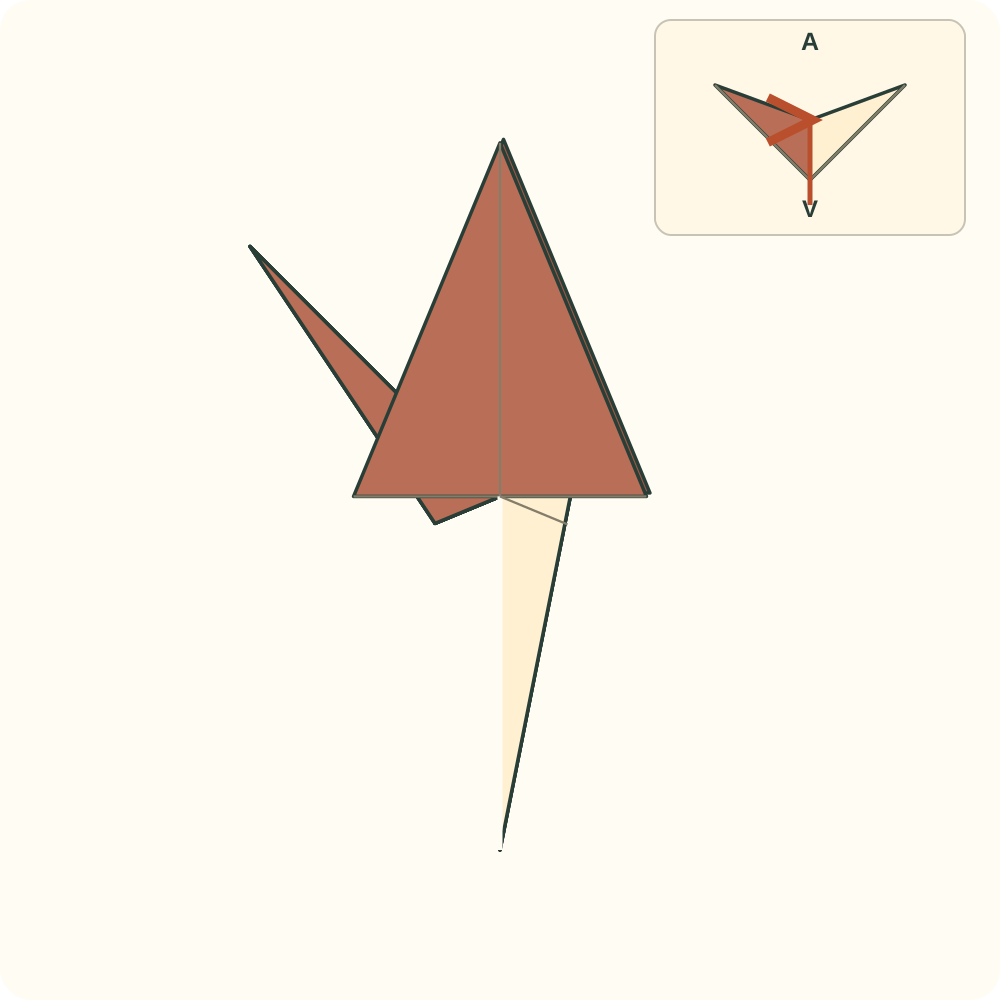
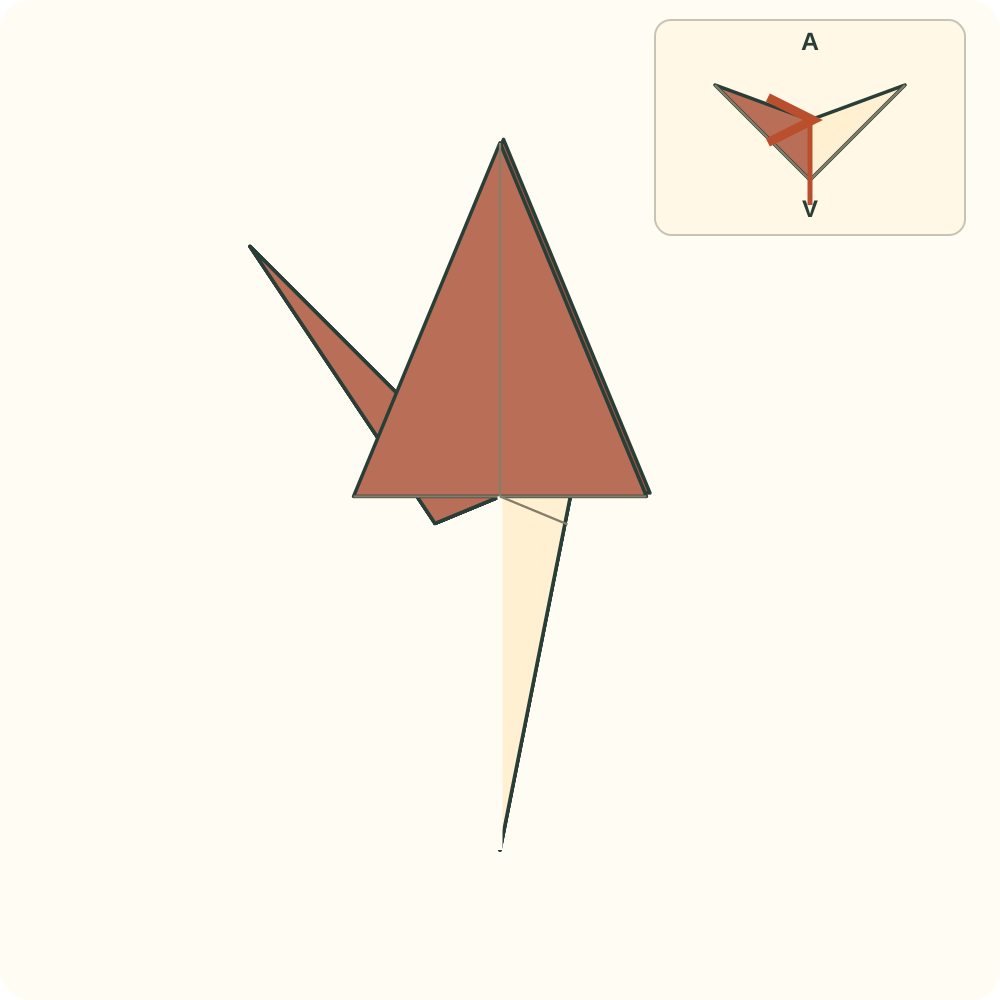
The point forms a small open V, ready for its spine crease to reverse.
Step 39: Inside reverse fold the tail
Raise the right tip along the rehearsed bend, pushing its centre spine in the opposite direction. Slide the tip between its front and back faces and close those faces around it.
Orientation: The narrow point rises to the right; it belongs between the wing layers, not on the front surface.
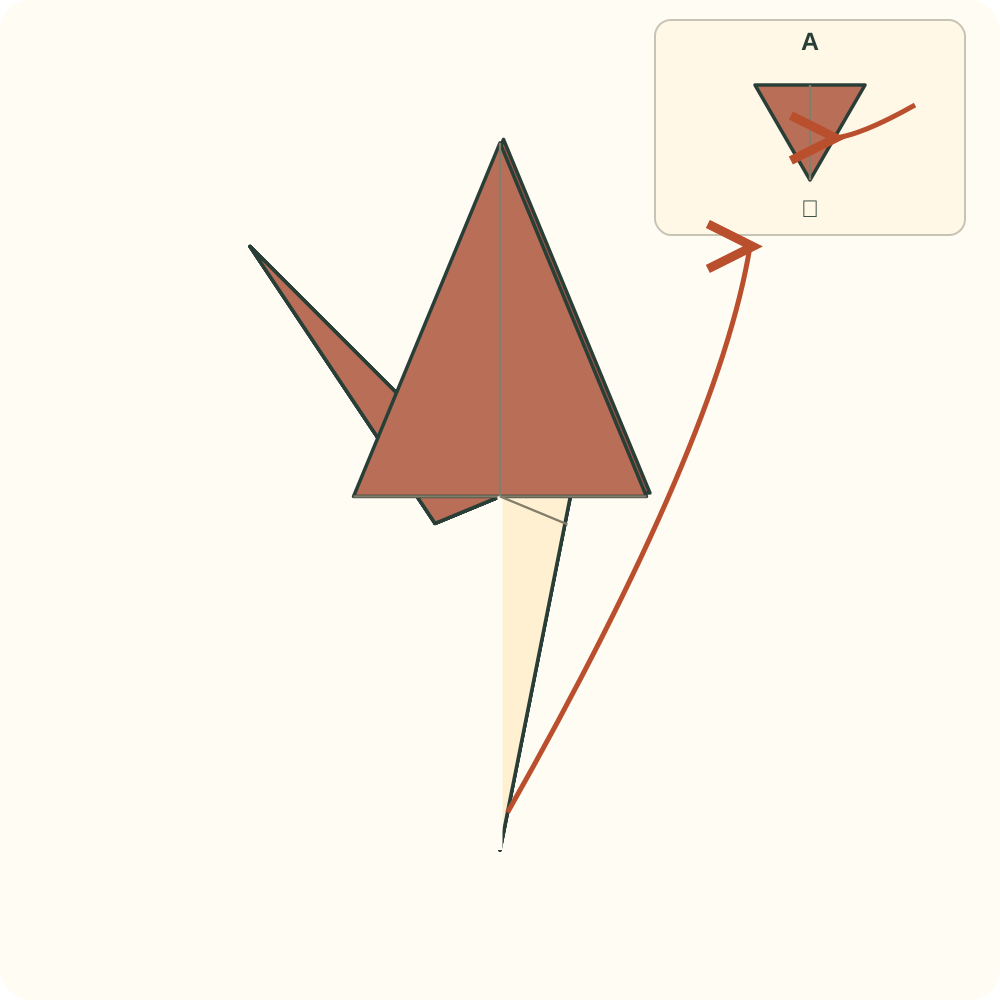
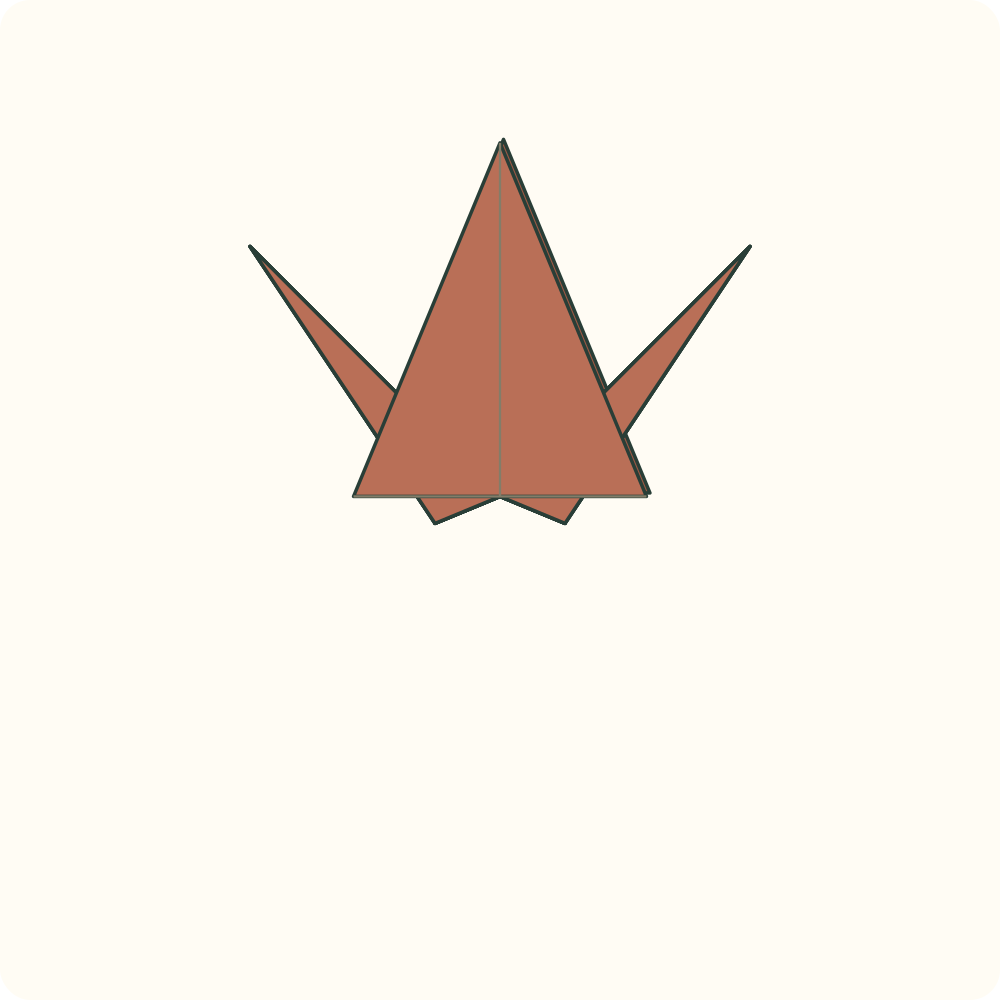
A completed inside reverse fold raises the tail; both broad wing points remain above.
Step 40: Rehearse the head bend
Locate B four fifths of the way from neck root A to the left neck tip. Fold the short final fifth down across a horizontal line through B.
Orientation: This is a proposed shaping position. Move only the neck tip, not the tail or a wing.
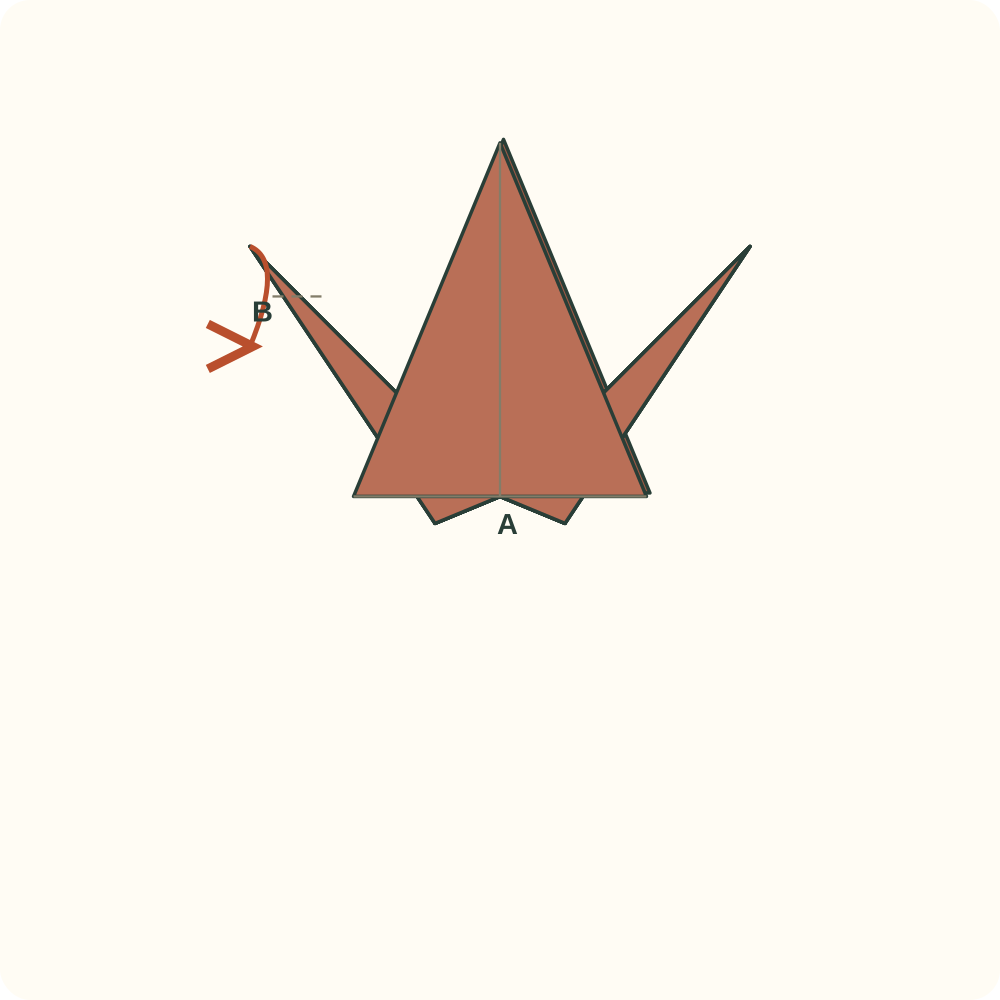
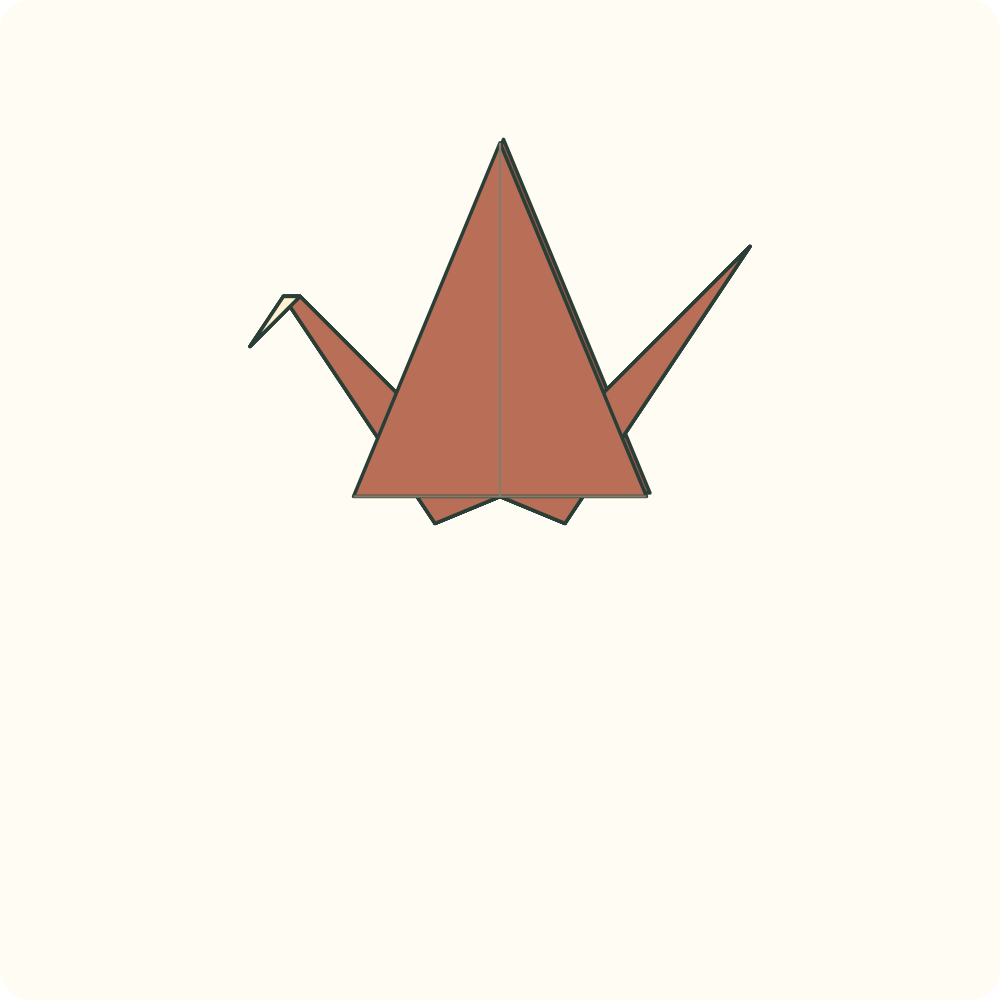
The temporary head fold gives a short downward-pointing beak.
Step 41: Reopen the short head fold
Return the small neck tip to its straight upward position, keeping the head crease.
Orientation: The neck remains raised to the left.
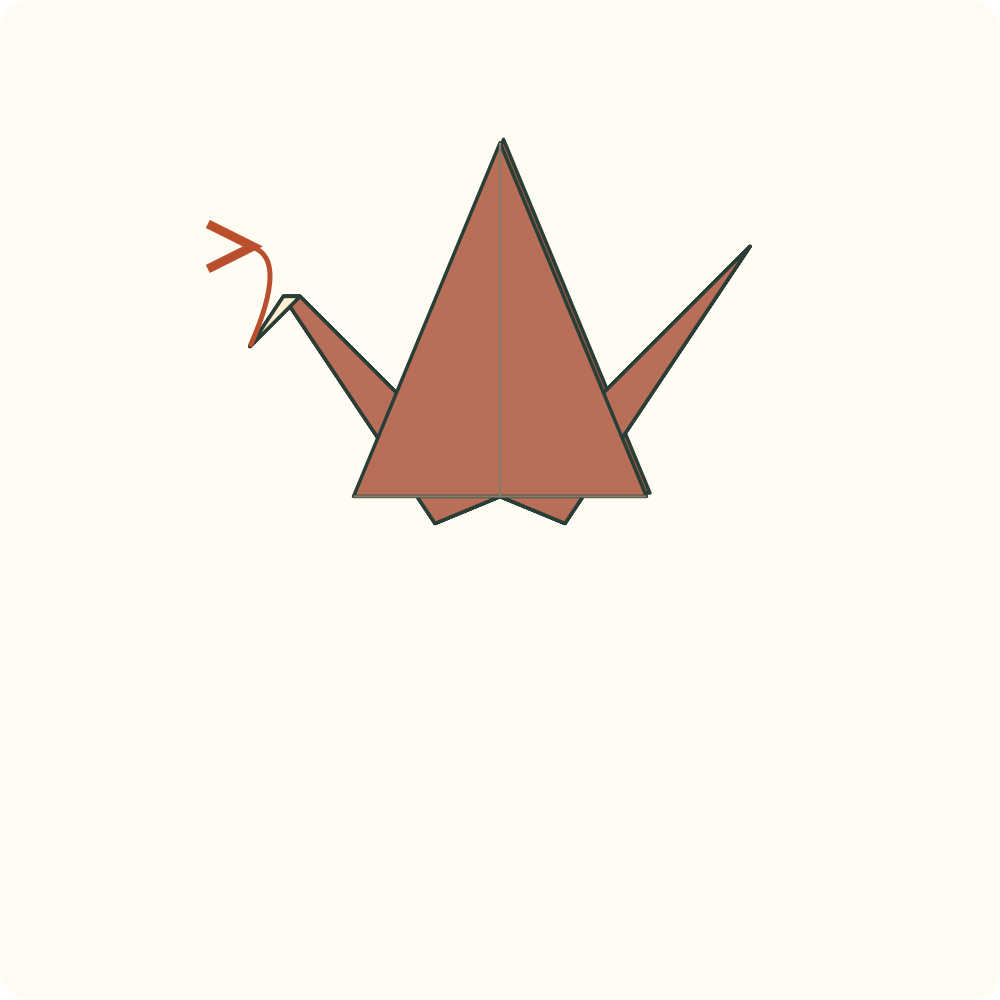
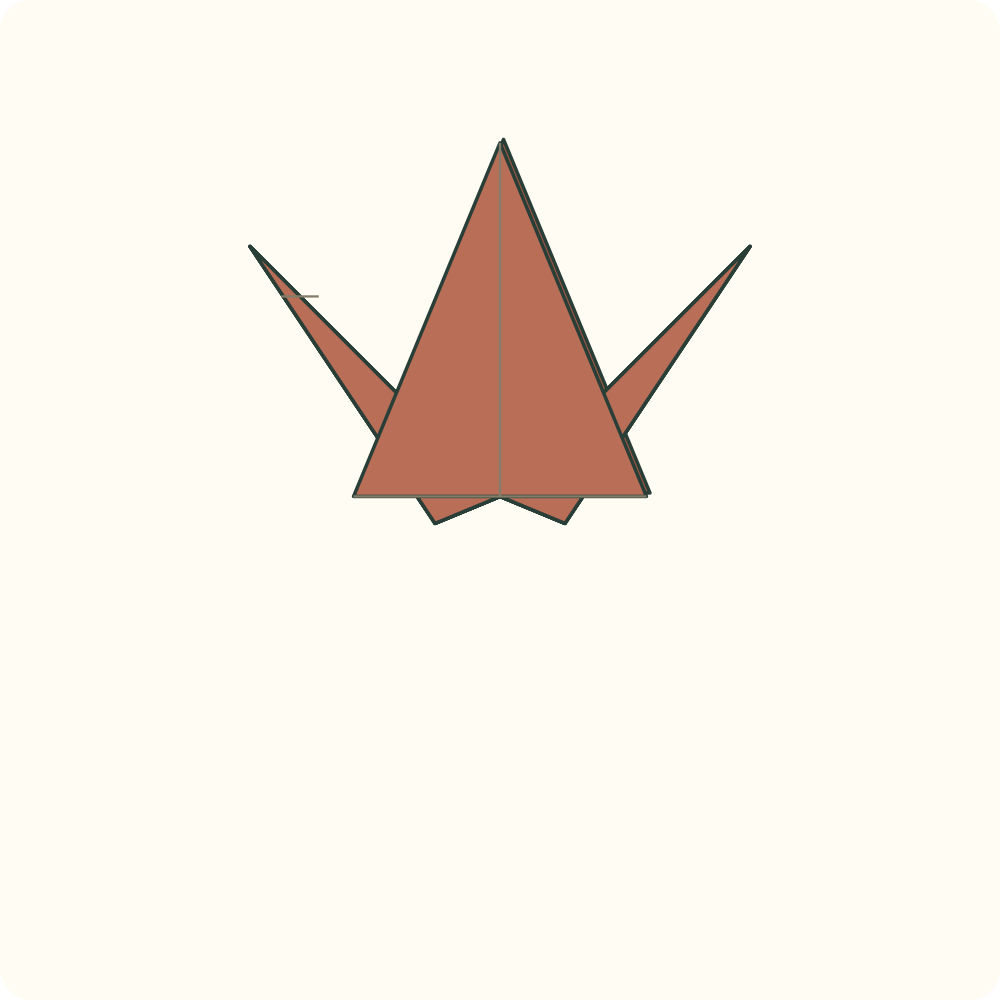
The short end of the neck is straight again, with its new head guide.
Step 42: Inside reverse fold the head
Open the two neck faces slightly at B, push the short tip down between them and close. Reverse the short spine crease as you close the beak.
Orientation: Use the same inside-reverse principle as for the neck and tail, on the smaller end section.
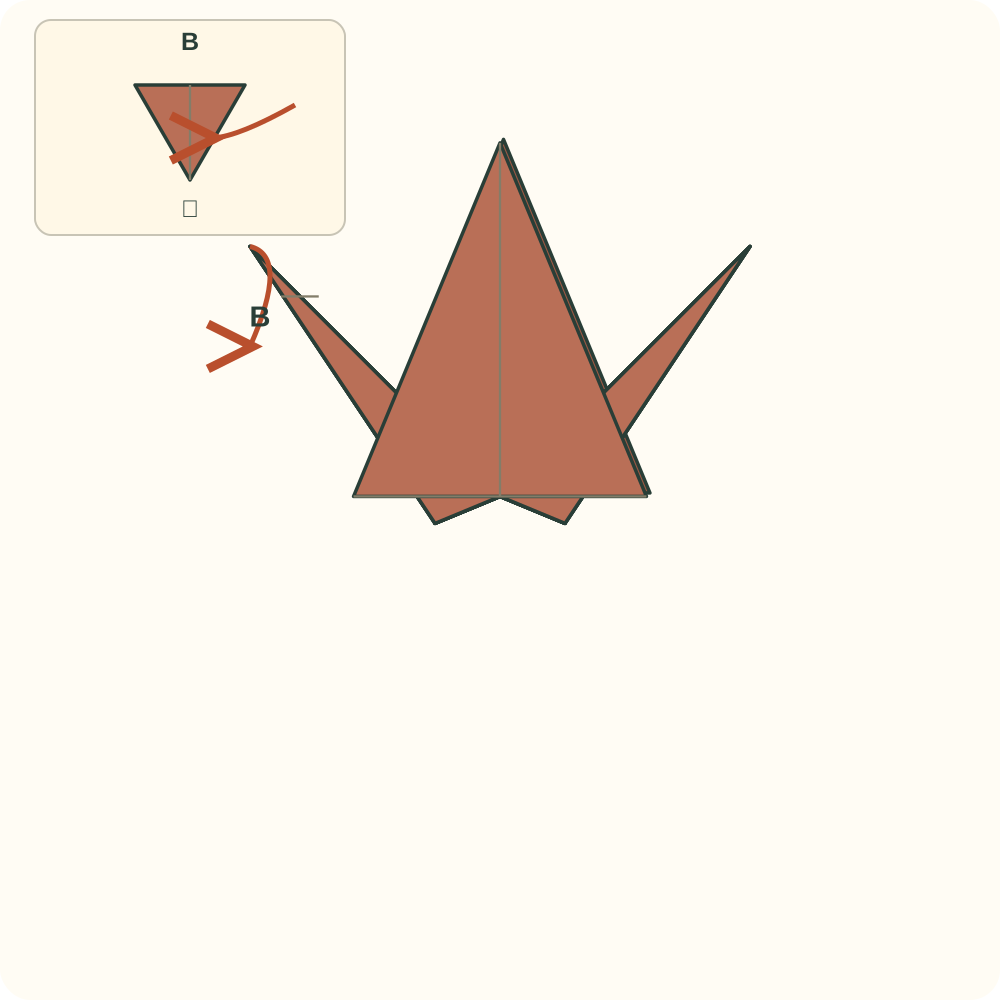
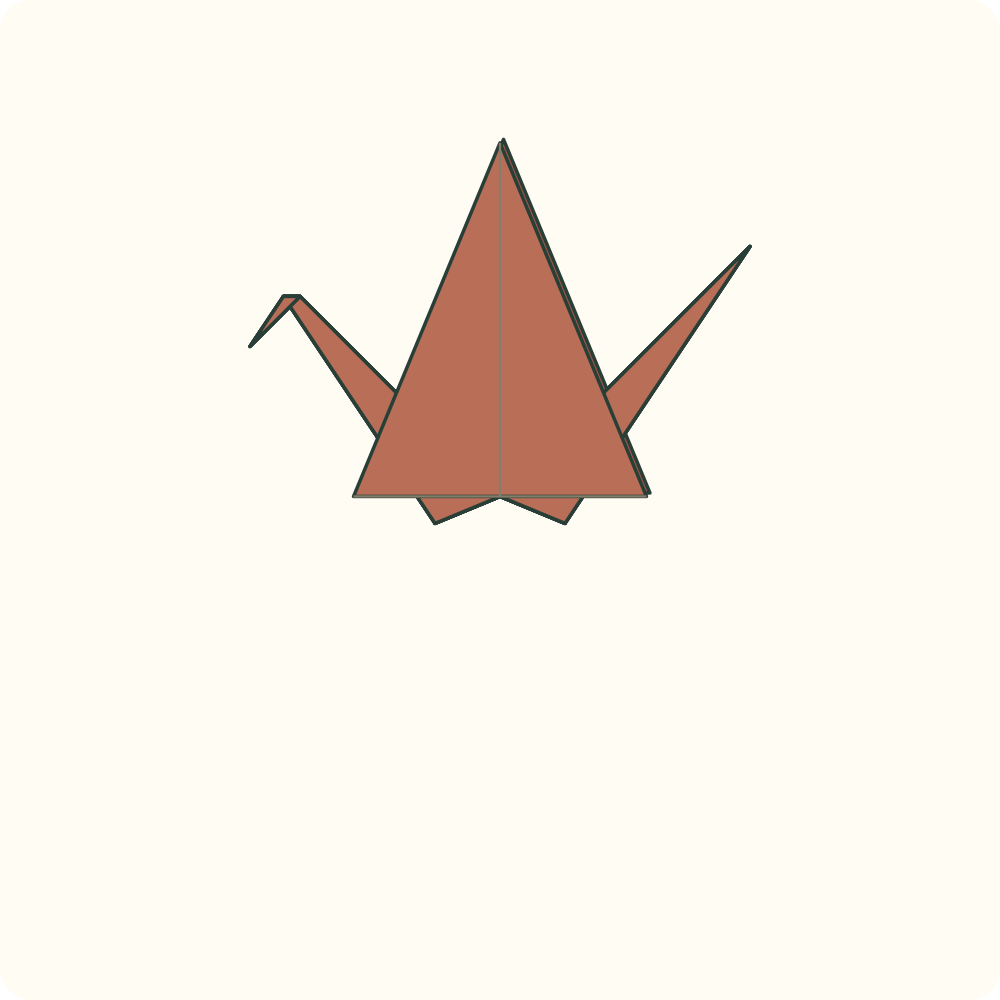
The left neck now has a lowered beak; the right tail stays straight.
Step 43: Open the front wing towards you
Take only the broad wing facing you and lower it towards you from its base. Stop with the wing projecting out from the body rather than pressed flat against it.
Orientation: The drawing now uses an oblique view. The other broad wing remains upright; the neck and tail keep their positions.
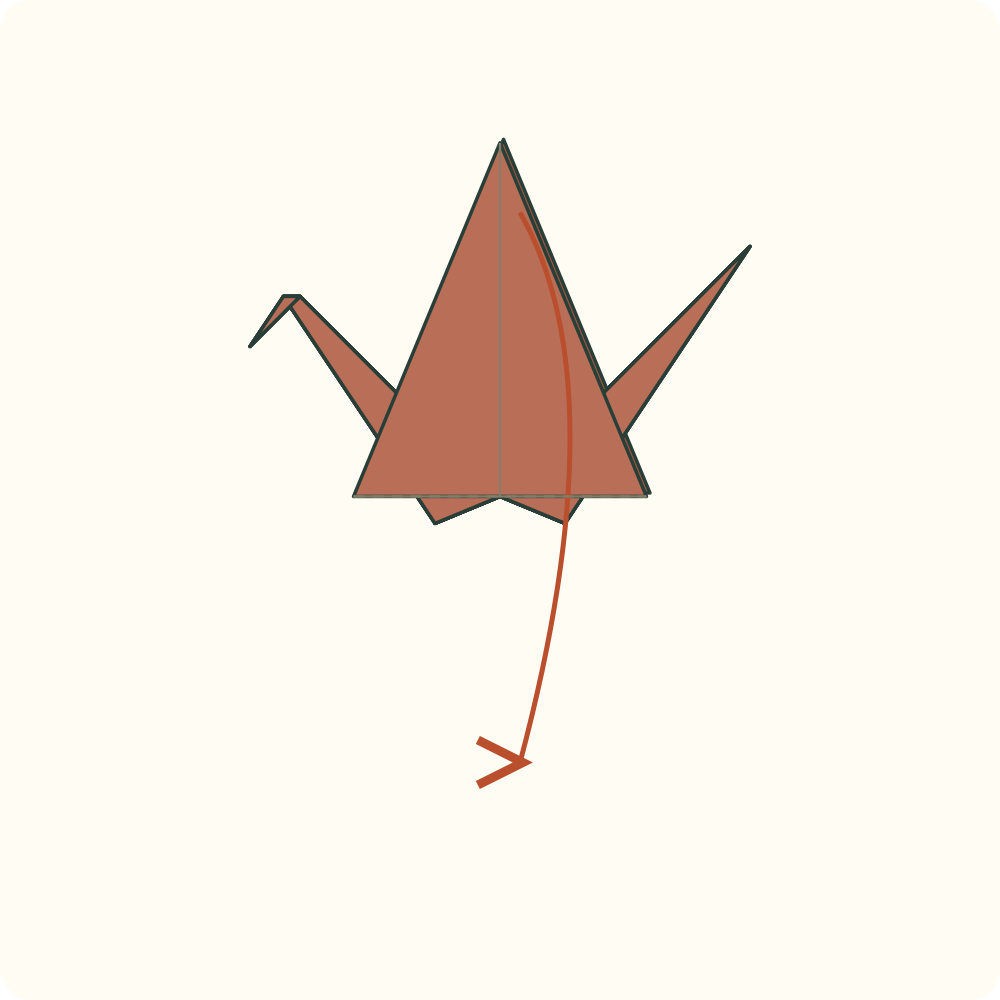
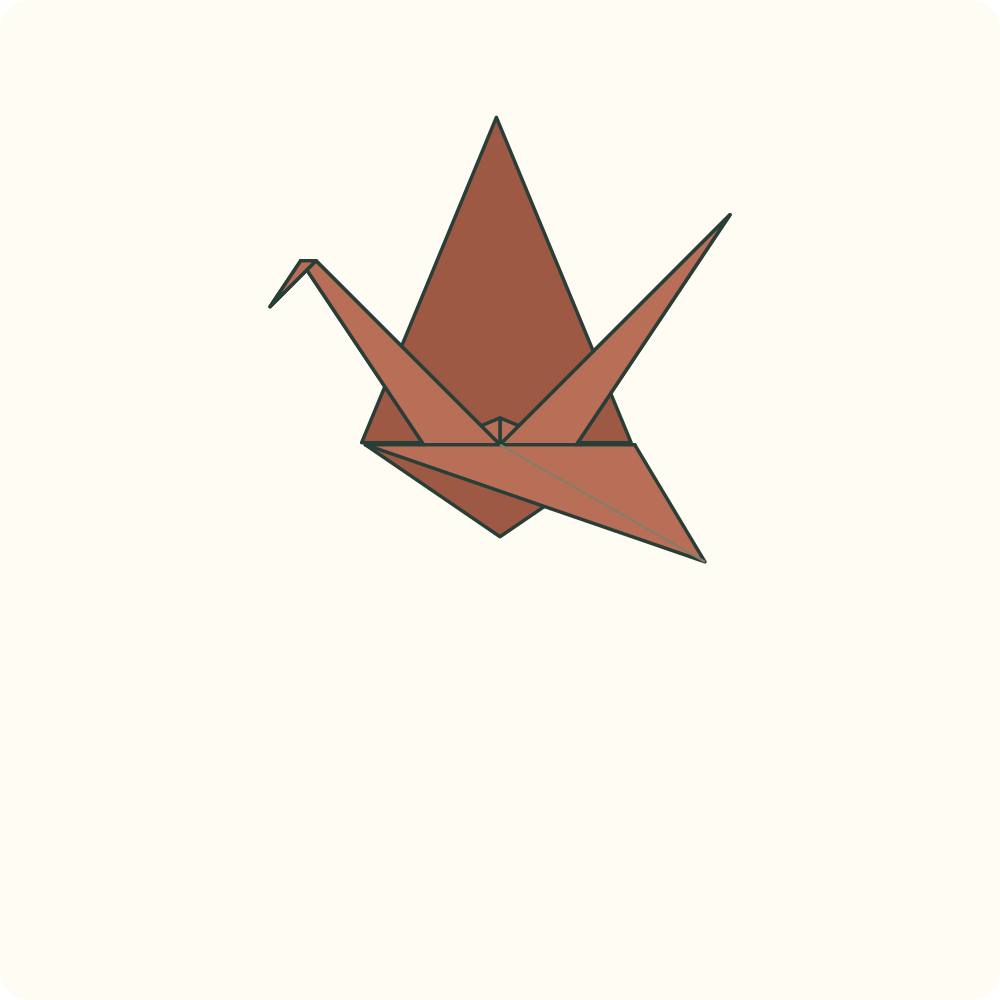
One wing projects forwards while the rear wing still points up.
Step 44: Open the rear wing away from you
Lower the remaining broad wing away from you from its base, matching the opening of the first wing without pulling the narrow points.
Orientation: Keep the body pointed. The final diagram shows the same oblique view, with one wing on each side.
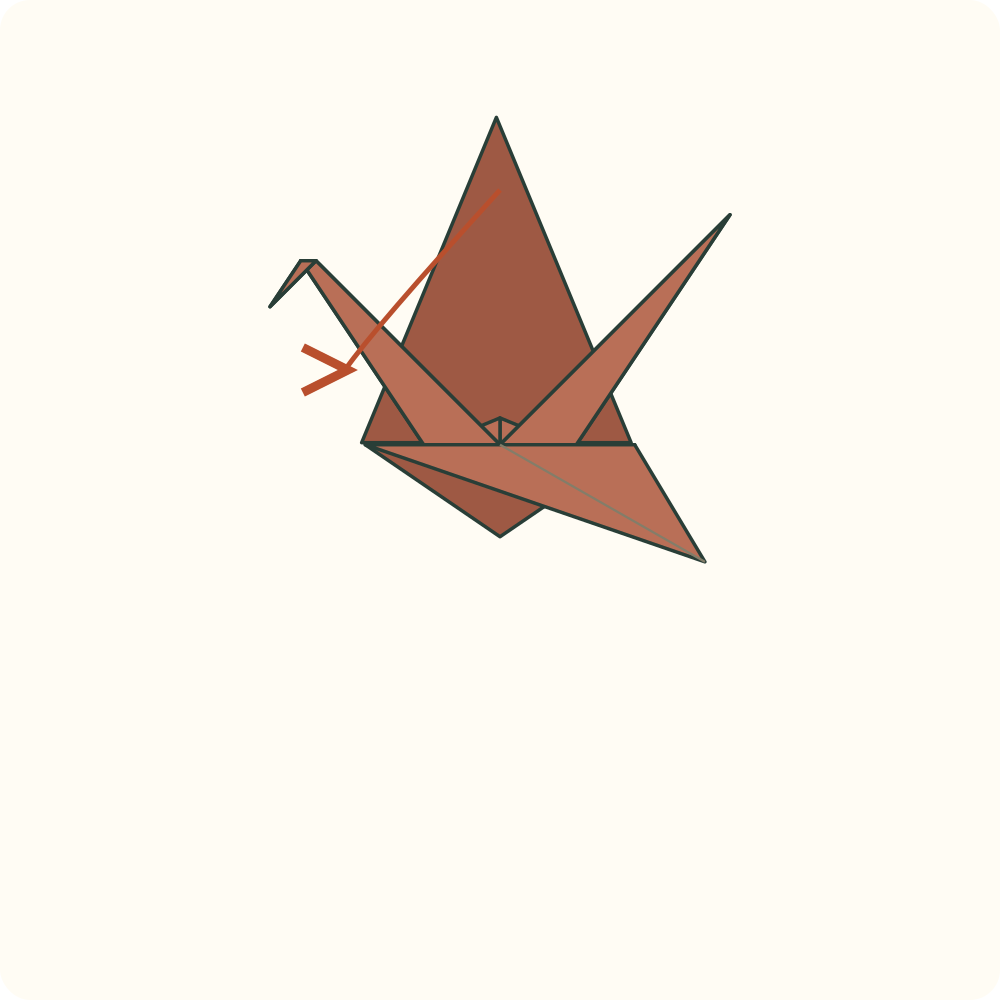
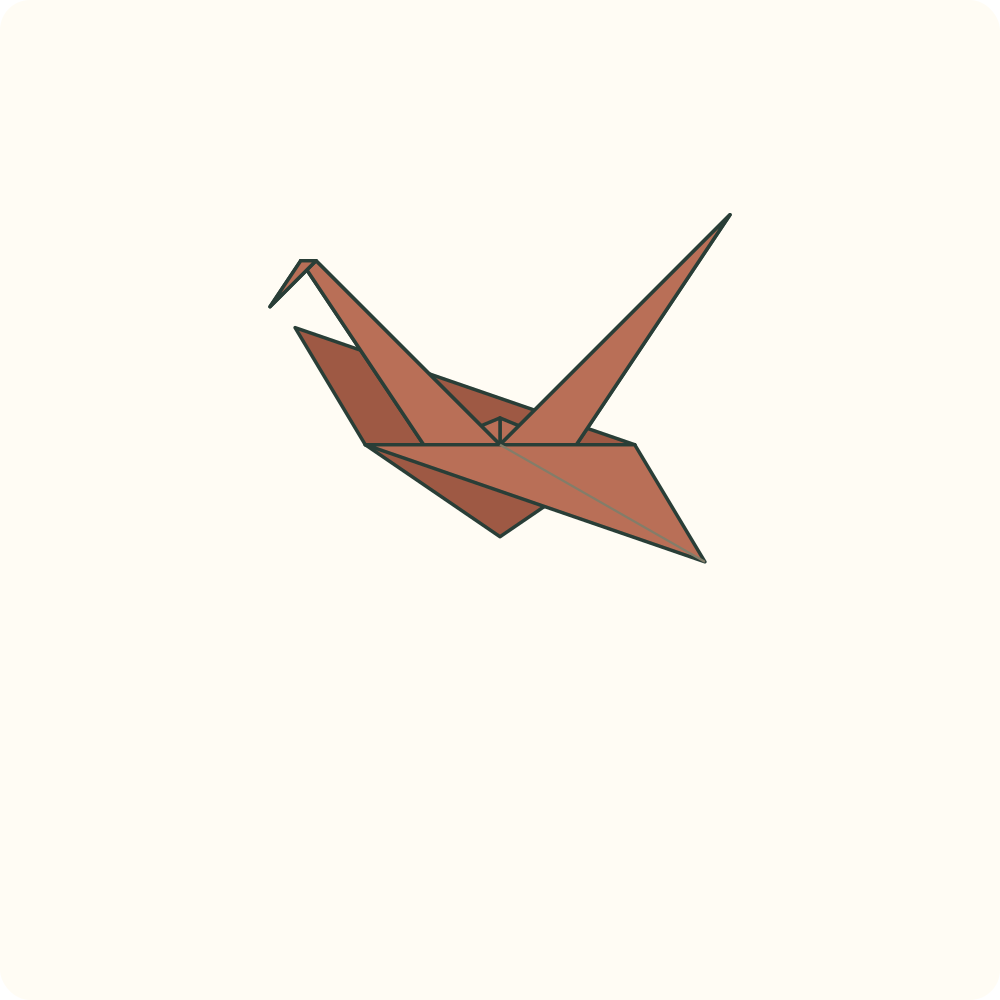
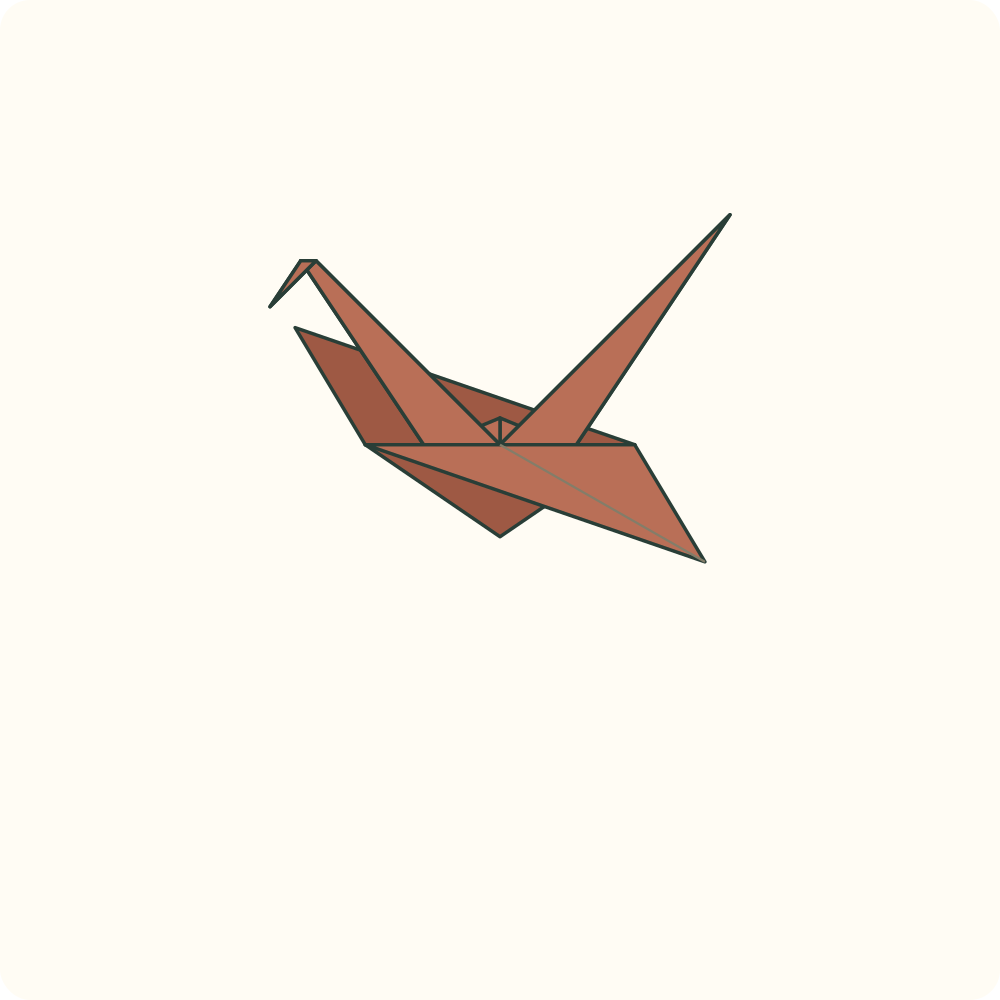
A terracotta paper crane has two open wings, a raised left neck with a lowered beak and a straight raised right tail.
Check the base, the split points and the reverses
- At step 9, the square base has a closed top and separate open corners at the bottom. If the lower point is a continuous folded edge, rotate the packet until its open corners are below before continuing.
- In steps 10–17, work on the front lower flap only. The back diamond remains flat. The horizontal top guide joins the two upper ends of the side creases; it is not a new arbitrary height.
- At step 18 the first long petal projects behind the short diamond. In steps 19–26, fold the short front diamond only. Do not bend the long point behind it.
- At step 26 there are two broad upper wing points and two separate lower points. At steps 27–31, narrow the lower edges of each face separately. Do not fold the two lower points together across the central gap.
- The neck, tail and head are inside reverses. Reopen each rehearsal, ease apart its two faces, reverse the spine crease and close with the tip between them. Leaving the tip on the front surface makes an ordinary fold rather than the indicated reverse.
- The last diagrams keep a pointed body. They do not add a puffed chest, a new hidden squash fold or a flight mechanism. All checks here are digital construction checks; physical folding, paper thickness and the suggested shaping angles remain untested.
The traditional crane with open wings
The neck and lowered beak are on the left, the straight tail is on the right and the two broad wings open to either side of the body. Leave the body pointed as illustrated. Do not pull the neck or tail to try to make the wings flap; this sequence describes a display crane, not a tested action model.
Printable version pending the physical folding test.
Traditional model and openly licensed diagram reference
The crane is attributed to Traditional by OrigamiUSA; no individual inventor is asserted here. The open diagram reference is “Orizuru / Tsuru wiki” by Andrew Hudson (Commons user Origamidesigner), 2011. Its file page specifies CC BY 3.0 Unported and the artwork contains a CC BY 3.0 United States notice. OrigamiLove has redrawn the geometry, changed the colours and layout, expanded the instructions into separate layer operations, added checks and produced the English and Spanish wording. The text and diagrams of this adaptation are provided under CC BY 3.0 US, with the original attribution and both source licence references retained. No endorsement by the source author is implied.
- Andrew Hudson / Origamidesigner — Tsuru wiki (Orizuru), 2011 — Open reference for the traditional model. The Commons file page states CC BY 3.0 Unported; the artwork credits Andrew Hudson and contains a CC BY 3.0 US notice. This guide redraws, recolours and expands its folding sequence.
- Creative Commons — Attribution 3.0 Unported
- Creative Commons — Attribution 3.0 United States
- OrigamiUSA — Crane, creator Traditional, diagrammer Marc Kirschenbaum — Provenance reference only. Its separate PDF artwork is not included or reproduced.
- Hans Bodlaender — From Bird Base to Crane, 2004 — Independent functional comparison for inside reverse folds and the option of leaving the body pointed. No photographs or text are reproduced.
