Prepare your paper
One square, a ruler and a pencil
- One 15 × 15 cm square of thin folding paper, coloured on one side and cream or white on the other. This size is proposed and awaits a physical folding test.
- A ruler and pencil for small reference marks. The two horn folds use thirds of a side and of the long folded base.
- A clean, flat surface. Optional fine-tip pen for eyes, nostrils and cheek scales after the folding is complete.
- Dashed line: Make this new fold
- Thin line: Existing crease or layer edge
- Curved arrow: Move the indicated layer or turn the whole piece
- A and B: Small measured reference marks for the current step
Look down at the paper. Left and right are your own; keep the long base horizontal. Steps 7 and 10 turn the whole piece over from left to right, without rotating it on the table. The green side corners and cream snout should face you again after step 10; the horns are folded afterwards.
Read the complete paper & materials guide ↗Shape the snout, then fold the horns
Step 1: Position the square
Place the square with the cream reverse up and one corner pointing away from you.
Orientation: Green faces the table; one unfolded sheet.
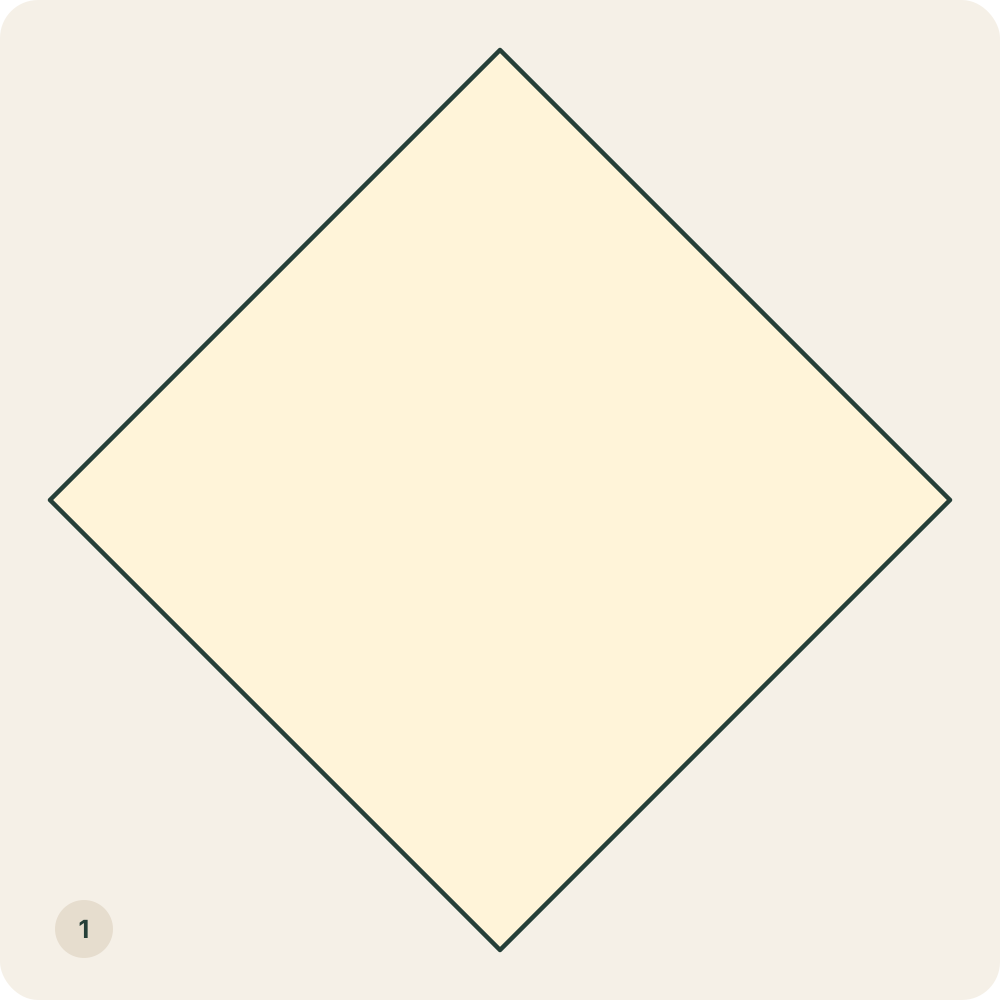
A cream diamond has points up, down, left and right.
Step 2: Bring the bottom point to the top
Lift the bottom corner to meet the top corner. Align the side edges and crease the horizontal diagonal.
Orientation: Move the lower half of the sheet; keep the left and right corners level.
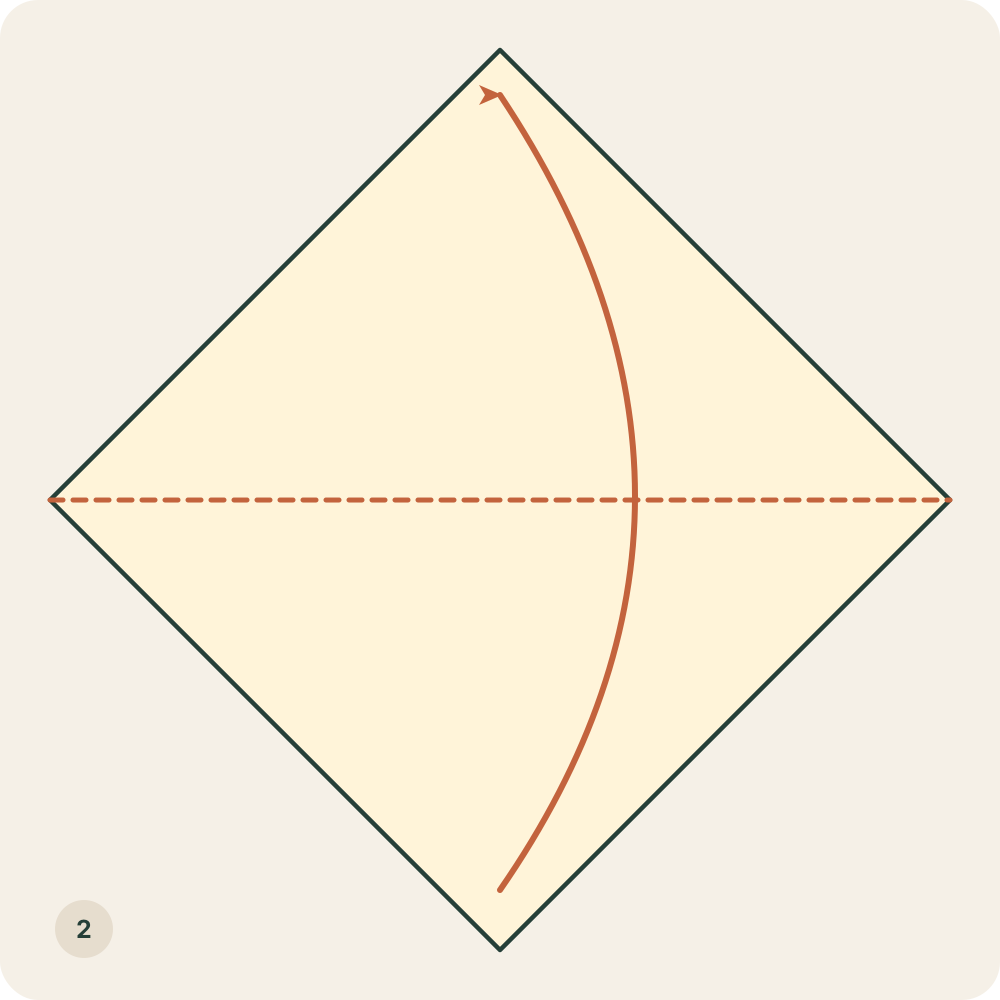
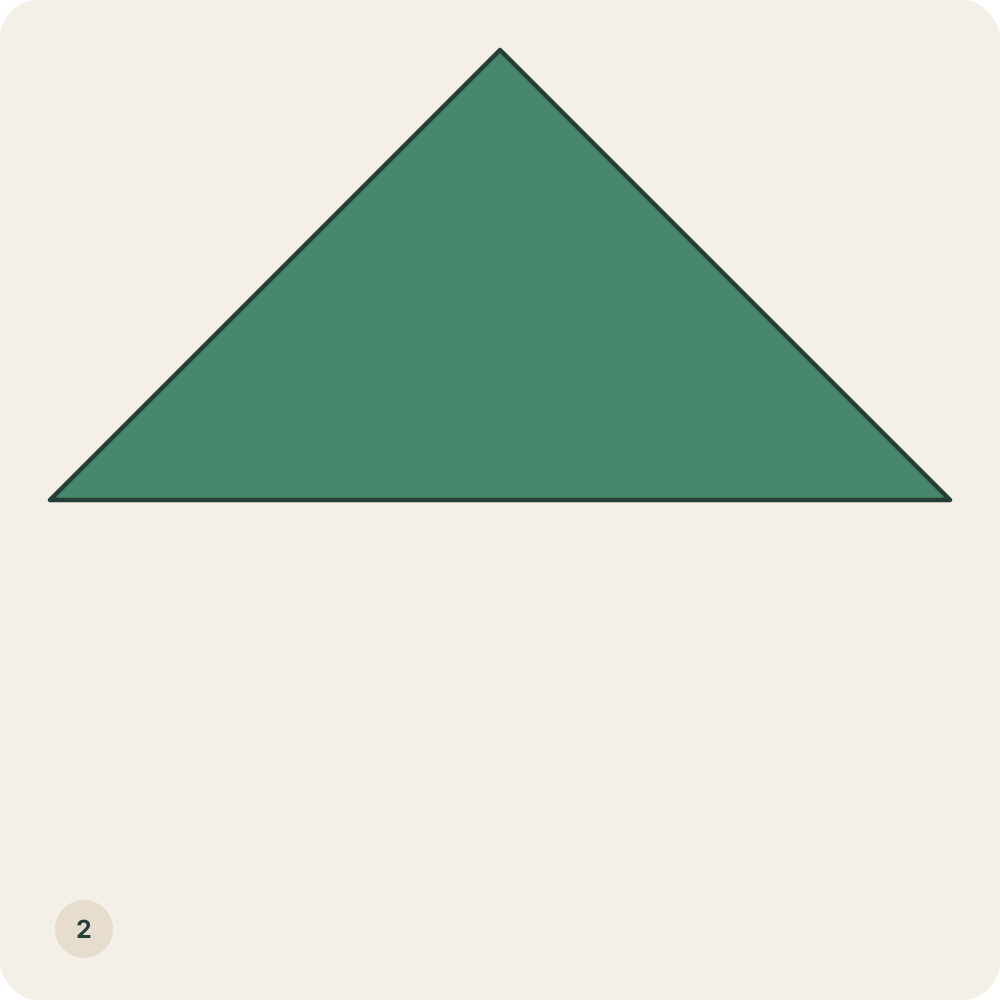
A green two-layer triangle points upwards, with its long folded base below.
Step 3: Fold the triangle in half sideways
Bring the right base corner onto the left base corner, moving both layers. Crease from the upper point to the middle of the base.
Orientation: Keep the upper point fixed; the folded packet lies on the left.
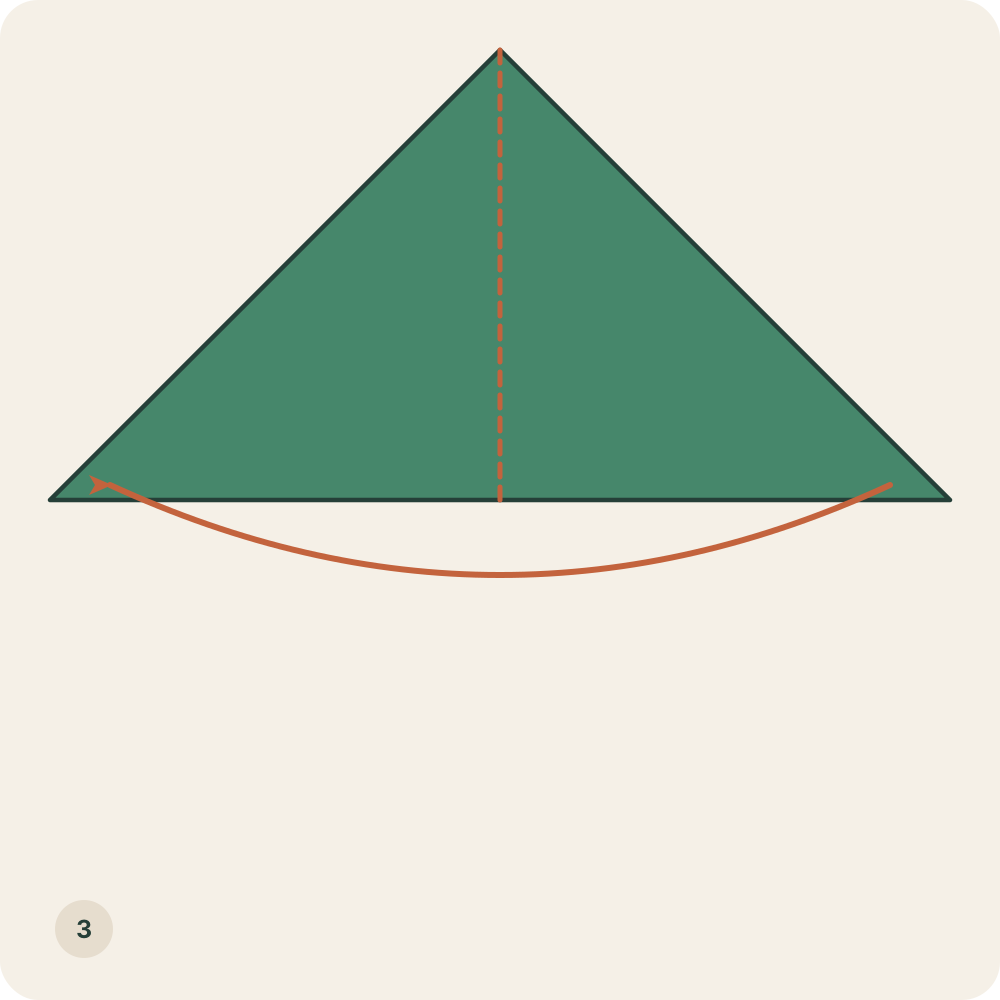
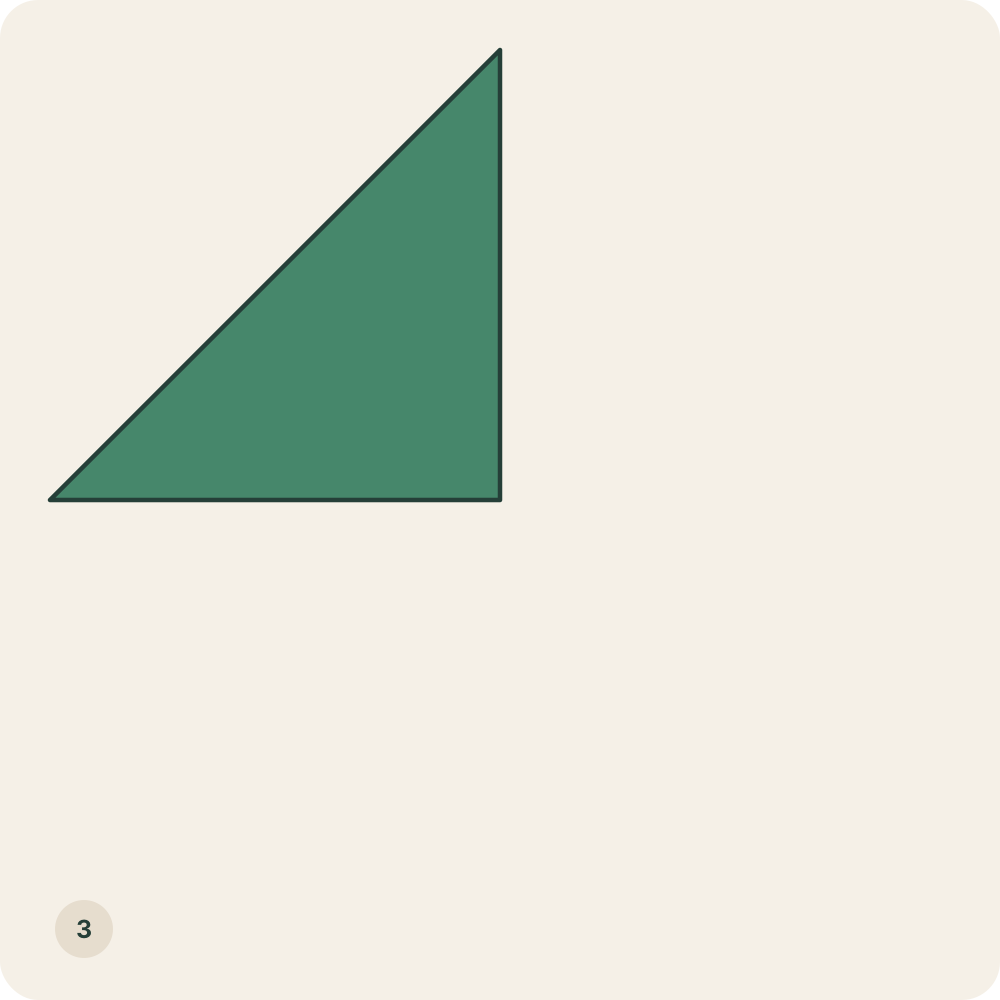
A narrower green triangle lies to the left of the vertical fold.
Step 4: Open the sideways fold
Return the folded right half to the right until the full triangle lies flat. Leave the first diagonal fold closed.
Orientation: The green front faces up; do not open the long base.
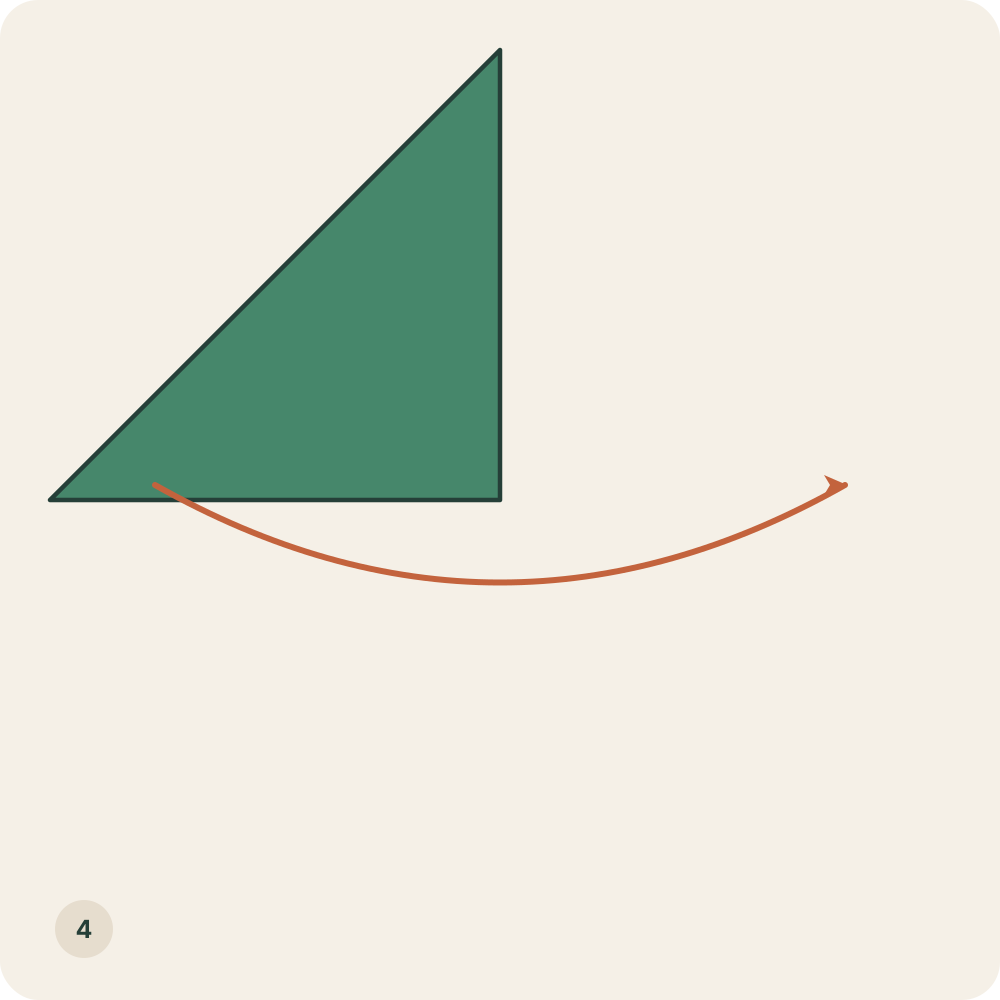
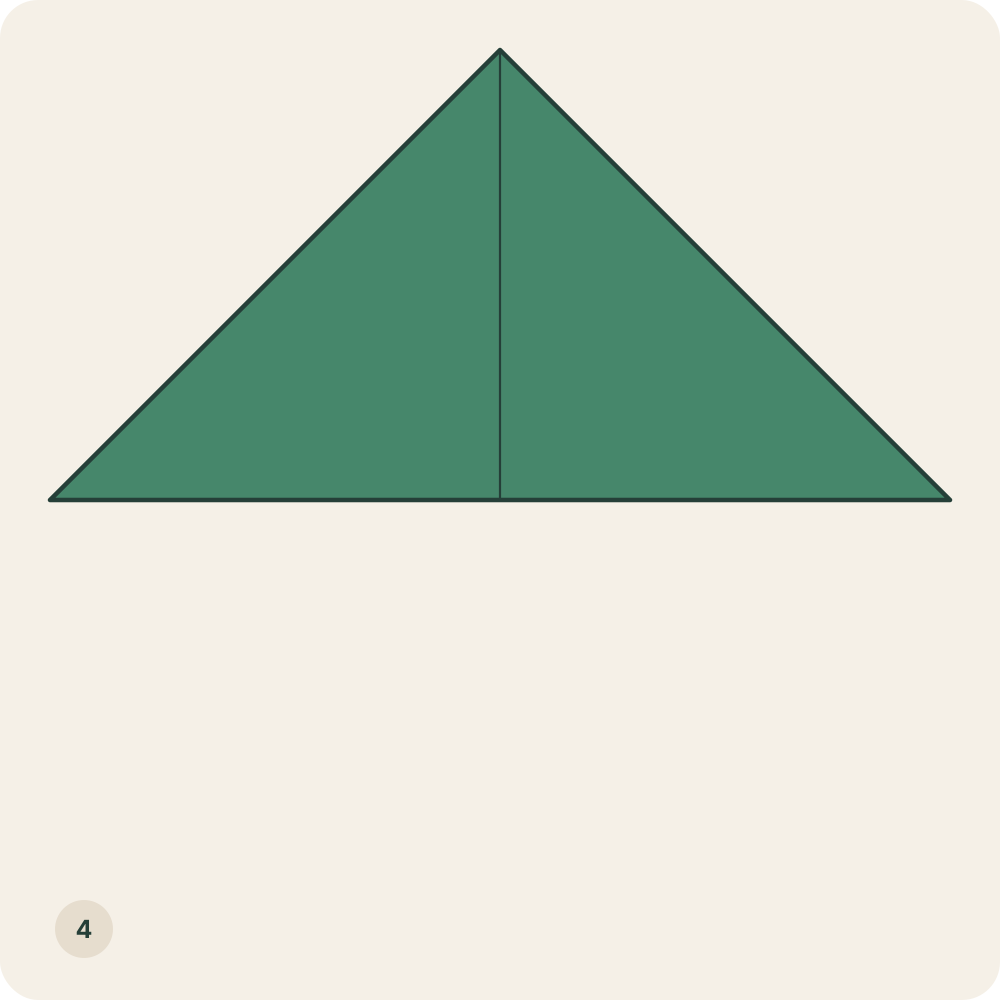
The original two-layer triangle has a vertical centre crease.
Step 5: Mark the front snout crease
Mark A on the left sloping edge and B on the right, each 2/5 of a side from its lower corner. For the proposed 15 cm square, measure 6 cm up each side.
Orientation: Mark only the front layer. A and B are level and will define one horizontal fold.
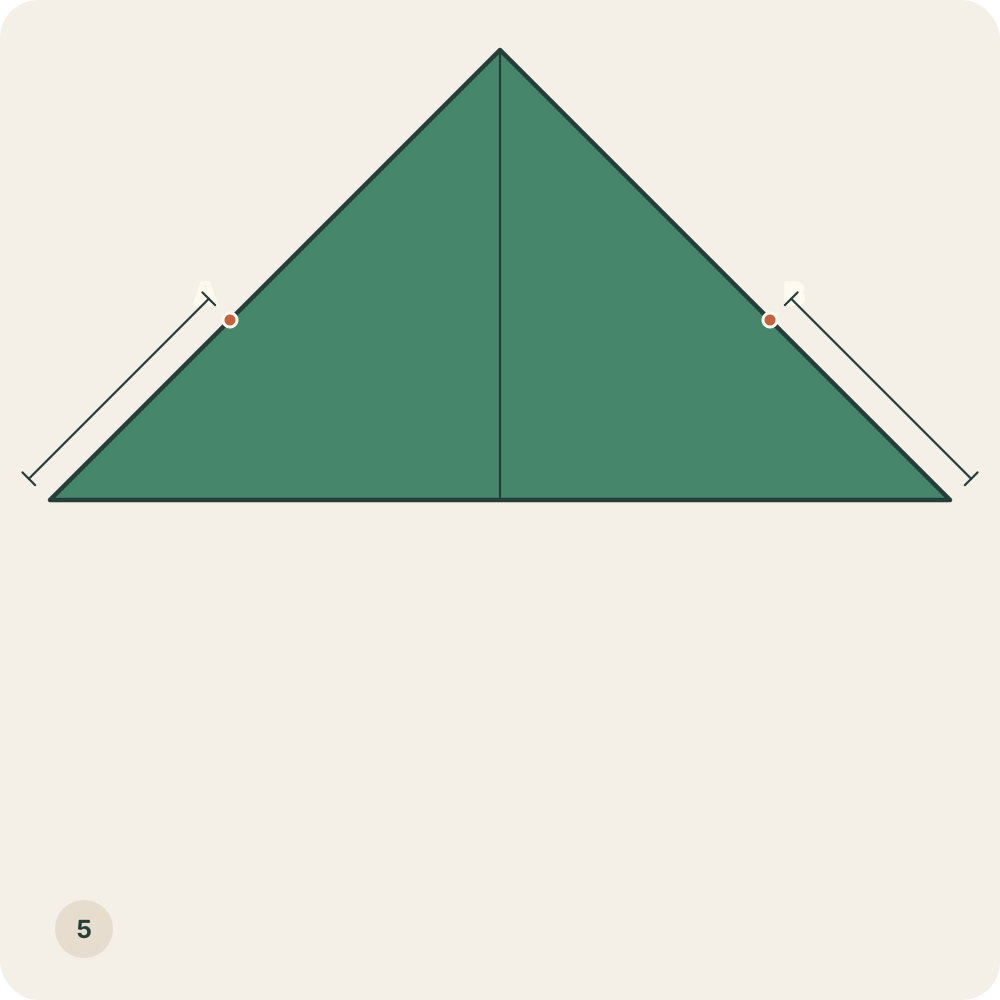
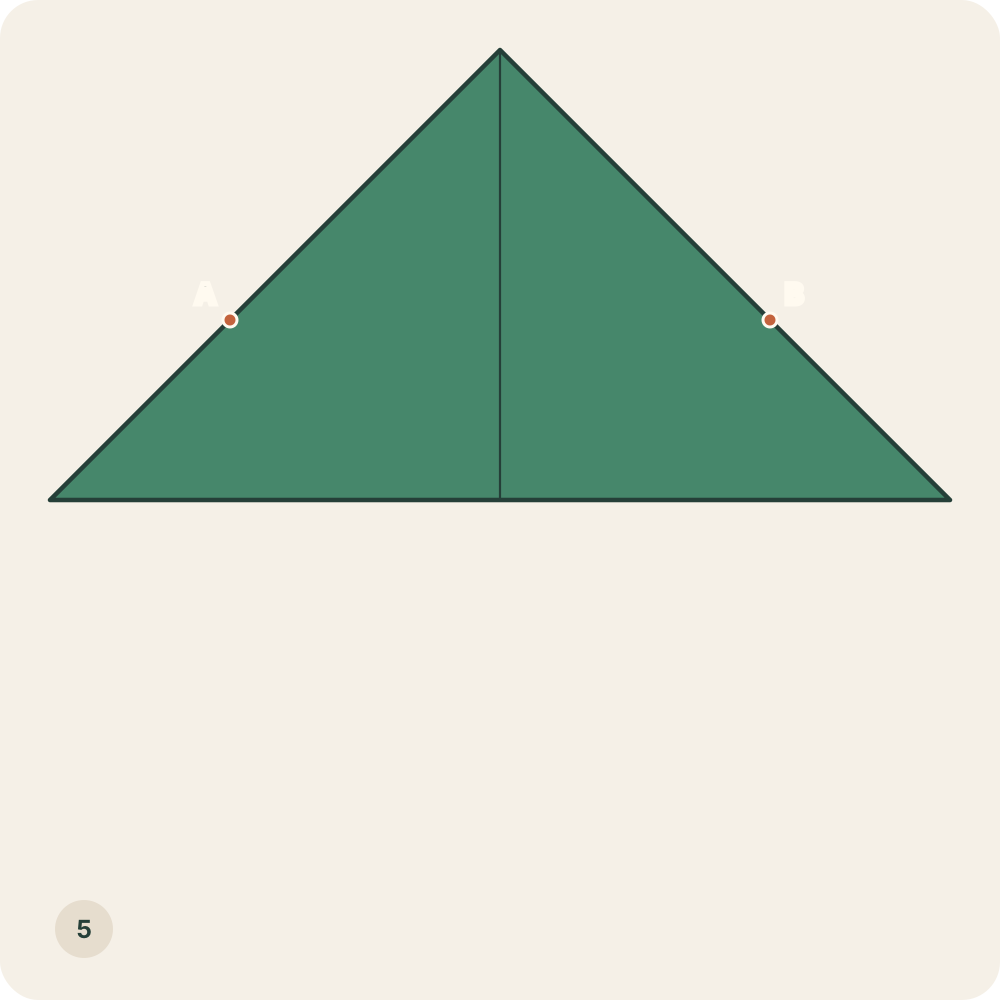
Two small marks sit at equal heights; the paper is still a full triangle.
Step 6: Fold only the front upper point down
Lift just the front upper point and fold it towards you along the straight line joining A and B. Keep the rear upper point upright.
Orientation: One layer moves; the other triangle stays in place.
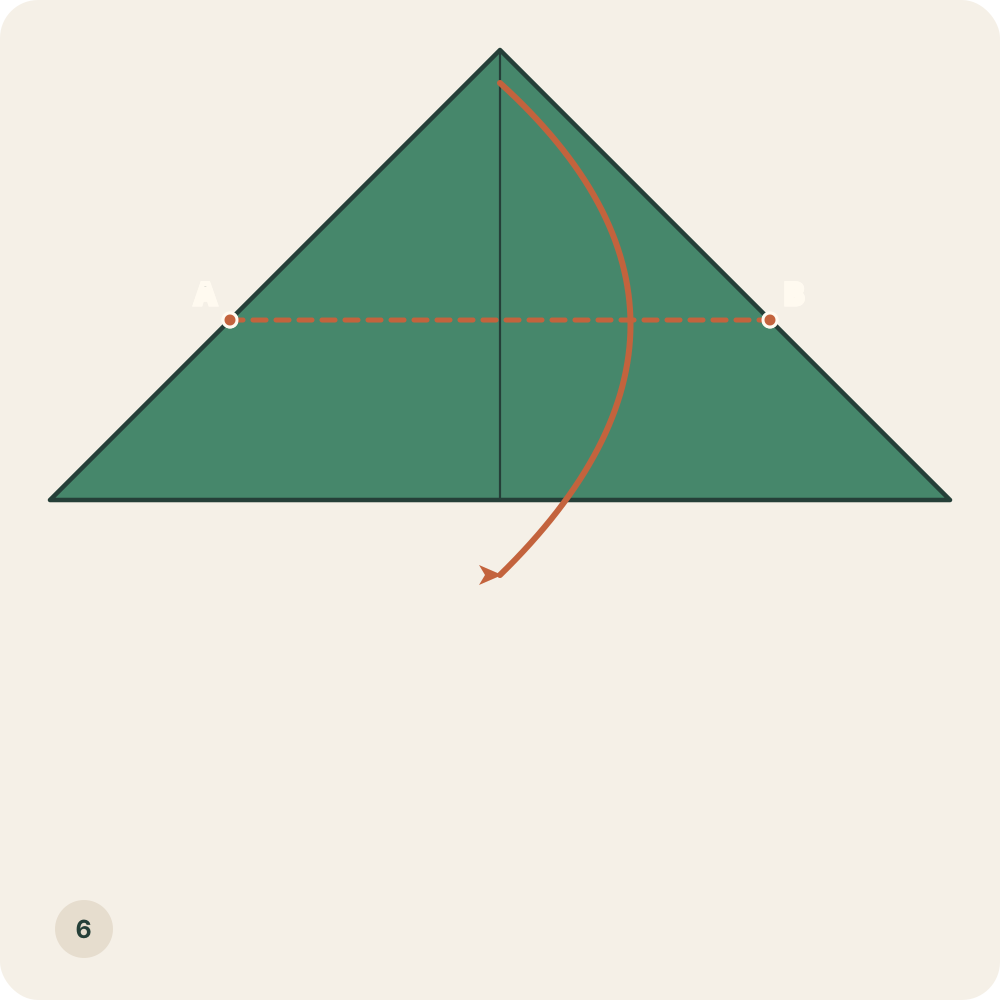
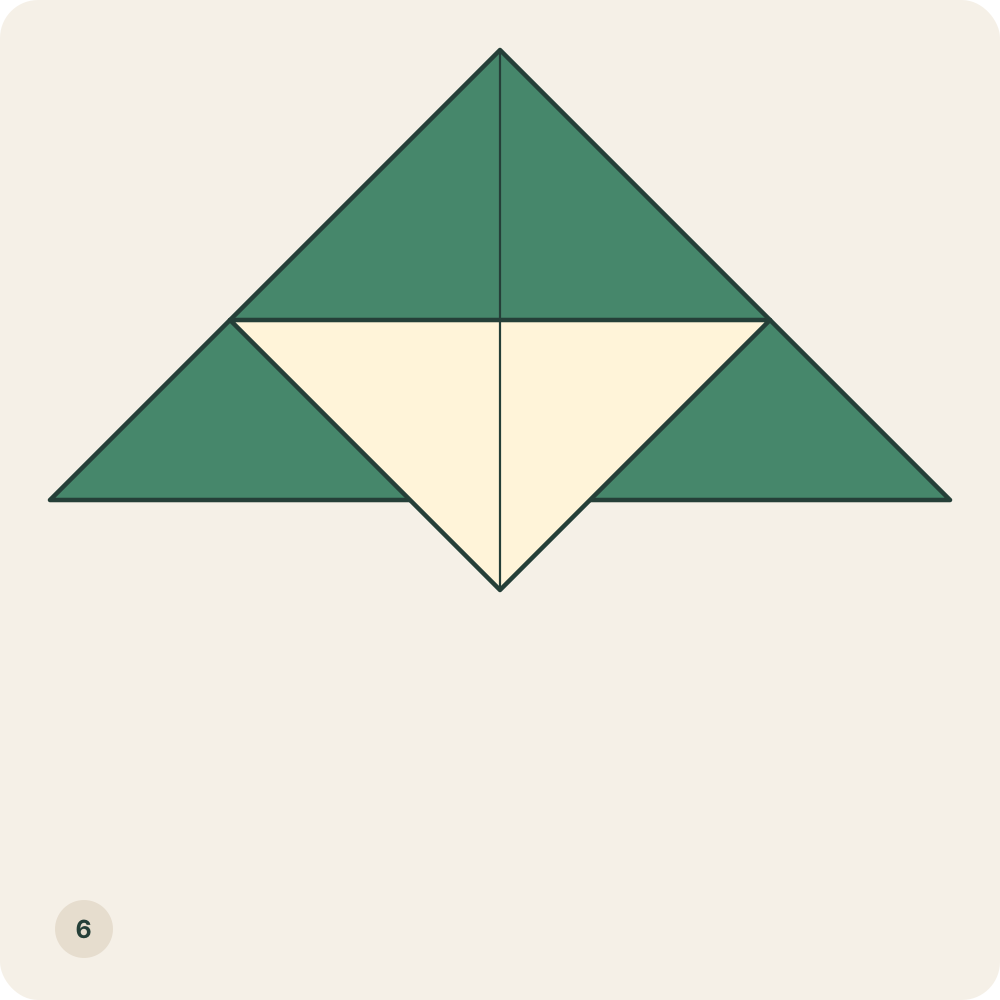
A cream triangle covers the front and its lower point extends below the long base. A green upper point remains behind.
Step 7: Turn the whole piece over
Turn the entire piece over from left to right, like turning a page. Keep the upper point pointing away from you.
Orientation: This is a change of face, not a new crease or a rotation on the table.
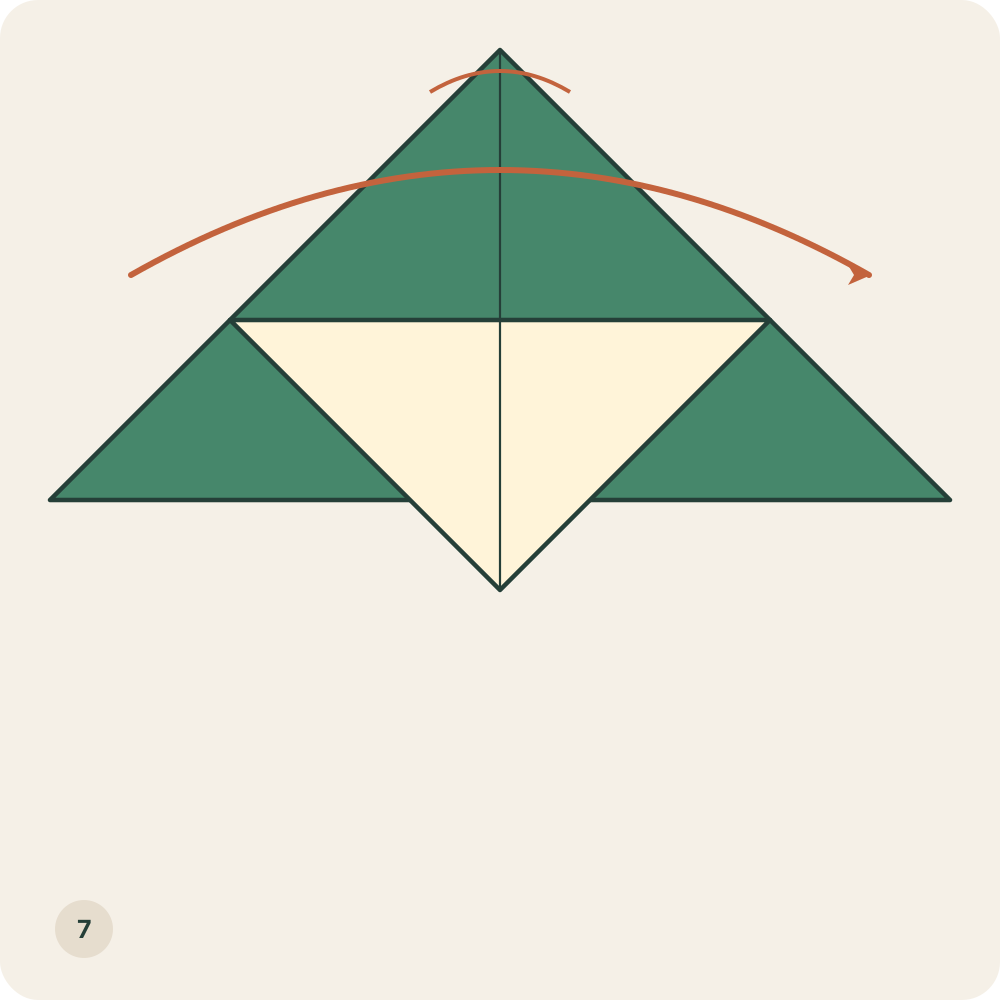
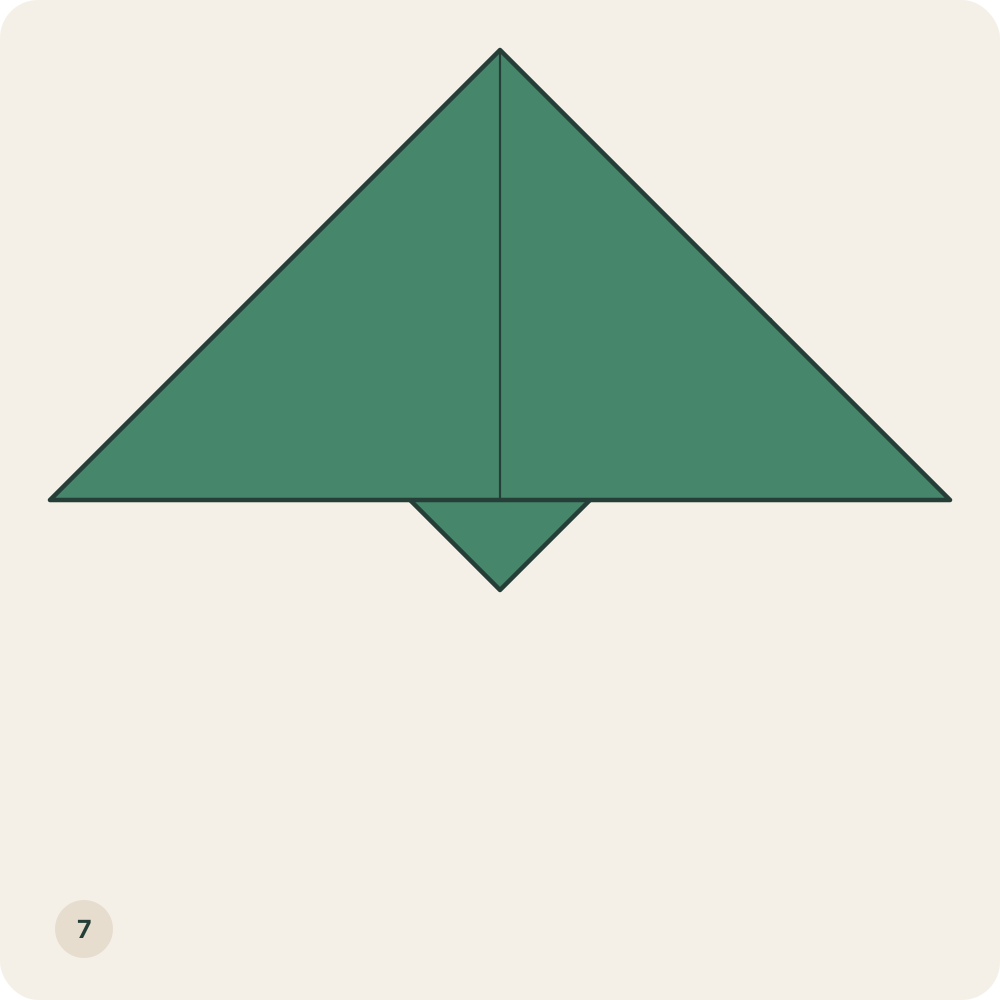
The uncreased green rear triangle now faces you. The small lower extension is green from this side.
Step 8: Mark the rear snout crease
On the layer now facing you, mark A and B at the same 2/5 distance from the lower corners along the sloping sides. Use 6 cm for the proposed 15 cm square.
Orientation: The earlier cream flap stays behind; these marks belong to the remaining upper triangle.
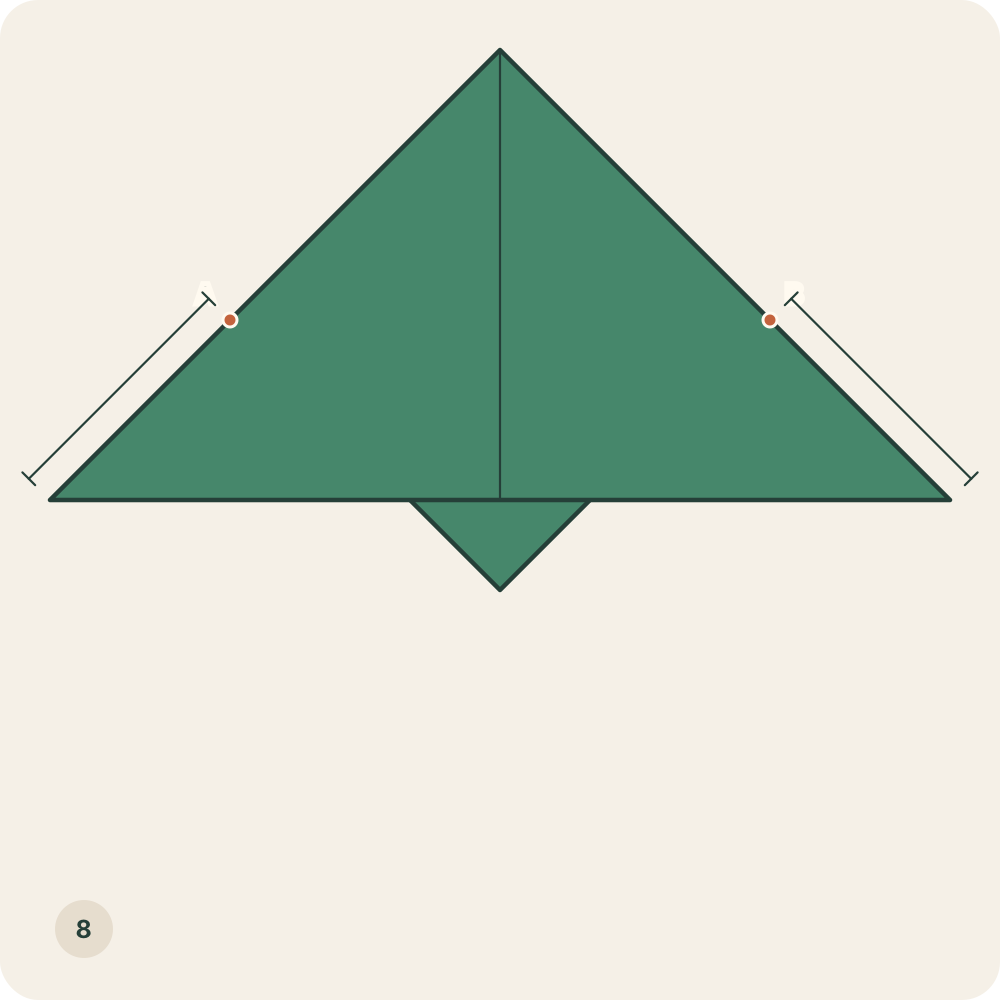
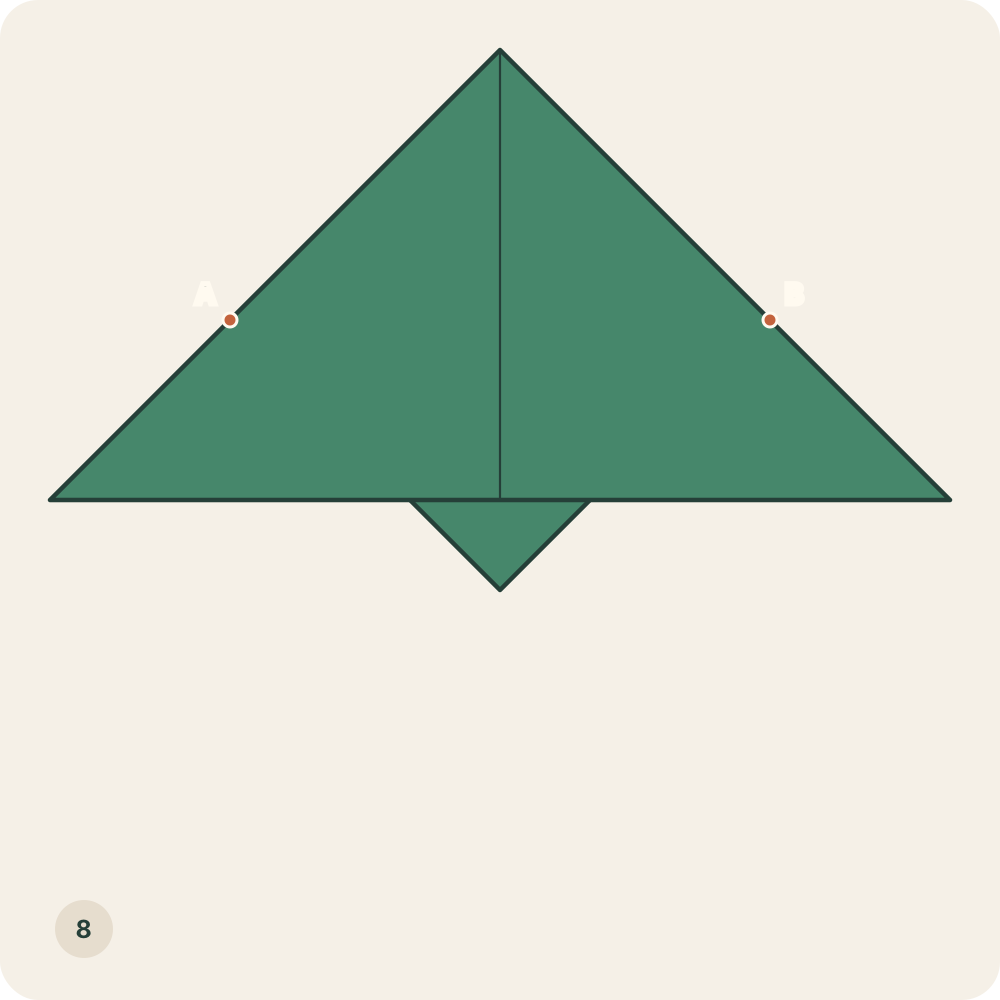
The second pair of level marks matches the position of the first snout crease on the other layer.
Step 9: Fold the remaining upper point down
Fold the upper point now facing you towards you along the straight line through A and B. Leave the flap on the far side where it is.
Orientation: Move the one remaining upper layer. Its lower point should align with the lower point of the earlier flap.
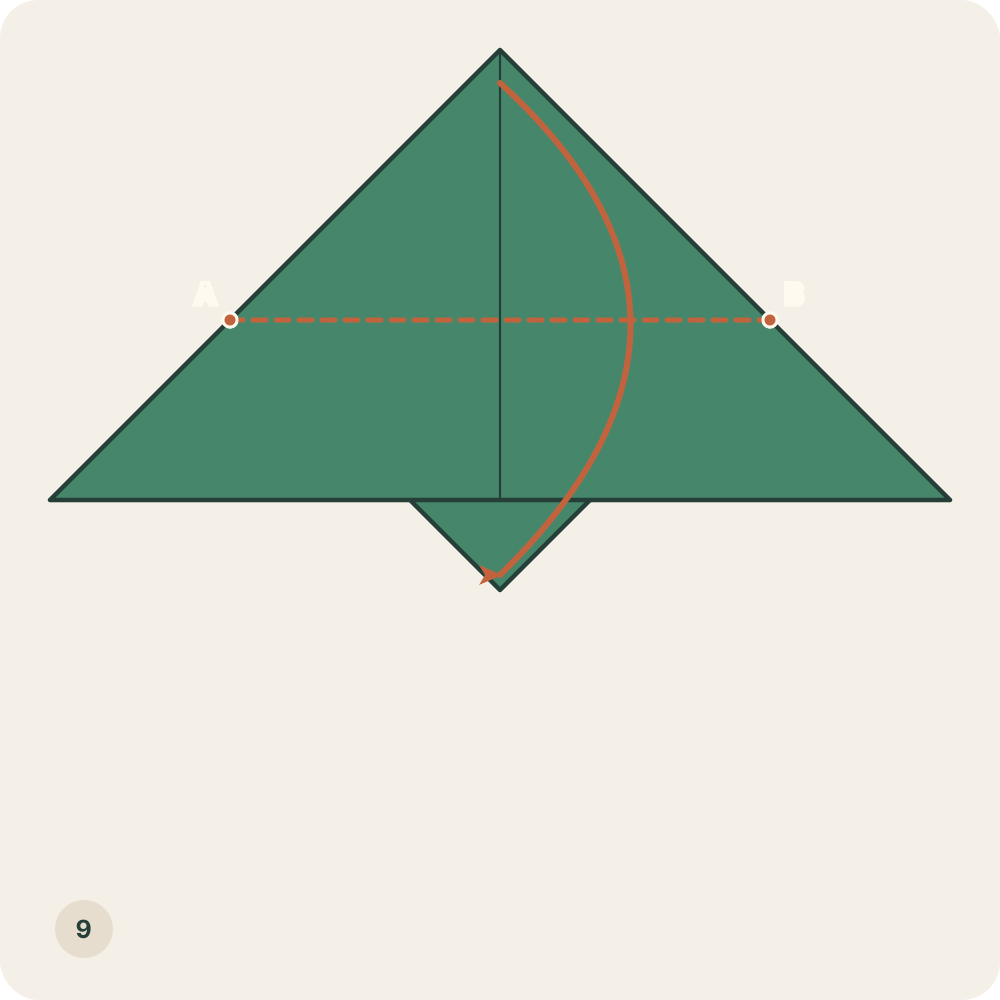
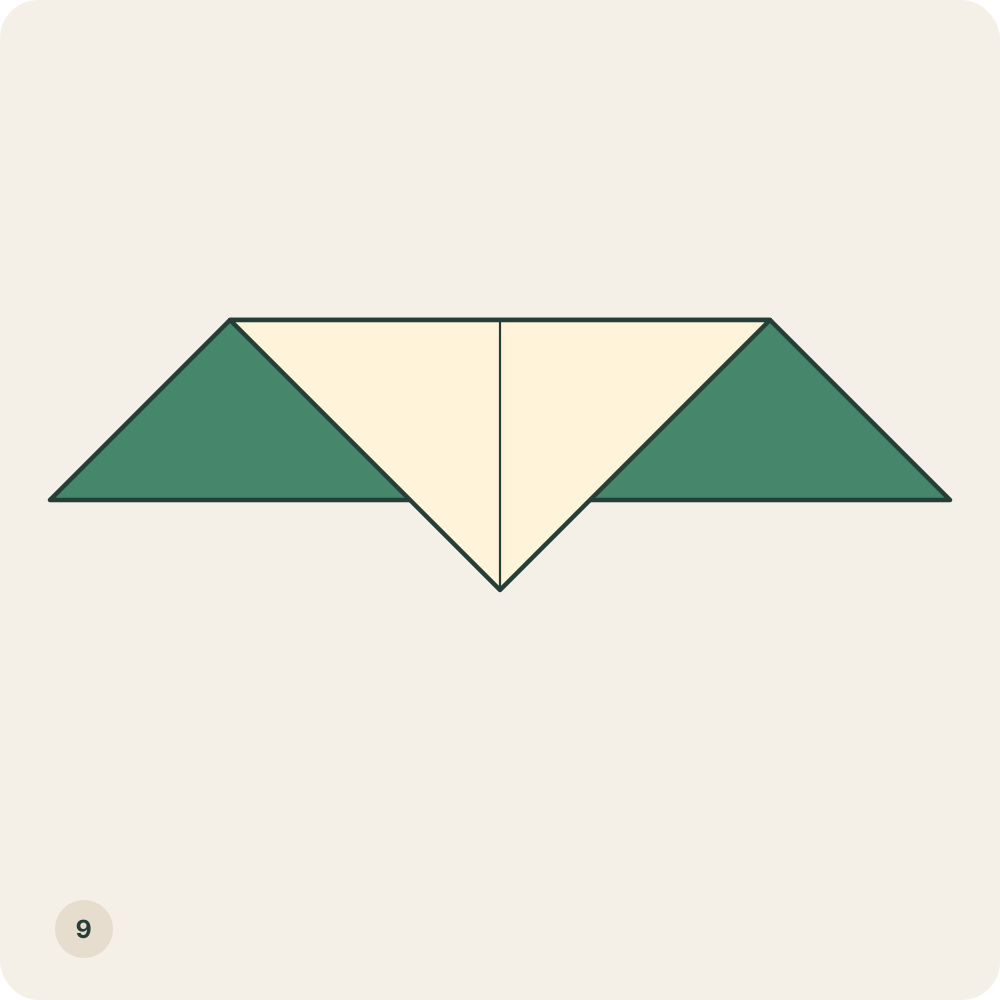
Both upper points have become lower snout flaps. A cream triangle faces you and the top of the head is horizontal.
Step 10: Turn back to the original front
Turn the complete piece over from left to right again. Keep the pointed snout facing you at the bottom.
Orientation: The original cream snout flap returns to the front. The outline is symmetrical, so the two faces look similar.
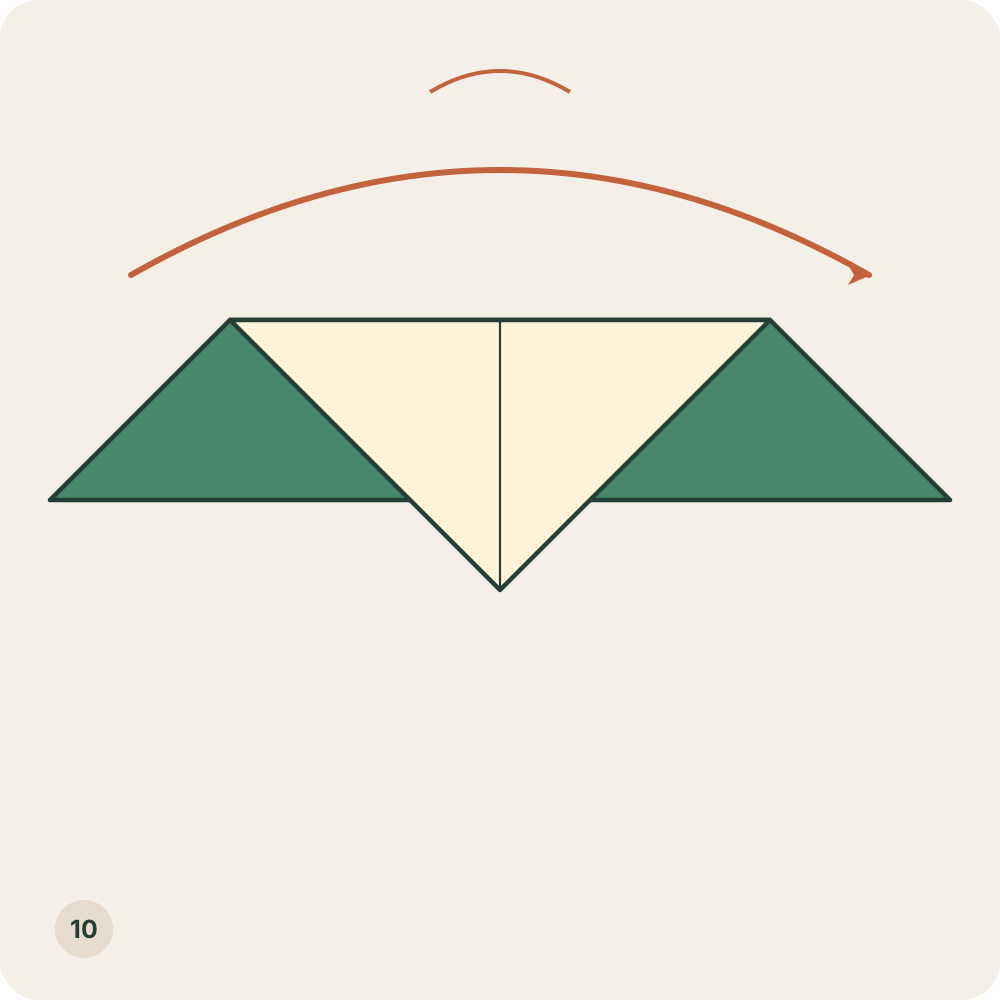
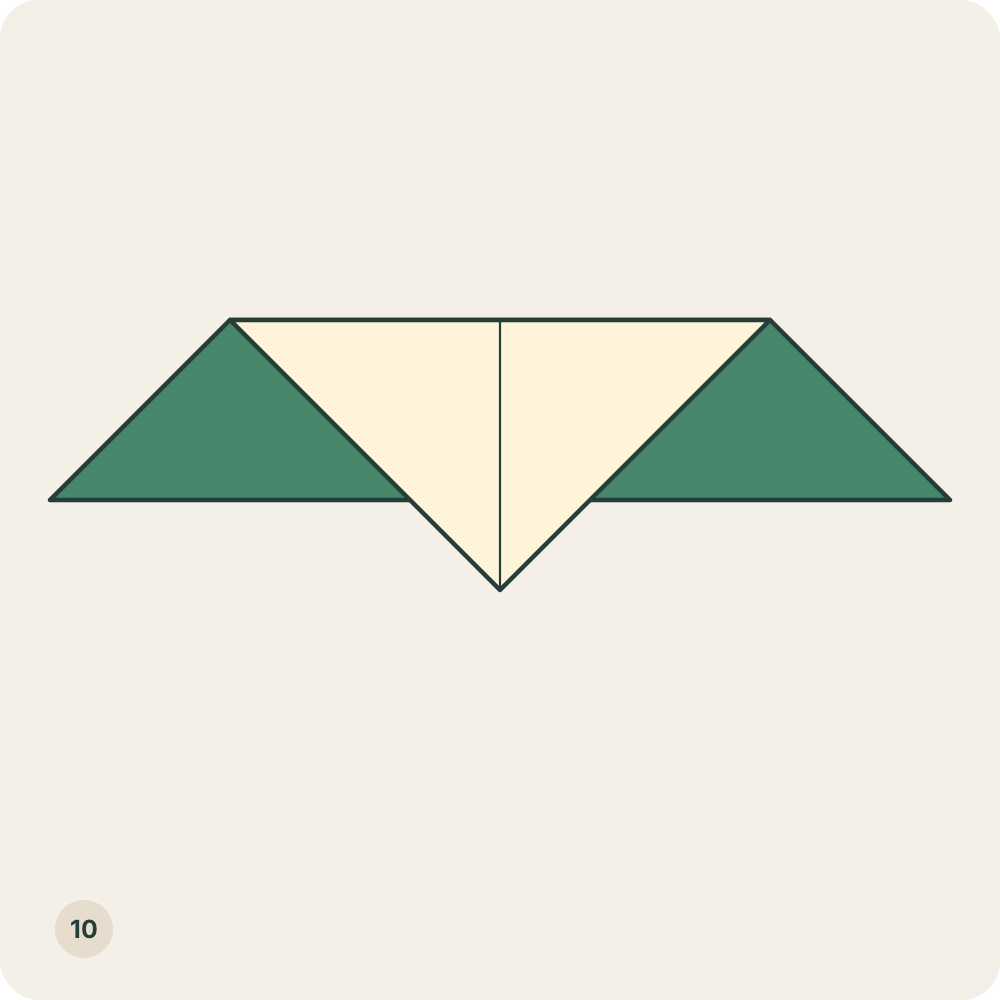
A cream snout lies over a green shape with a horizontal top and two wide side corners.
Step 11: Mark the left horn hinge
From the left outer corner, mark A at 1/3 of the sloping side and B at 1/3 of the full long base. For the proposed square, A is 5 cm up the side; find B by measuring the full base and dividing by three.
Orientation: A and B define a diagonal across only the left corner. Do not use the short horizontal forehead as the base.
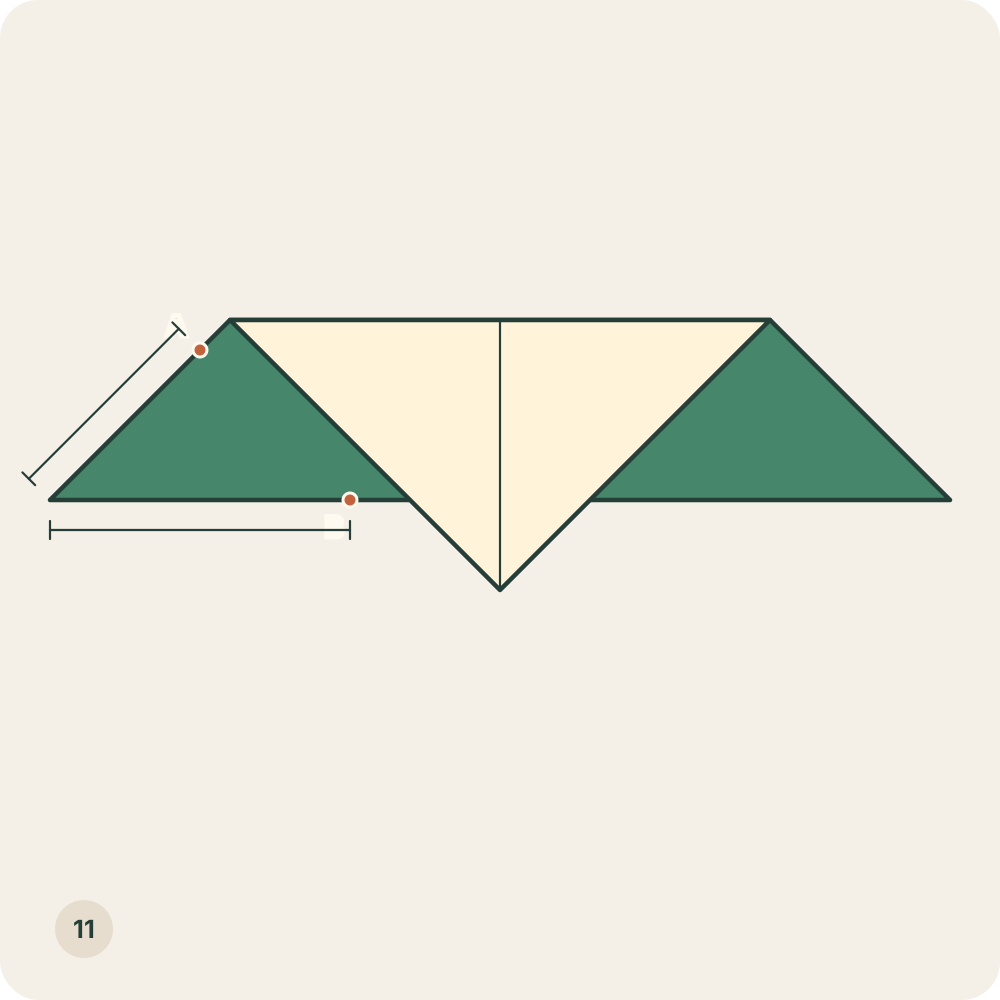
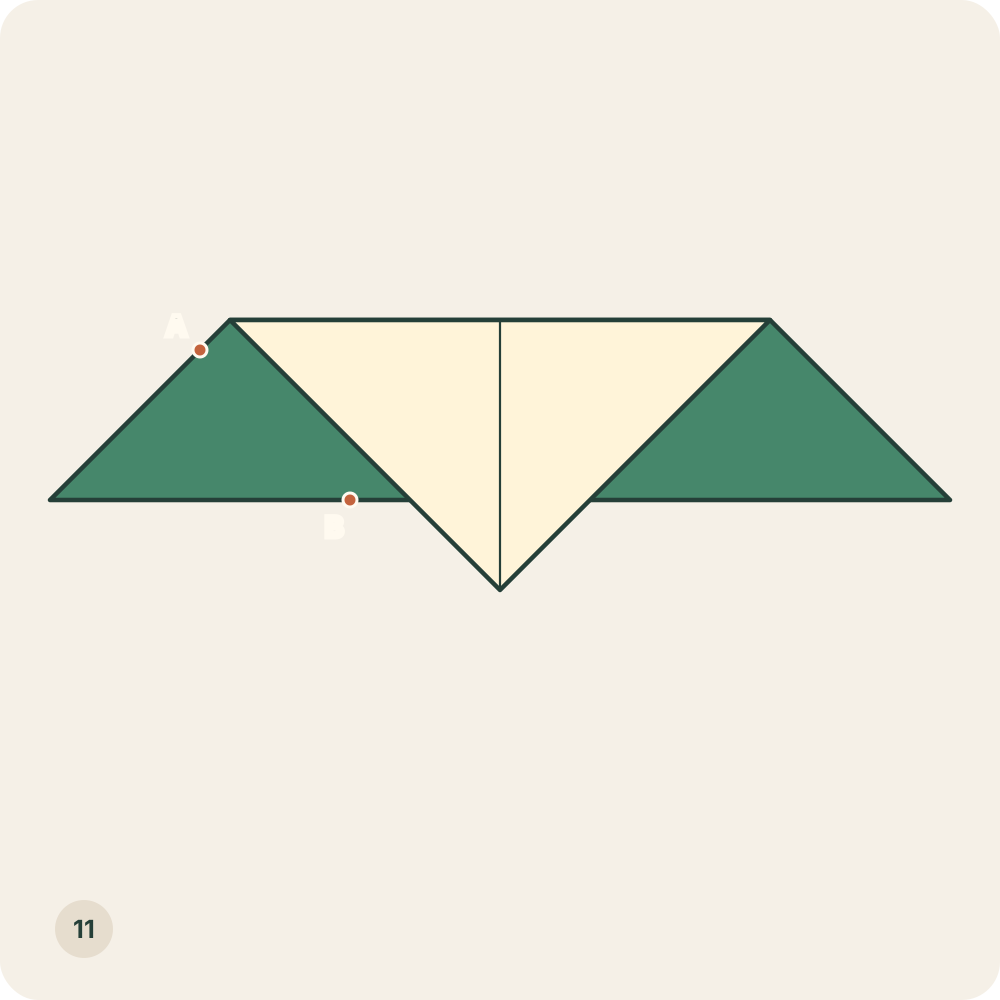
A lies on the left outer slope and B on the long base, left of the centre crease.
Step 12: Lift the left corner into a horn
Fold the left outer corner upwards along the straight line through A and B, moving both layers of that corner together. Leave the cream snout flaps still.
Orientation: The green corner triangle lands on the front; its new point rises above the forehead.
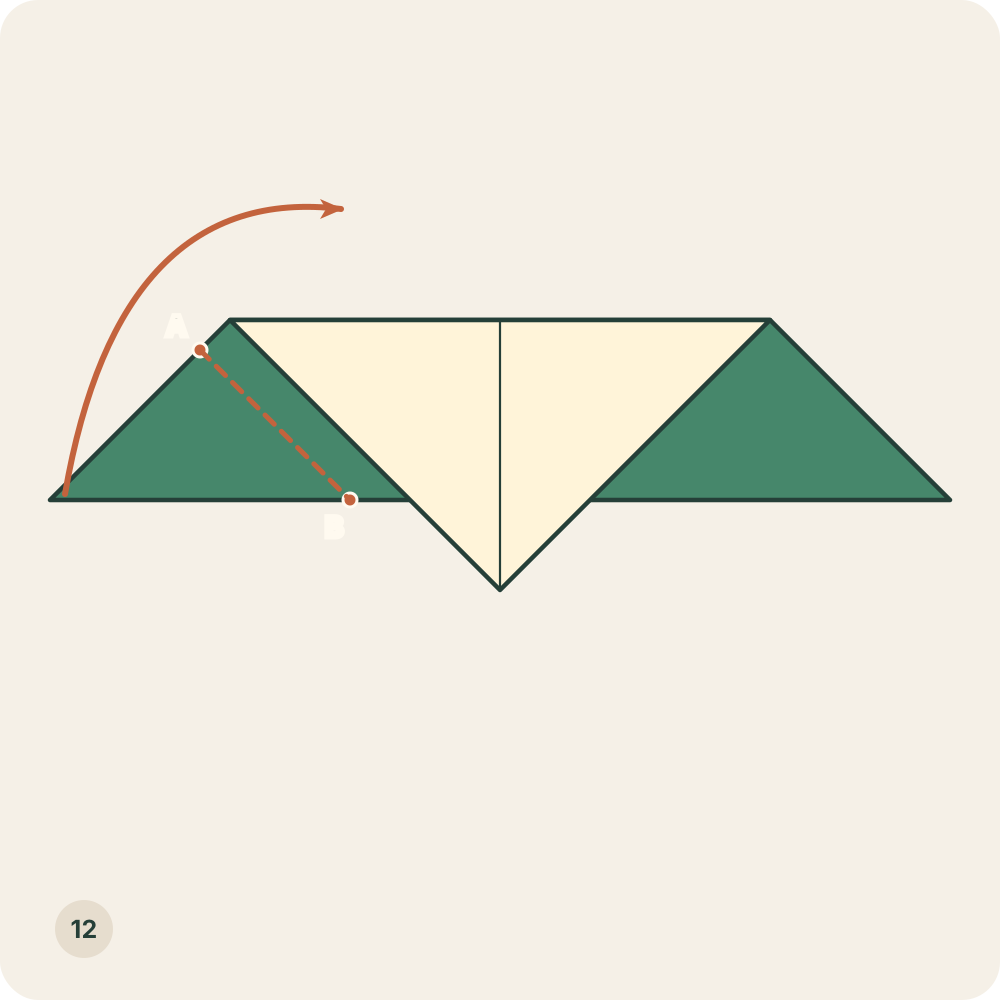
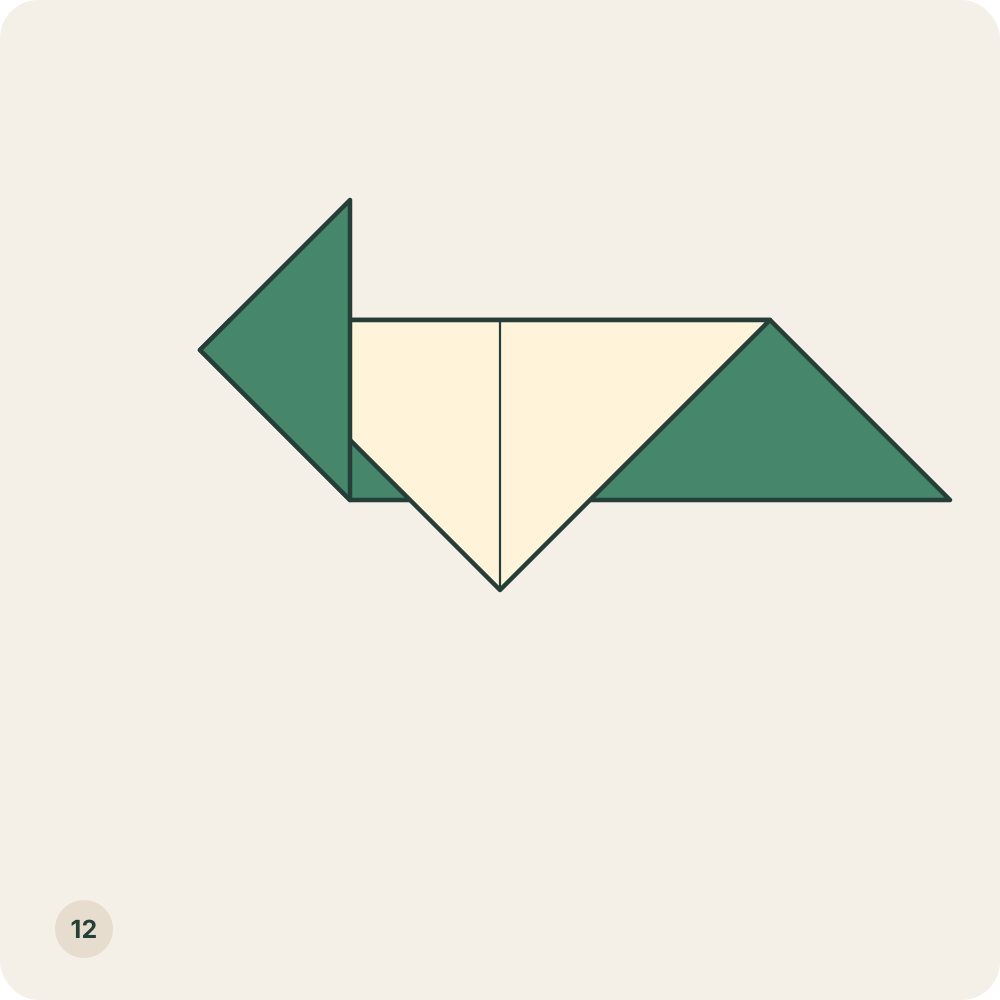
One green horn projects upwards on the left. The right outer corner is still spread out.
Step 13: Mark the matching right horn hinge
From the right outer corner, mark a new A at 1/3 of the sloping side and a new B at 1/3 of the original full long base. Use the same distances as on the left.
Orientation: The right B is the same distance from the centre crease as the left B. Keep the finished left horn folded.
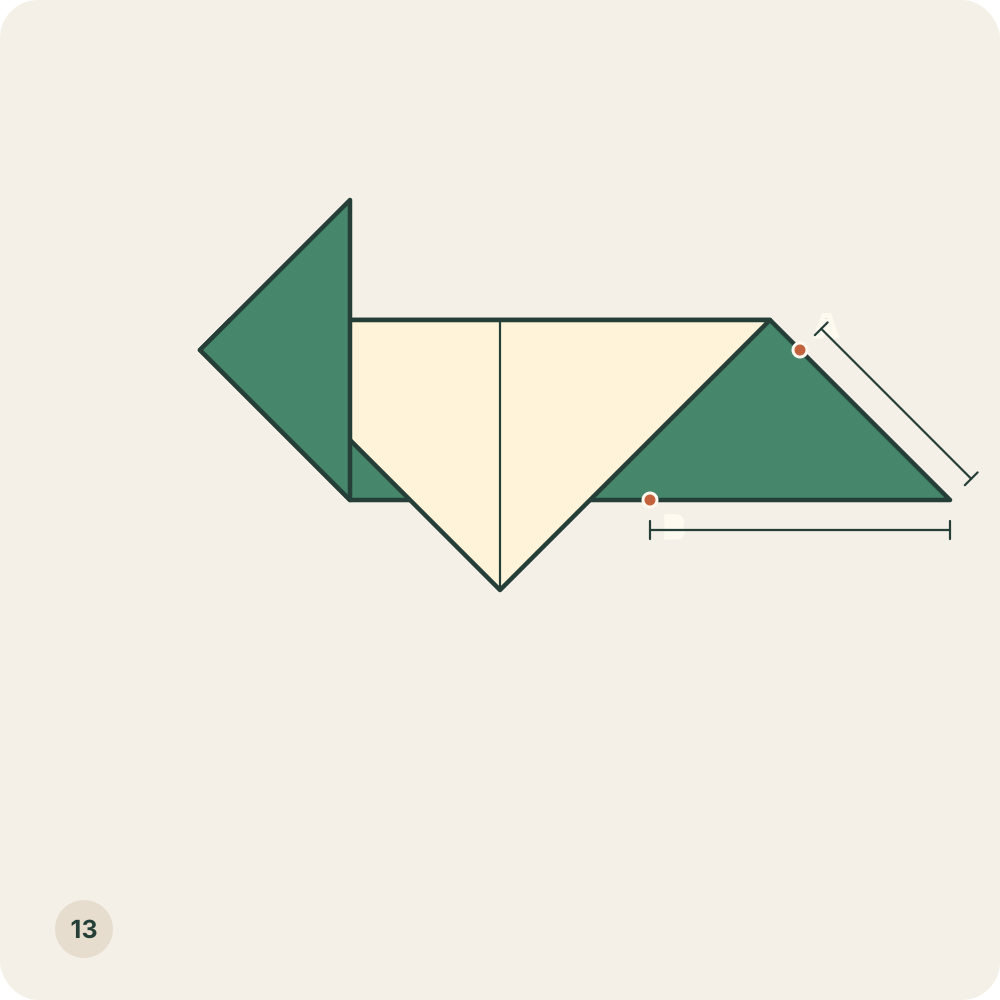
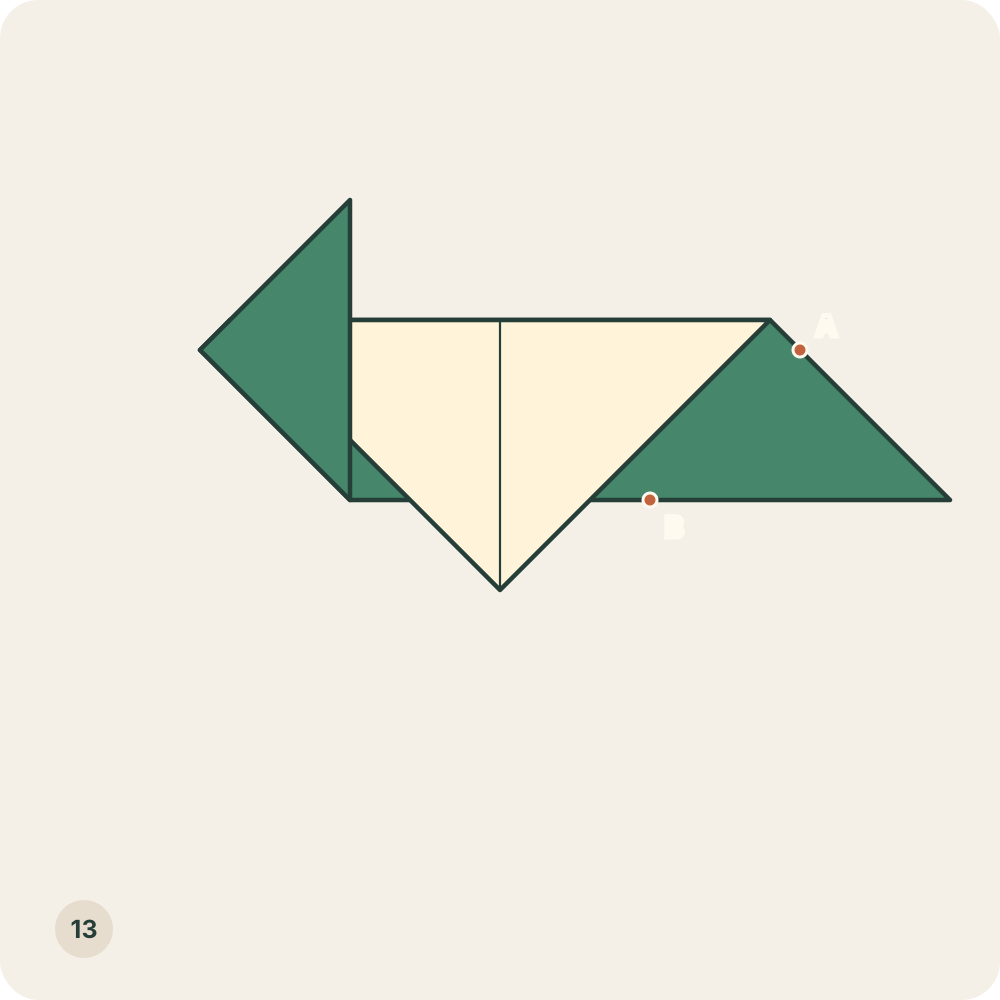
The remaining corner has a mirror pair of reference marks.
Step 14: Lift the right corner into a horn
Fold the right outer corner upwards along its A-to-B line, moving both layers together. Keep the snout still, as for the first horn.
Orientation: The right triangle lands on the front as a mirror of the left one.
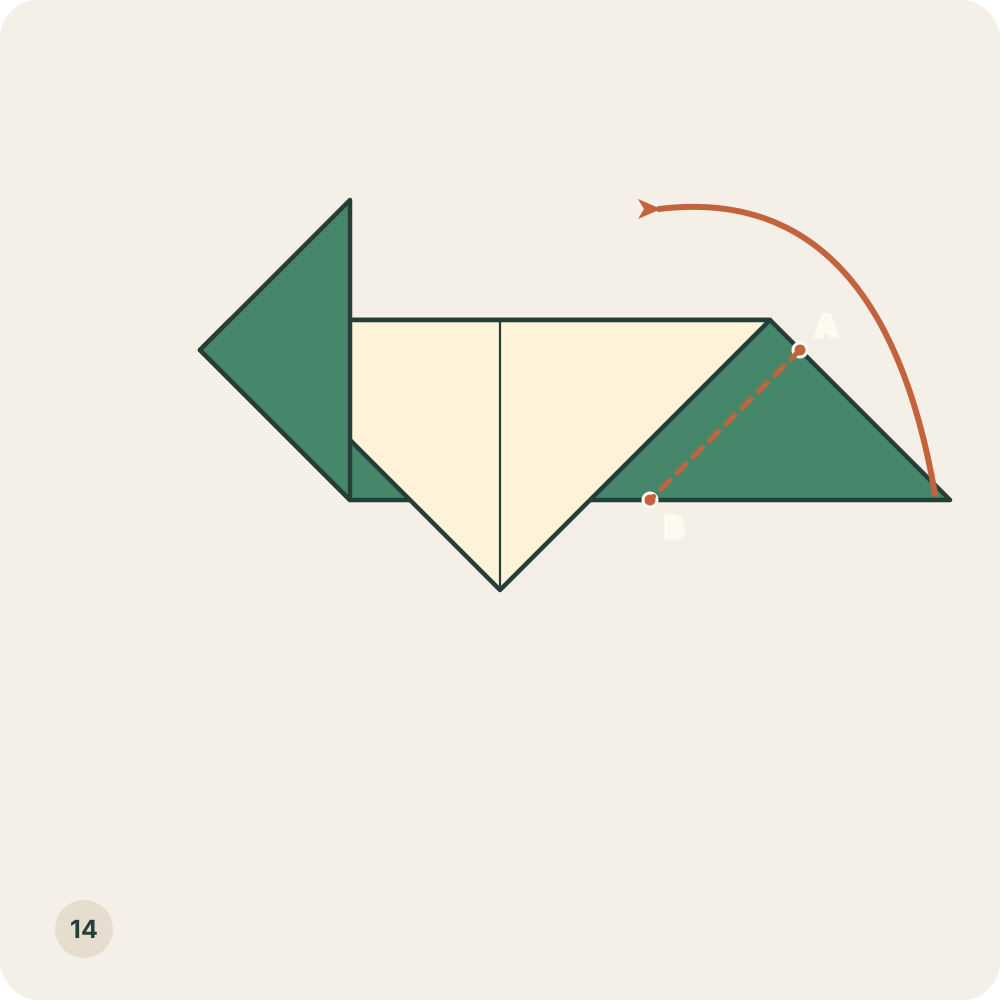
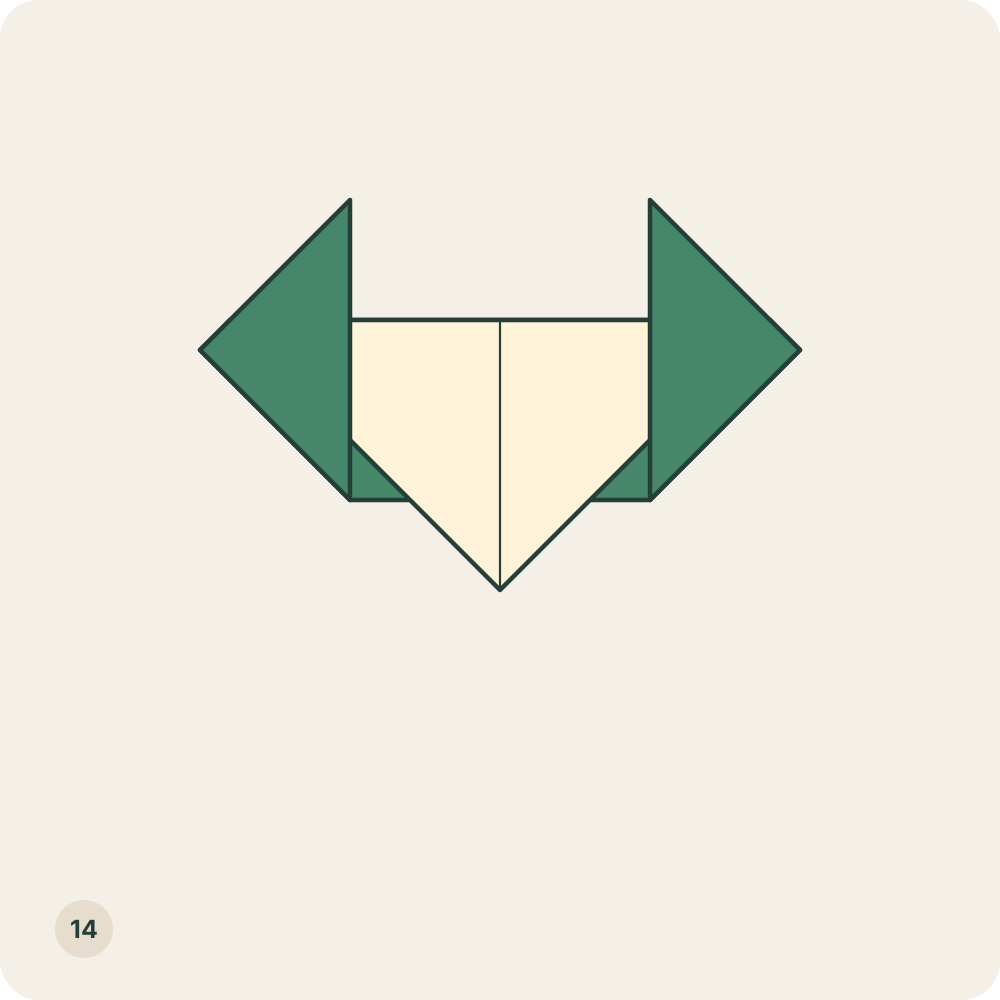
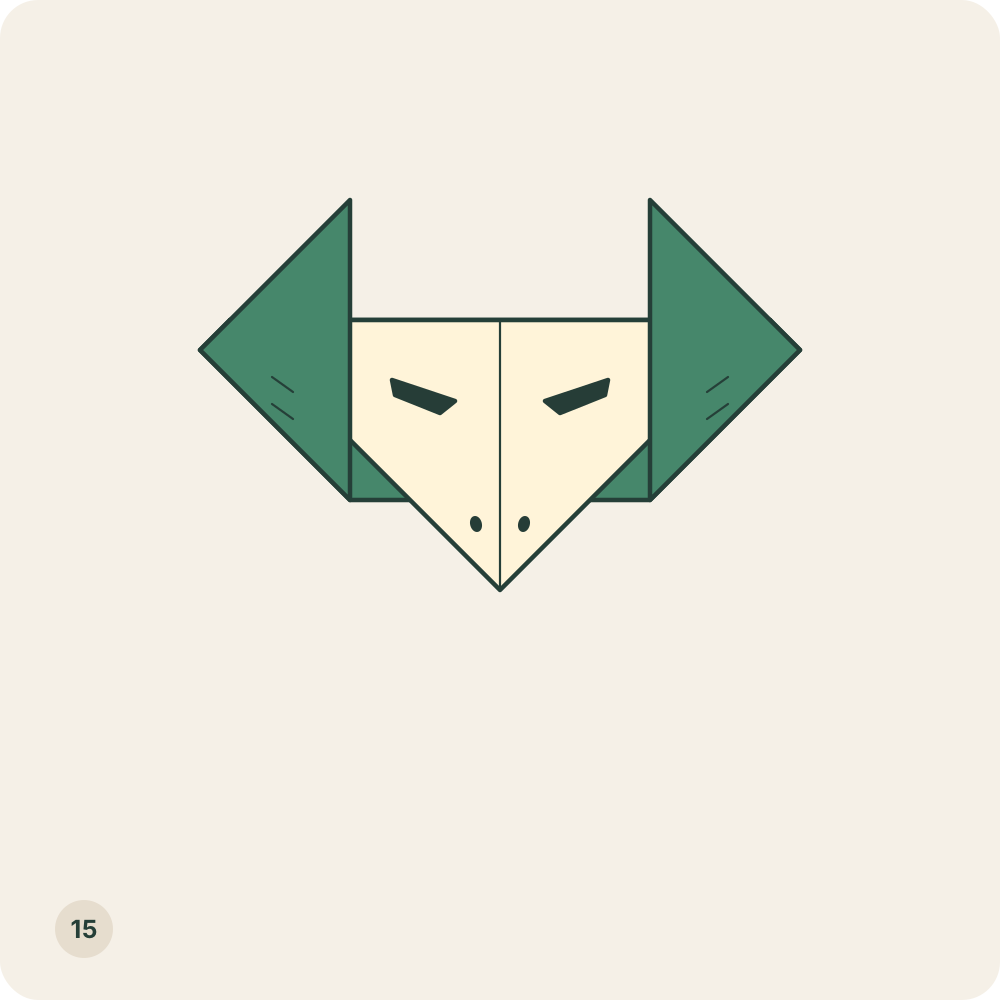
The undrawn folded head has two upper horns, a short horizontal forehead and a lower cream snout.
Step 15: Optional: Draw the dragon features
If you want a face, draw two narrow eyes above the snout tip, two small nostrils near that tip and short scale marks on the cheeks. Leave the paper plain if you prefer the folded silhouette.
Orientation: Decoration only; no paper layer moves and no further fold is made.
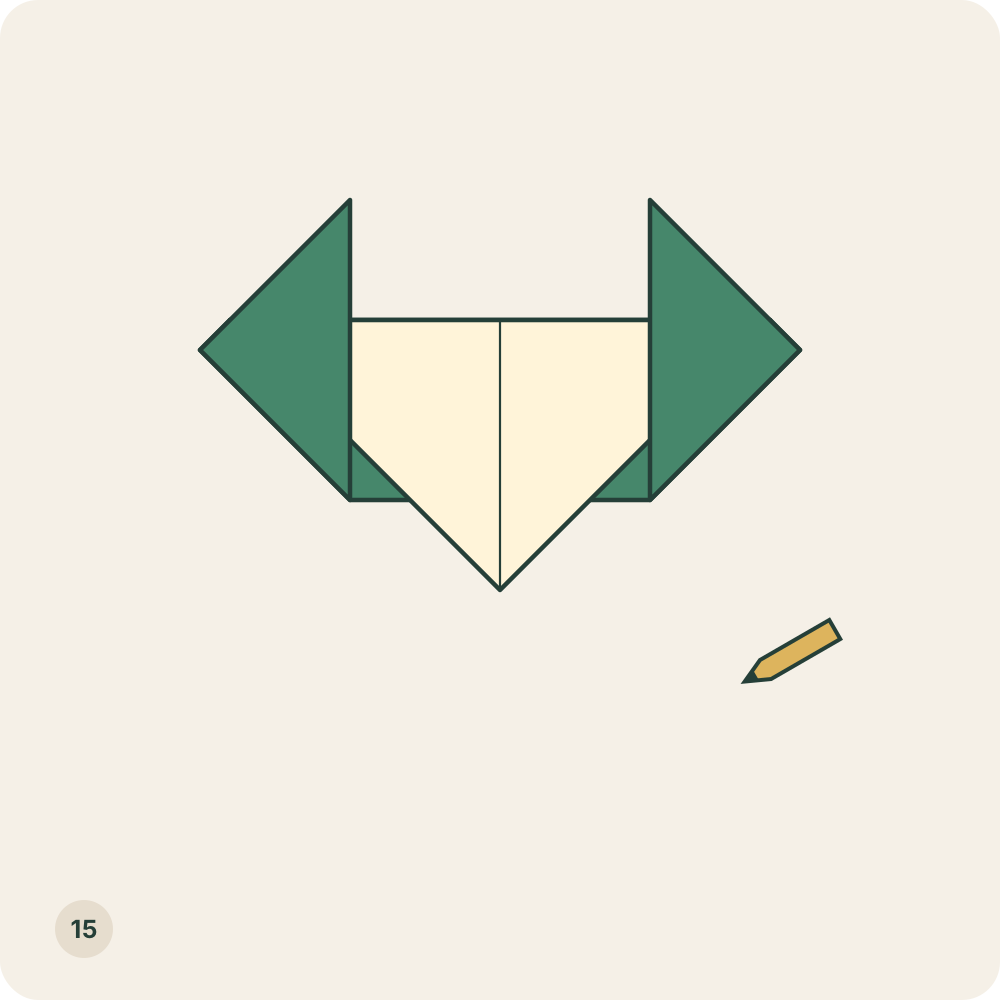
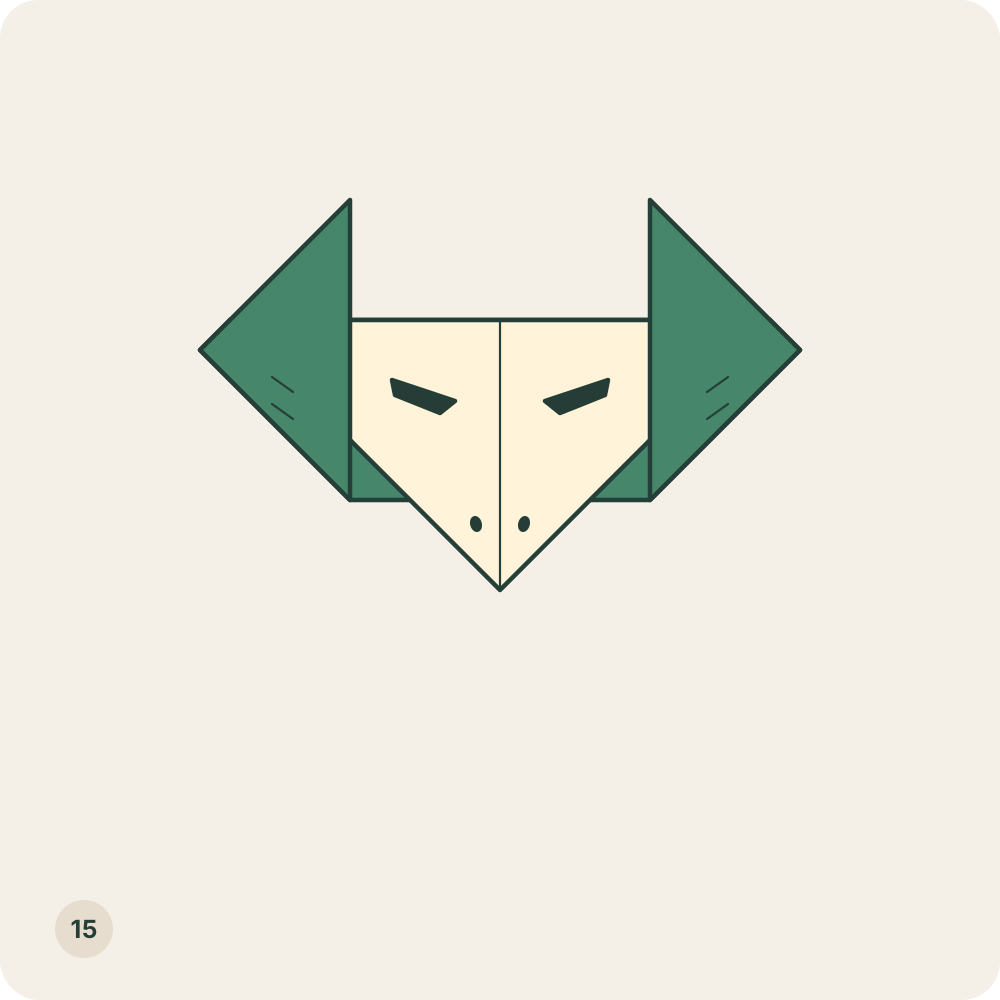
The same flat two-horn head may now have a drawn dragon expression. The horns remain folded paper, not drawn additions.
Layer and symmetry checks
- The first diagonal fold gives two layers. In step 6, move only the front upper point; the other point remains upright. After turning over, step 9 folds only the point then facing you.
- The two snout creases join marks 2/5 of a sloping edge from its lower corner. On the proposed 15 cm square, that distance is 6 cm. The folded snout extends below the long base.
- For each horn, A is 1/3 along its sloping side from the outer corner; B is 1/3 along the full long base from the same corner. On the proposed square, the side distance is 5 cm. Measure the actual full base and divide by three for B.
- The horn folds move both layers at the outer corners. Leave the two cream snout flaps where they are; their edges do not belong to the moving corner triangles.
- The final silhouette has two upper horns, a short horizontal forehead between them and a lower pointed snout. These are digital geometry checks, not observations from a physical folding session. Paper thickness, handling and age suitability remain untested.
A flat two-horn dragon head
The folded silhouette is complete before the optional drawing step. Use the plain version as a fantasy emblem, or add narrow eyes, nostrils and small scale marks for a dragon-like expression. The head is a flat model; this guide does not make a three-dimensional dragon body.
Printable version pending the physical folding test.
Variant, technique references and original diagrams
OrigamiLove developed the exact measured combination shown here in 2026 from basic triangular and corner folds. We describe it as our illustrated variant, without claiming invention of the general horned-head model family or identifying a traditional inventor. The British Origami Society is a technique reference, not a source for this model. All wording, geometric SVG coordinates and optional drawn features were produced for this guide; no third-party diagrams or photographs are copied. Our original text and artwork are licensed CC BY 4.0.