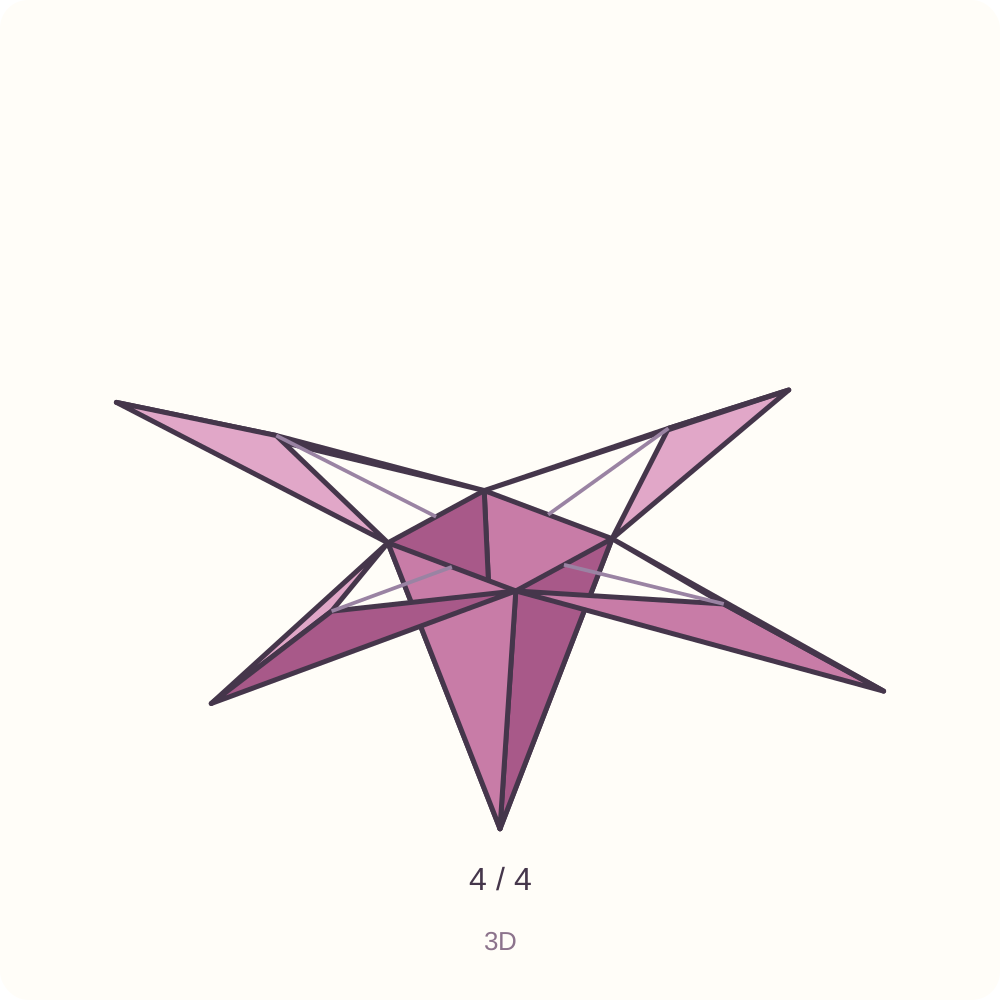
Prepare your paper
Paper and the techniques to prepare
- One 20 × 20 cm square of thin folding paper, proposed at about 60–80 g/m². These dimensions and weight range are preparation suggestions, not a physically tested specification.
- Use two contrasting sides for a first attempt. Pink represents the front; cream represents the reverse in our diagrams. A plain sheet makes the small pocket edges easier to see.
- A clean flat surface and a pencil for optional gentle petal curling. The square is already prepared; the folding sequence uses no cuts, glue, wire, separate stem or added stamens.
- Before starting, recognise a valley fold, opening a pocket, flattening a squash fold and turning one layer like a book page. The first petal fold is broken into its preparation and movement; the next three repeat that demonstrated sequence.
- Dashed line: Make the fold or preparation shown
- Thin grey line: Existing crease; dark continuous line: Layer edge
- Arrow: Move paper, open a pocket or change the visible face
- A and B: Reference points for the current drawing; a/b: Detail views of one action
Left and right are your own. From step 13 onwards, keep the closed point at the top until the explicit half-turn in step 30. Several repeated-face diagrams show the same face detail after a page change; the completed faces are hidden behind it. A face counter identifies the repetition. Source diagrams are schematic rather than measurements.
Read the complete paper & materials guide ↗Build the base, then work around its four faces
Step 1: Position the square
Place the square cream side up, with horizontal and vertical edges. The centre A is a reference, not a mark you need to draw.
Orientation: Cream reverse up.
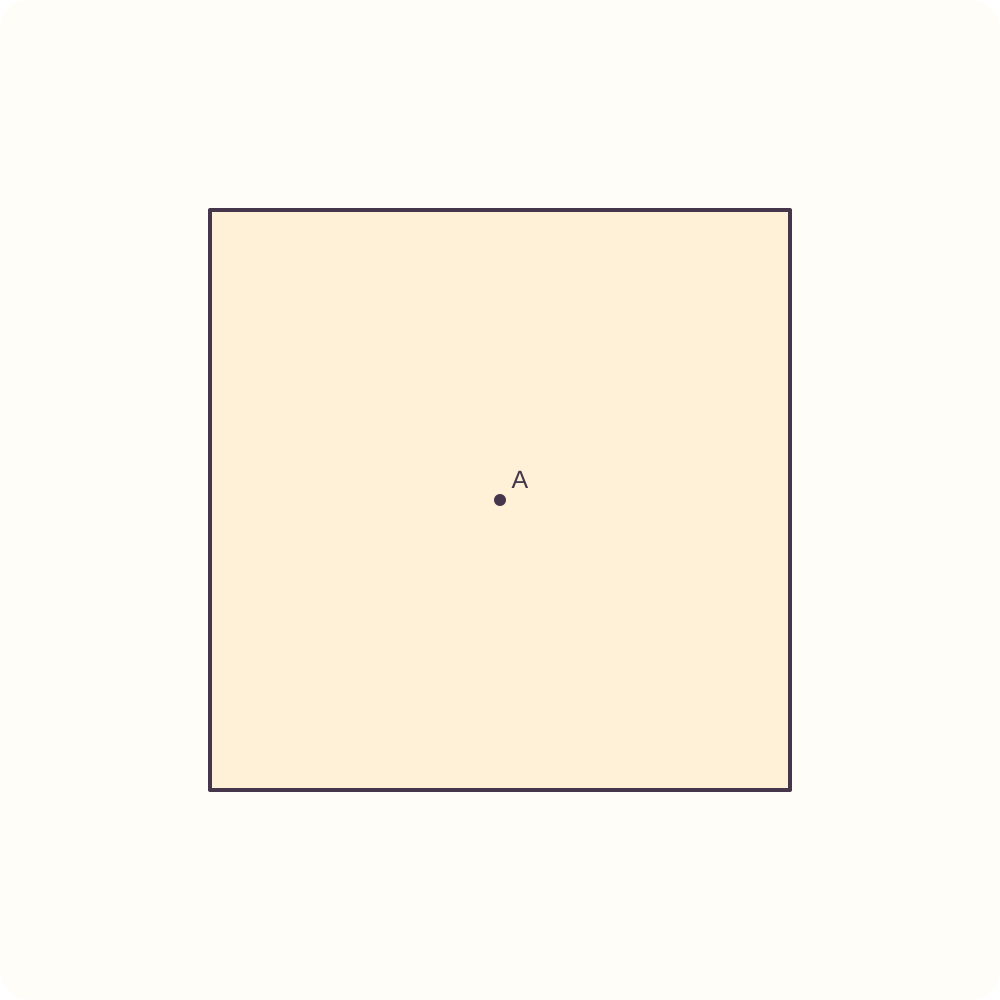
A square sheet with its four corners free.
Step 2: Precrease the vertical middle
Bring the left edge to the right edge, press the middle fold, then reopen the square.
Orientation: Cream up; keep the edges parallel to the diagram.
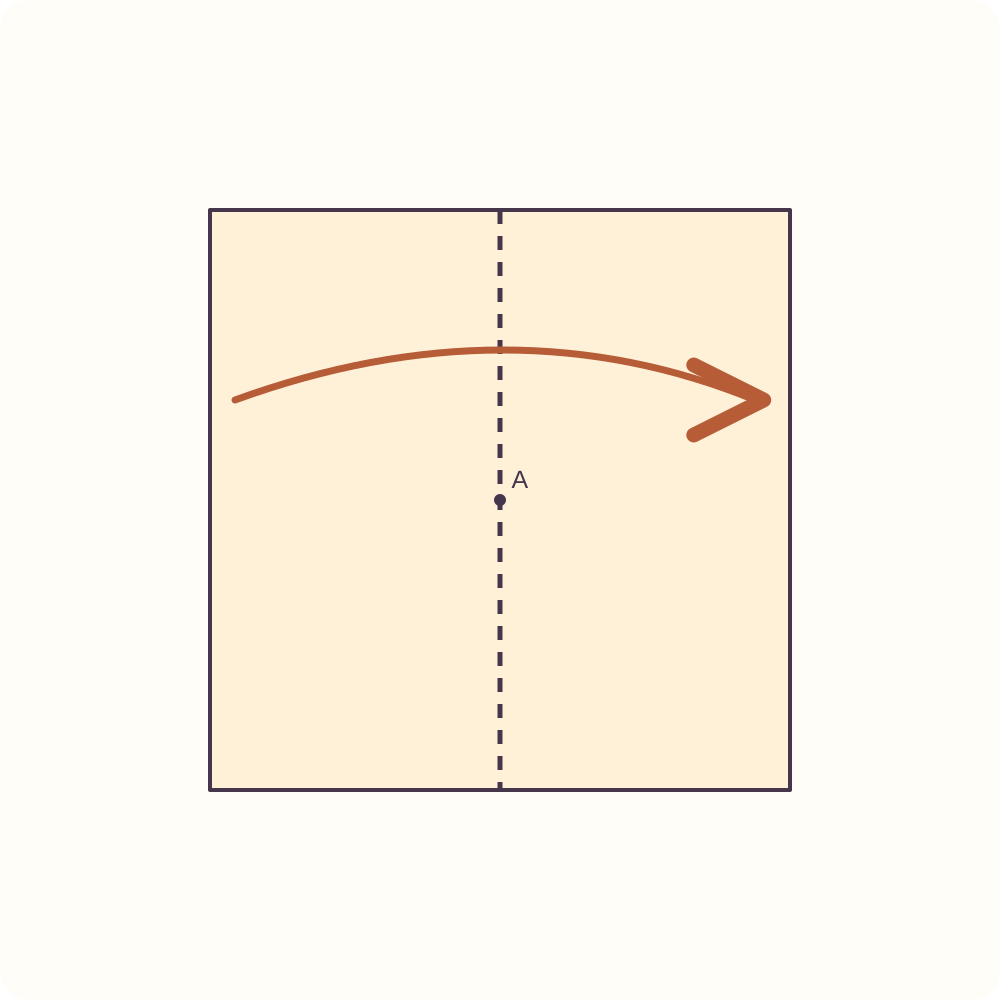
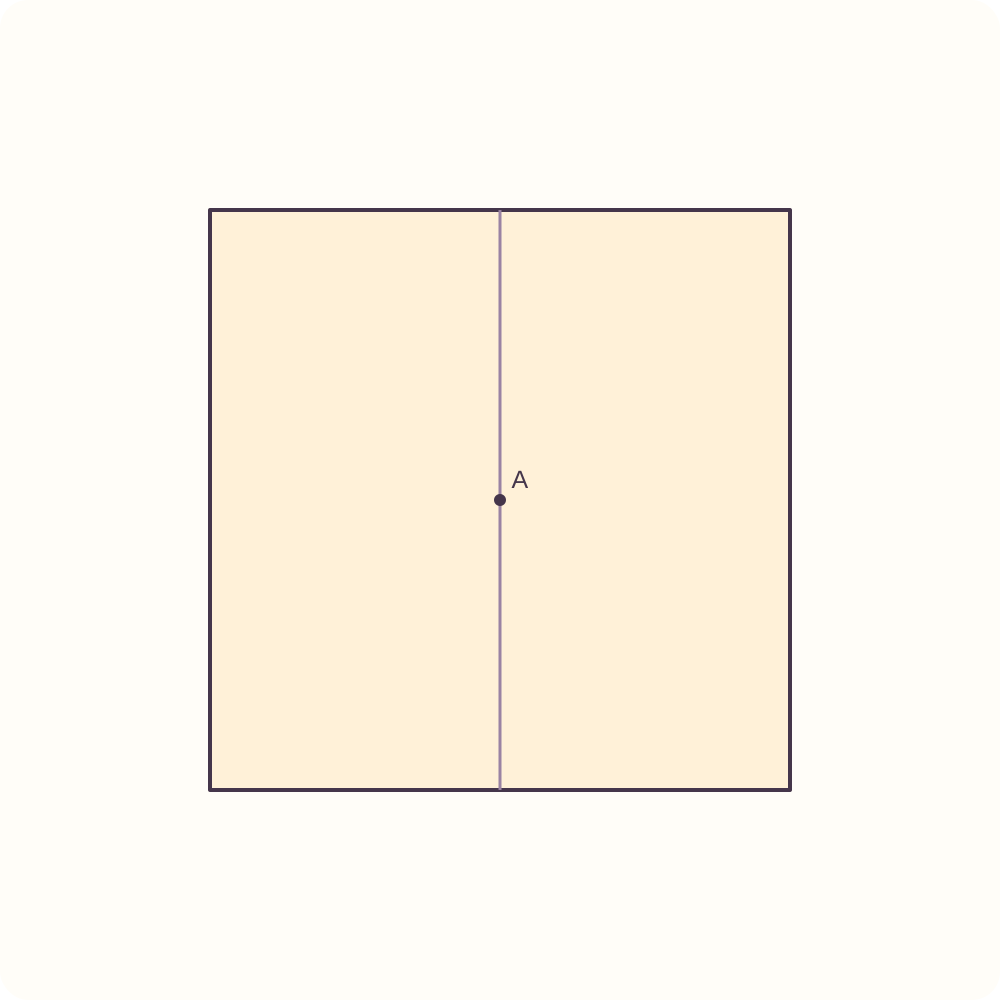
A vertical centre crease.
Step 3: Precrease the horizontal middle
Bring the bottom edge to the top edge, press, then reopen. The two middle creases meet at A.
Orientation: Same face up.
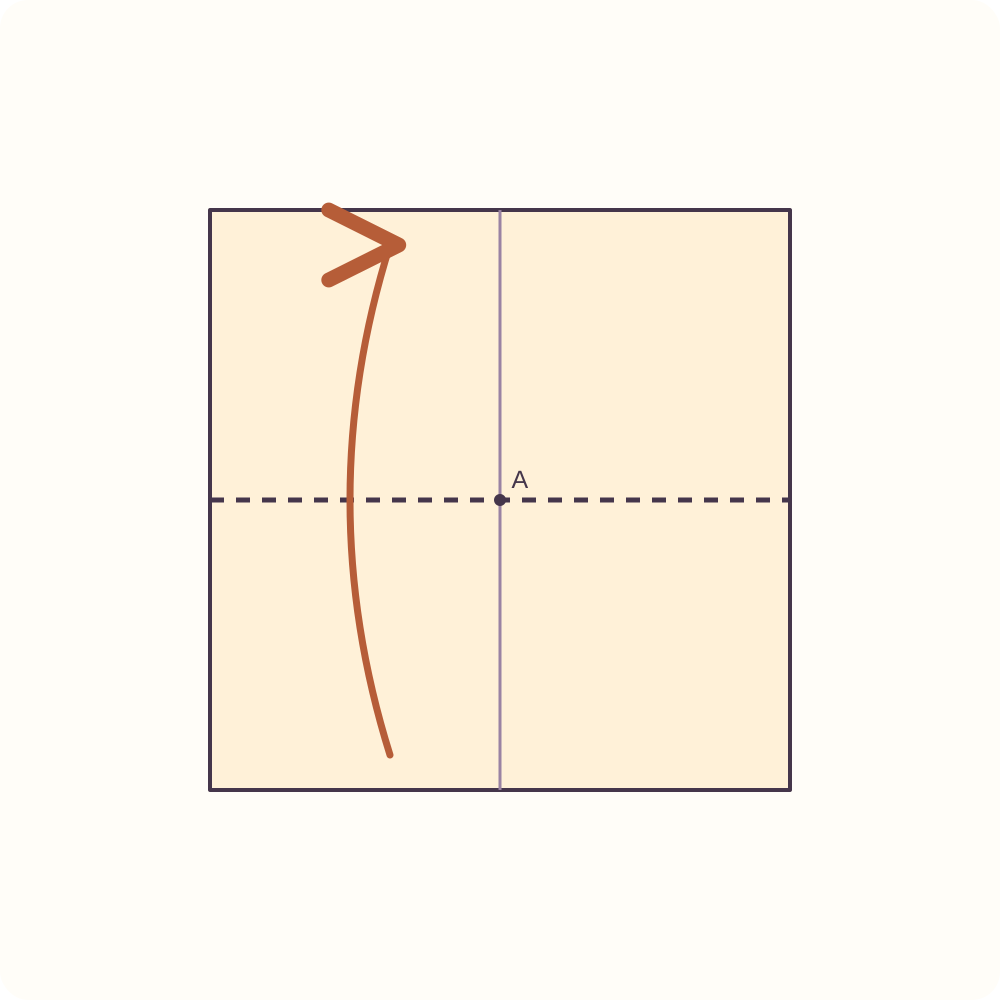
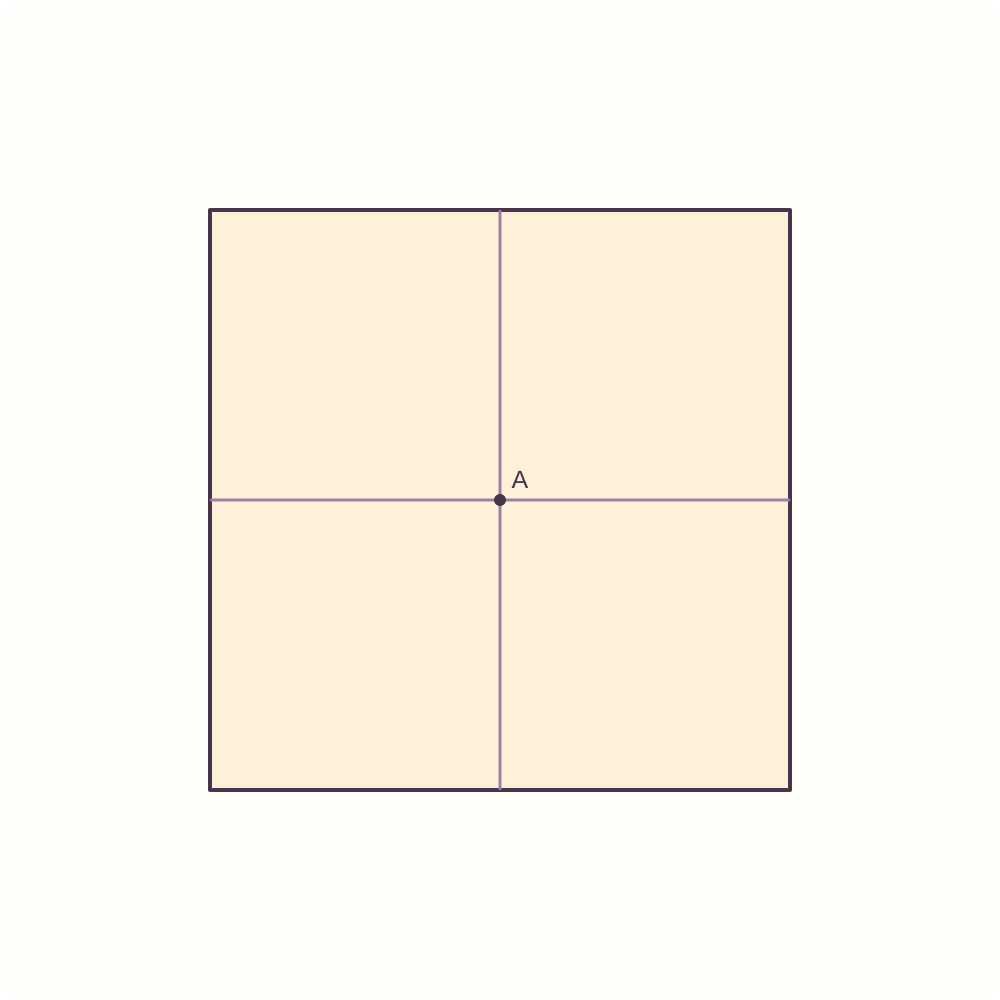
A cross through the centre of the square.
Step 4: Precrease the top-left corner
Bring only the top-left corner to A, press the fold, then return that corner to its original position. Keep the other corners open.
Orientation: Cream up; A is the intersection of the two middle creases.
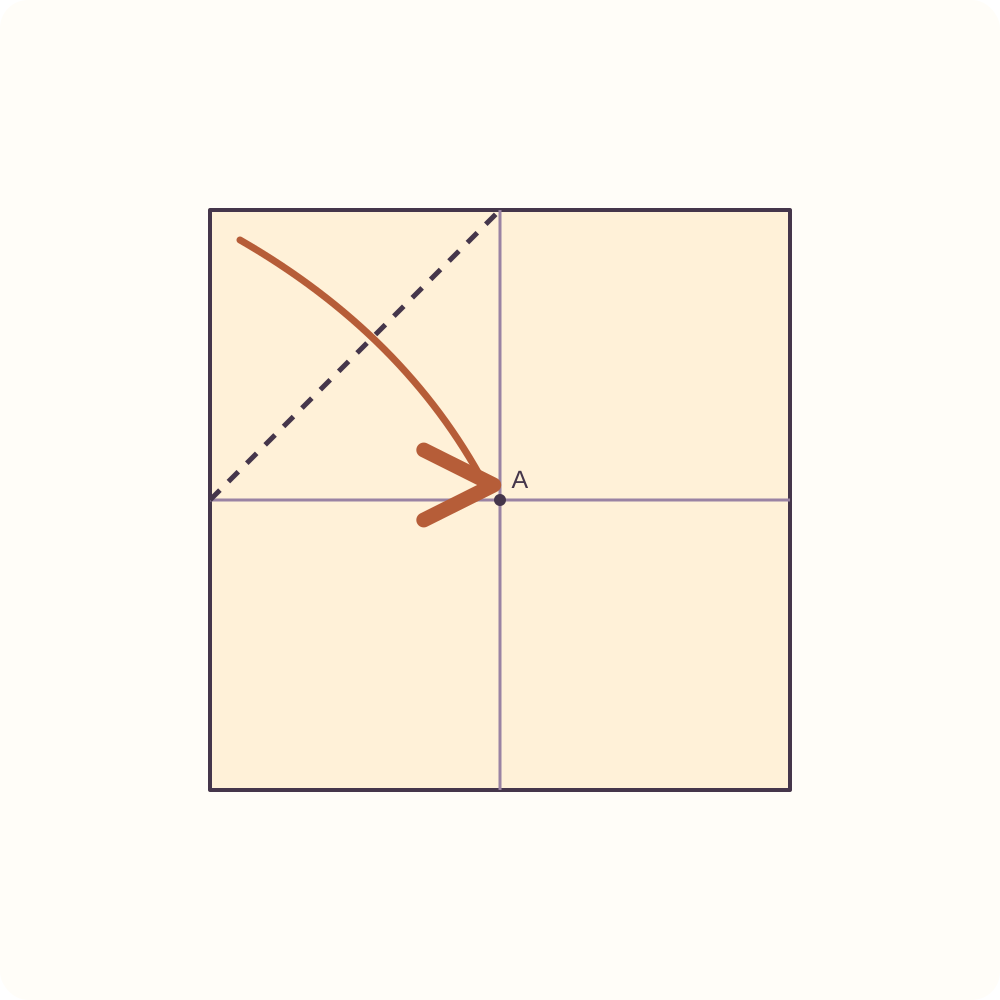
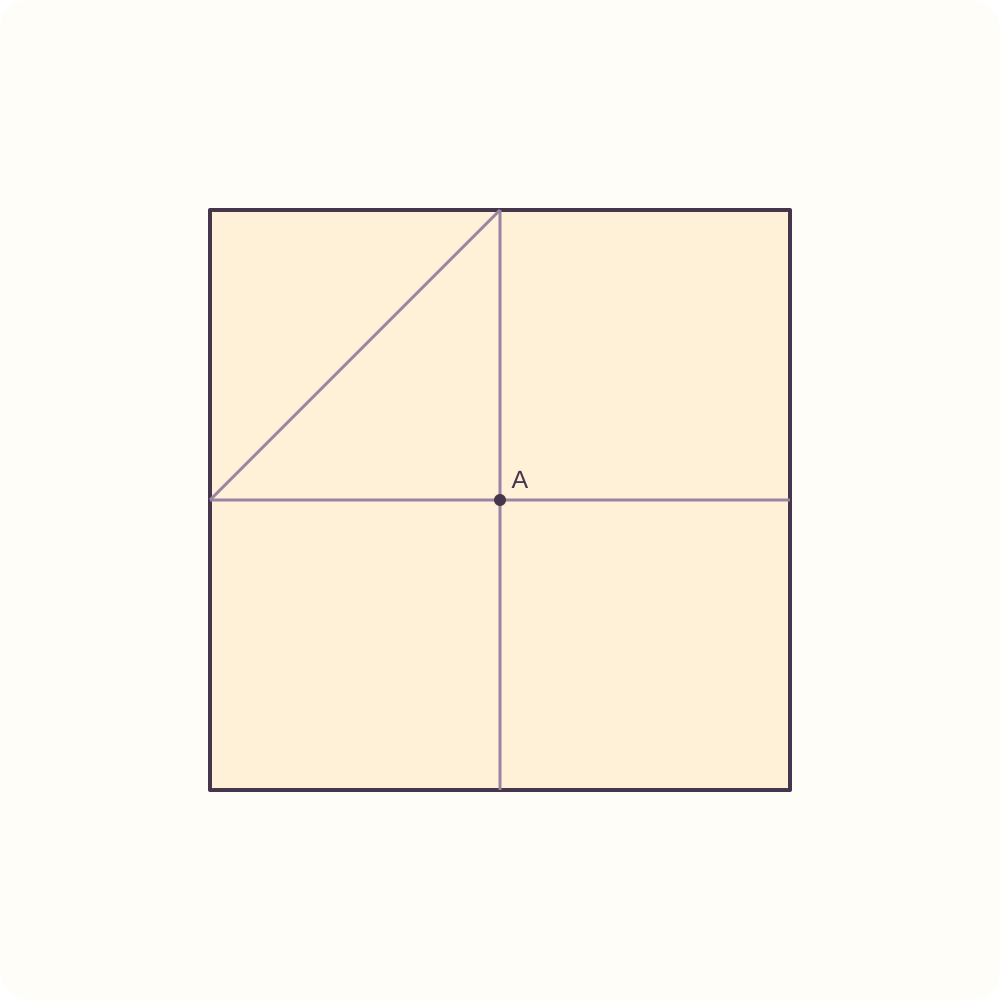
The square is open again with 1 corner-to-centre preparation crease.
Step 5: Precrease the top-right corner
Bring only the top-right corner to A, press the fold, then return that corner to its original position. Keep the other corners open.
Orientation: Cream up; A is the intersection of the two middle creases.
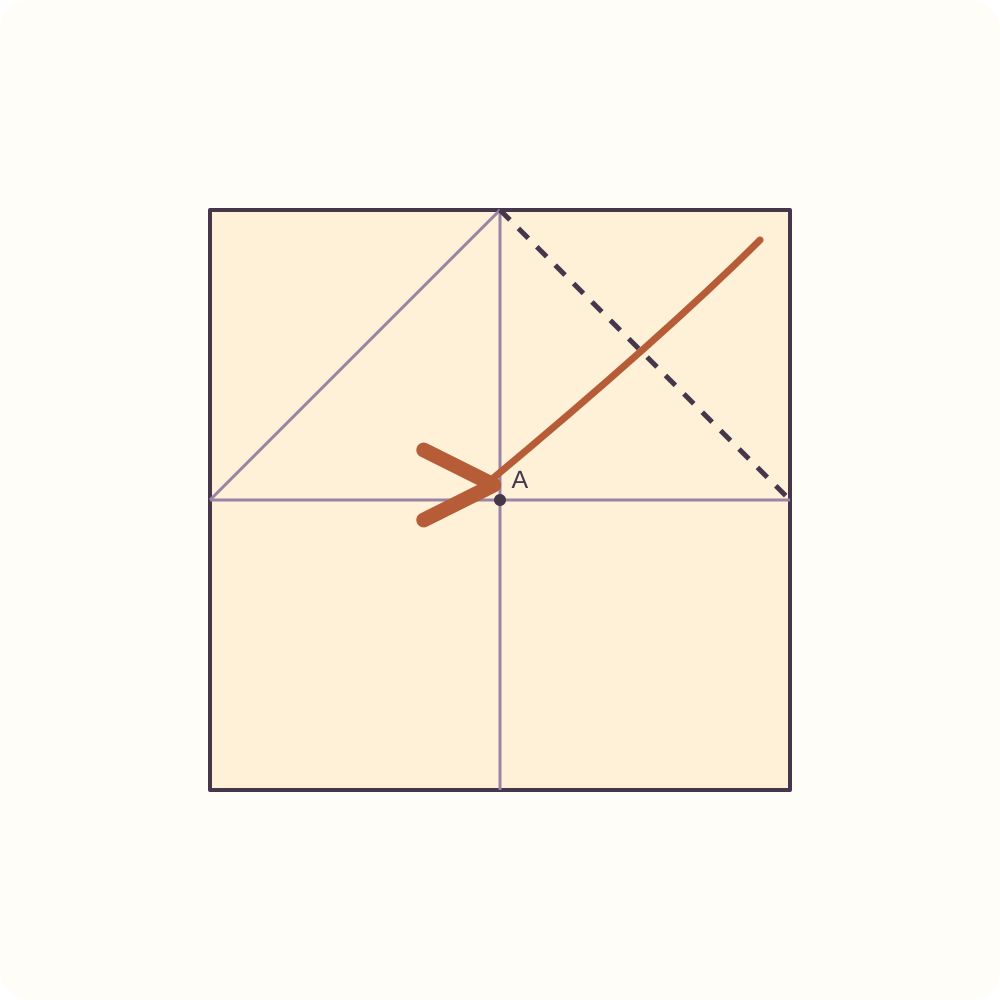
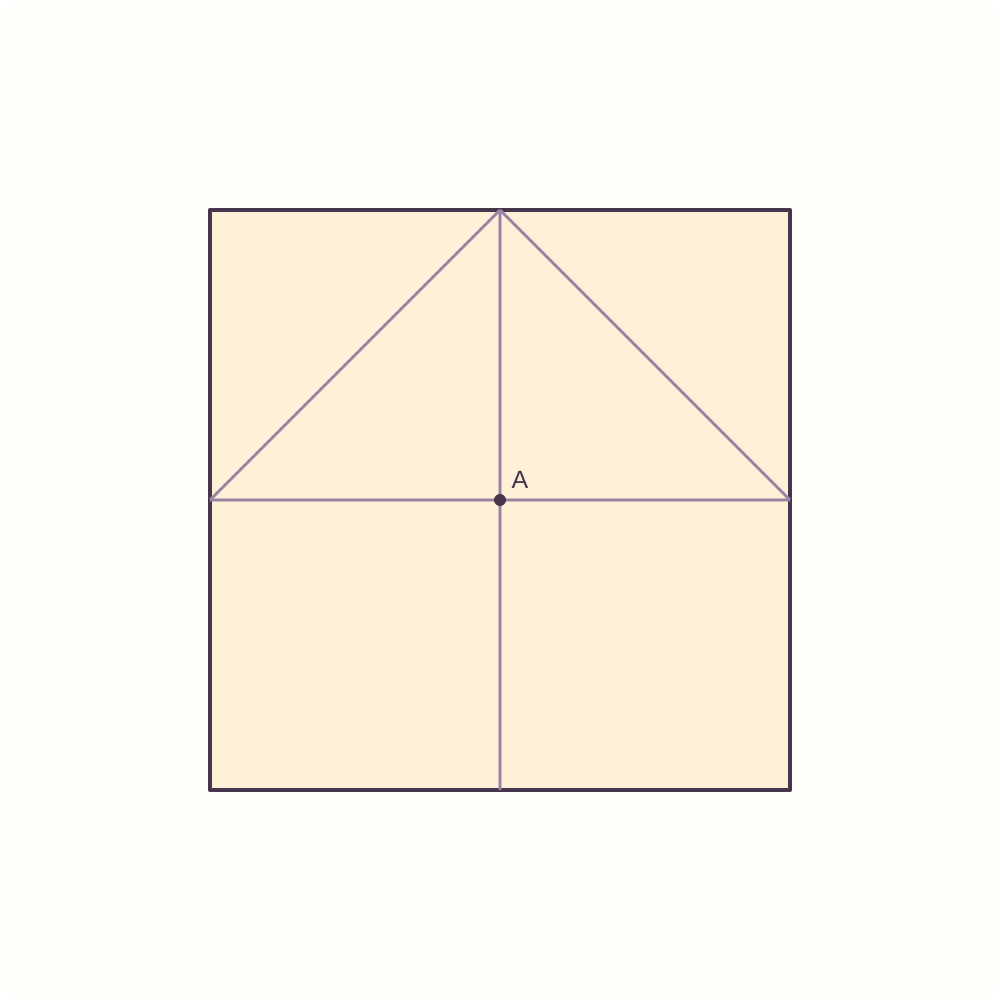
The square is open again with 2 corner-to-centre preparation creases.
Step 6: Precrease the bottom-right corner
Bring only the bottom-right corner to A, press the fold, then return that corner to its original position. Keep the other corners open.
Orientation: Cream up; A is the intersection of the two middle creases.
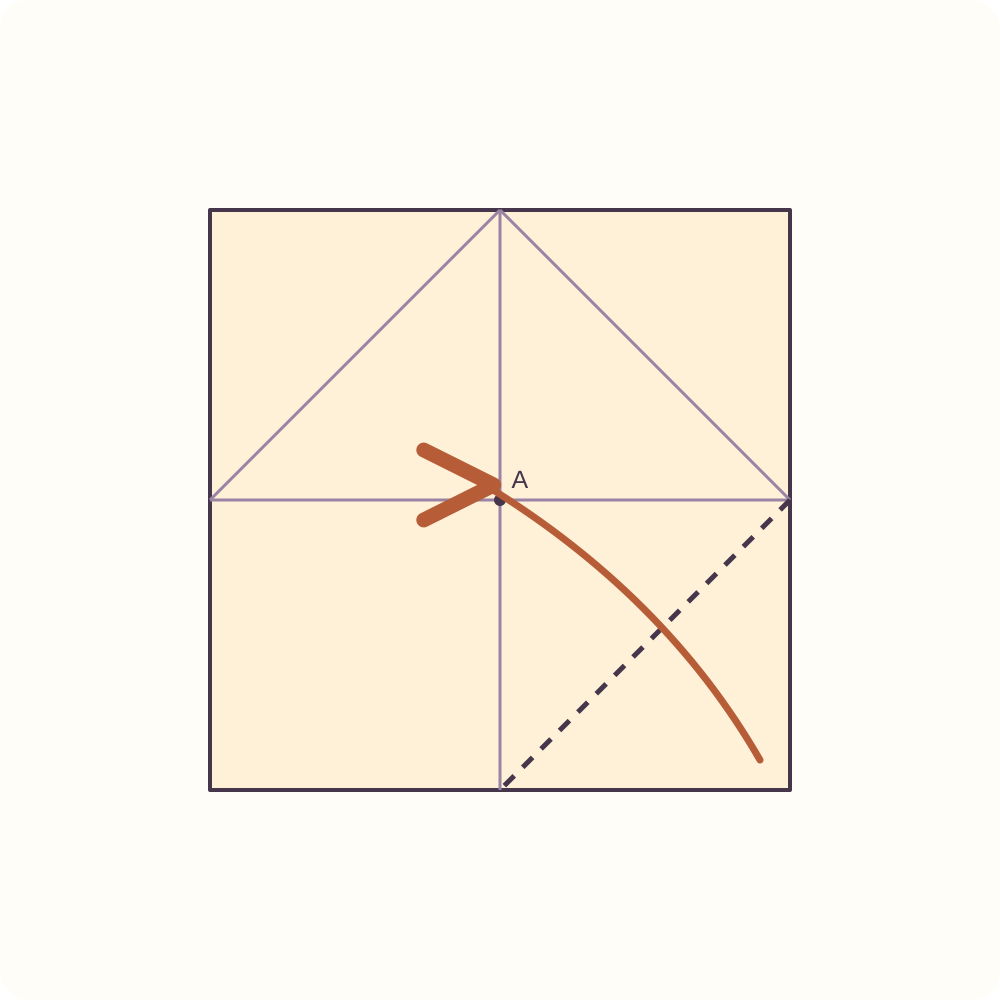
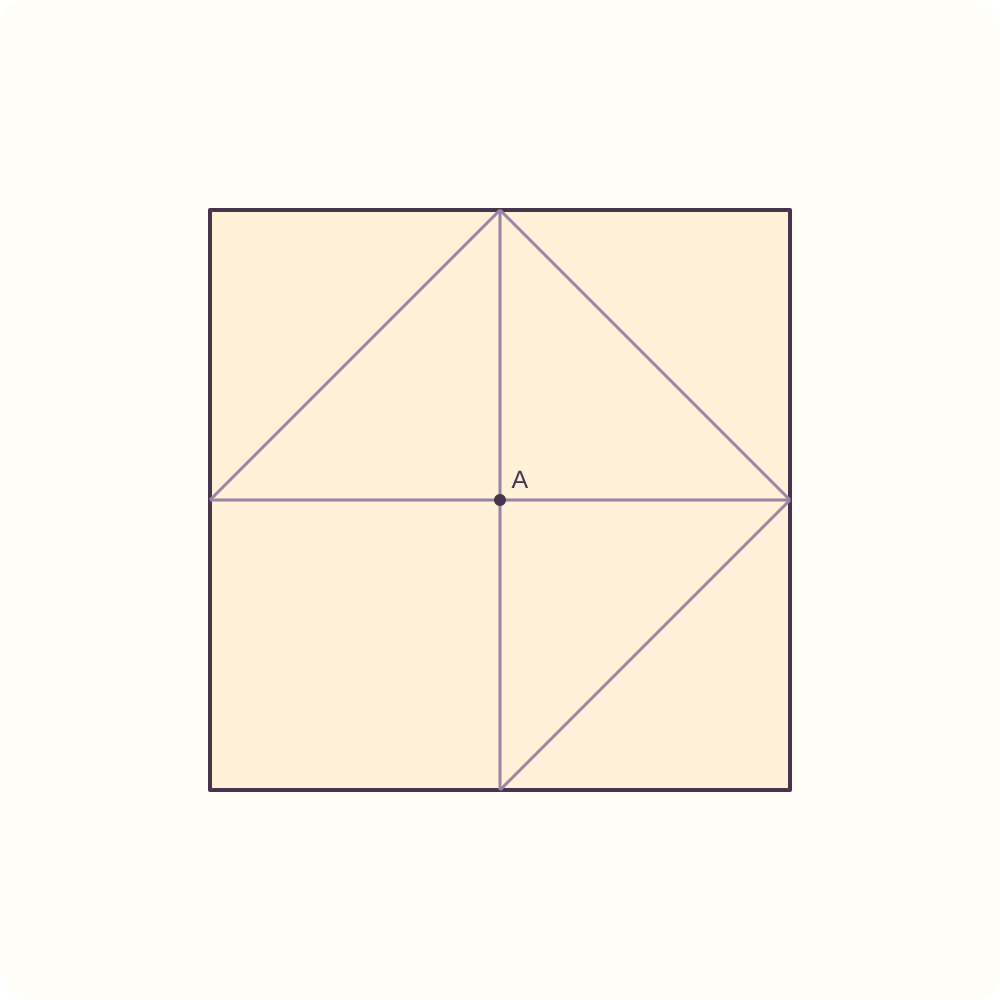
The square is open again with 3 corner-to-centre preparation creases.
Step 7: Precrease the bottom-left corner
Bring only the bottom-left corner to A, press the fold, then return that corner to its original position. Keep the other corners open.
Orientation: Cream up; A is the intersection of the two middle creases.
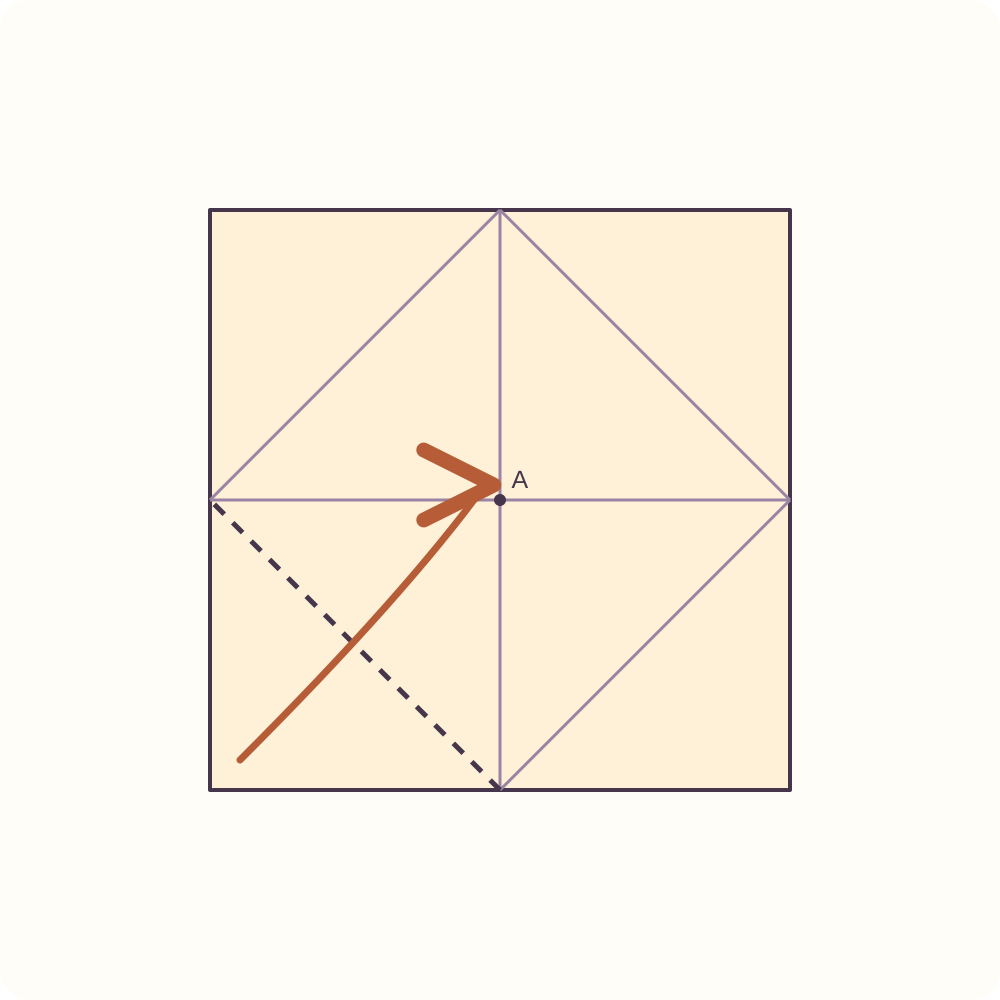
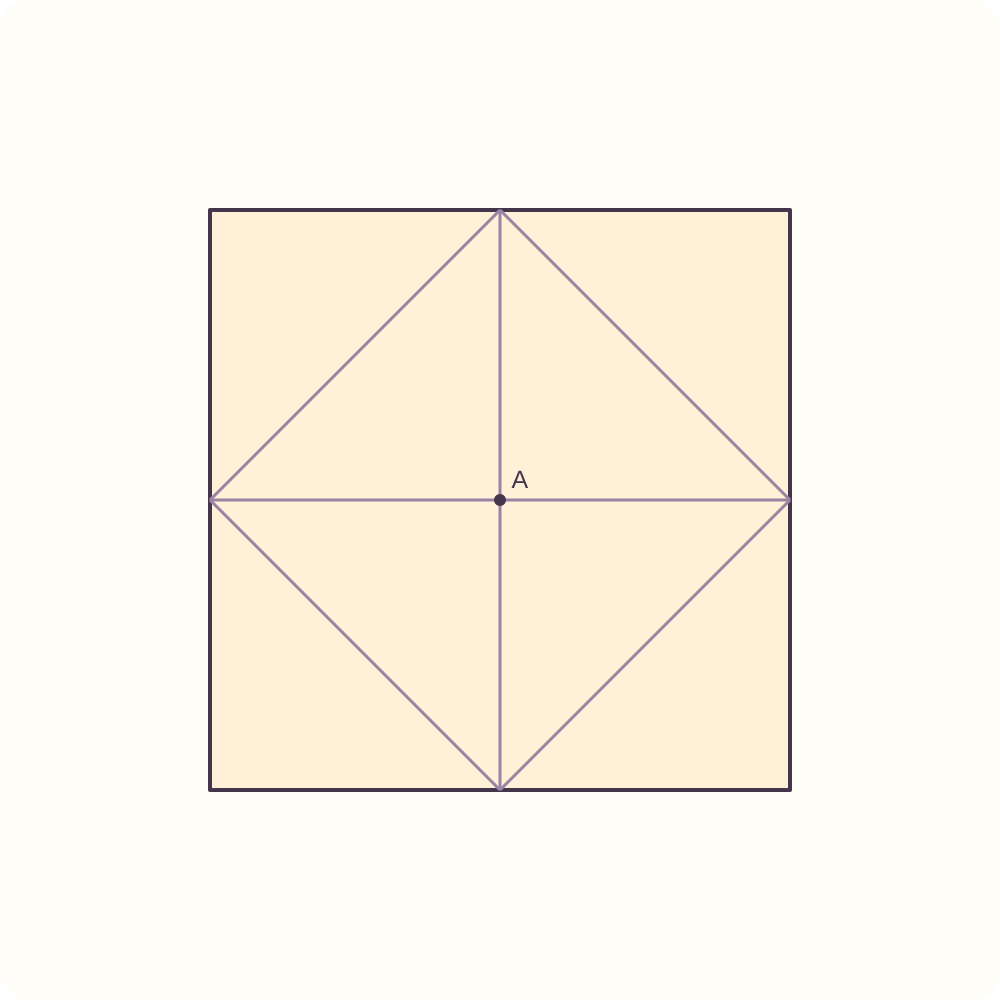
The square is open again with 4 corner-to-centre preparation creases.
Step 8: Turn the square to a diamond
Rotate the flat sheet a quarter of a right angle on the table, so one corner points straight up. Do not turn it over.
Orientation: Cream up; the middle creases now run diagonally.
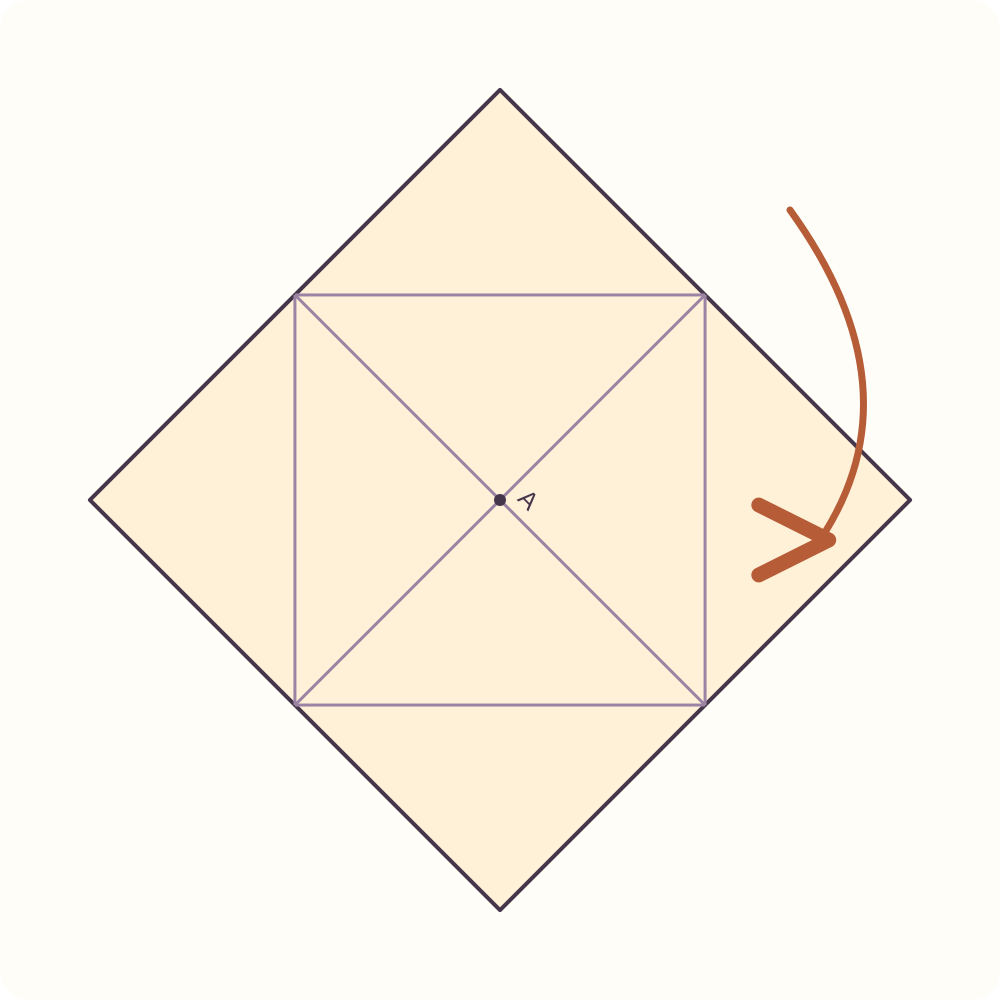
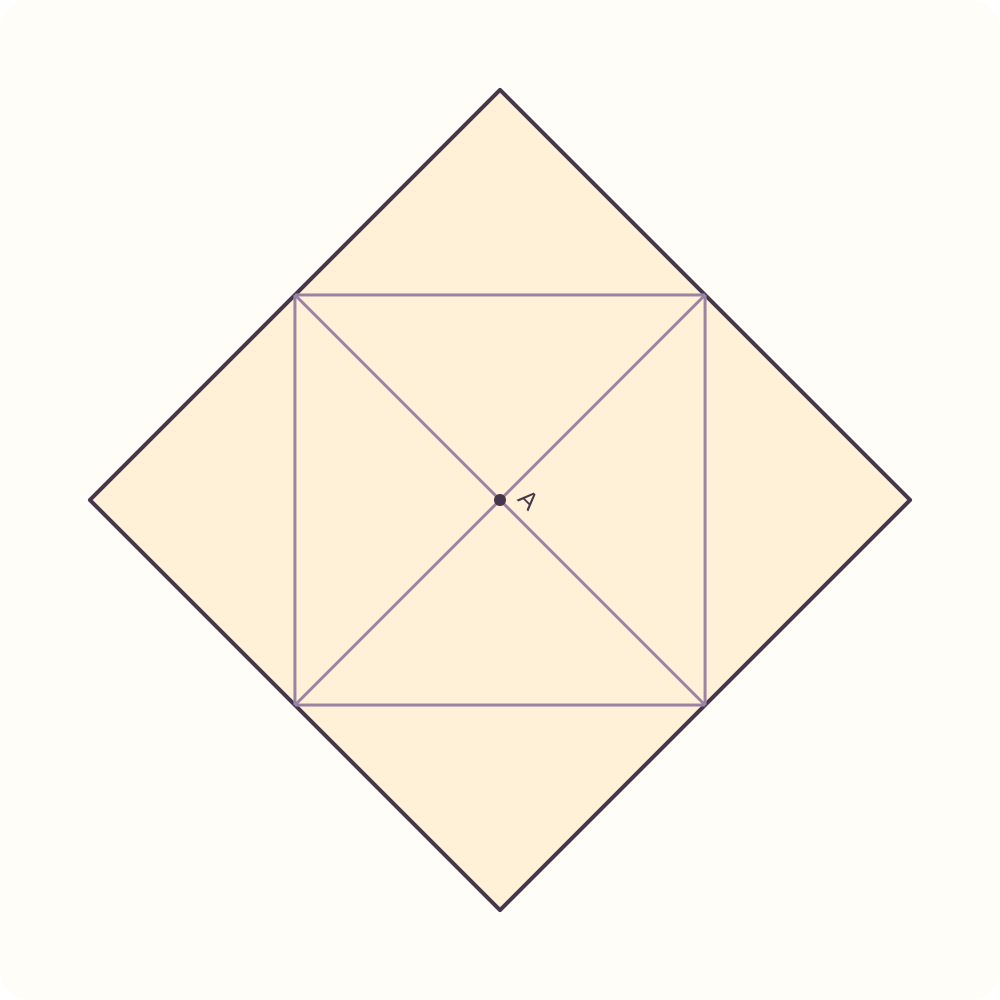
A diamond with the same preparation creases.
Step 9: Fold the top corner down
Bring the upper corner to the lower corner and press the horizontal fold joining the side corners. Leave this fold closed.
Orientation: The cream face folds inside; pink is now visible.
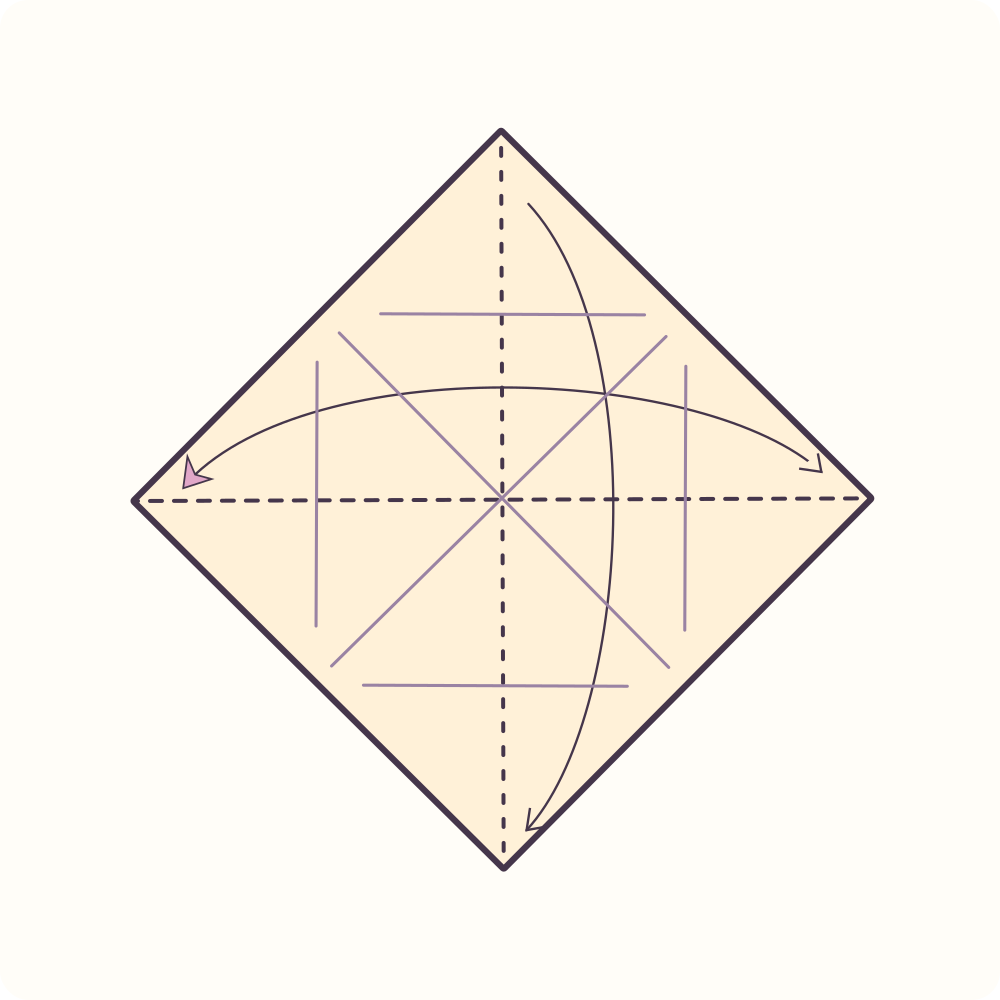
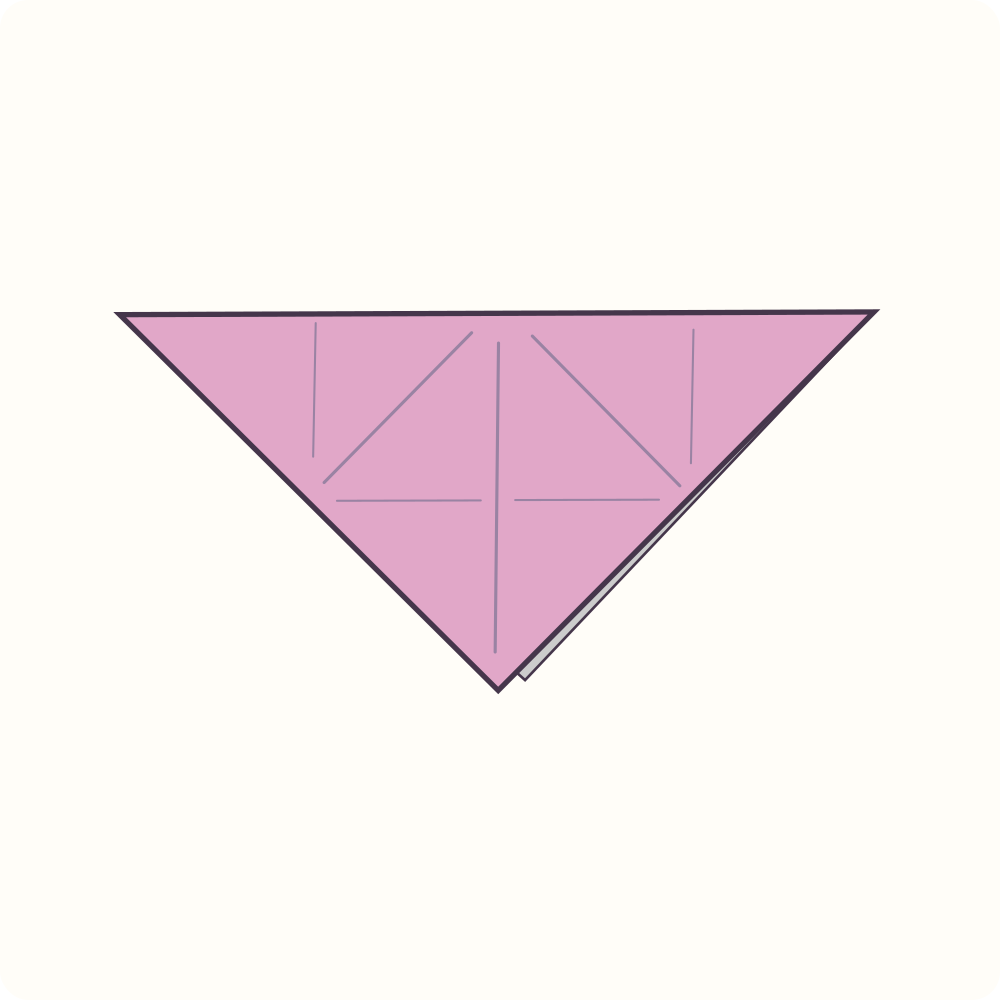
A triangle with a horizontal long edge and its point down.
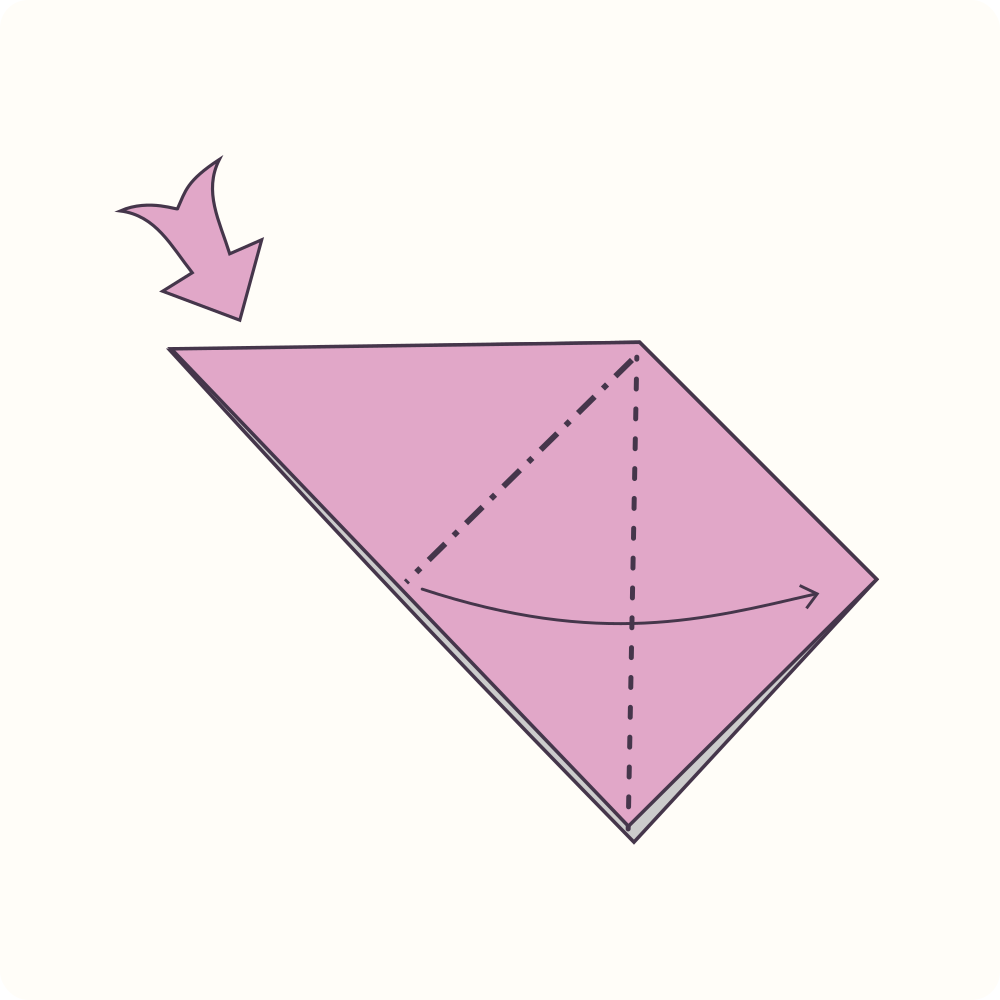
Step 10: Fold the left half across
Bring the left corner of the triangle to the right corner. Crease along the line from the long-edge midpoint to the lower point.
Orientation: Keep the lower point down; move both layers together.
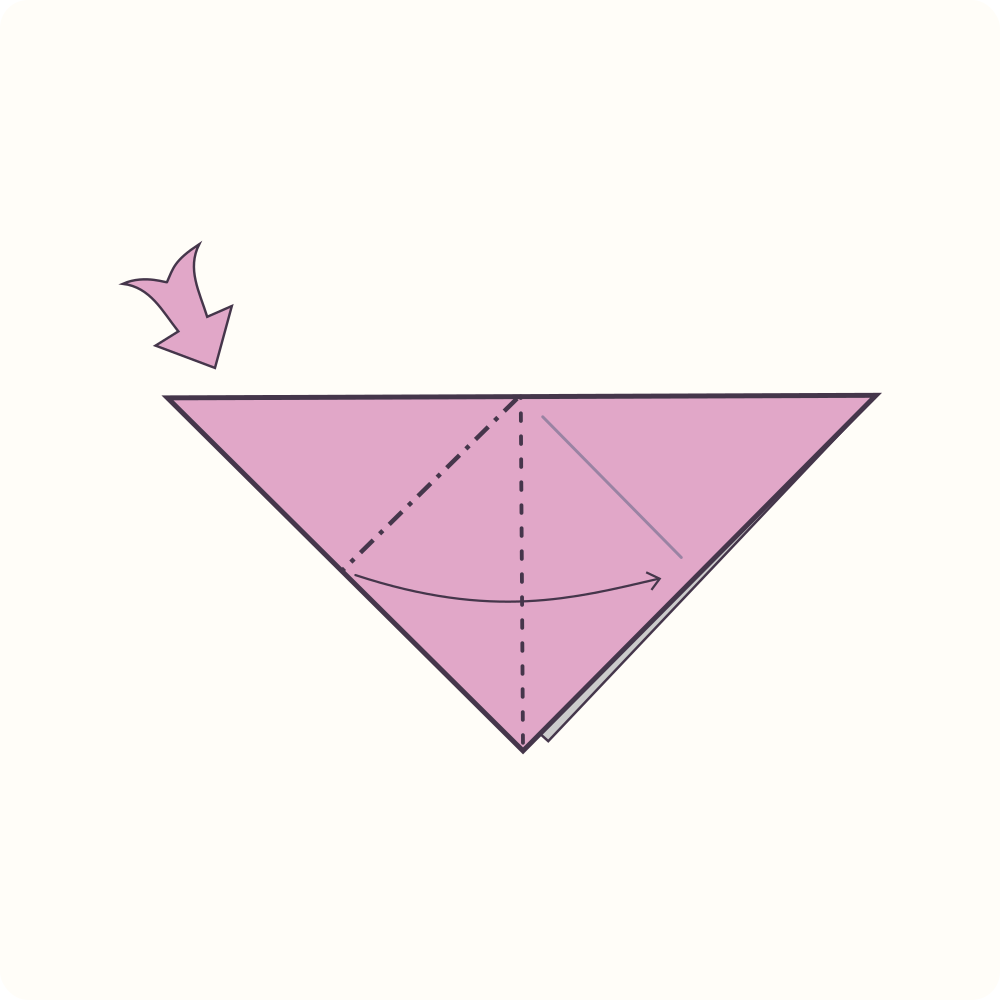
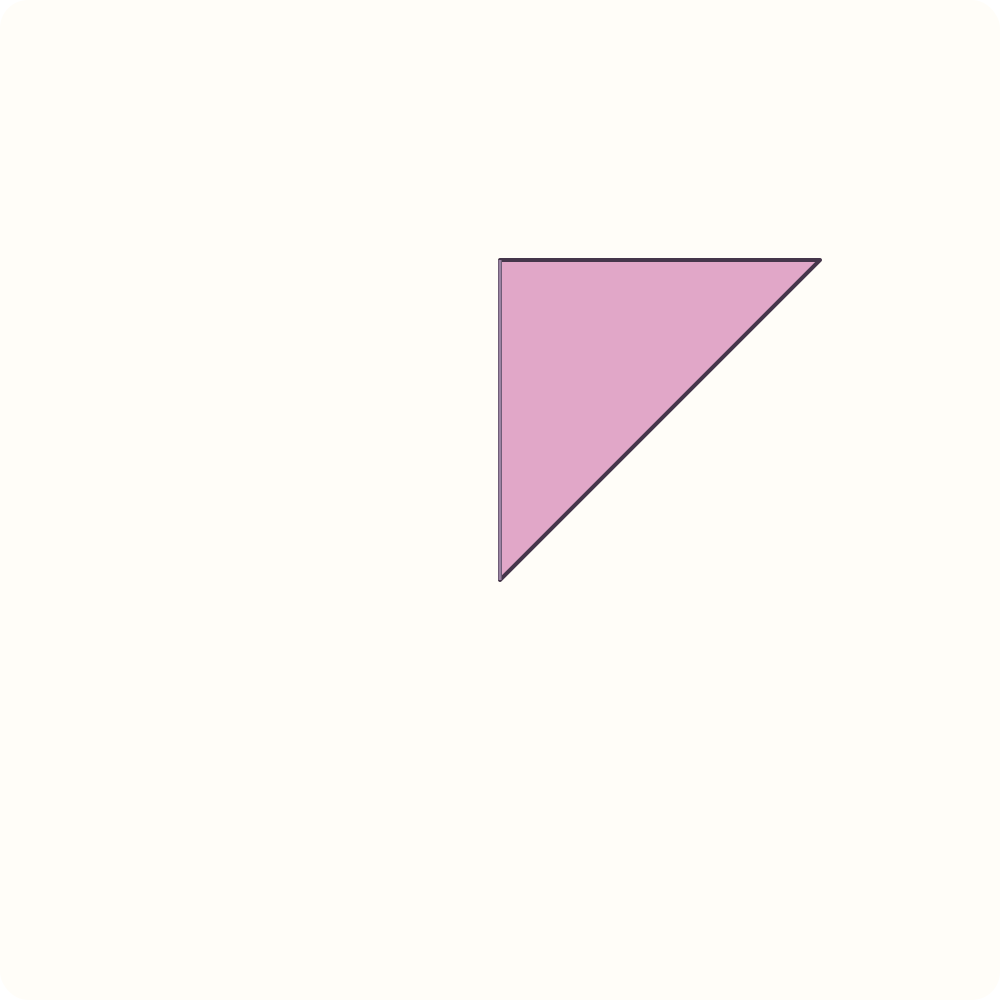
A half-triangle, with the folded packet on the right.
Step 11: Open and flatten the front pocket
Separate the uppermost triangular pocket. Open it from its free edge and lower it so the pocket seam lies over the vertical centre; flatten its two sides.
Orientation: Move one pocket, leaving the rear triangular flap in place.
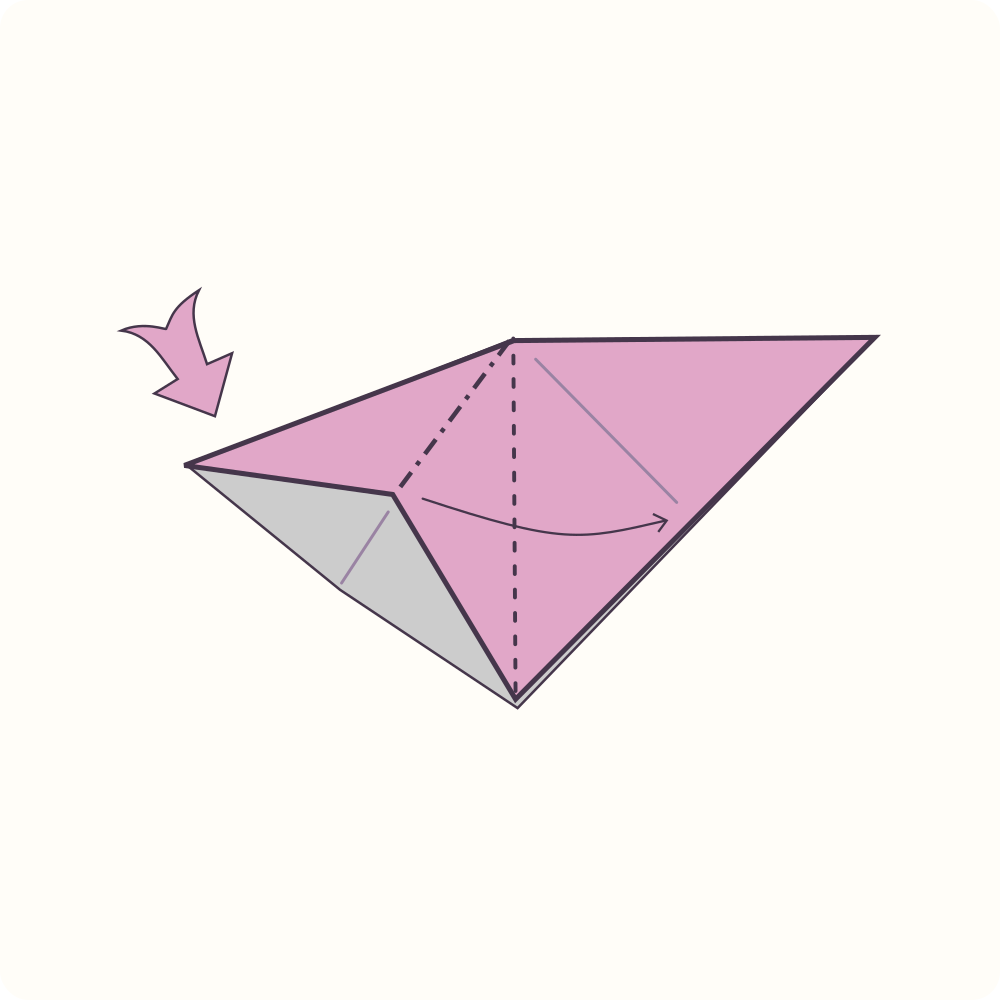
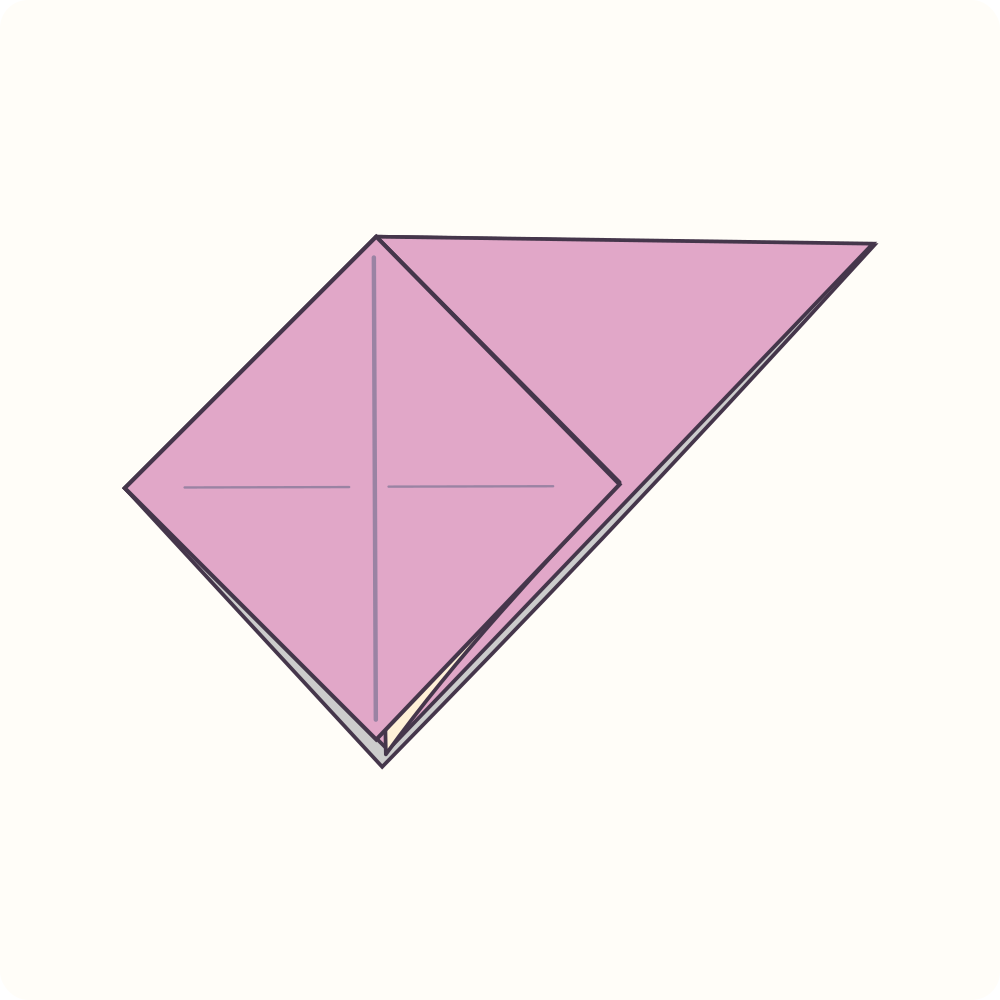
A front diamond with an unworked triangular flap behind it.
Step 12: Turn the whole packet over
Turn the complete piece over from left to right, like a book page. Keep the lower point down.
Orientation: Change the visible face; do not rotate on the table.
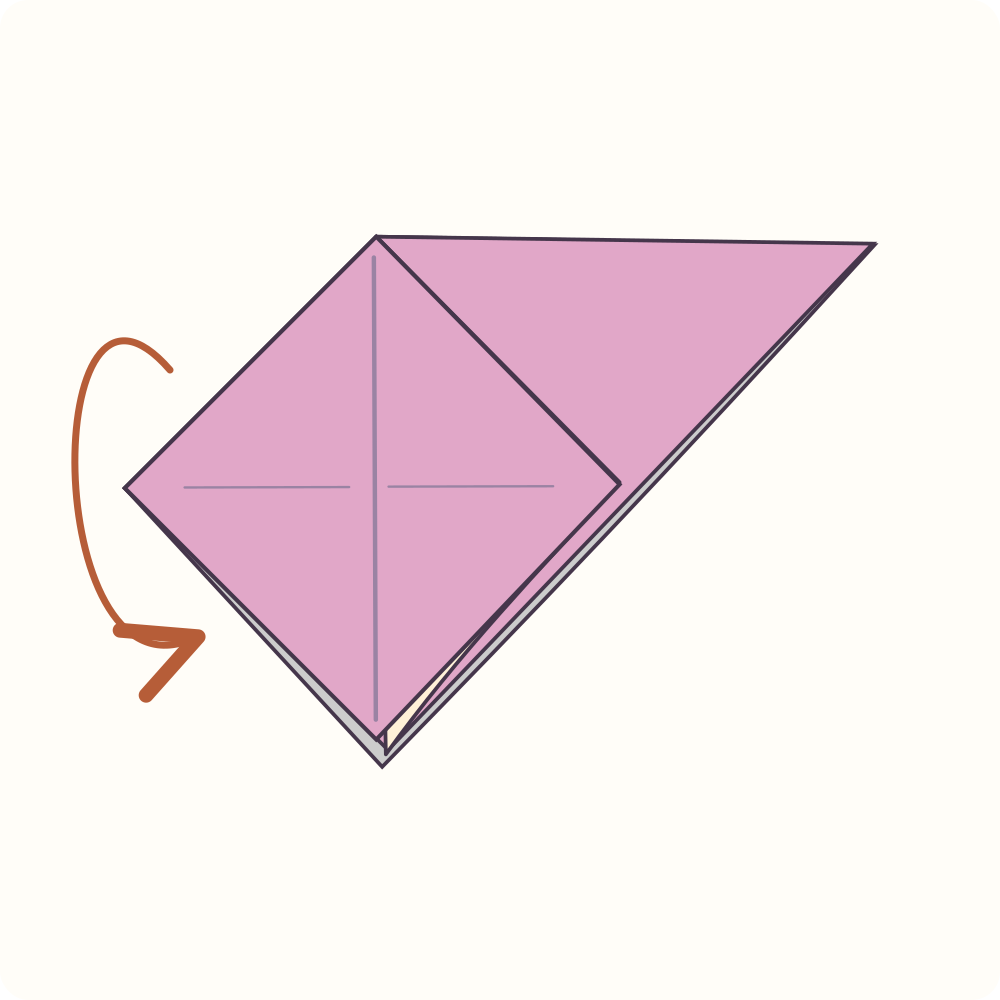
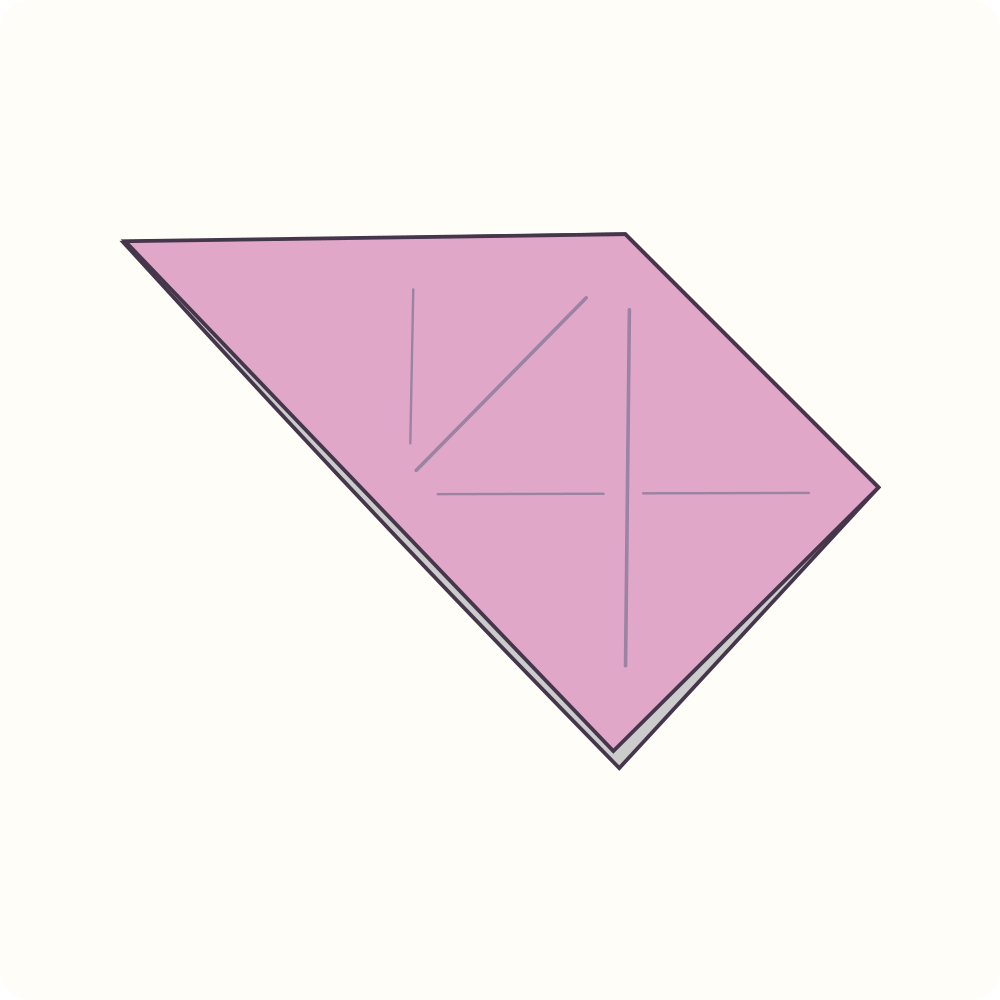
The remaining triangular pocket faces you.
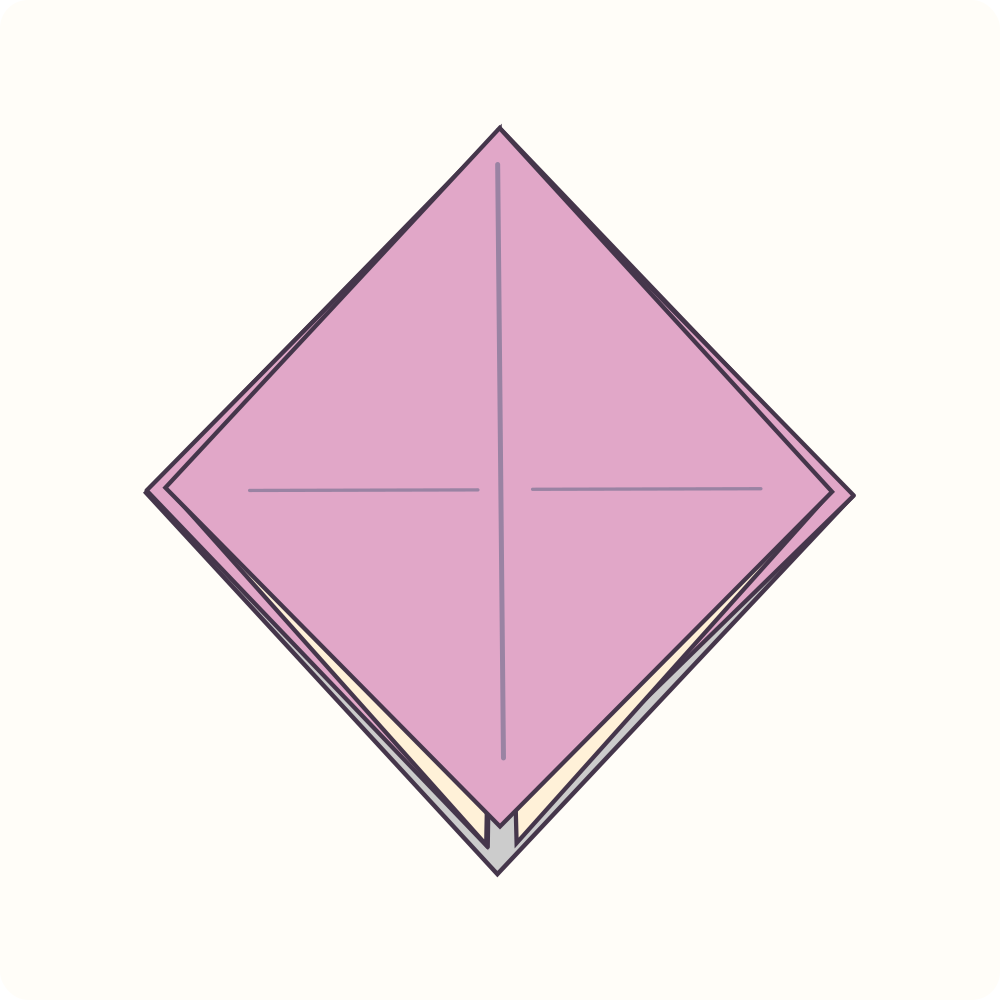
Step 13: Flatten the second pocket
Open the remaining triangular pocket and centre its seam as in step 11. Press its two sides flat.
Orientation: The square base now has a closed point at the top and four flaps at the bottom.
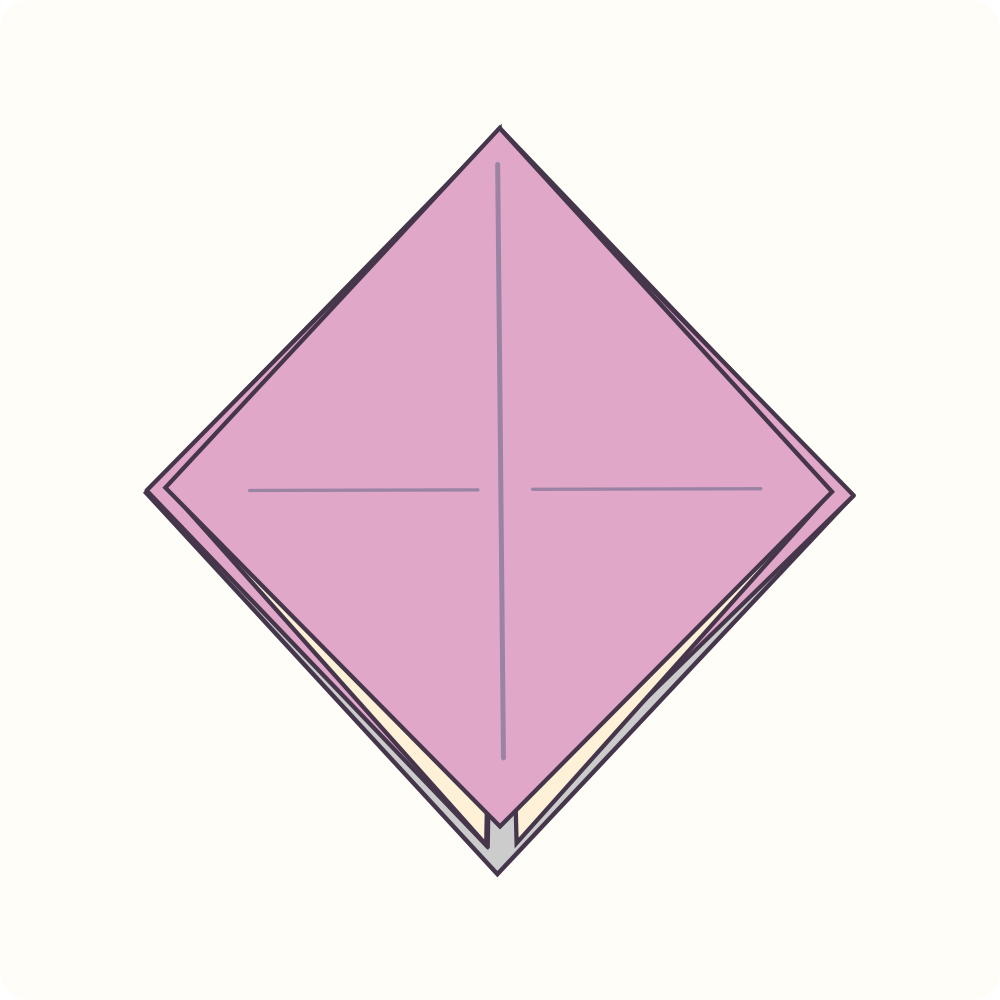
A layered diamond, called a square or preliminary base.
Step 14: Prepare the first squash pocket
Swing only the front-right flap to the left along the vertical centre, press lightly, then return it to the right. This loosens its long hinge.
Orientation: Closed point up; other layers remain still.
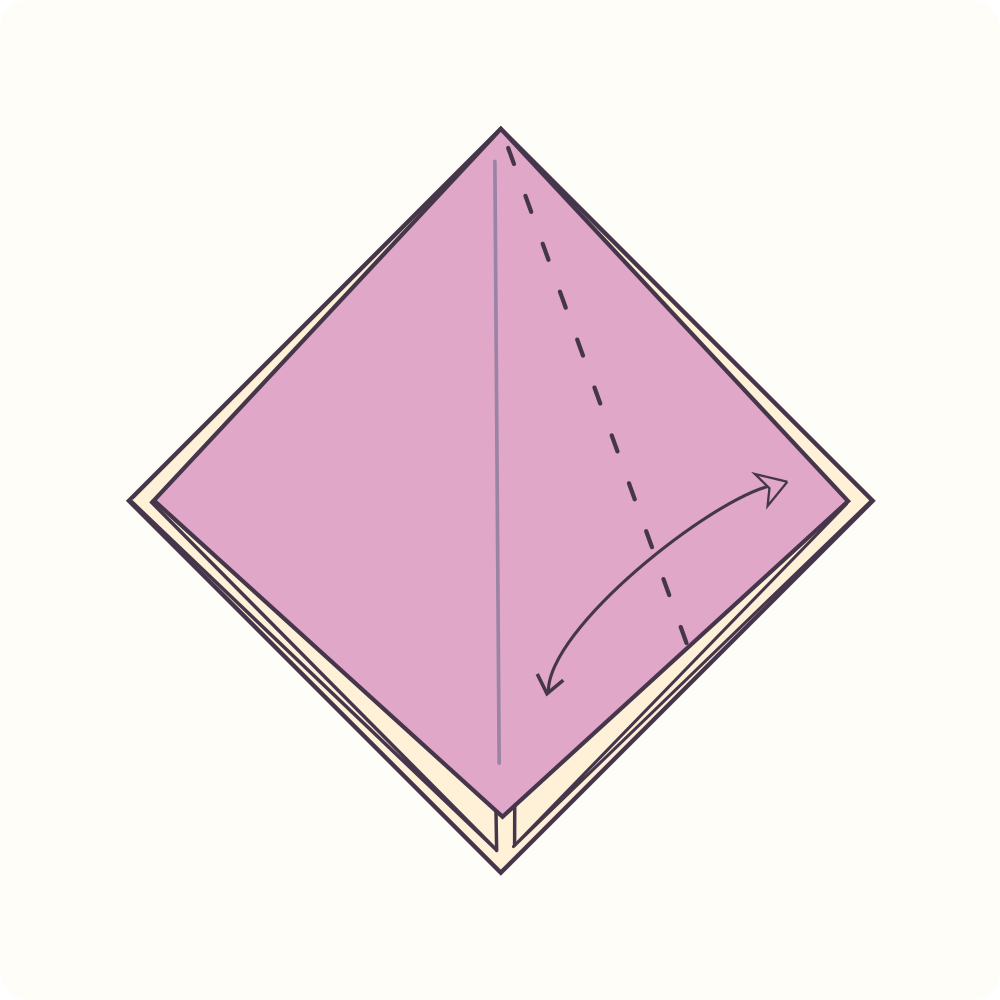
The original diamond is open again, with the selected hinge prepared.
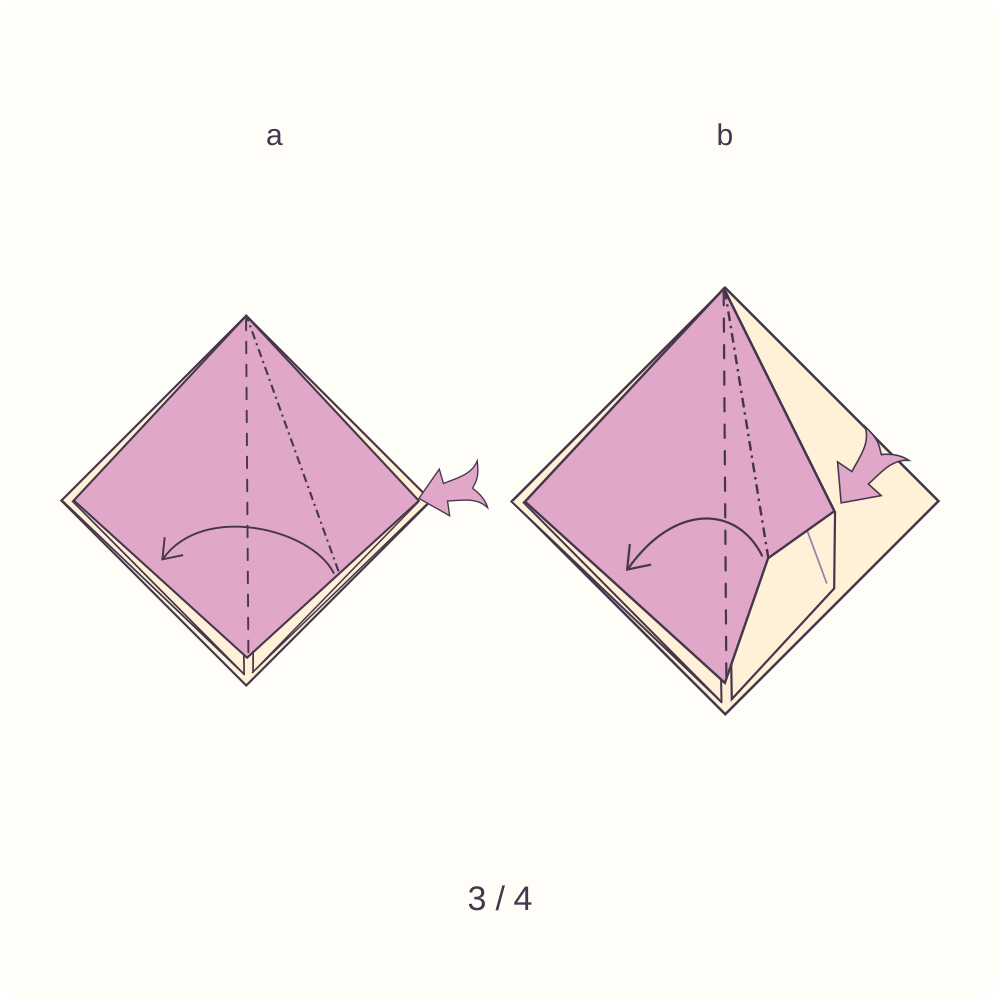
Step 15: Squash the first triangular flap
Raise the selected front-right flap, open its pocket and bring its long outer ridge over the centre line. Lower the two sides of that pocket together. The two detail views show the same action opening and flattening.
Orientation: One triangular pocket moves; the upper closed point stays up.
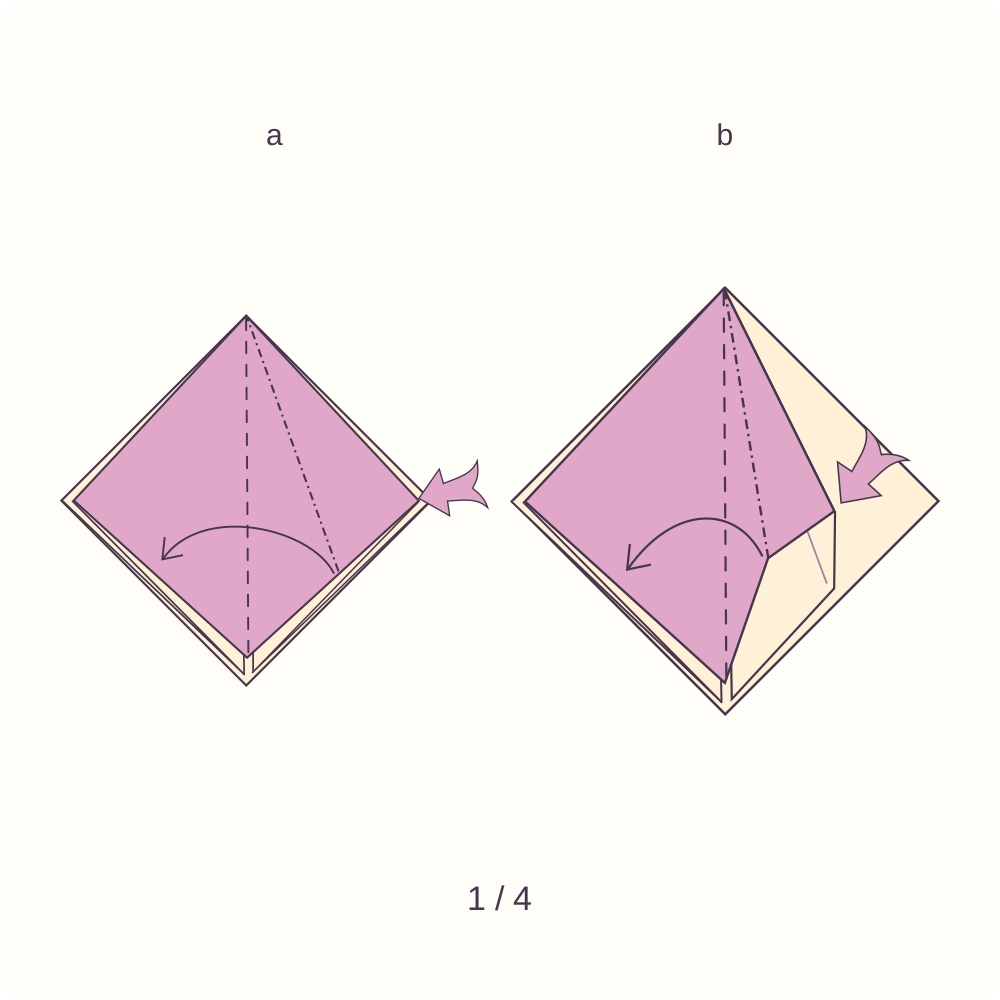
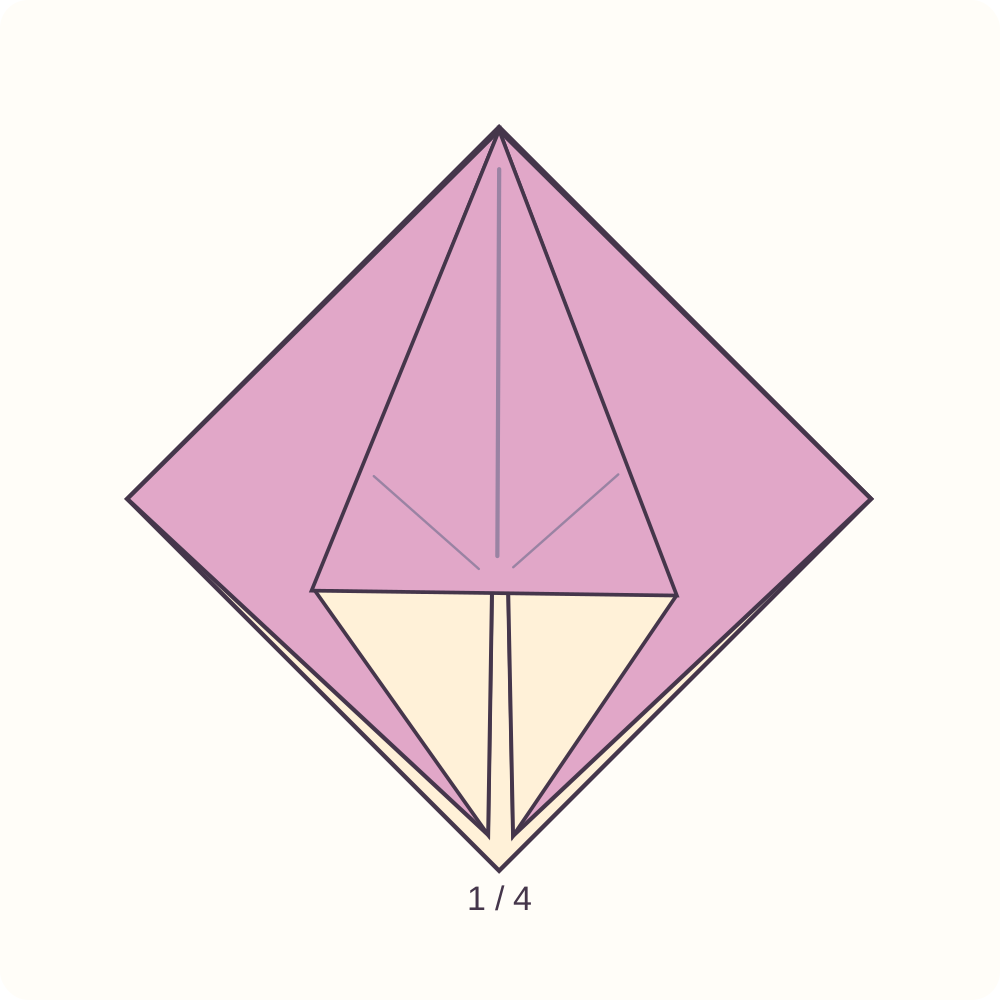
A narrow kite on the front of the remaining square base.
Step 16: Expose the second triangular flap
Pass the finished narrow front flap to the left like a page until the next unsquashed triangular pocket is on the right.
Orientation: Do not turn the whole piece over or crease a new diagonal.
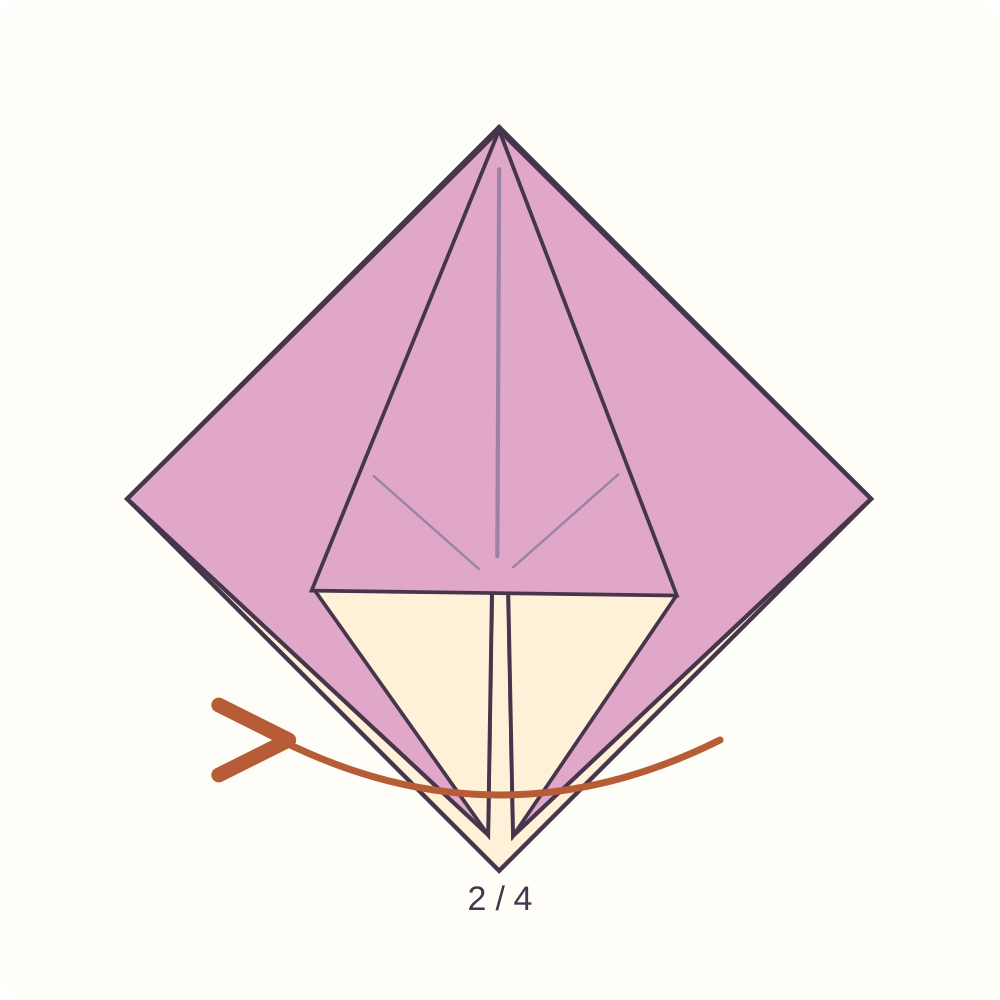
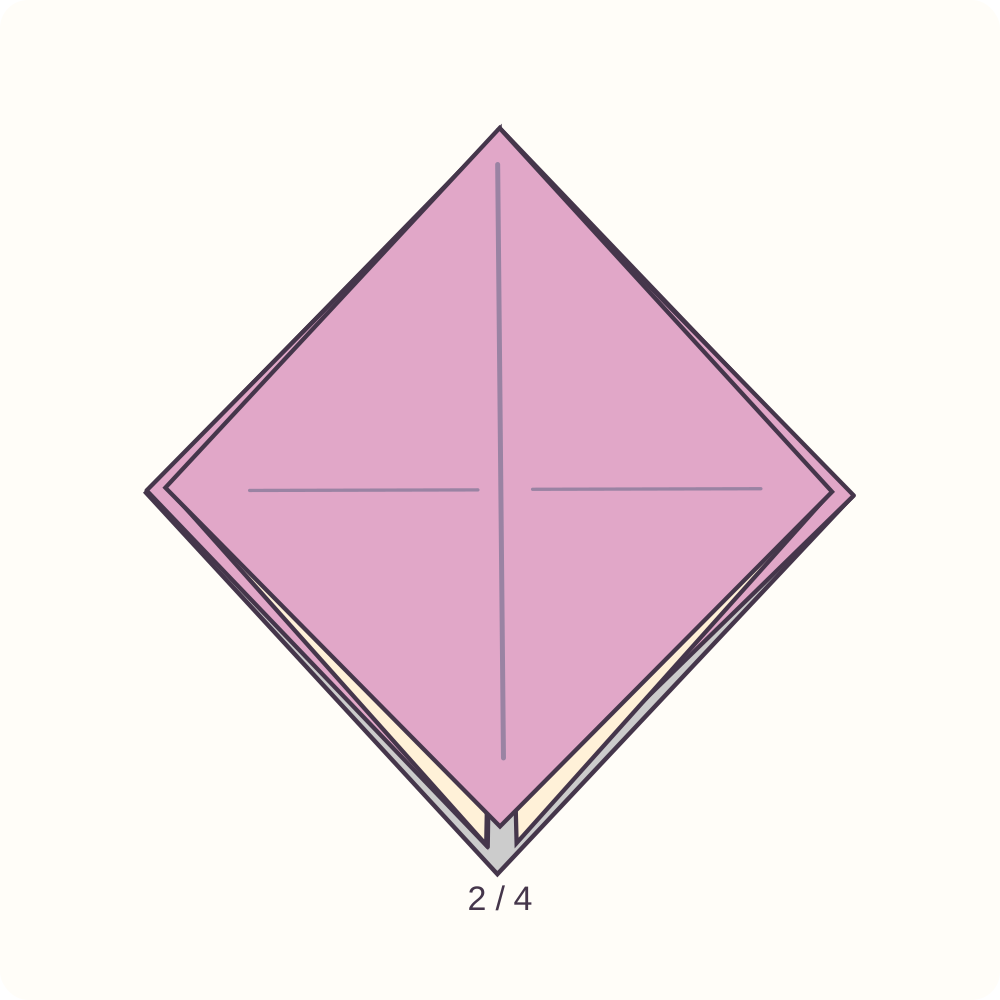
A new right-hand triangular pocket is accessible.
Step 17: Squash the second flap
Open that unworked pocket, centre its long ridge and lower its two sides as in step 15. Keep the first finished flap folded behind.
Orientation: Second of four pockets; closed point up.
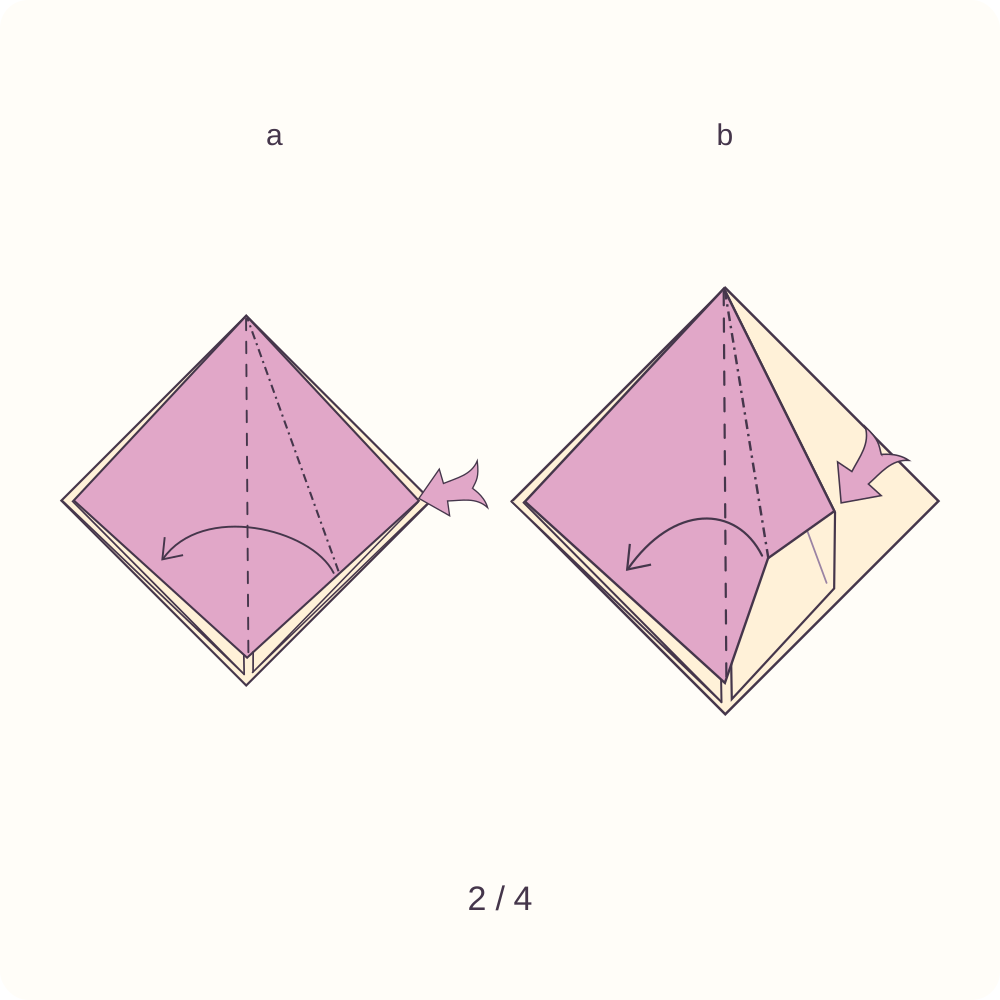
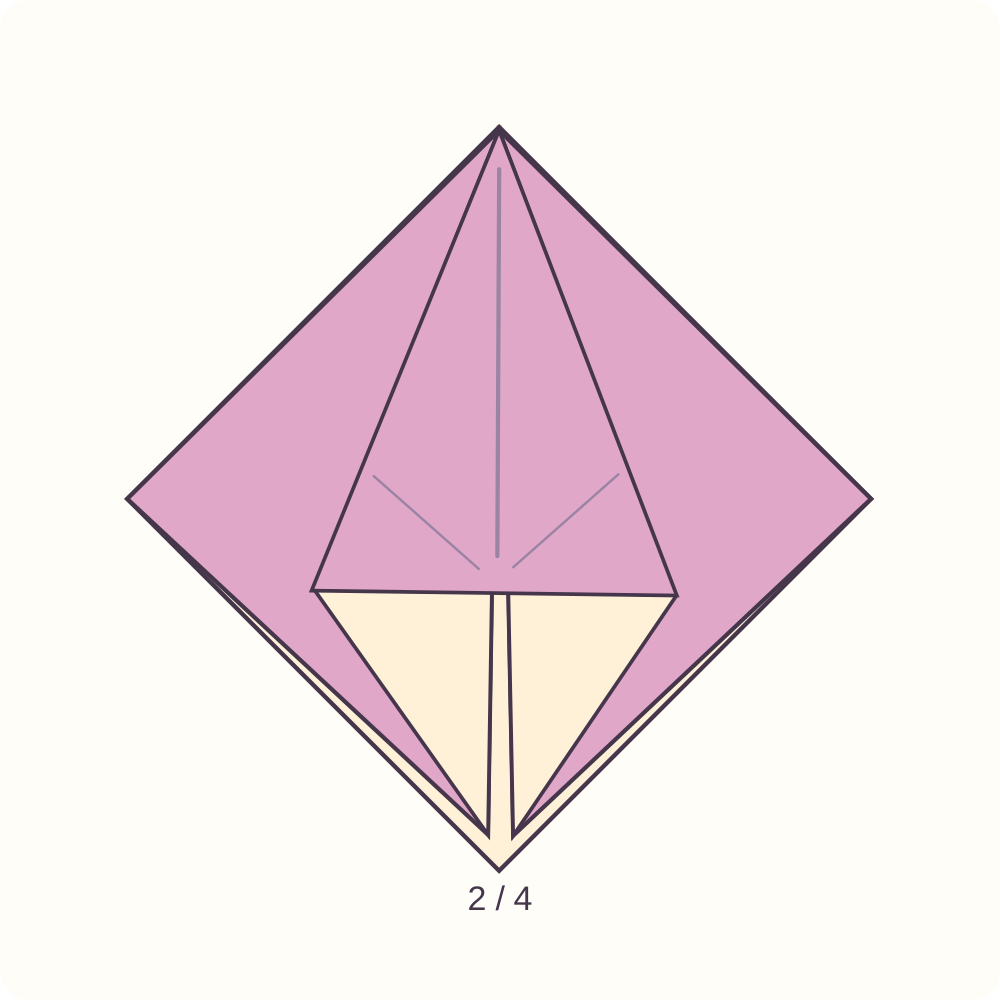
A second narrow squash-fold face.
Step 18: Turn to the back pair
Turn the complete piece over from left to right. Keep the closed point at the top and locate one of the two triangular pockets that still has a broad outer corner.
Orientation: The two finished squash folds are now behind.
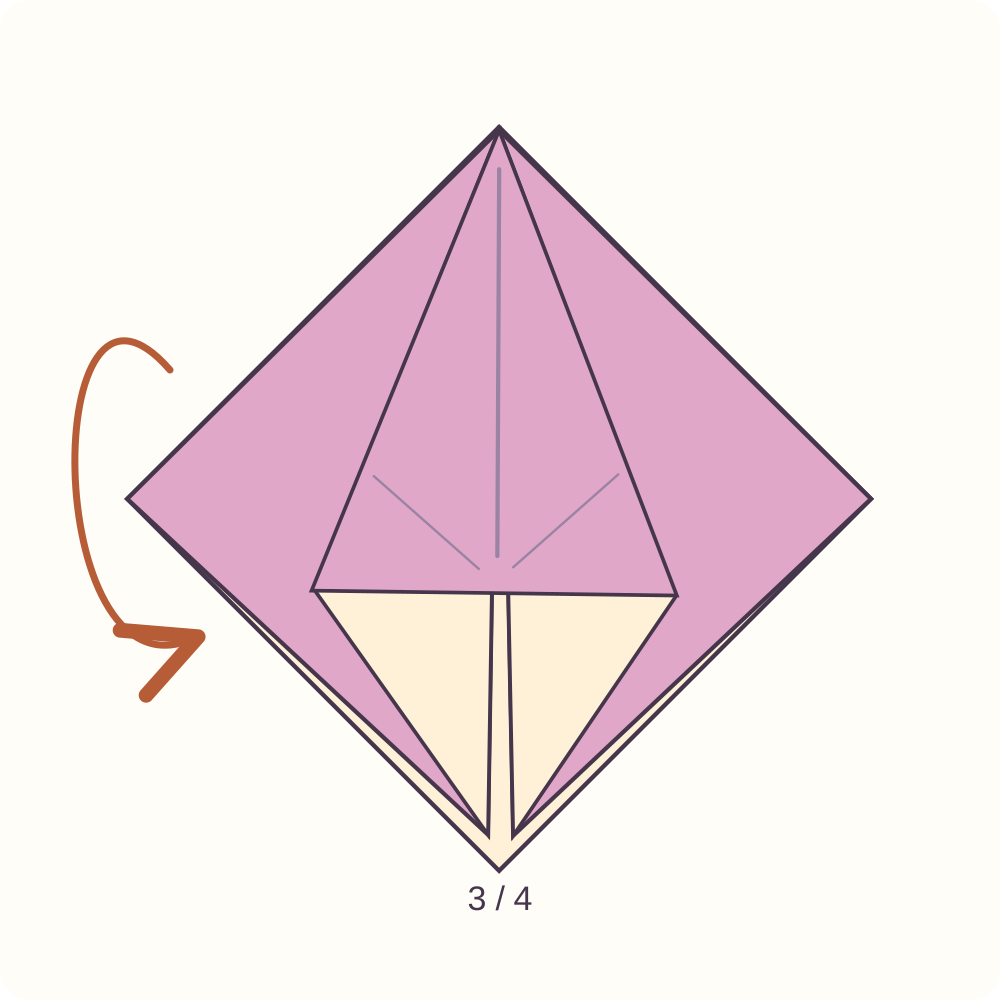
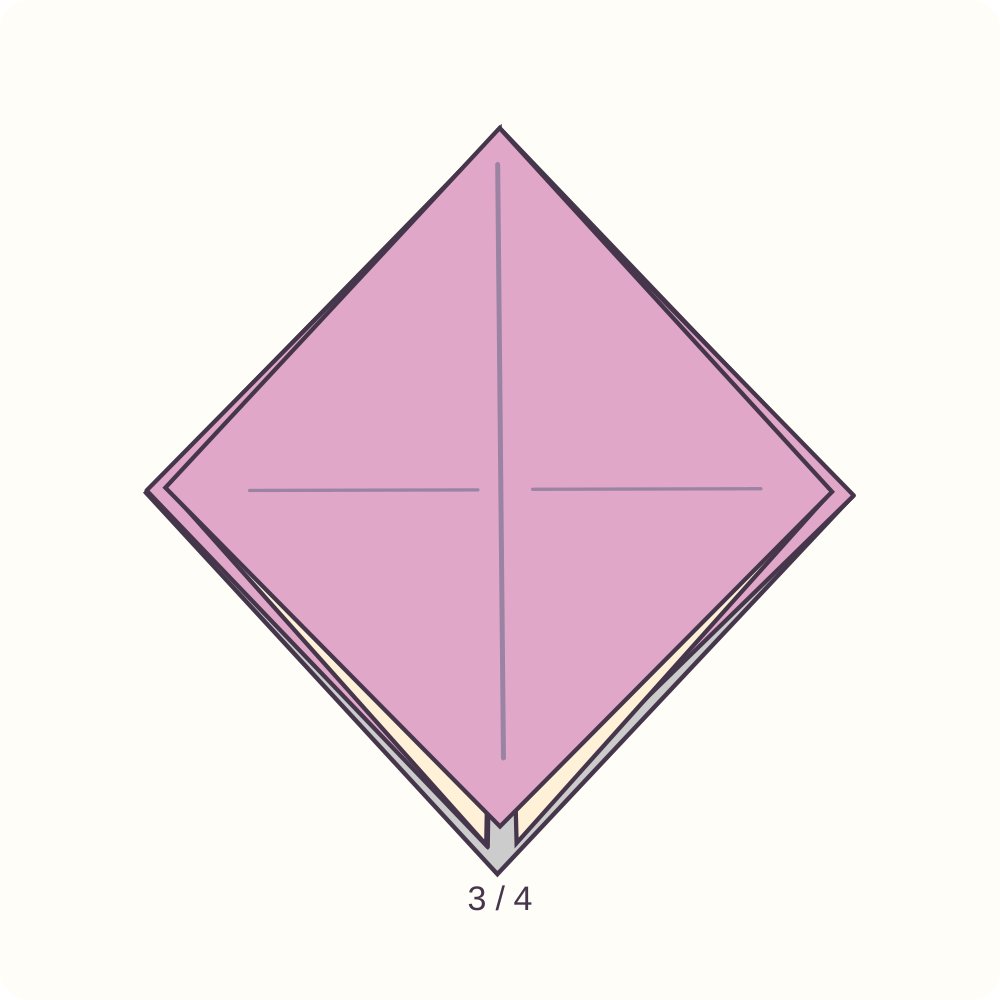
The third unworked triangular pocket faces you.
Step 19: Squash the third flap
Raise and open the third triangular pocket, centre its outer ridge and flatten its two sides. Use the same pocket opening as in step 15.
Orientation: Third of four pockets; do not unfold the finished faces.
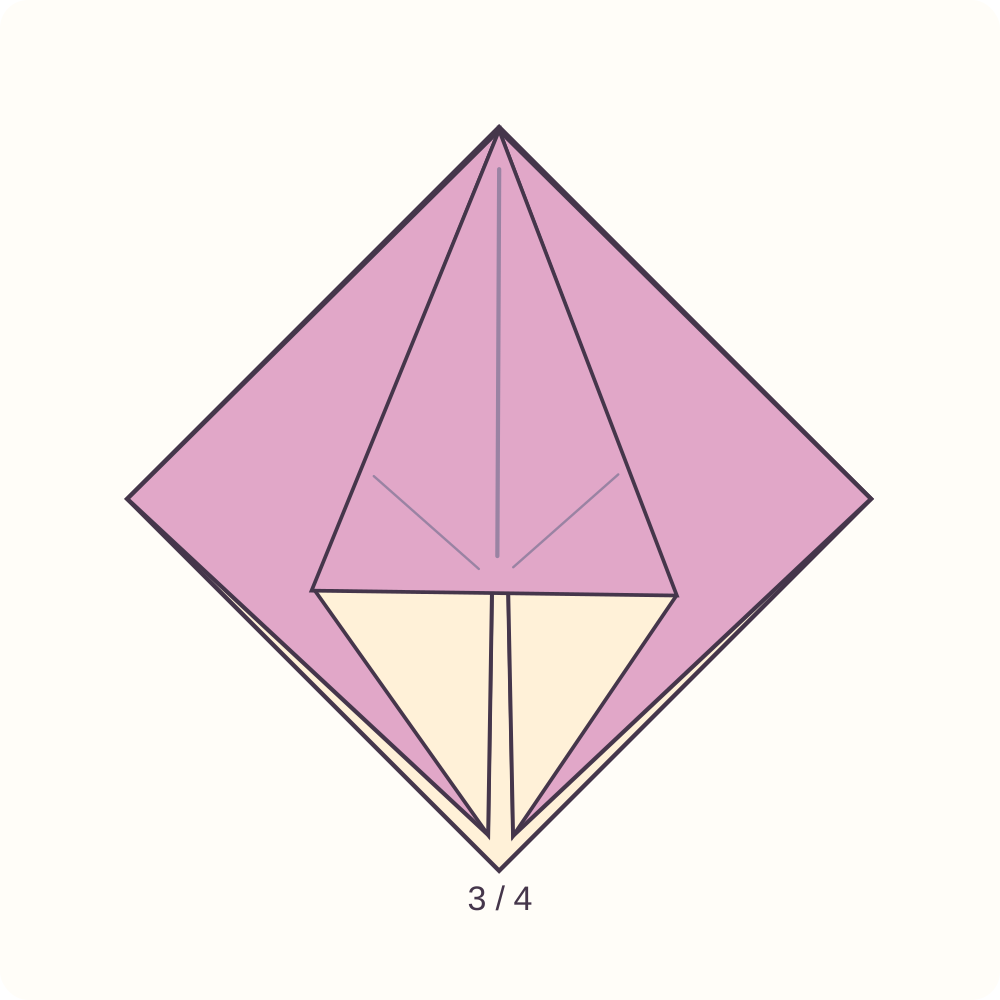
Three narrow squash folds are complete.
Step 20: Expose the last broad pocket
Pass the narrow face like a page until the last broad triangular pocket is available. Leave the three completed pockets folded.
Orientation: Closed point up; look for the only broad corner not yet squashed.
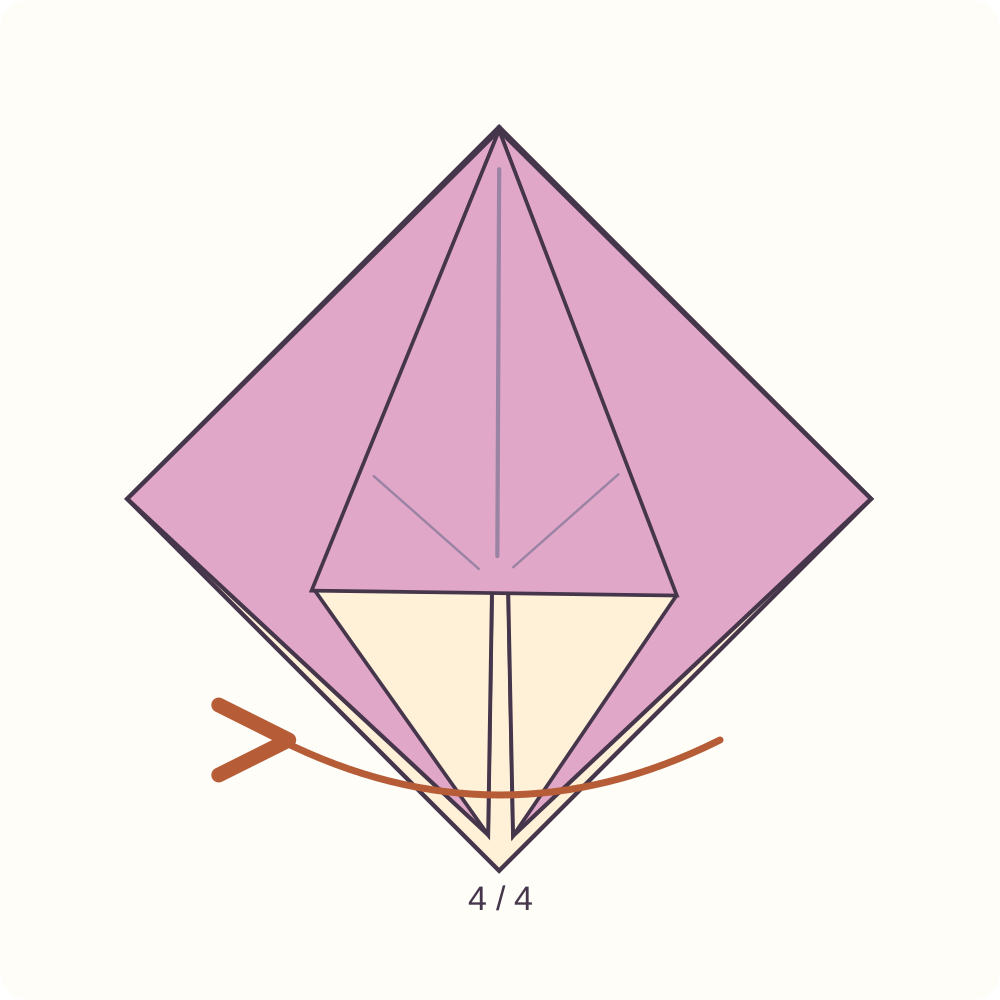
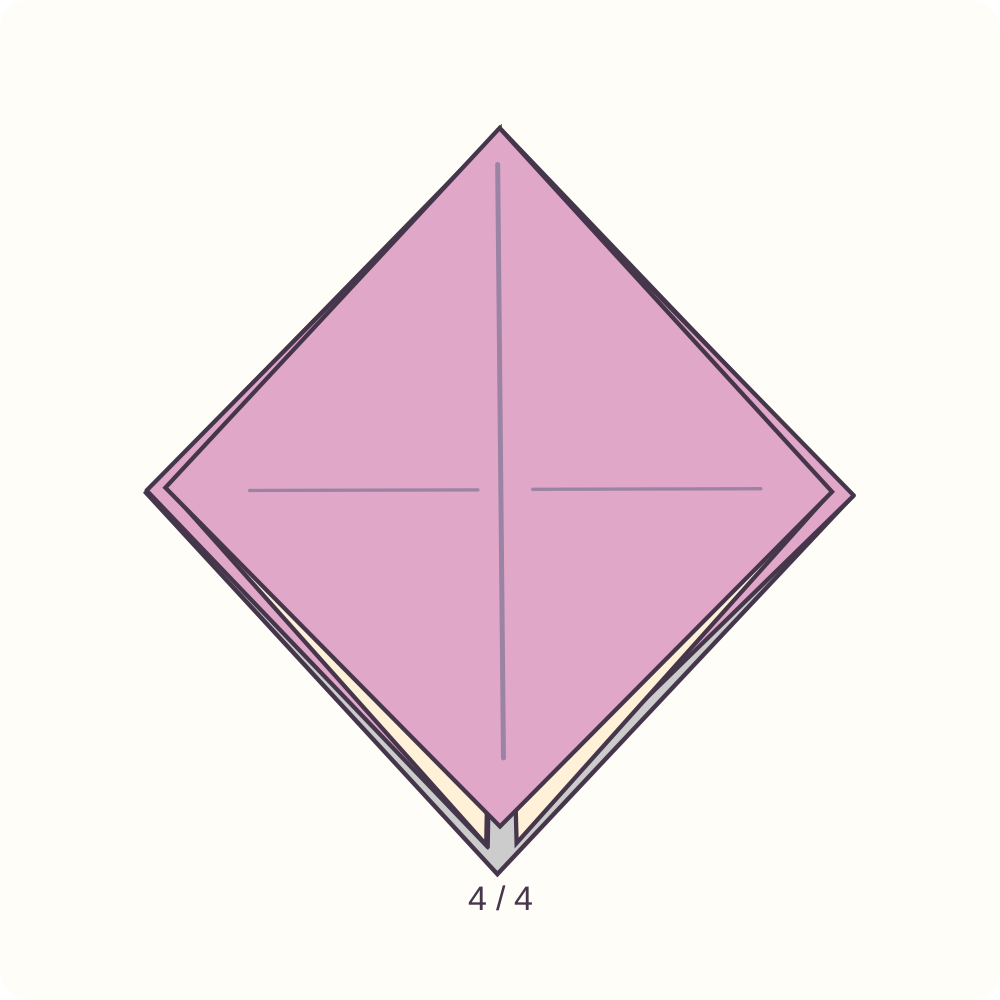
The fourth triangular pocket is ready.
Step 21: Squash the fourth flap
Open this final triangular pocket, centre its ridge and press the two sides down as before. Arrange the narrow faces evenly around the closed point.
Orientation: Fourth of four pockets; no broad triangular corners should remain.
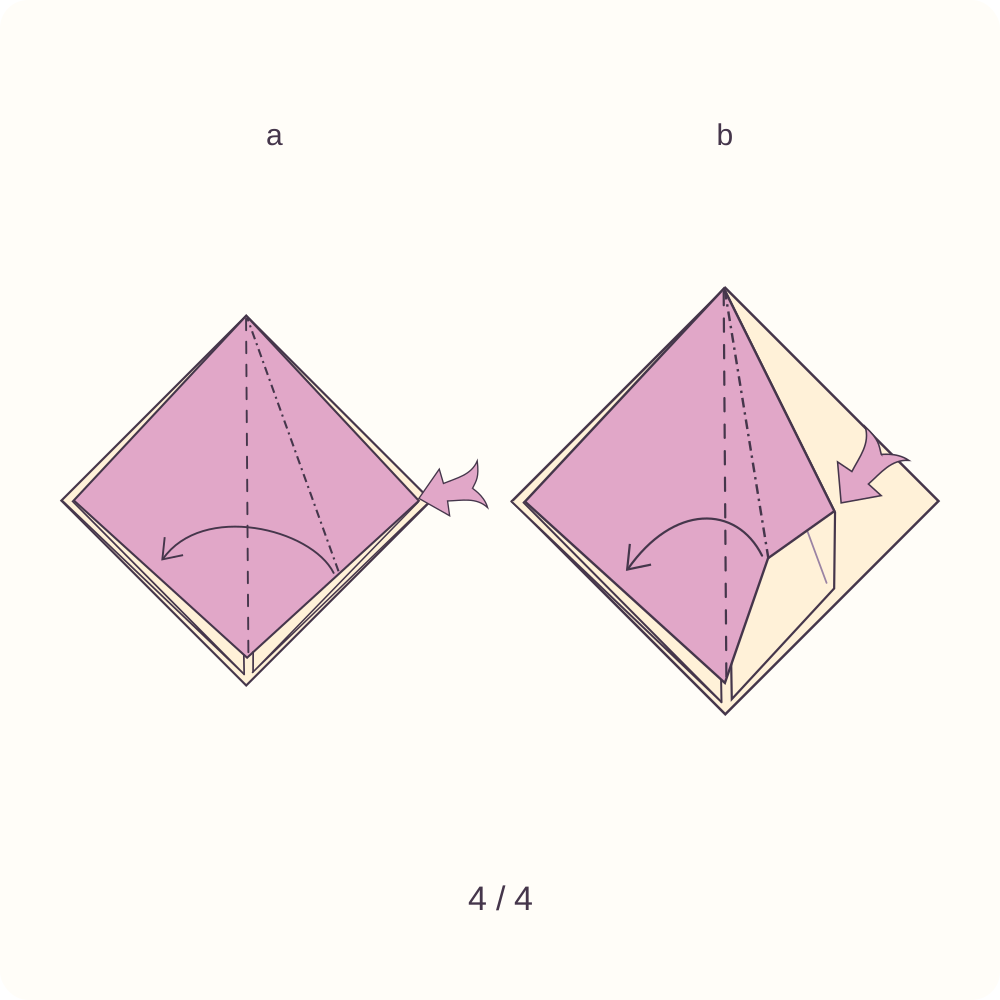
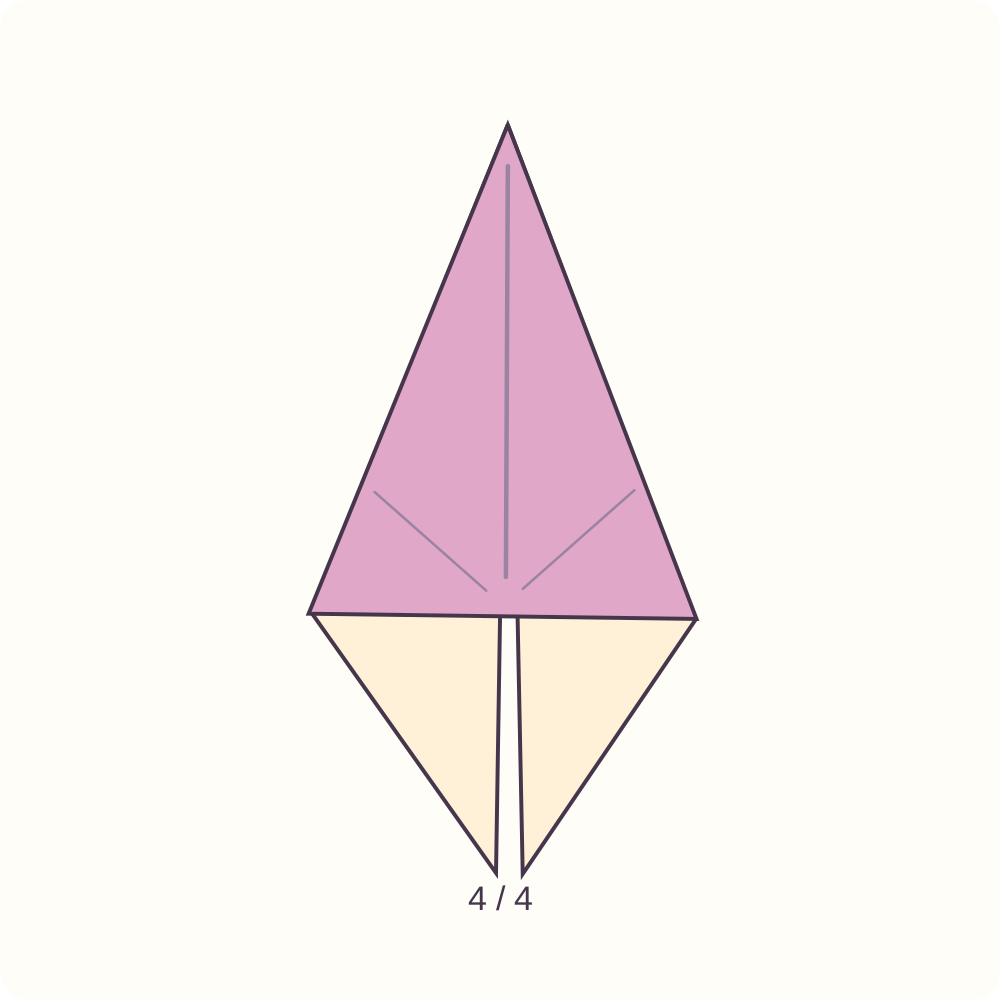
A narrow packet with four equivalent squash-fold faces.
Step 22: Prepare the first lower-left edge
On one narrow face, bring its lower-left sloping edge to the vertical centre. Press just that front layer and reopen it.
Orientation: Closed point up; move the edge between the left shoulder and the bottom tip.
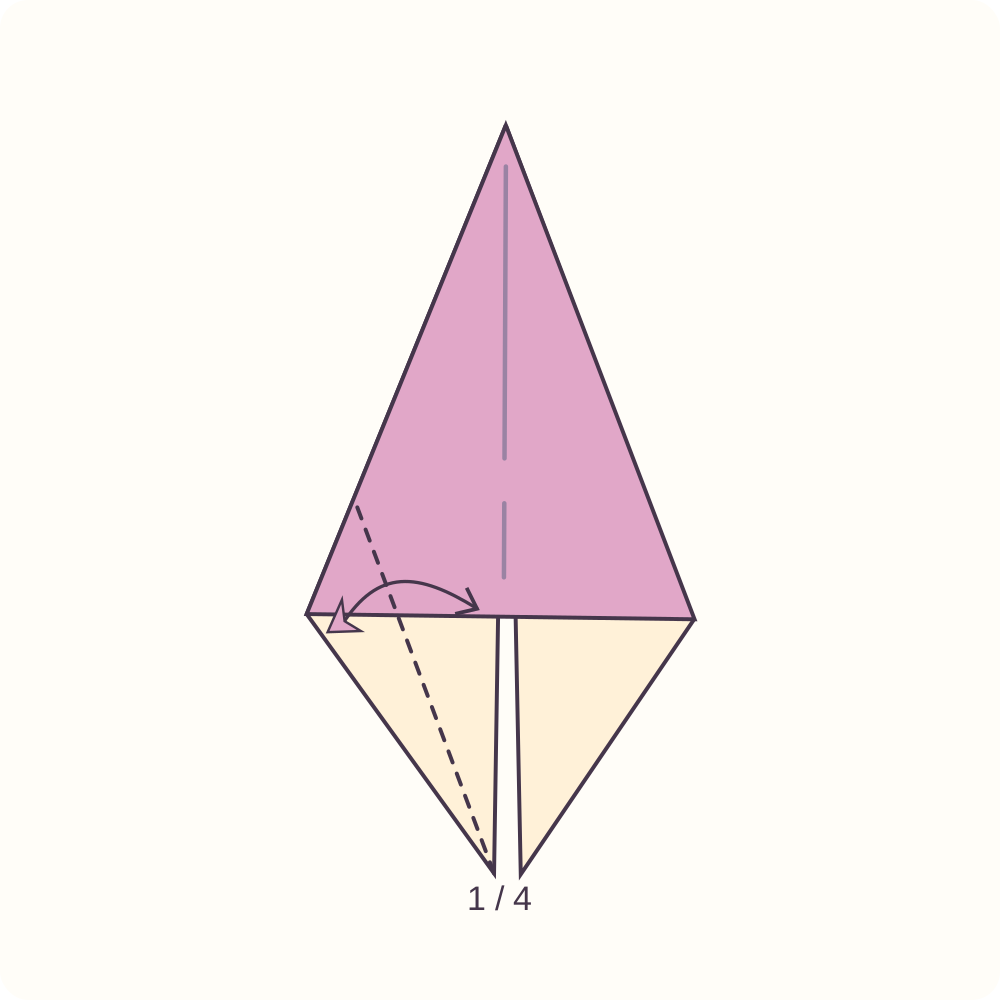
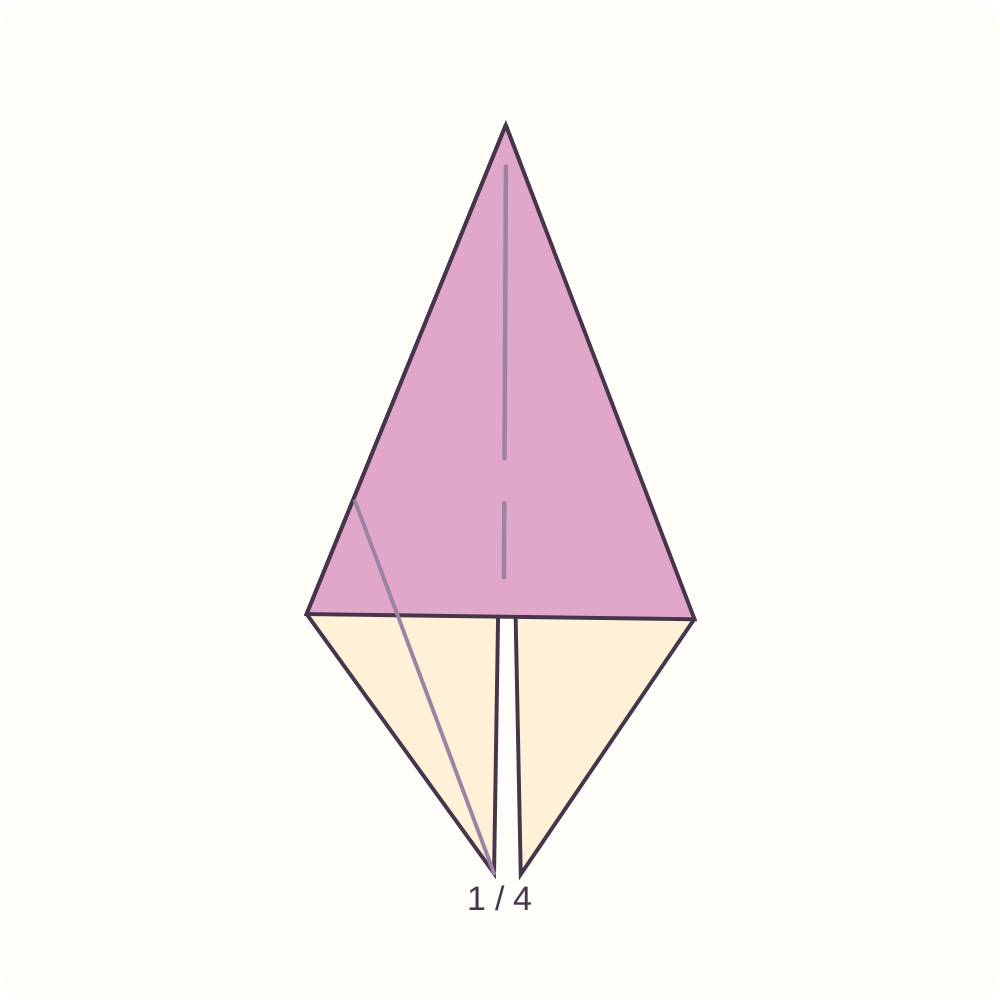
A left preparation crease on the selected face.
Step 23: Prepare the first lower-right edge
Bring the lower-right edge of the same face to the centre, press, then reopen. Both lower edges are open again before the next movement.
Orientation: Work only the same front face.
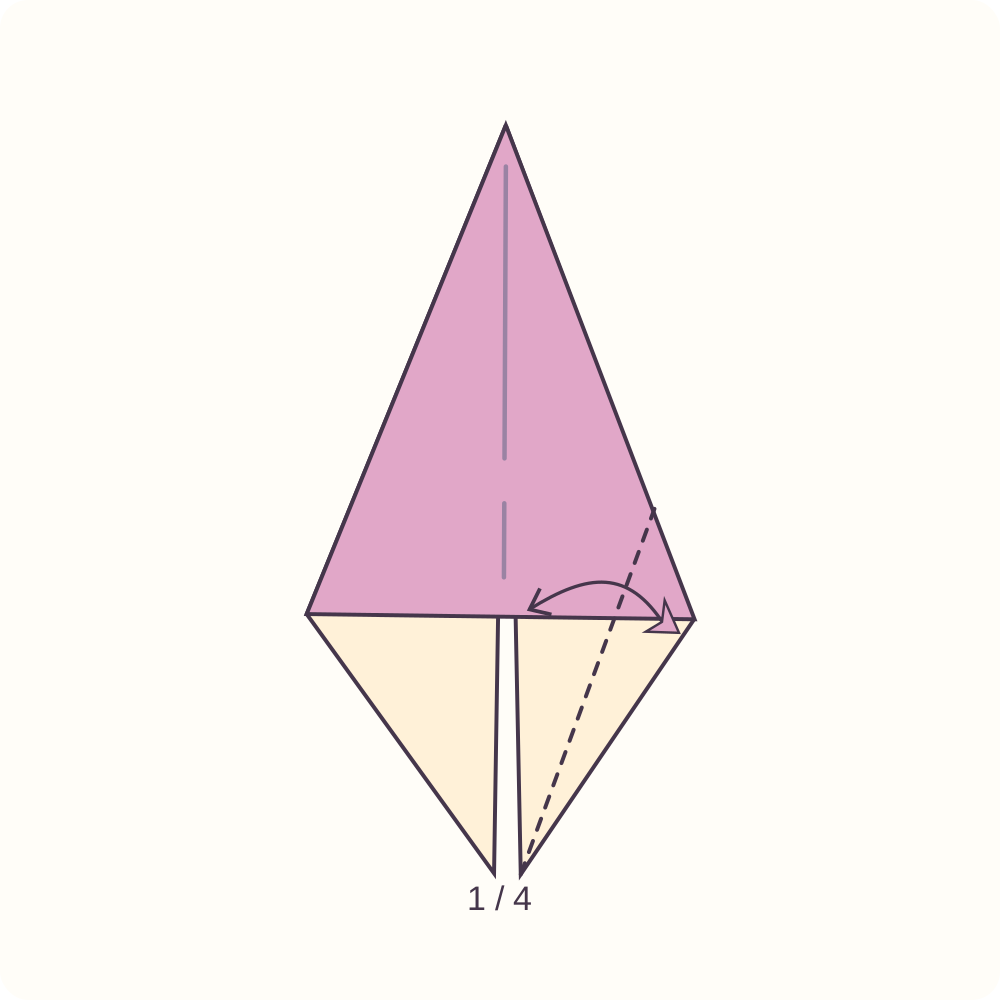
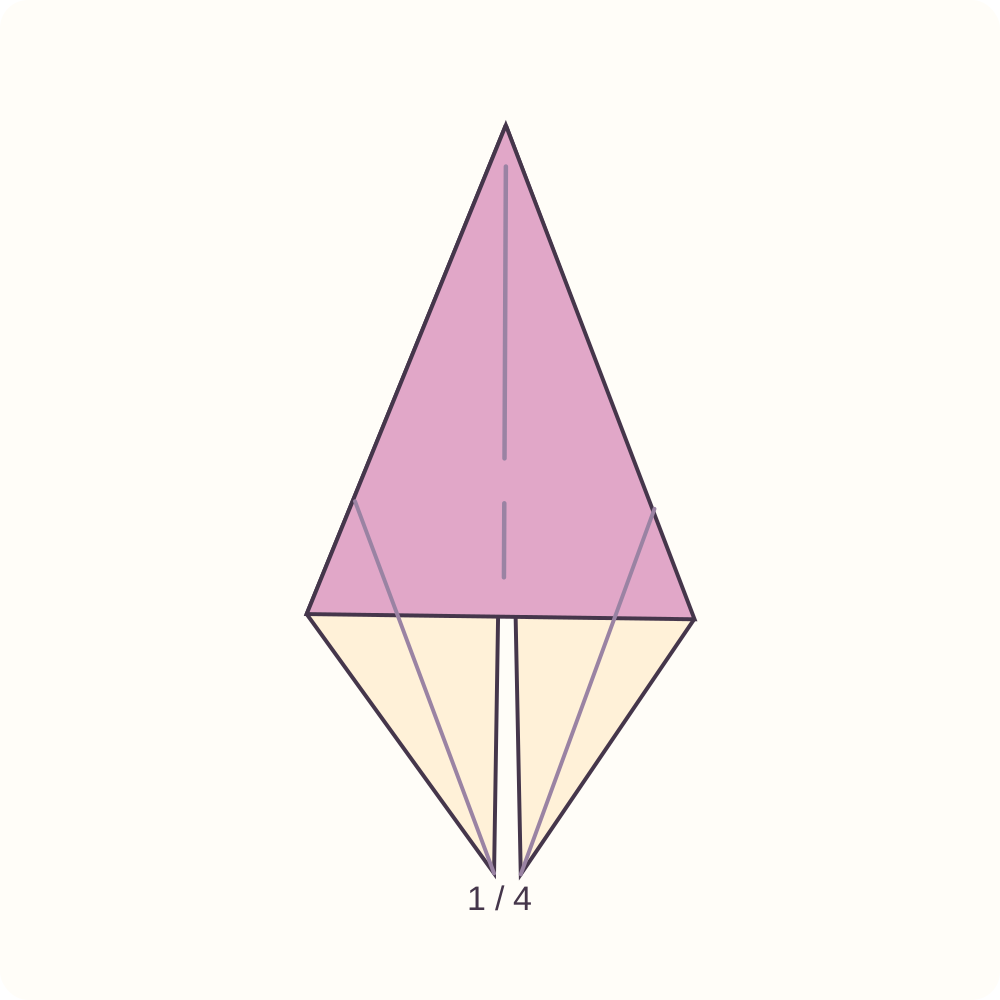
Two symmetrical lower preparation creases.
Step 24: Lift the first petal fold
Lift the bottom point of the front face upwards. As it rises, let its two lower edges fold in along the preparations from steps 22–23. Open the pocket only enough to guide those edges, then flatten the raised layer.
Orientation: One front face; the closed top point stays still.
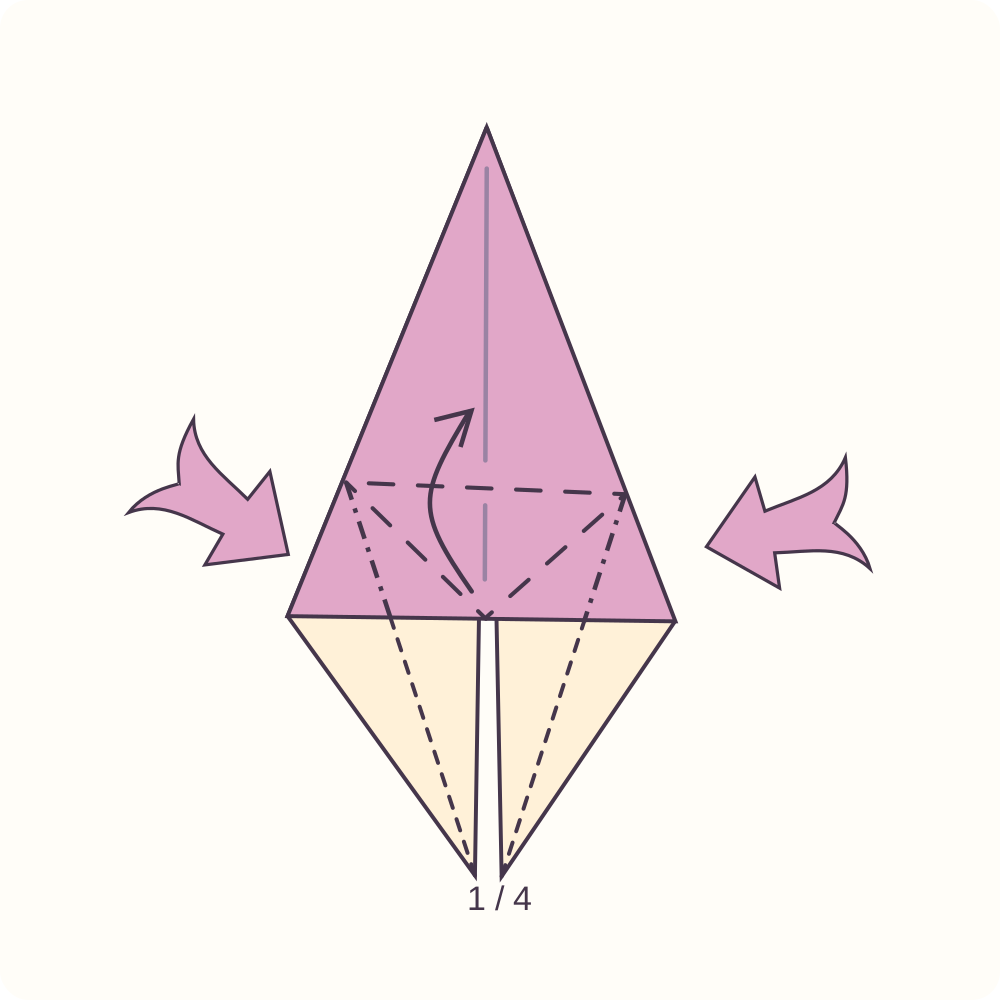
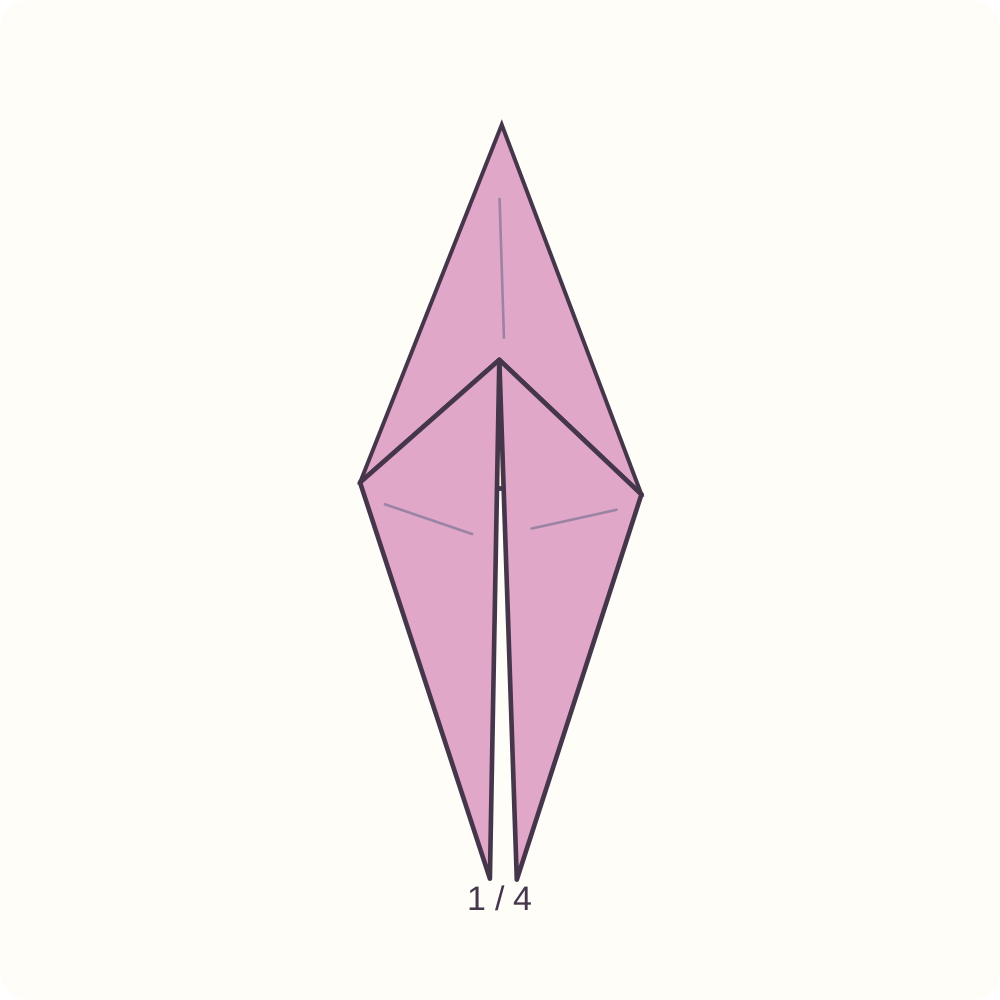
The petal fold is raised, with a small triangular flap crossing the middle.
Step 25: Lower the small centre triangle
Fold the small raised triangle at the middle down along its horizontal base. This triangle is much shorter than the long outer point.
Orientation: Only the small central triangle moves.
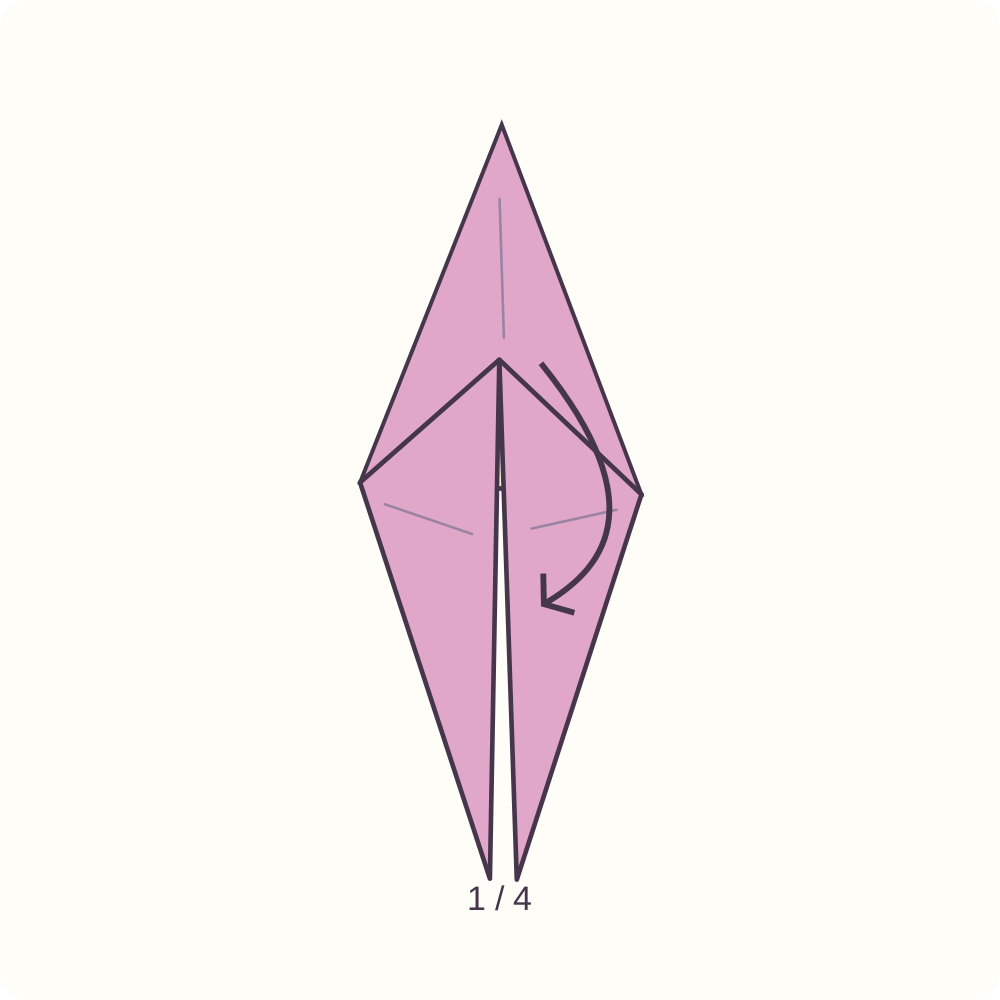
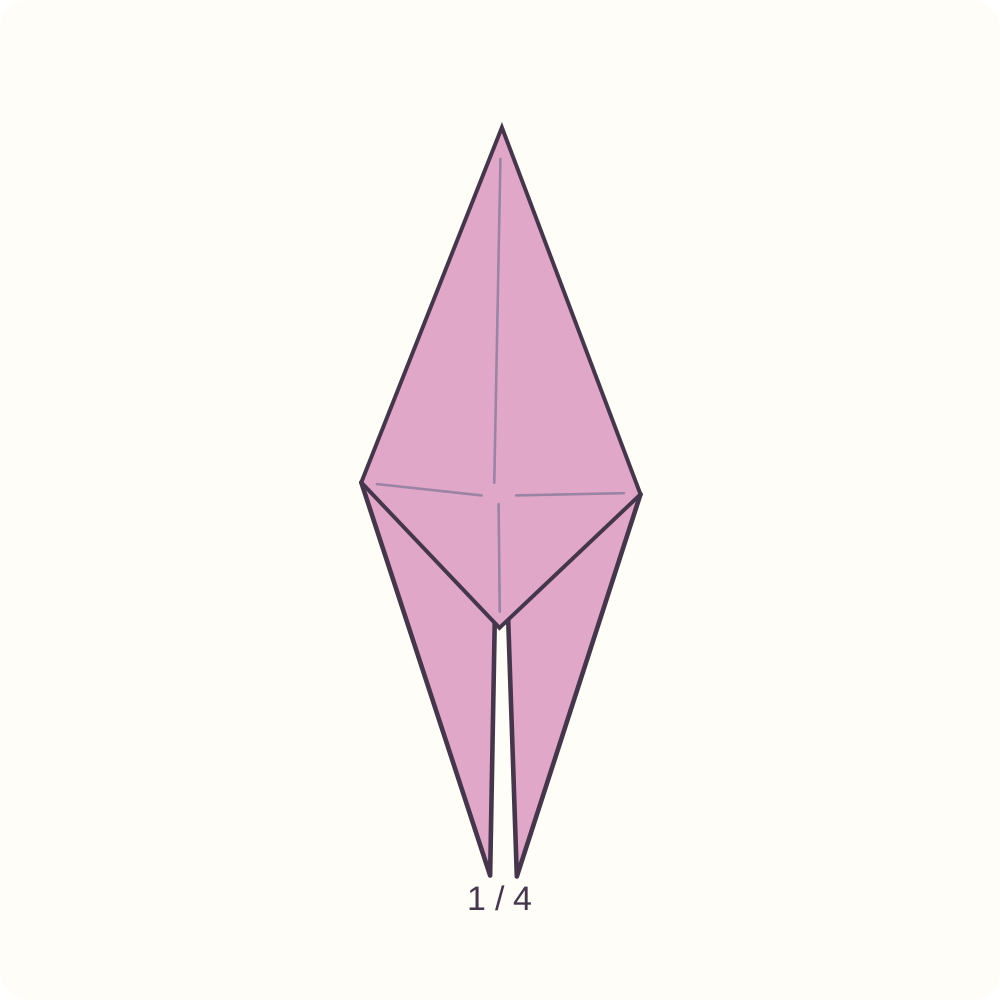
One completed frog-base face with a small downward central triangle.
Step 26: Work petal-fold face 2 of four
Pass the finished face aside like a page and locate an unworked squash-fold face. On this new face repeat the demonstrated sequence in order: Prepare its lower-left edge to the centre and reopen; prepare the lower-right edge and reopen; lift the bottom point while the sides fold in; lower the small centre triangle. These are the four movements of steps 22–25, now on face 2.
Orientation: Keep the closed point up. Count this face only once; completed faces stay behind.
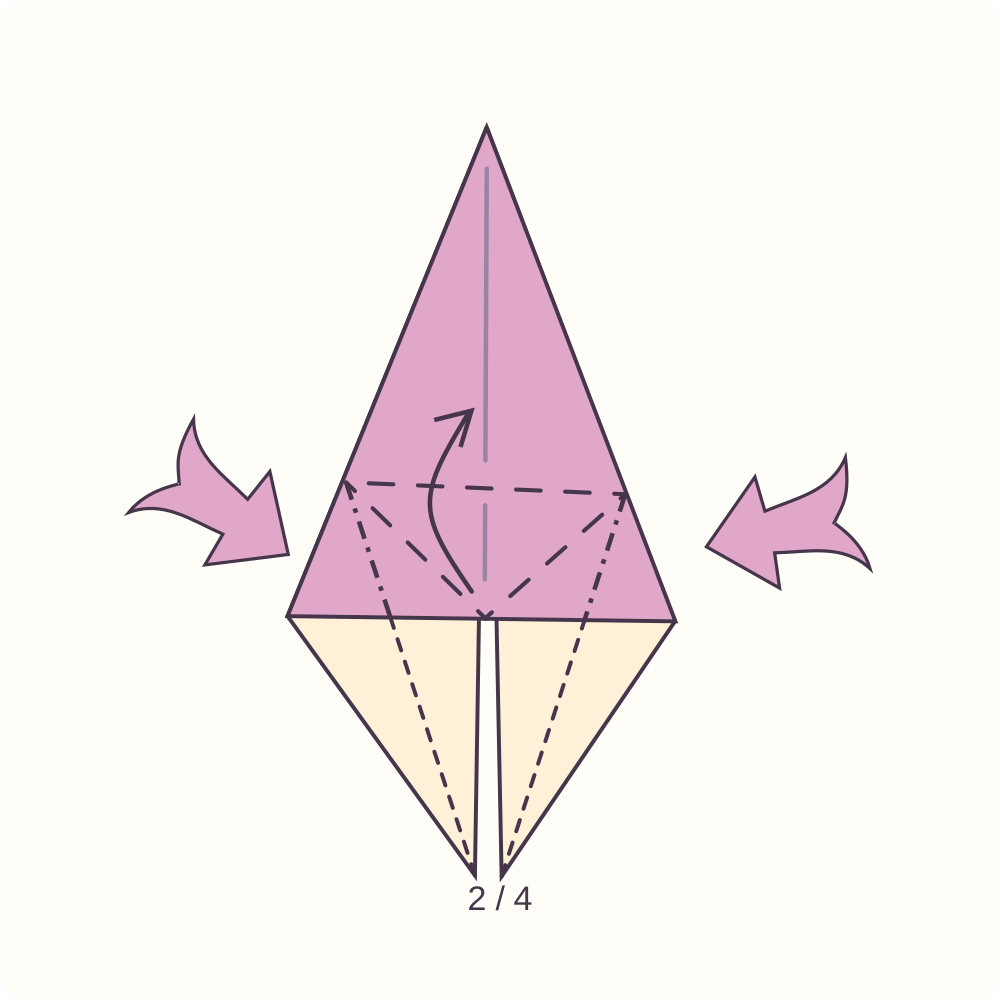
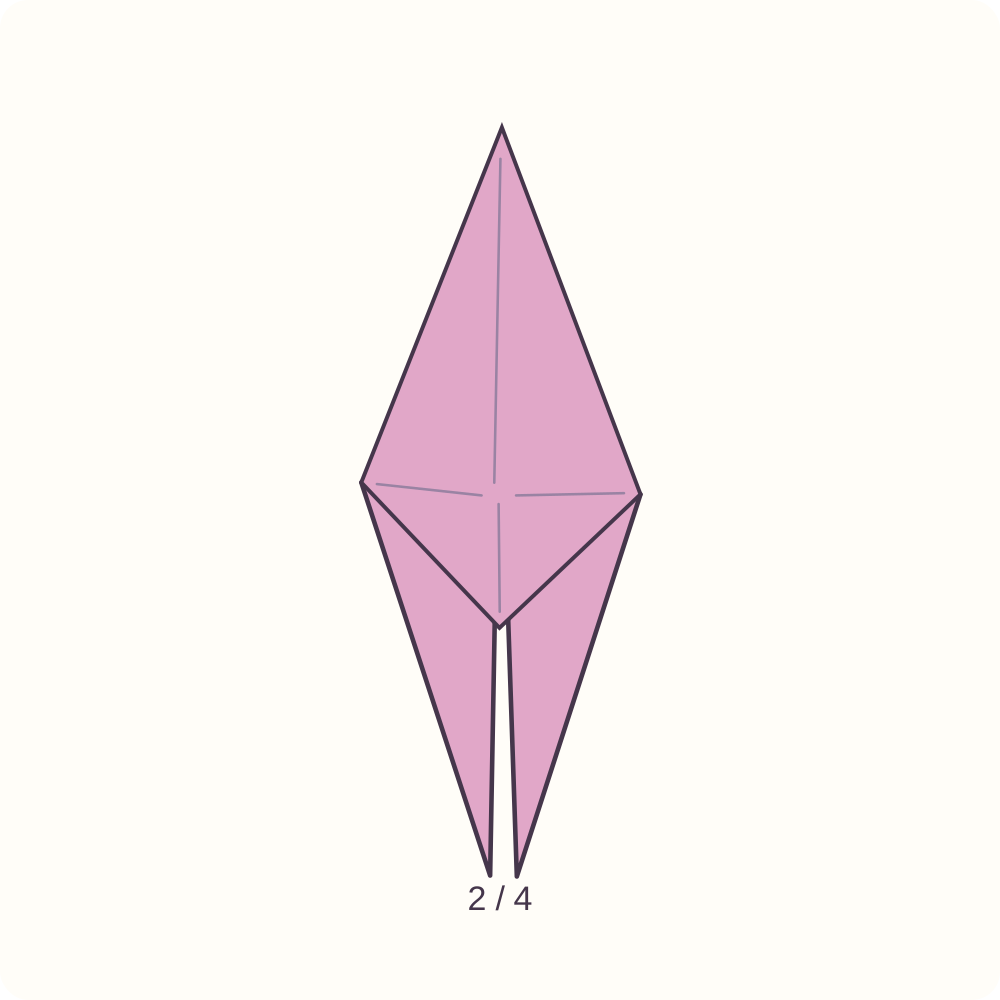
2 of four petal-fold faces are complete.
Step 27: Work petal-fold face 3 of four
Pass the finished face aside like a page and locate an unworked squash-fold face. On this new face repeat the demonstrated sequence in order: Prepare its lower-left edge to the centre and reopen; prepare the lower-right edge and reopen; lift the bottom point while the sides fold in; lower the small centre triangle. These are the four movements of steps 22–25, now on face 3.
Orientation: Keep the closed point up. Count this face only once; completed faces stay behind.
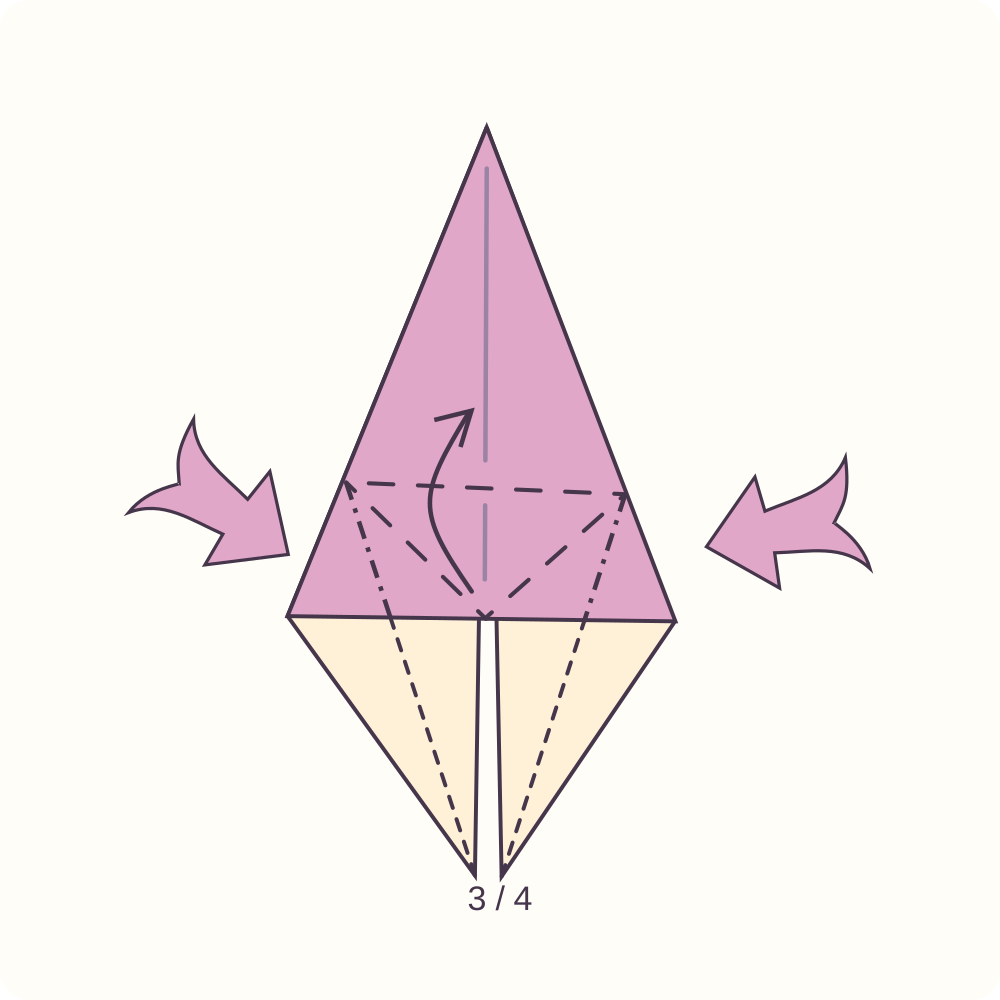
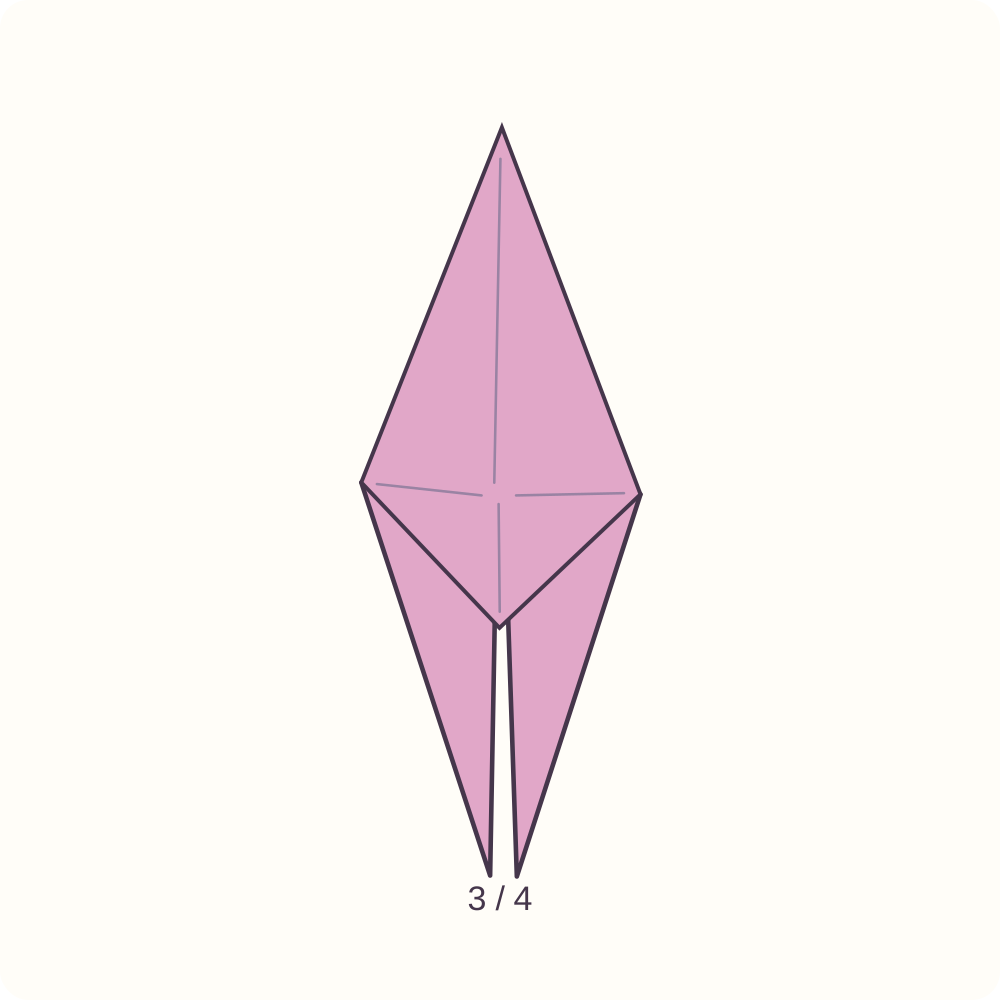
3 of four petal-fold faces are complete.
Step 28: Work petal-fold face 4 of four
Pass the finished face aside like a page and locate an unworked squash-fold face. On this new face repeat the demonstrated sequence in order: Prepare its lower-left edge to the centre and reopen; prepare the lower-right edge and reopen; lift the bottom point while the sides fold in; lower the small centre triangle. These are the four movements of steps 22–25, now on face 4.
Orientation: Keep the closed point up. Count this face only once; completed faces stay behind.
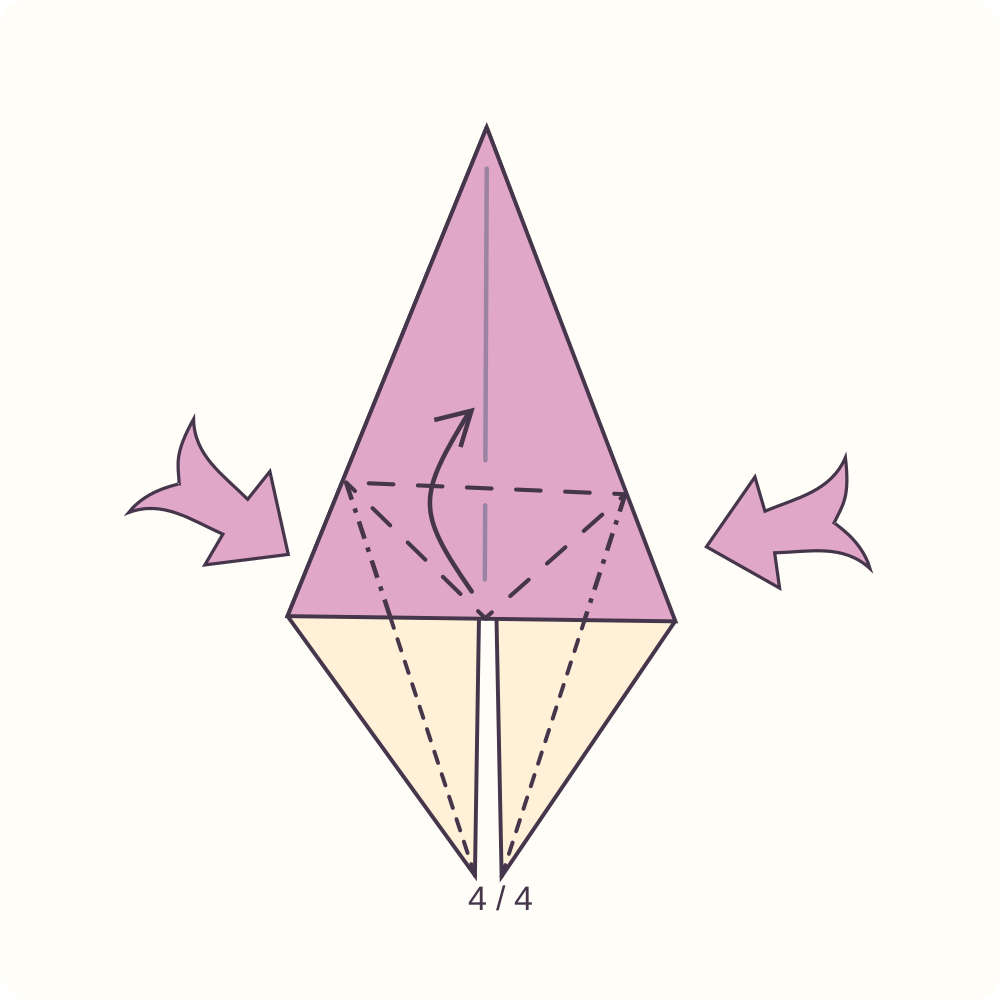
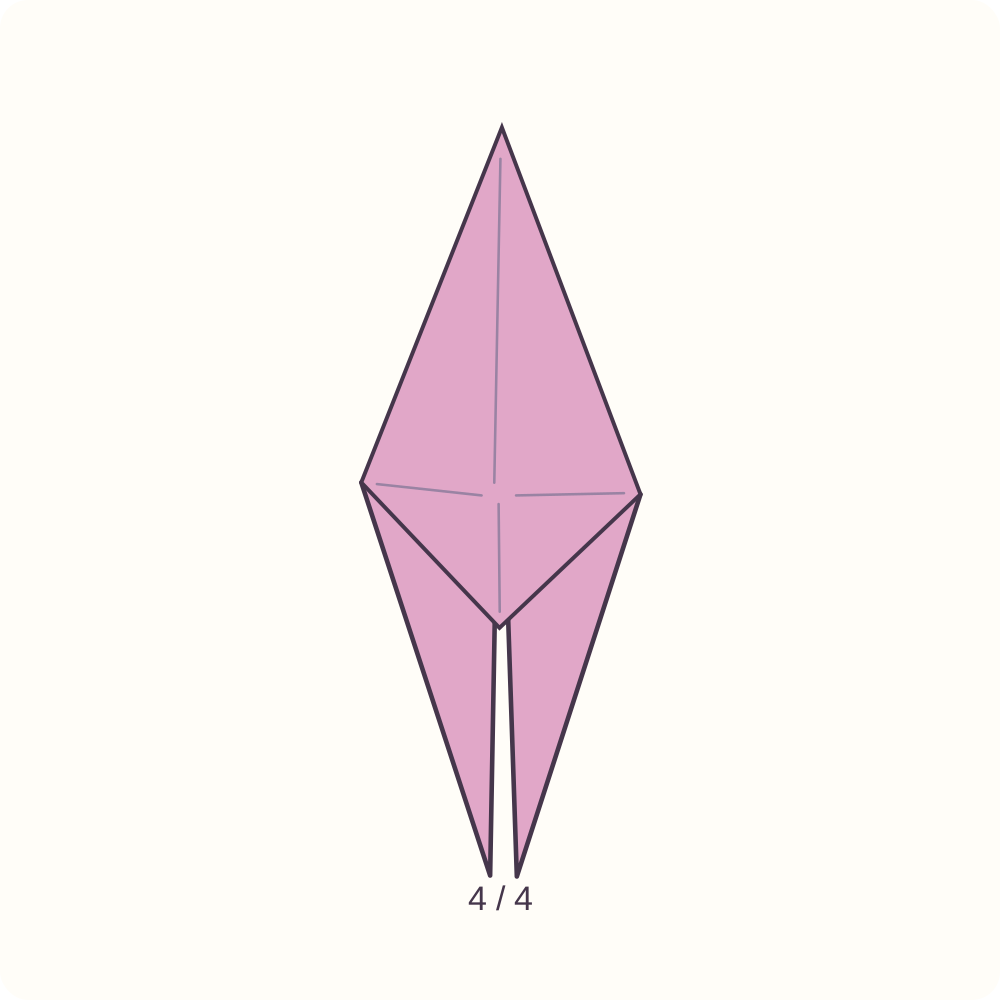
4 of four petal-fold faces are complete.
Step 29: Raise the four small triangles
Find the small triangle crossing the middle of each of the four faces. Raise each one on its existing horizontal hinge, moving round the packet one face at a time. Leave the long outer points together.
Orientation: This repeats one demonstrated hinge movement on all four faces; do not lift the whole lower half.
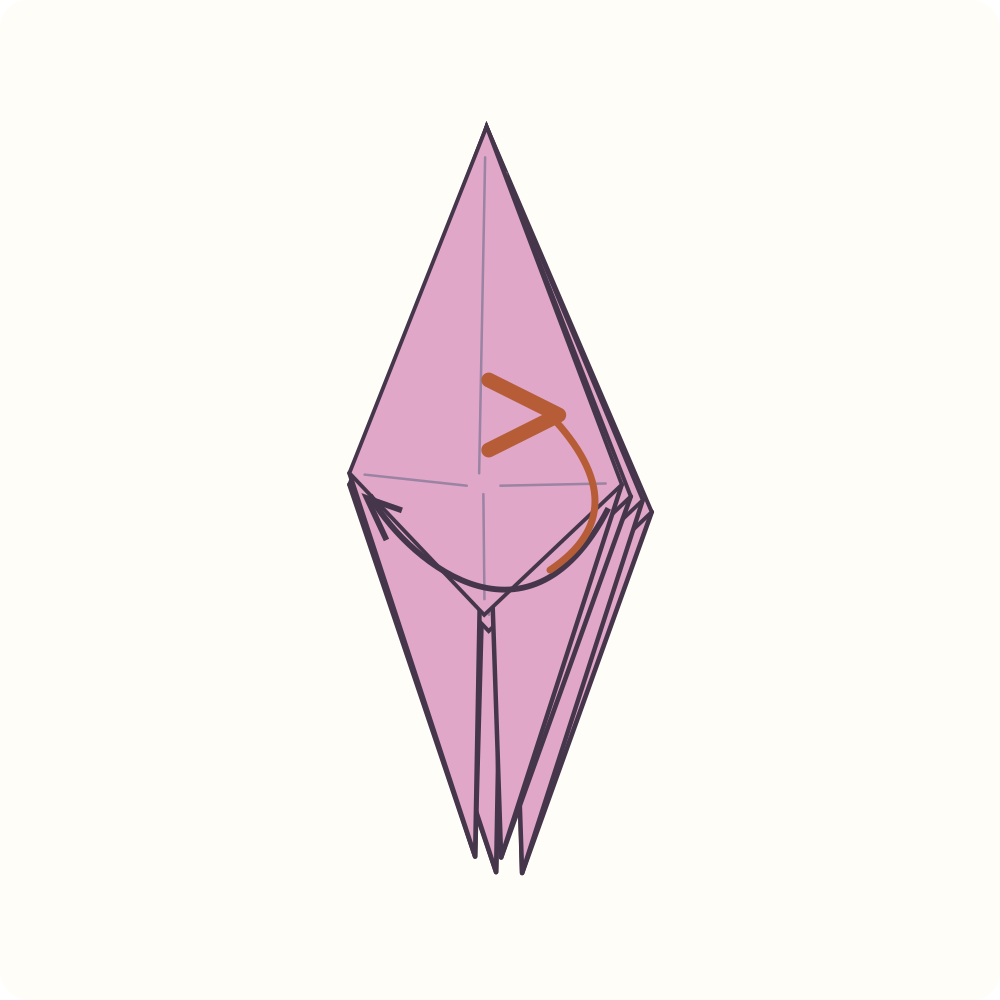
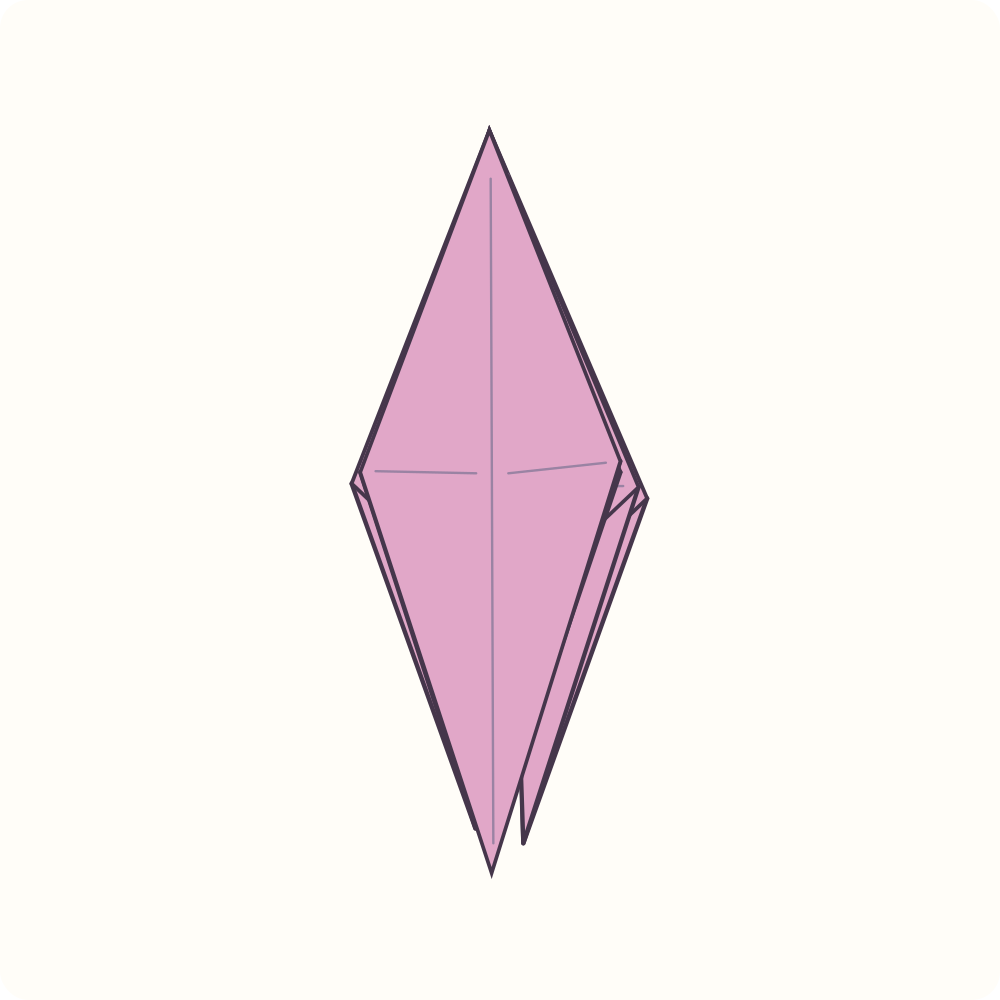
All four short centre triangles point upwards; the four long outer points still form a compact packet.
Step 30: Turn the packet end for end
Rotate the complete packet half a turn on the table. Then arrange the pages so a plain face lies in front, between two long petal flaps; do not open a pocket.
Orientation: The former lower long point now points up; the tapered base points down.
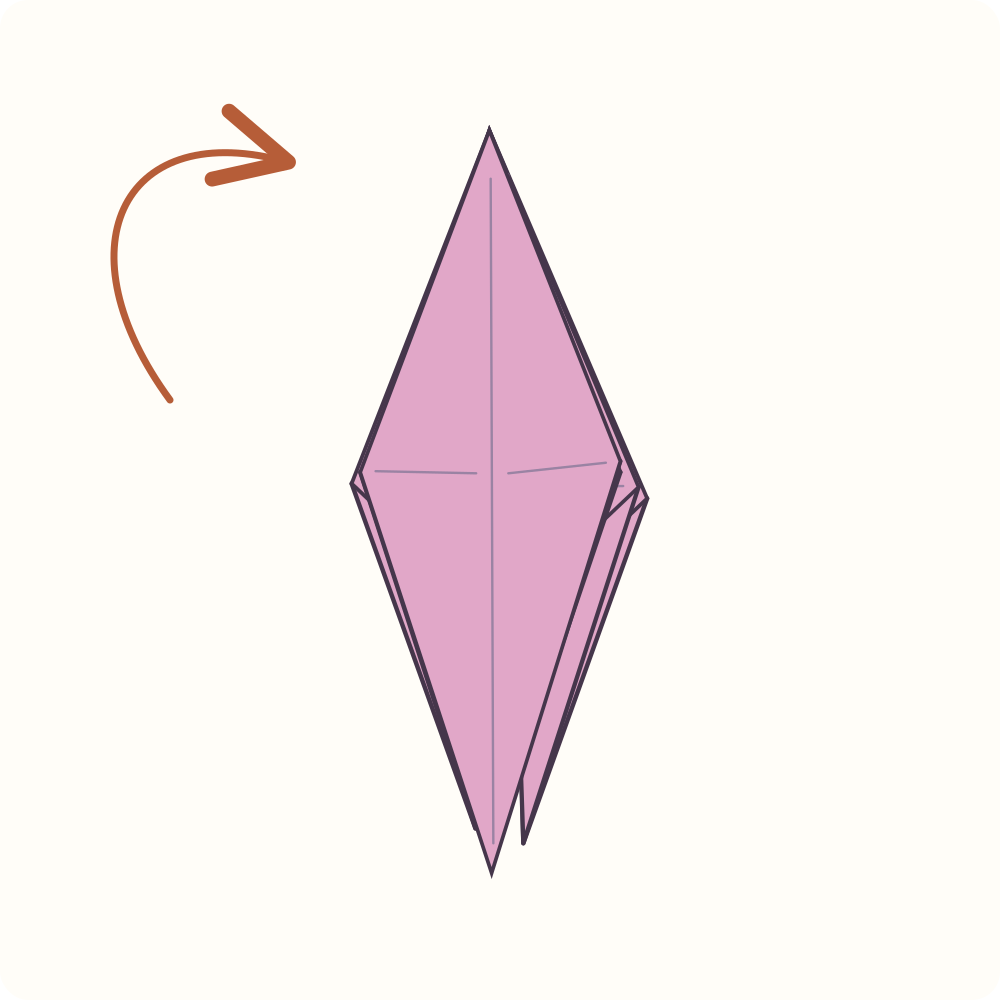
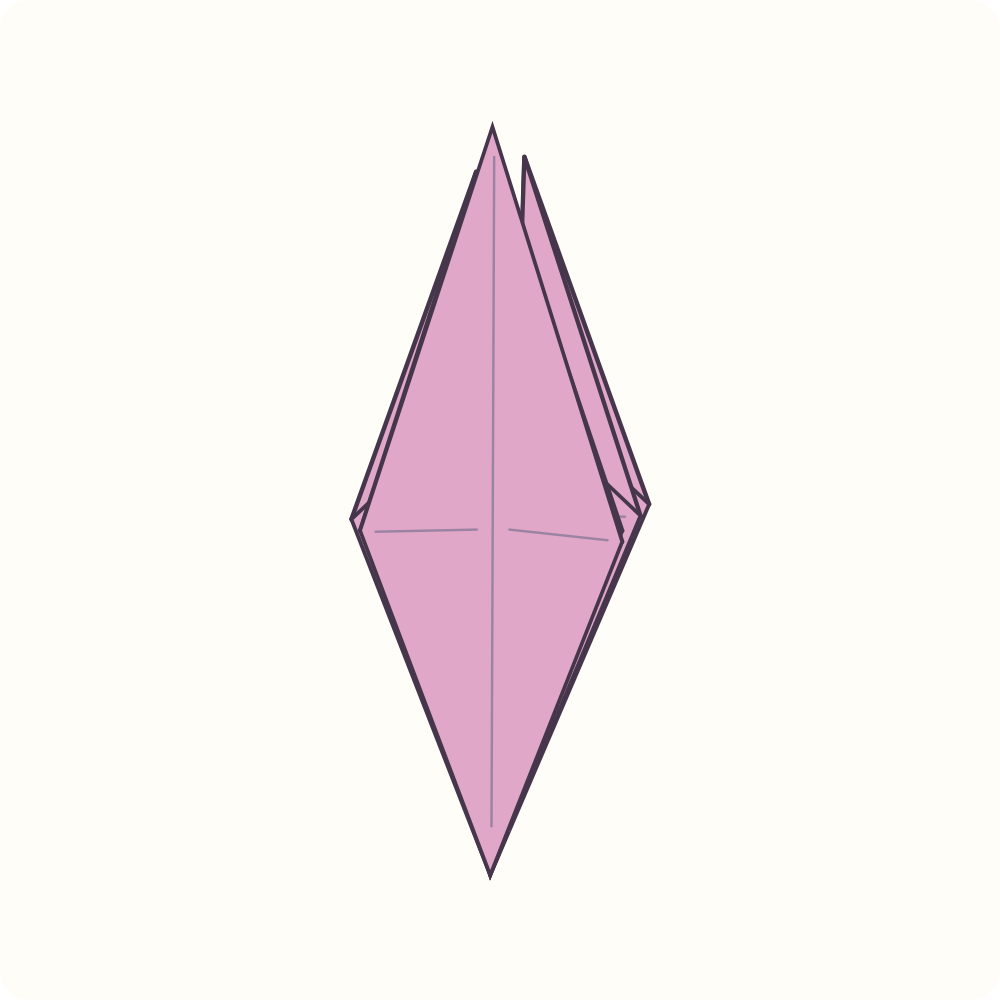
A tall plain face ready to be narrowed.
Step 31: Narrow the first left edge
Bring the lower-left outer sloping edge of the plain front face to the vertical centre line. Press only that front edge; leave the opposite side open.
Orientation: Long petal points up; tapered base down.
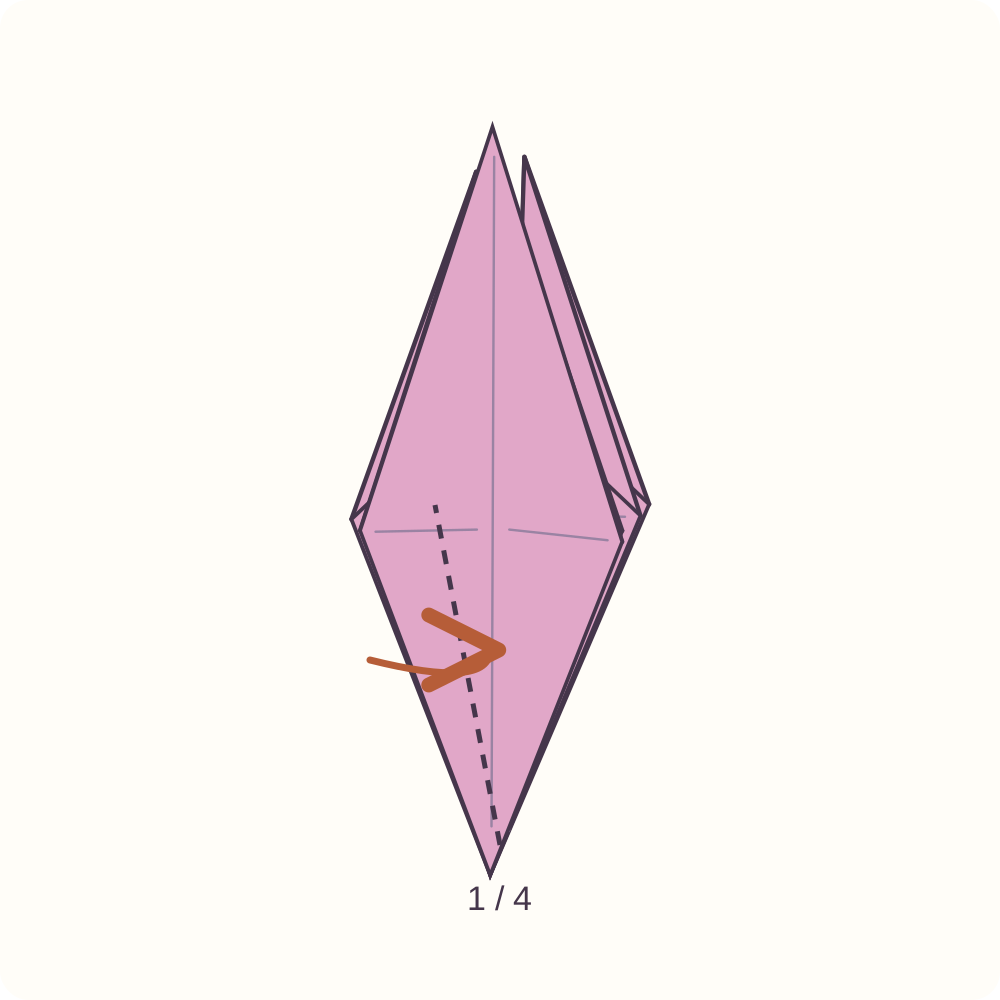
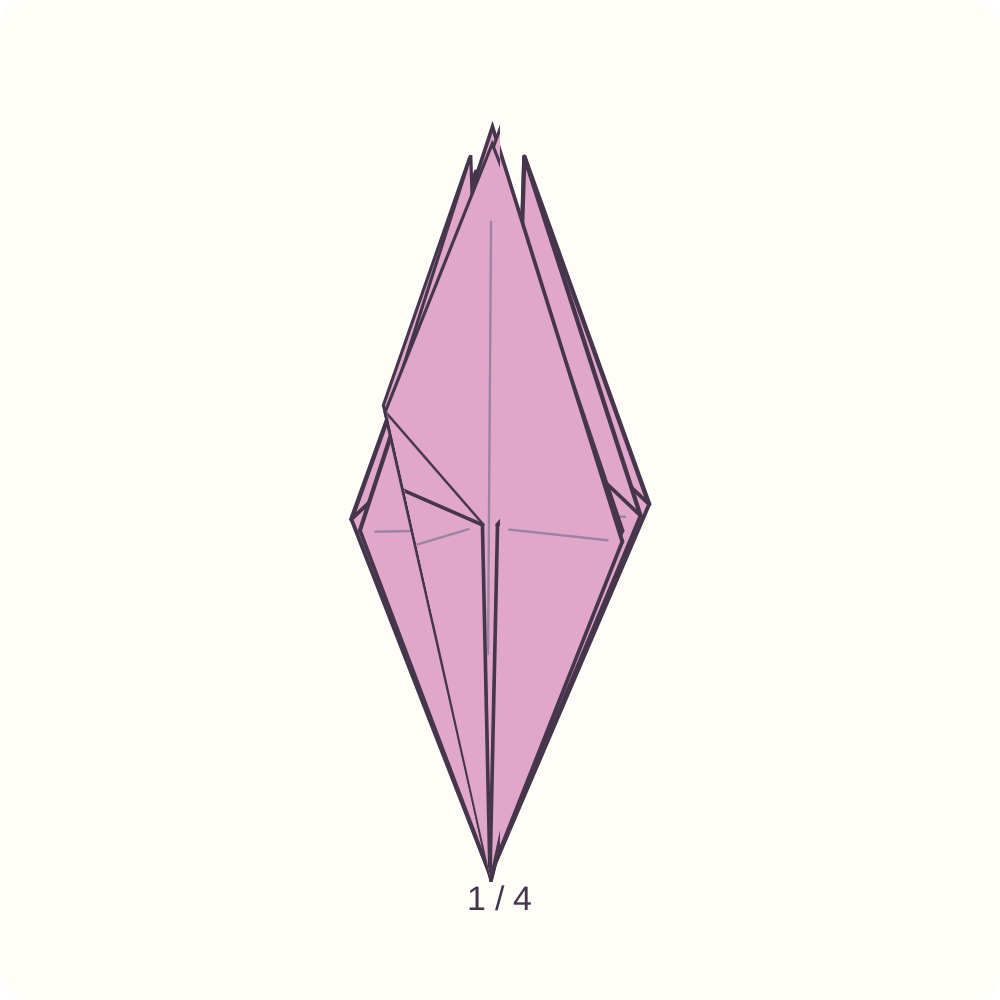
One lower side of the front face is narrowed.
Step 32: Narrow the first right edge
Bring the matching lower-right edge to the same vertical line. Keep the two folded edges meeting rather than crossing.
Orientation: Same plain front face.
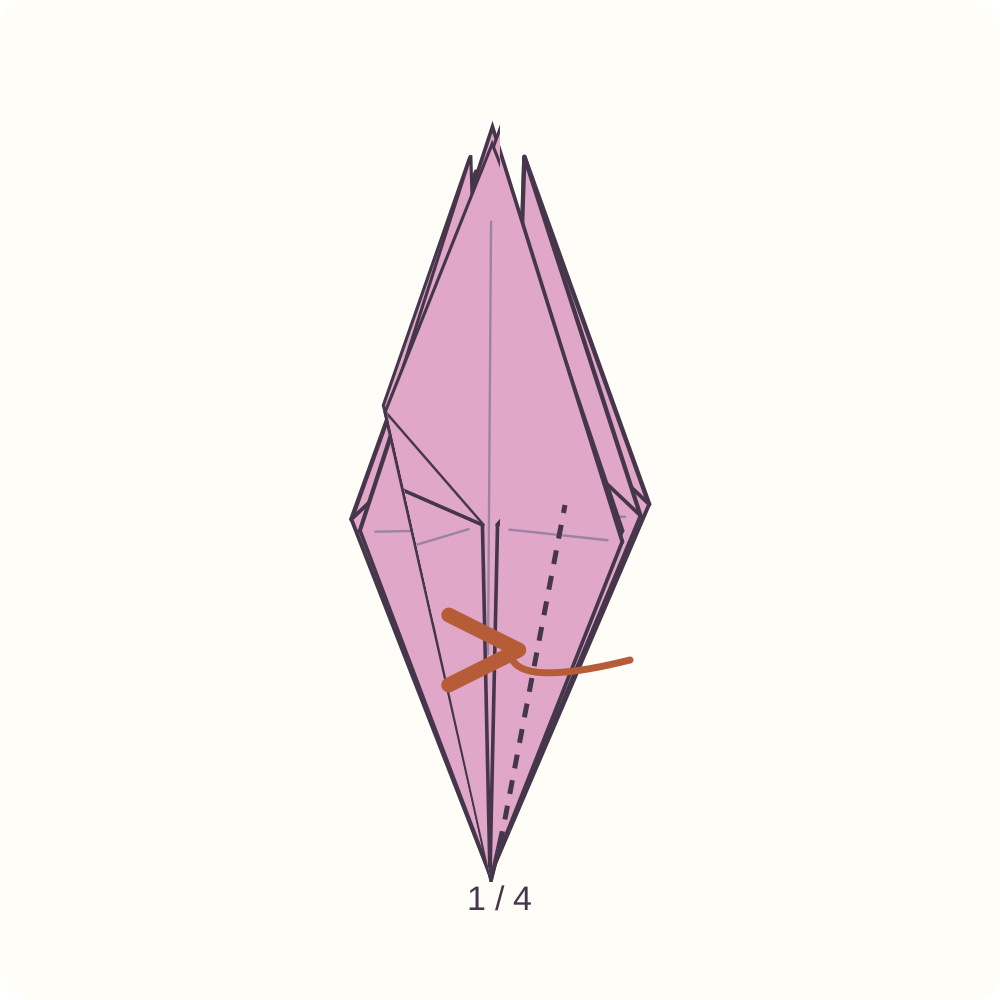
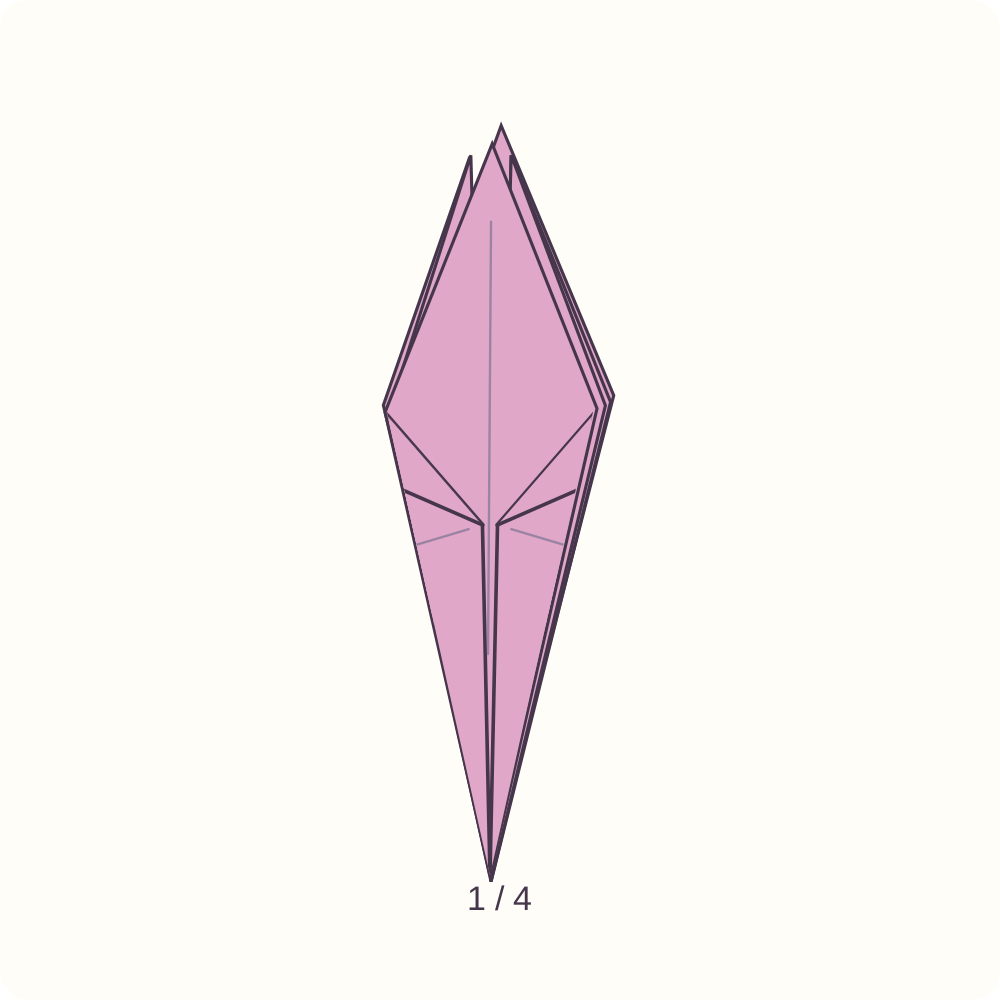
The first plain face has two narrow lower folds.
Step 33: Narrow plain face 2 of four
Pass the worked face aside and expose the next plain face between petal flaps. Repeat the left-edge fold of step 31, then the right-edge fold of step 32 on this face only. Keep their meeting line centred.
Orientation: Long points up; work face 2 of four without reopening the earlier folds.
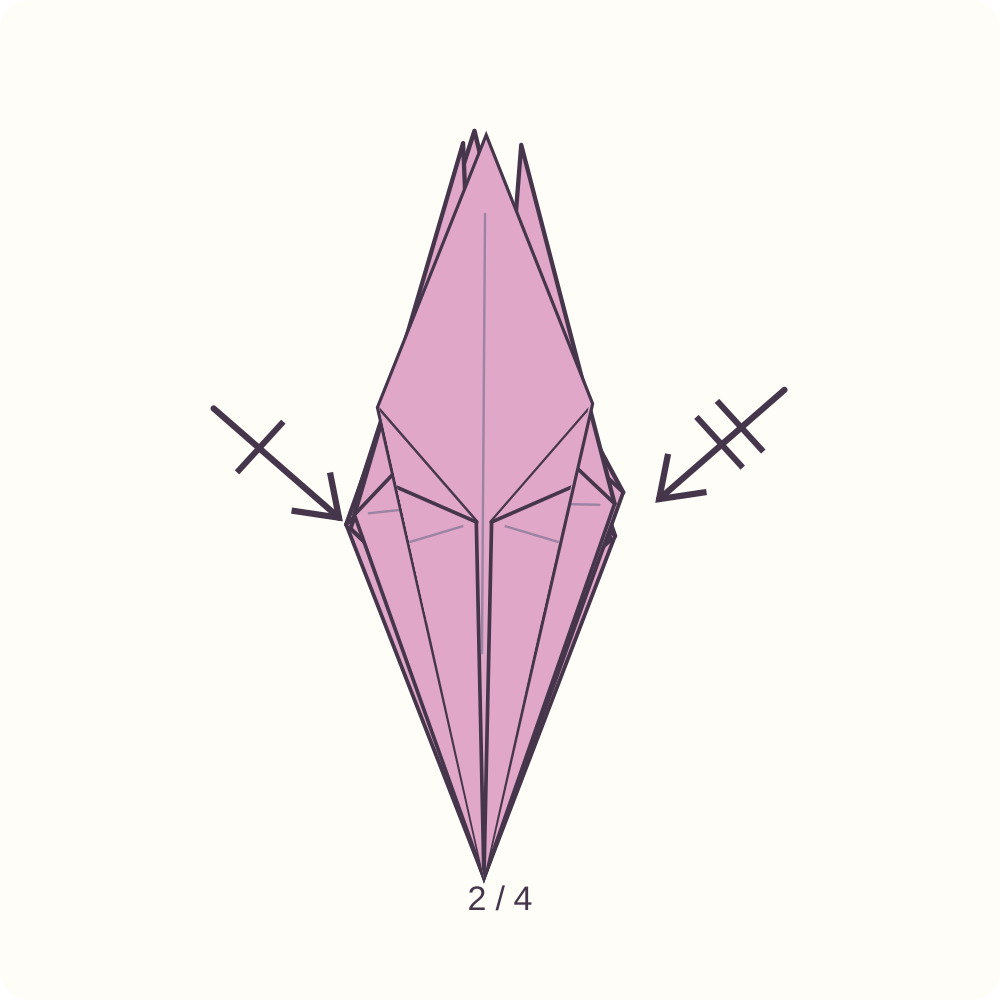
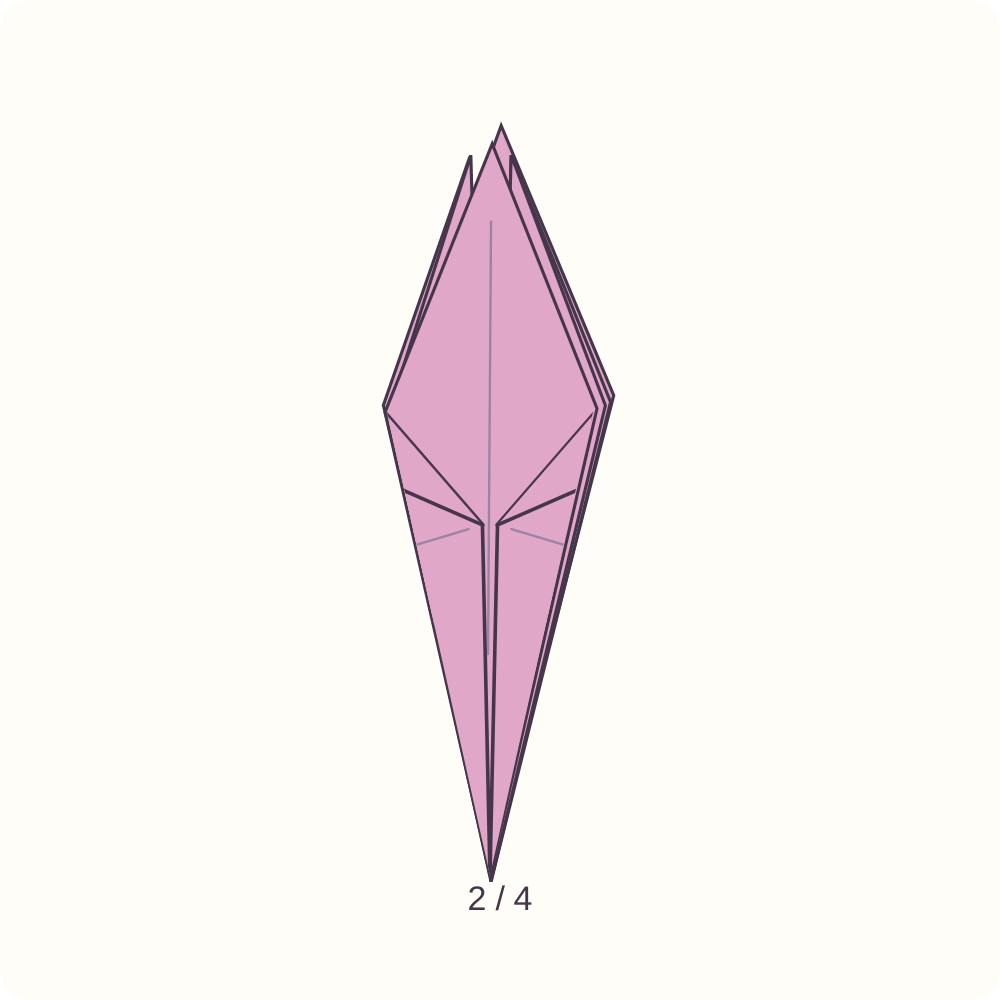
2 plain faces have been narrowed.
Step 34: Narrow plain face 3 of four
Pass the worked face aside and expose the next plain face between petal flaps. Repeat the left-edge fold of step 31, then the right-edge fold of step 32 on this face only. Keep their meeting line centred.
Orientation: Long points up; work face 3 of four without reopening the earlier folds.
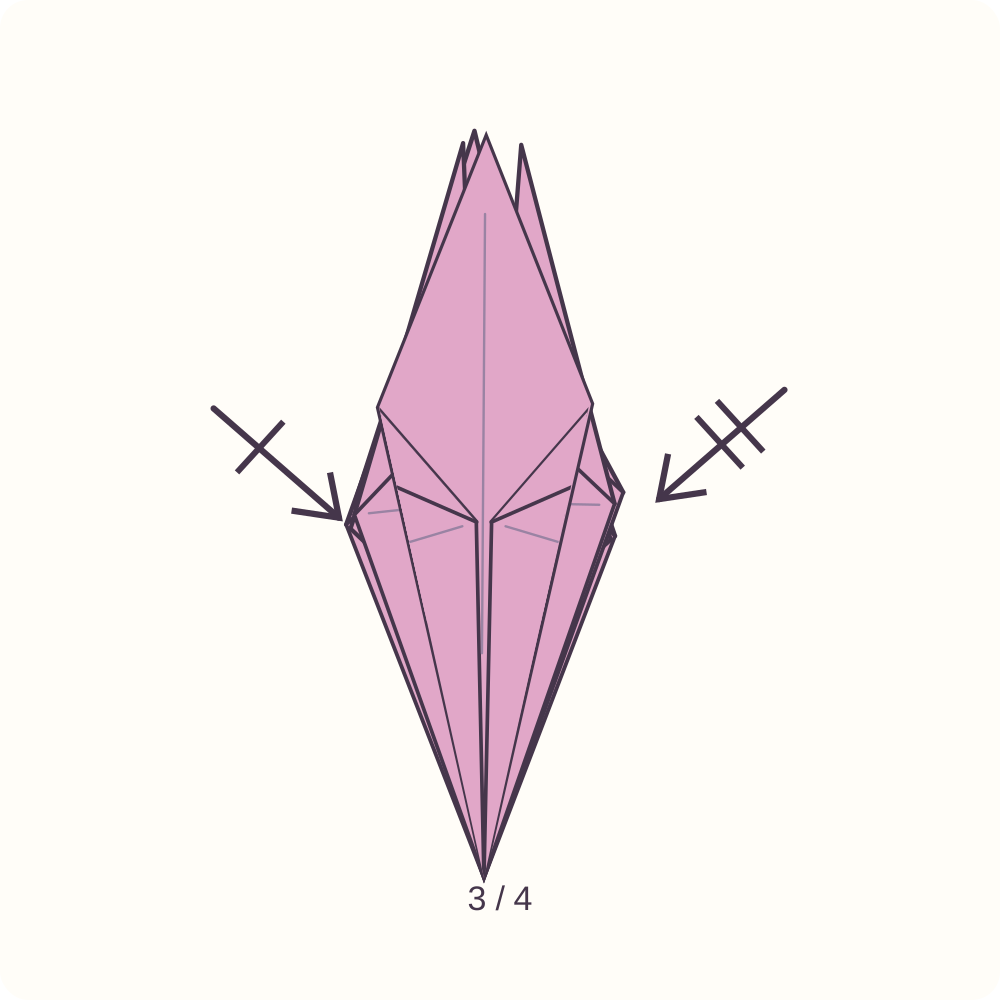
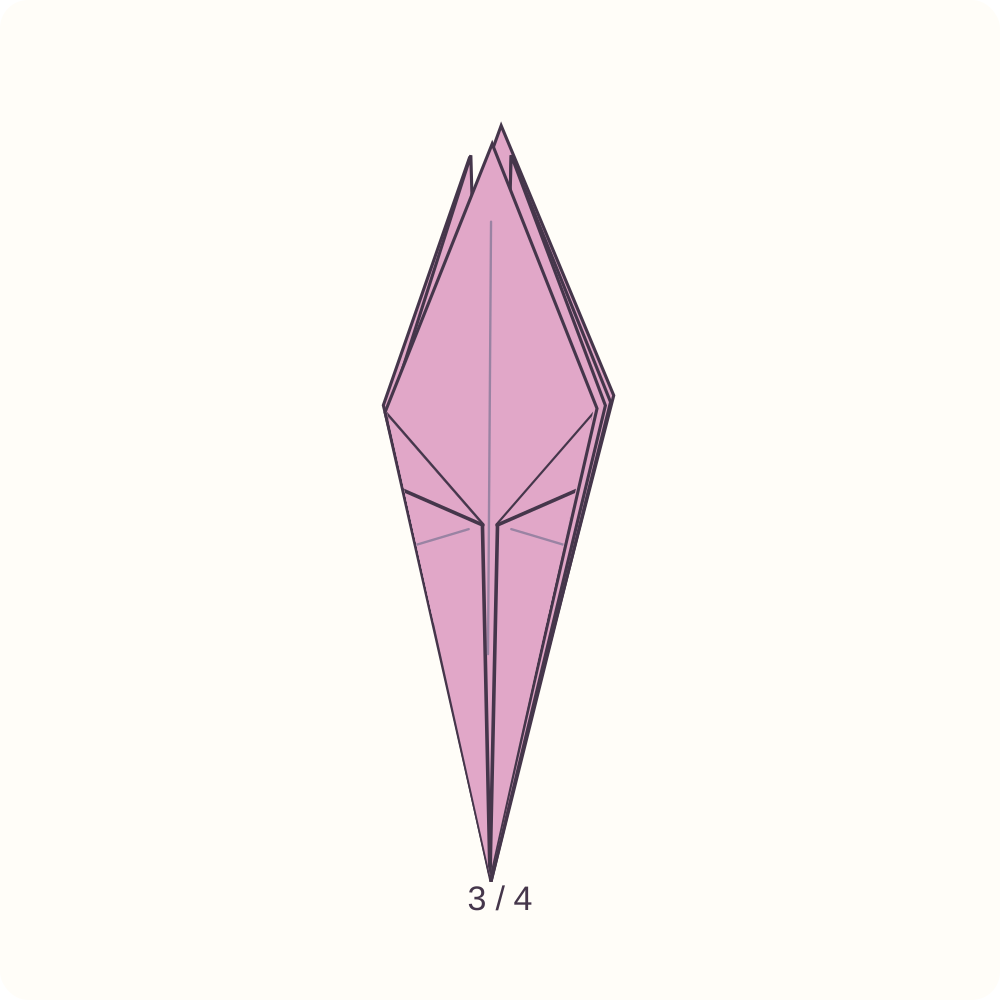
3 plain faces have been narrowed.
Step 35: Narrow plain face 4 of four
Pass the worked face aside and expose the next plain face between petal flaps. Repeat the left-edge fold of step 31, then the right-edge fold of step 32 on this face only. Keep their meeting line centred.
Orientation: Long points up; work face 4 of four without reopening the earlier folds.
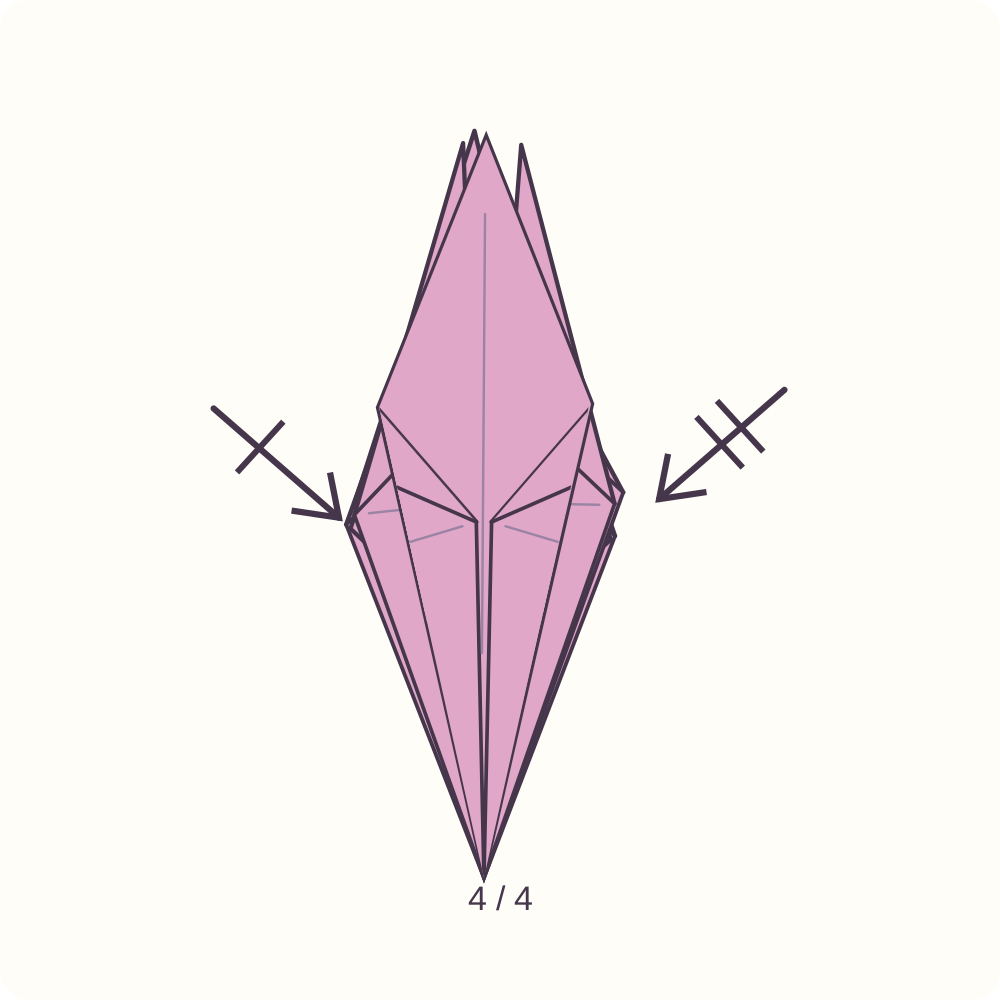
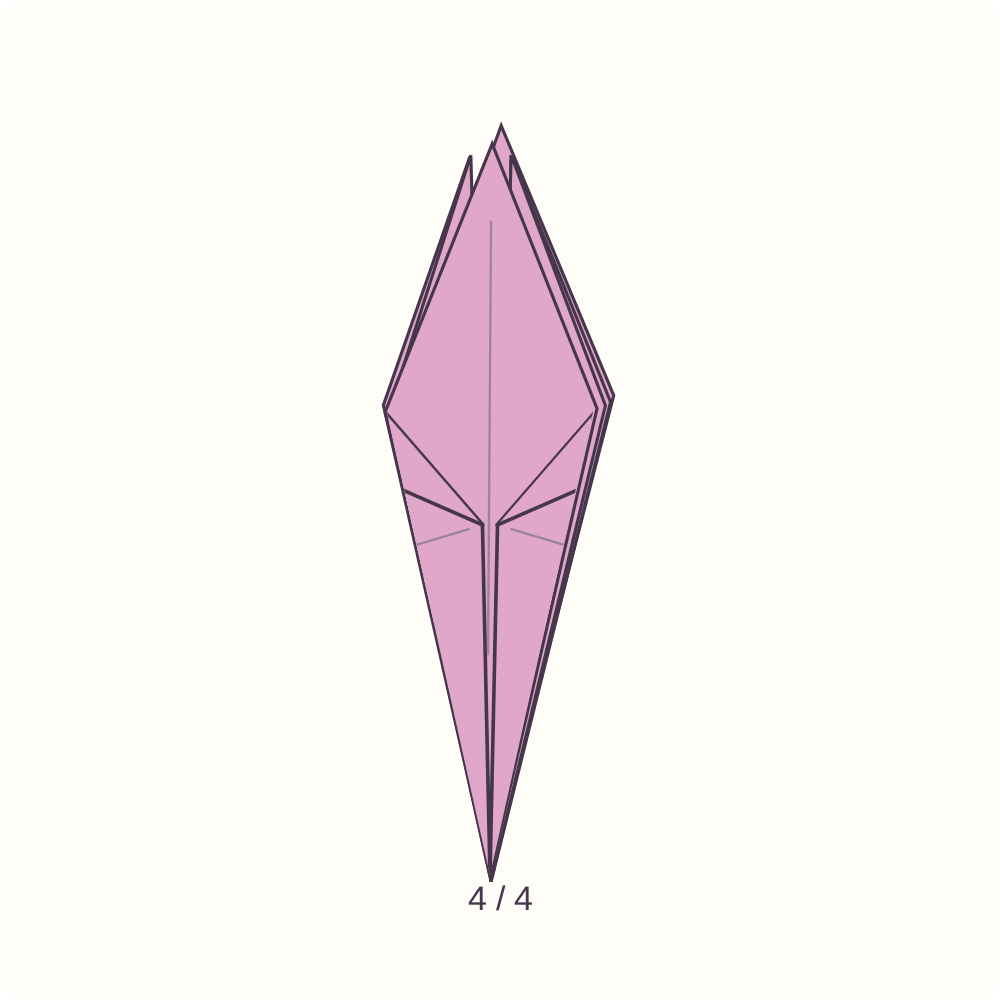
4 plain faces have been narrowed.
Step 36: Open the front long petal
Hold the tapered base lightly and separate the front long outer point from its neighbours. Lower that single point outwards at the existing shoulder, keeping the small inner triangle near the centre. The oblique detail shows the direction of opening.
Orientation: Change to an oblique view for opening; one long petal moves at a time.
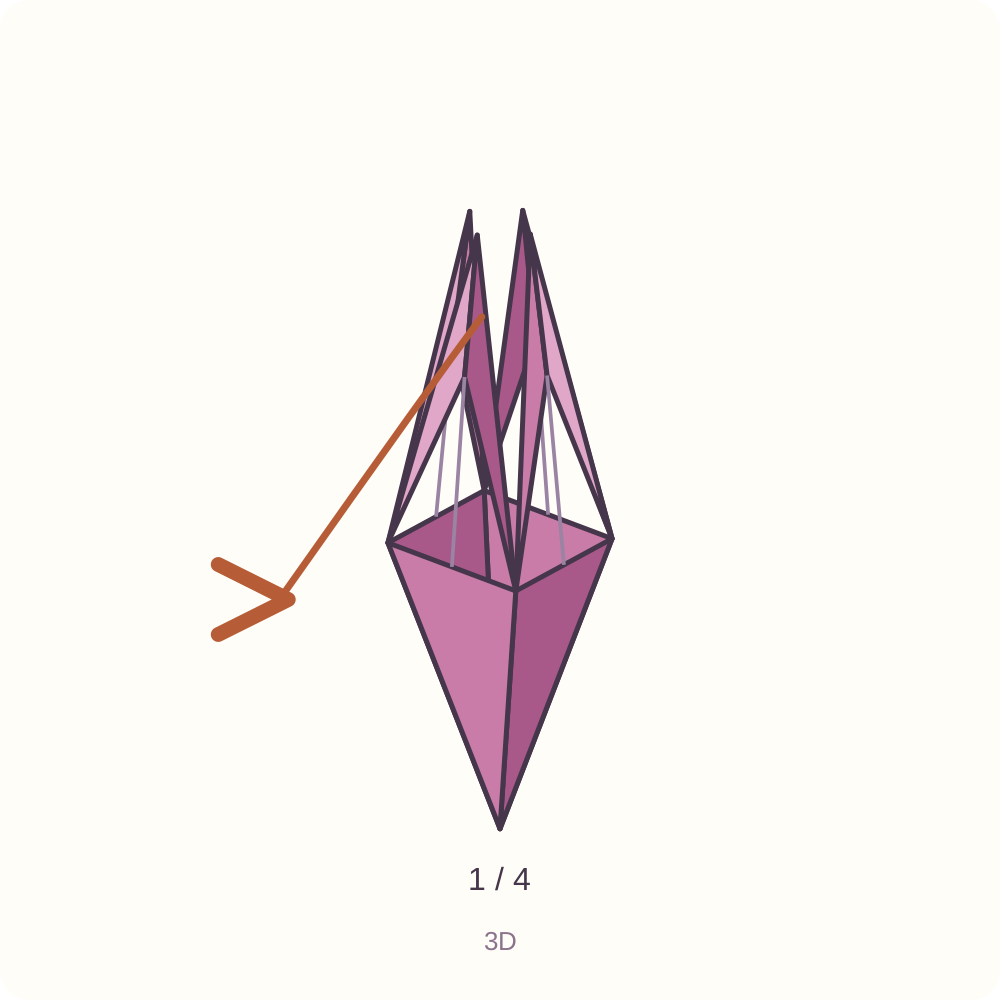
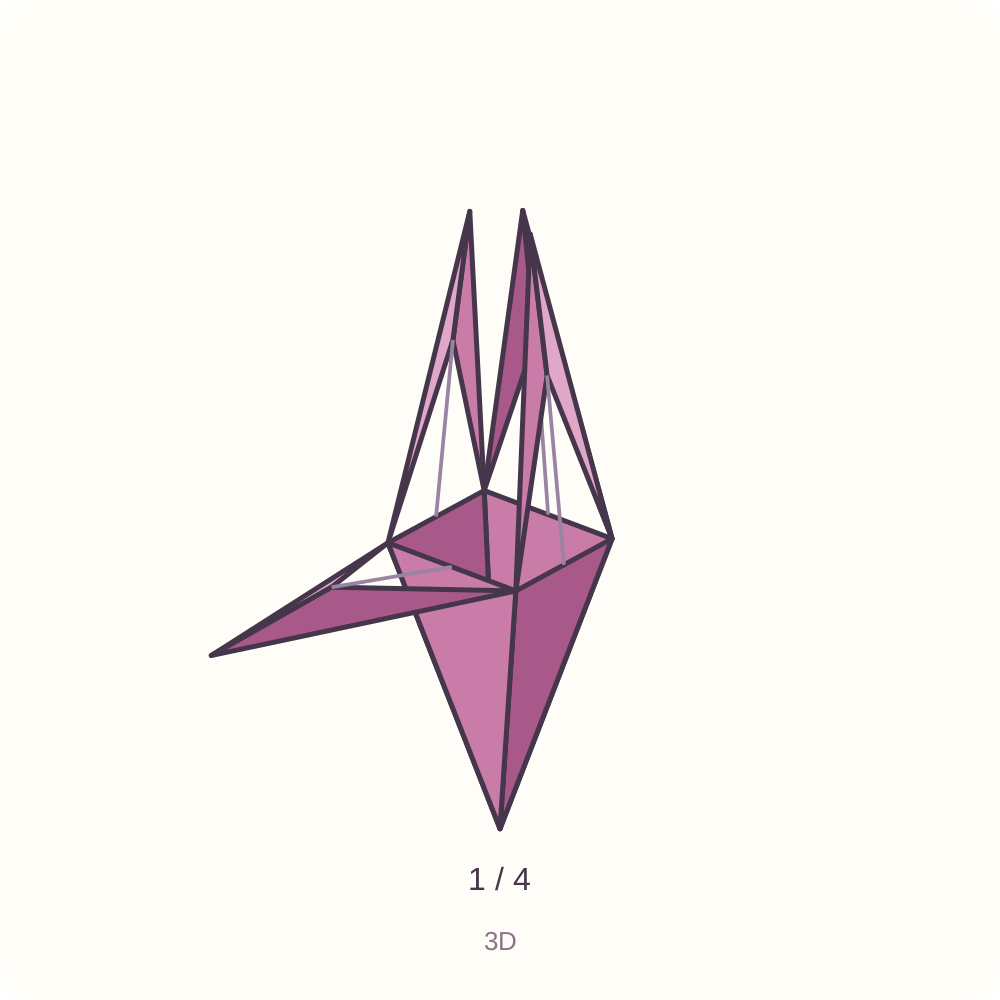
1 of four long petals is spread around the centre.
Step 37: Open the right long petal
Hold the tapered base lightly and separate the right long outer point from its neighbours. Lower that single point outwards at the existing shoulder, keeping the small inner triangle near the centre. Keep the petals already opened away from the moving flap.
Orientation: Change to an oblique view for opening; one long petal moves at a time.
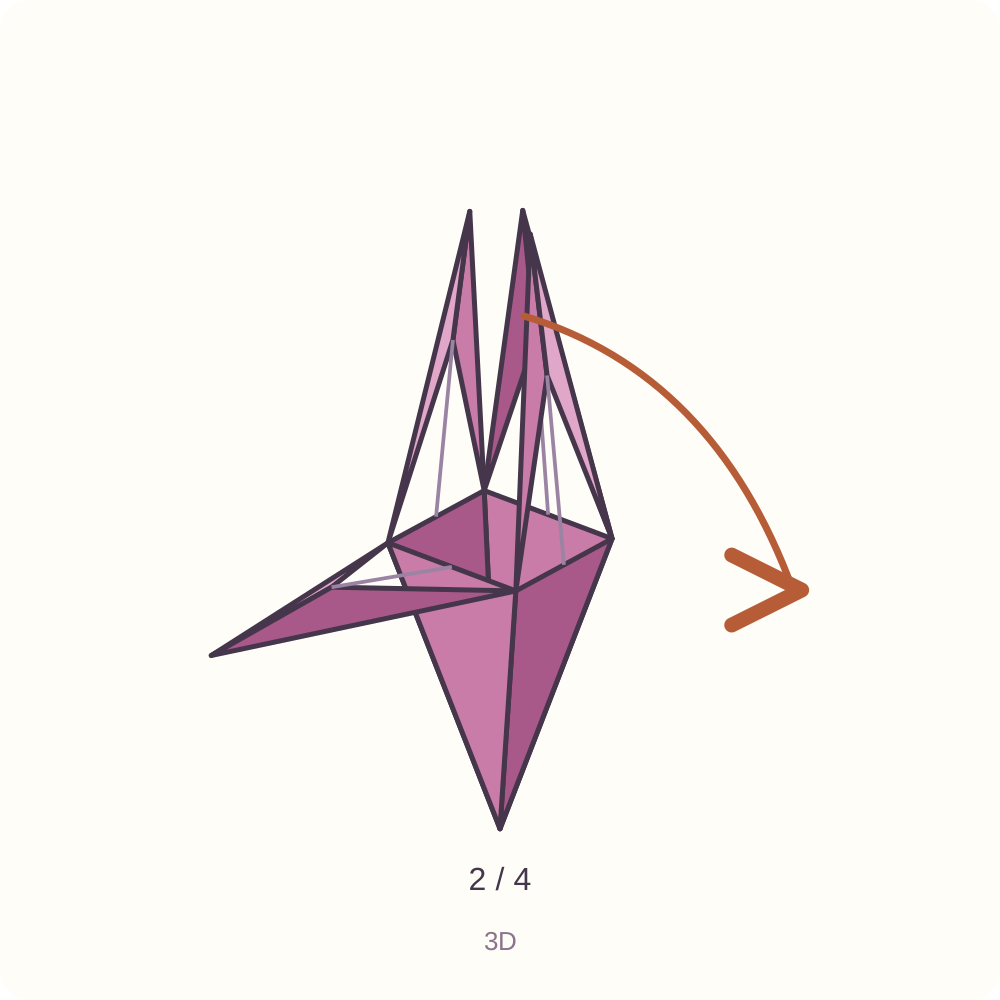
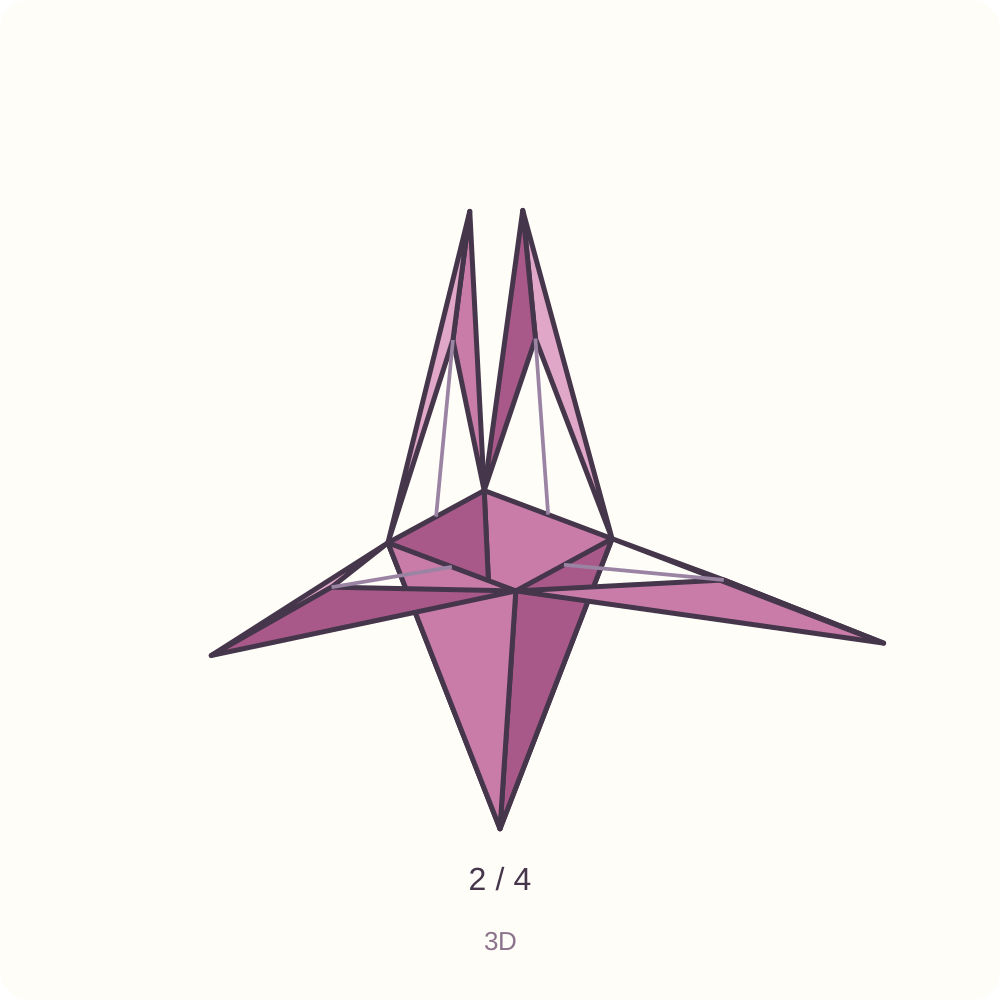
2 of four long petals are spread around the centre.
Step 38: Open the back long petal
Hold the tapered base lightly and separate the back long outer point from its neighbours. Lower that single point outwards at the existing shoulder, keeping the small inner triangle near the centre. Keep the petals already opened away from the moving flap.
Orientation: Change to an oblique view for opening; one long petal moves at a time.
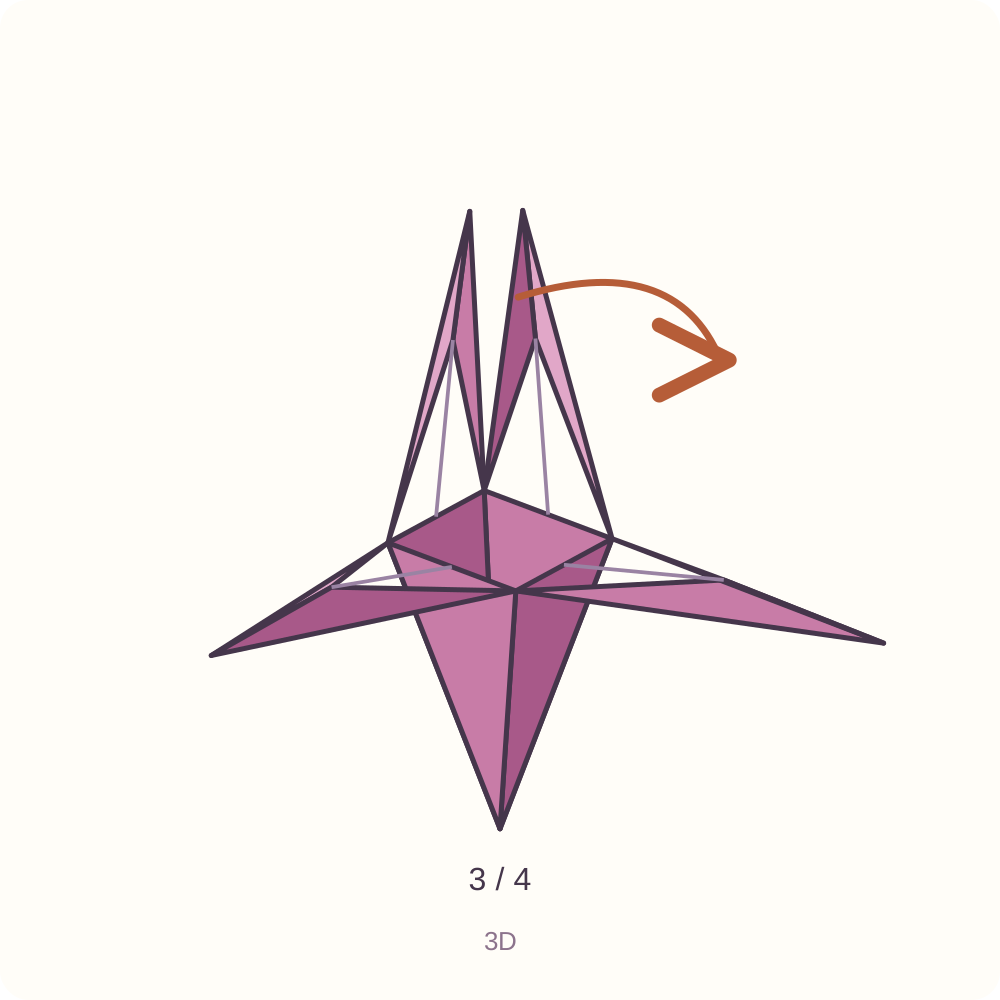
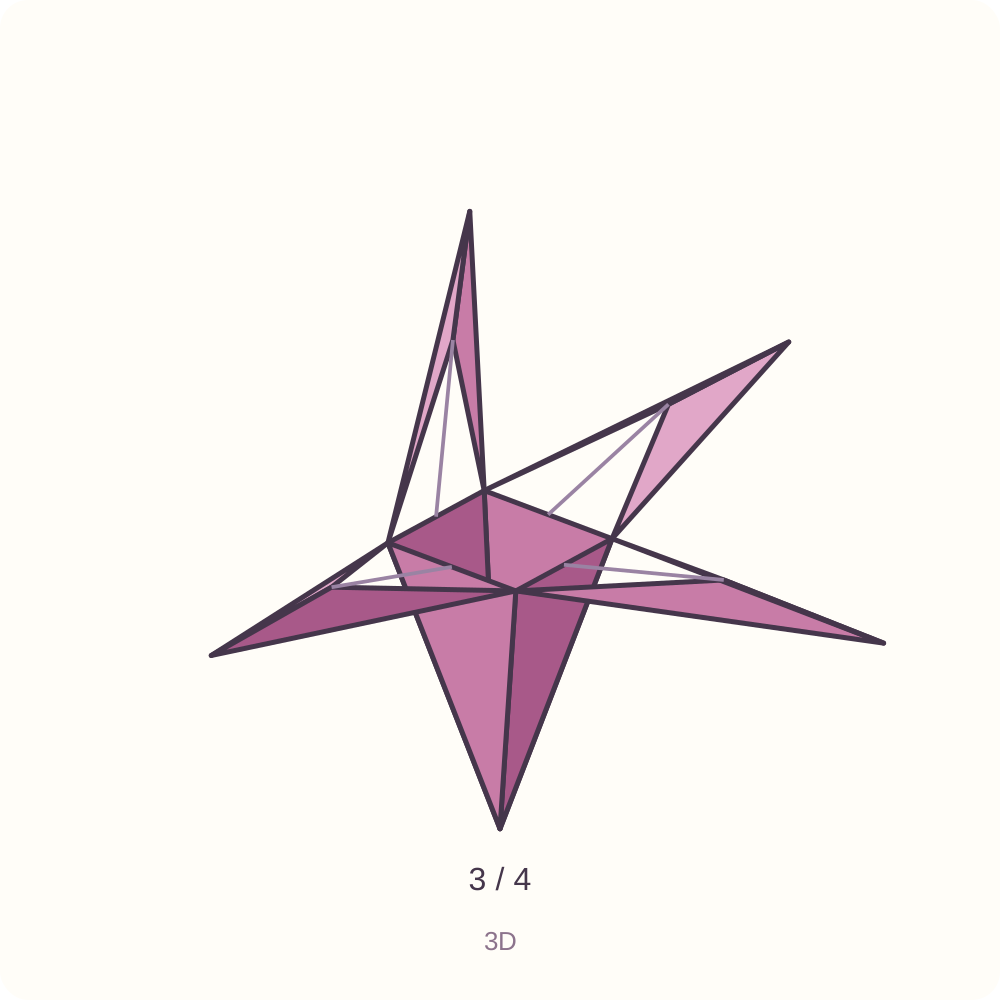
3 of four long petals are spread around the centre.
Step 39: Open the left long petal
Hold the tapered base lightly and separate the left long outer point from its neighbours. Lower that single point outwards at the existing shoulder, keeping the small inner triangle near the centre. Keep the petals already opened away from the moving flap.
Orientation: Change to an oblique view for opening; one long petal moves at a time.
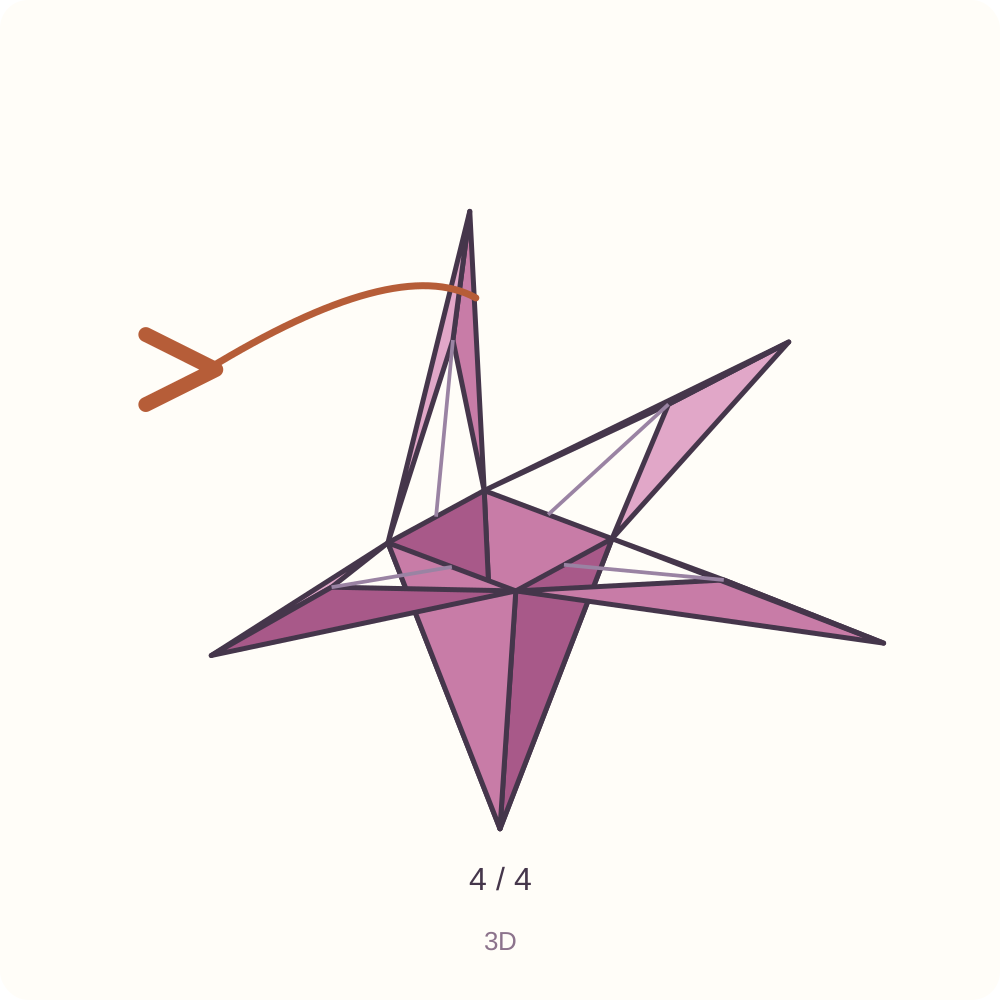
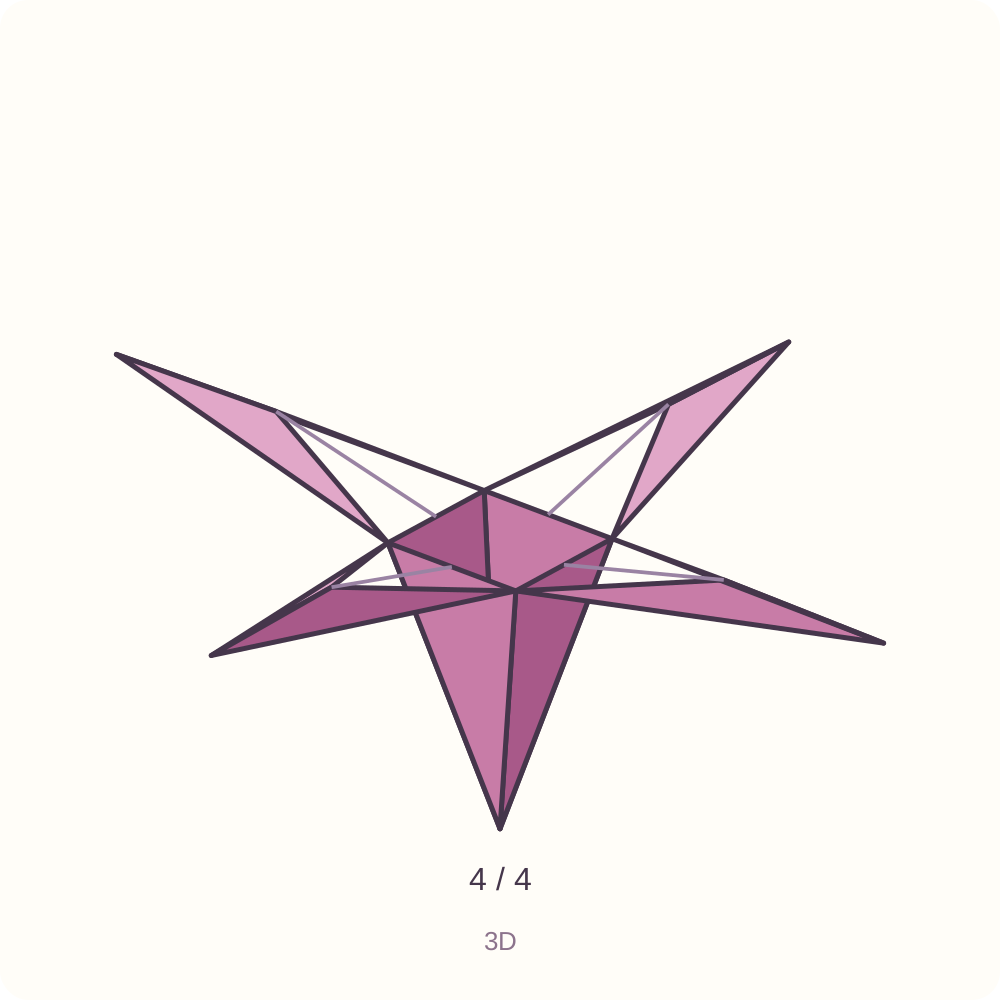
4 of four long petals are spread around the centre.
Step 40: Optional: Gently curve the tips
If you want curved petals, support one petal at a time and ease only its outer tip around a pencil barrel. Release it and repeat on the other tips. You may leave all four petals straight. Do not introduce a sharp new crease across the flower cup.
Orientation: Oblique display view; the curl and opening angles are illustrative.
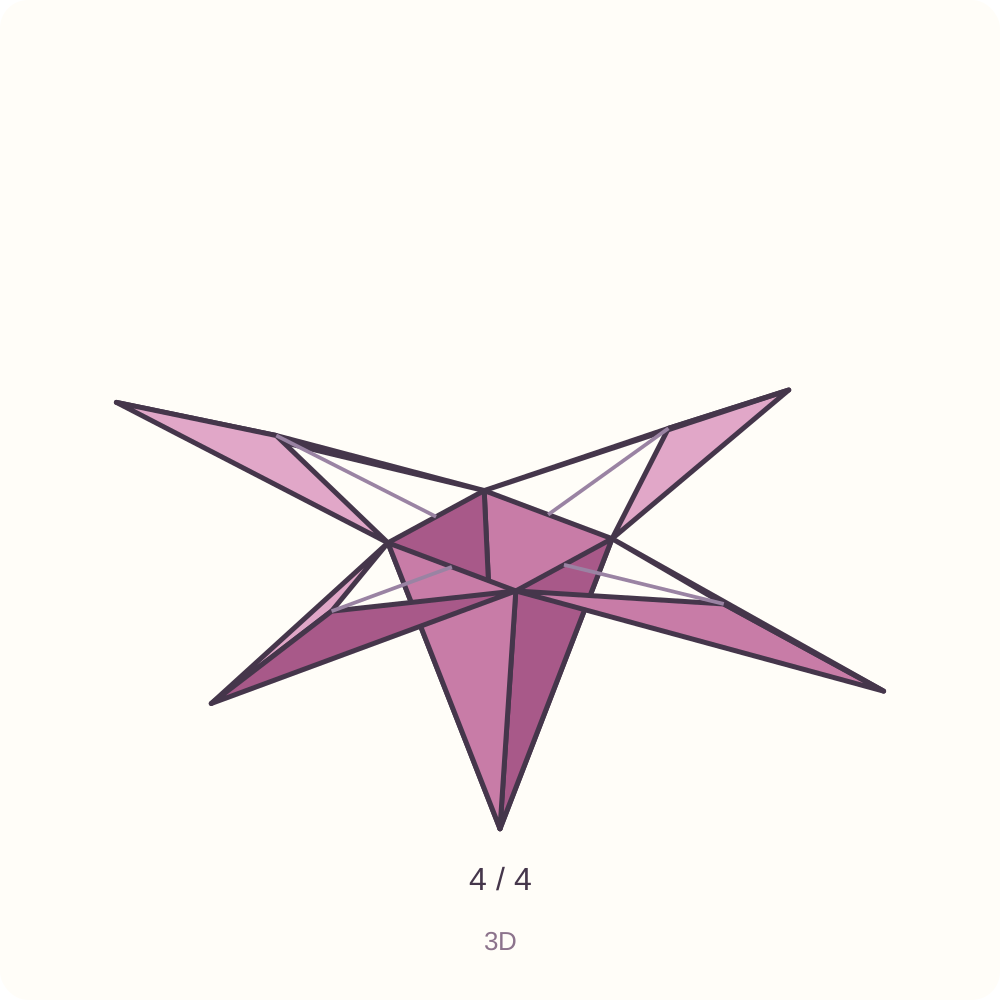
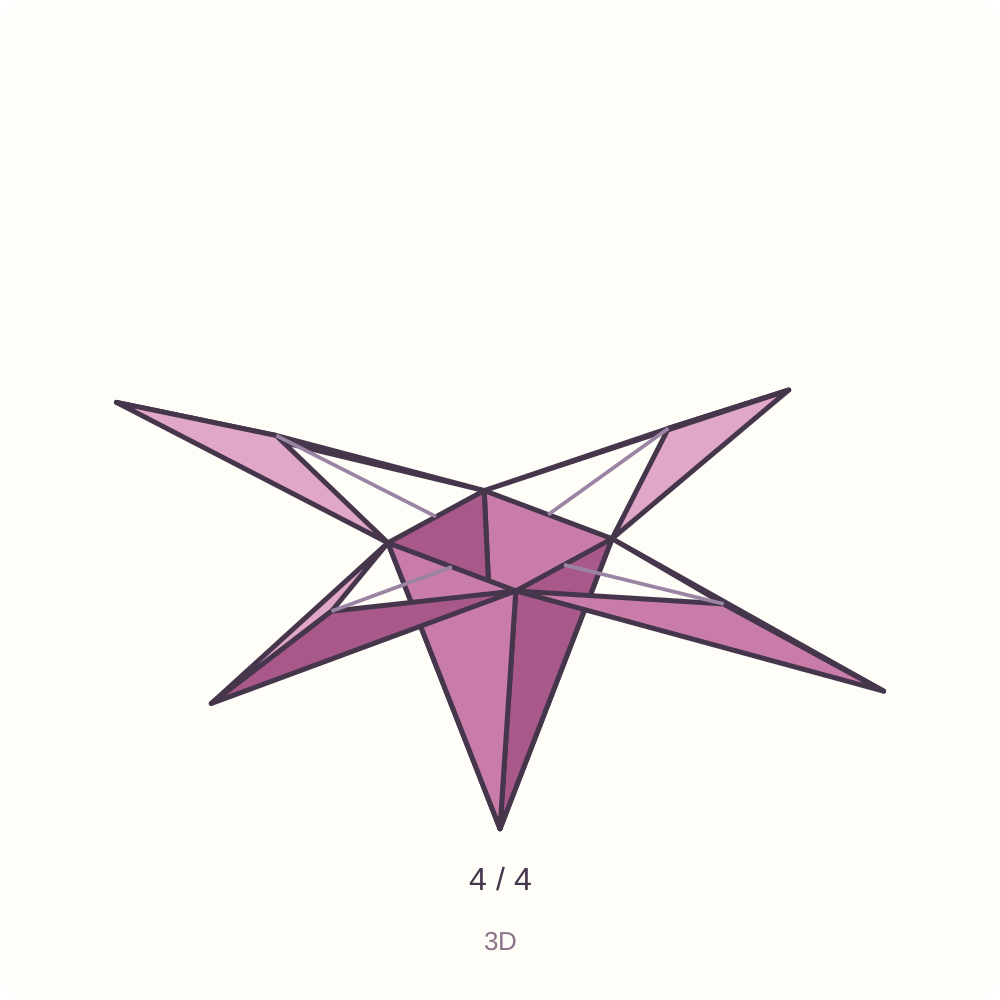
A four-petal paper lily with an open centre and optional gently curved tips. Physical folding and stability remain untested.
Control the layers before opening the flower
- A square base has four triangular flaps around a closed point. At a squash fold, open one triangular pocket only; centre its long edge and lower both sides together. Do not squash the entire packet.
- There are four squashes and four petal-fold sequences. After each page change, identify a face that has not yet been worked, rather than folding the same face twice.
- For a petal fold, reopen the two lower-edge preparation folds before lifting the bottom point. The outer edges then reverse along those preparations. If a corner bunches up, lower the point and reopen its pocket.
- Keep the small triangle that crosses the middle of each completed face distinct from the four long outer petal points. Step 29 raises the four small triangles; the long outer points are opened only at the end.
- After the half-turn, narrow only the two outer edges of the plain face in front. If the centre opens like a pocket, change to the plain face between the petal flaps first.
- The last drawings deliberately use an oblique view to show four petals around the centre. Opening angles and curling are illustrative. The proposed paper, handling of layers, folding sequence and final stability await physical testing.
The opened four-petal lily
Four long petals spread around a central folded cup, with a tapered base underneath. Shape the petals gently rather than pressing the whole flower flat. This guide makes the flower head only; it does not provide an interlocking stem or claim that the flower stands unaided.
Printable version pending the physical folding test.
Traditional model, licensed source and changes
Traditional four-petal lily, documented and diagrammed by Tavin (Wolf Weidner), “Origami Lily Flower Instructions”. This is an attributed adaptation of his openly licensed SVG. OrigamiLove has isolated and rearranged vector states, introduced pink and cream faces, expanded the layer-by-layer explanations in English and Spanish, and added preparation drawings, face counters and reference labels. The original artist does not endorse this site. The author page and SVG link CC BY-SA 4.0; the source PDF retains a 3.0 label beside a 4.0 URL, a discrepancy recorded in our research. This adaptation is distributed under CC BY-SA 4.0. No inventor or general public-domain status is independently asserted.
