
Prepare your paper
Paper and preparation
- One rectangular sheet of ordinary paper. A4 (21 × 29.7 cm) is proposed for the first attempt; this size has not been physically tested here.
- A flat, dry surface with room to open the paper.
- No scissors, glue or drawing tools are required for this sequence.
- Dashed line: The new fold
- Thin line: An existing crease
- Arrow: Move the indicated paper or open the pocket
- Overlapping edges: Separate front and back layers
Left and right always mean your left and right. Keep the point at the top unless a step asks for a turn. Steps 14–15 and 19–22 change between a flat view and an oblique view to show the openings. The diagrams are schematic and are not a cutting or measuring template.
Read the complete paper & materials guide ↗Folding instructions
Step 1: Set out a rectangle
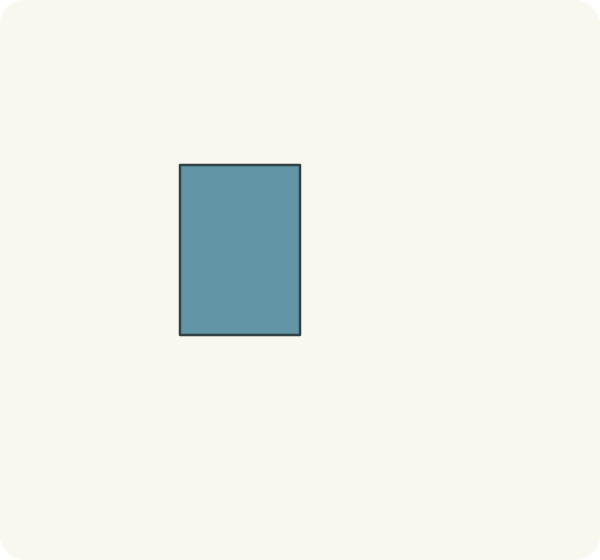
Place one rectangular sheet on the table with the reverse side facing you. Keep the short edges at the top and bottom.
Orientation: Reverse side up; portrait position.
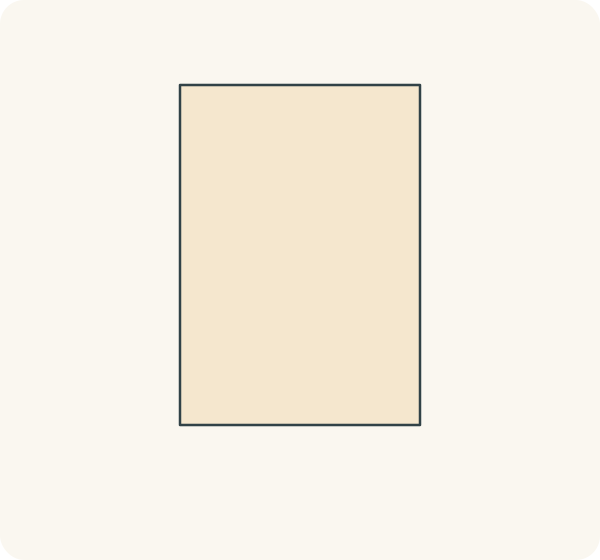
The sheet is flat and has no folds.
Step 2: Fold the top edge down
Bring the top short edge down to the bottom short edge. Match both lower corners, then press the fold across the middle. Move the whole top half.
Orientation: The closed folded edge is now at the top; both open edges are at the bottom.
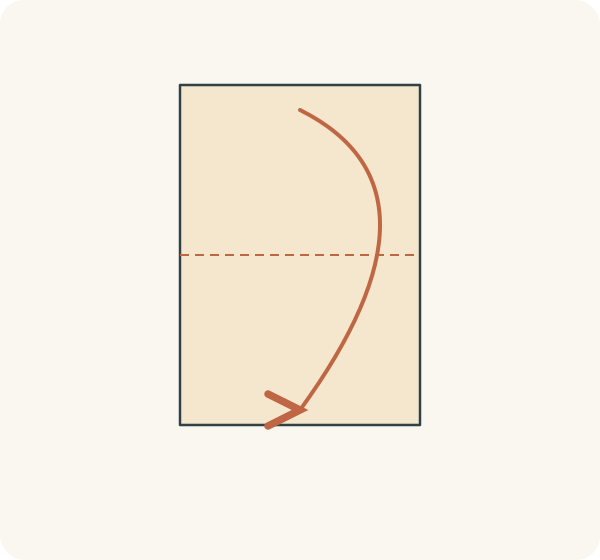
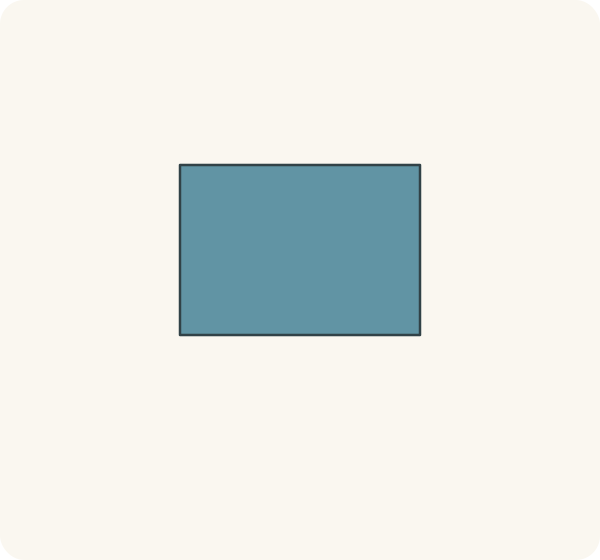
A wide rectangle shows the coloured side. Two layers lie together.
Step 3: Fold the right side over the left
Bring the right edge to the left edge, moving both layers together. Press the new vertical fold.
Orientation: Keep the closed edge at the top; do not turn the paper over.
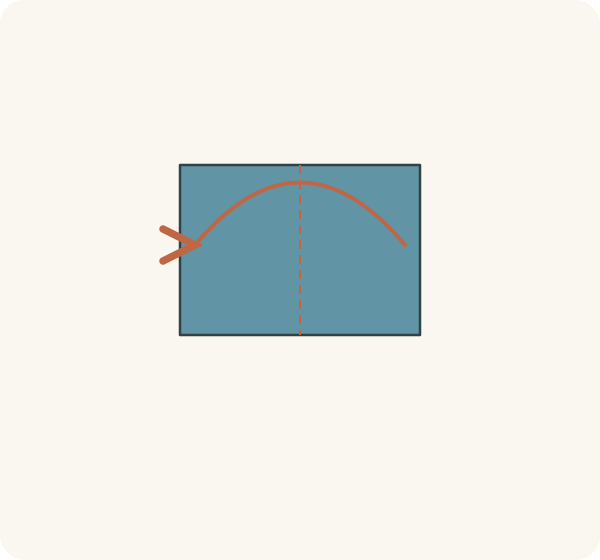
A narrower rectangle has a folded edge on its right.
Step 4: Open only the last fold
Return the upper half to the right. Leave the first horizontal fold closed.
Orientation: Closed horizontal edge at the top; open edges at the bottom.
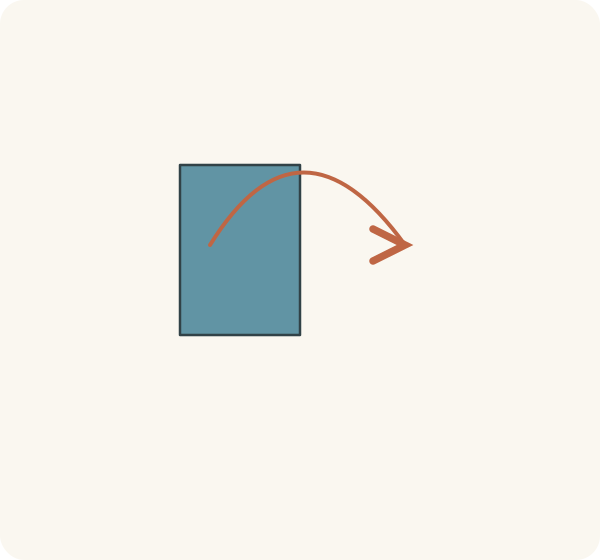
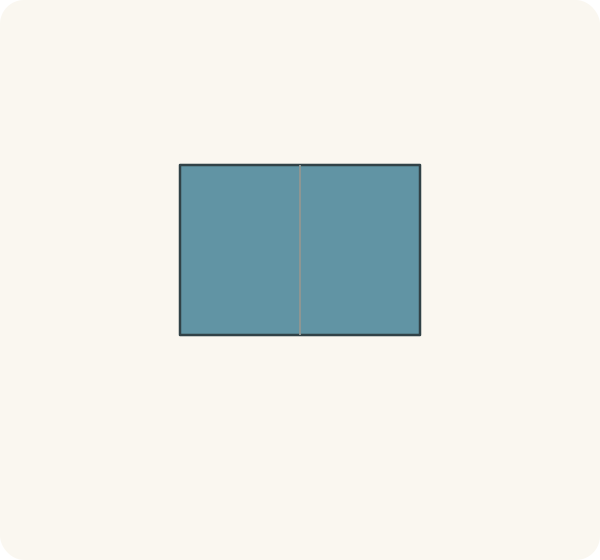
The wide rectangle returns, with a vertical centre crease.
Step 5: Fold the upper left corner to the centre
Bring the upper left corner down onto the centre crease. Align the left half of the closed top edge with that crease. Press the diagonal fold, moving both layers.
Orientation: Keep the open lower strip at the bottom.
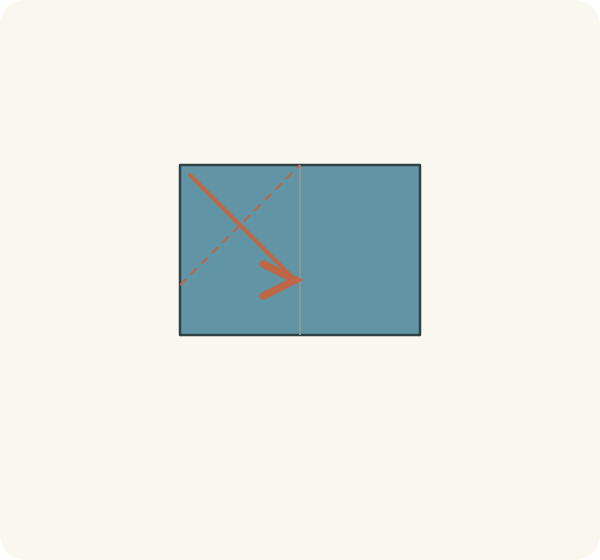
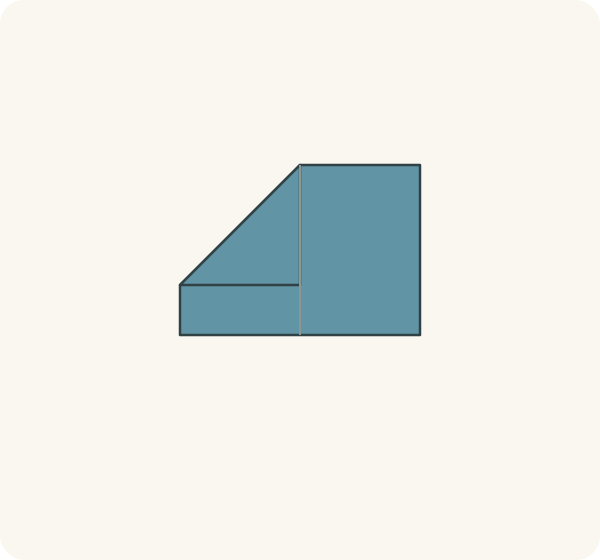
The left side forms half of a pointed roof. A rectangular strip remains below.
Step 6: Fold the upper right corner to the centre
Bring the upper right corner down in the same way. Its closed top edge should meet the left flap along the centre crease. Move both layers and press the diagonal.
Orientation: Do not rotate the paper.
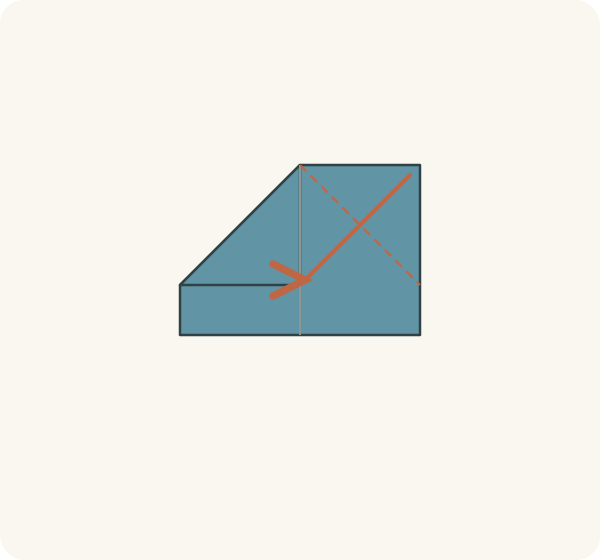
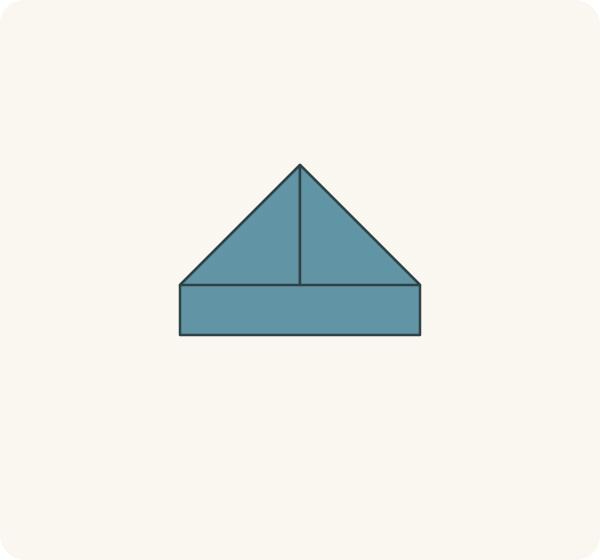
The two folded edges meet at the centre. A pointed roof sits above the lower strip.
Step 7: Lift the front lower strip
Lift only the front layer of the lower strip. Fold it up along the horizontal line at the base of the roof. Press the fold. Leave the strip on the back hanging down.
Orientation: Front face towards you; the top point stays still.
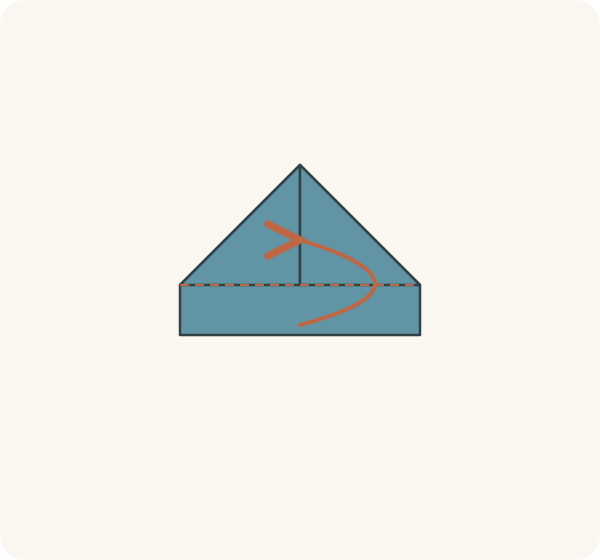
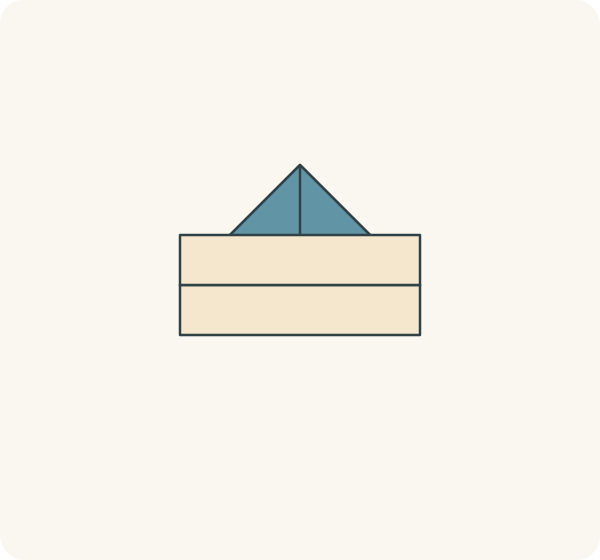
A cream band lies across the front of the roof, with a small overhanging triangle at each end.
Step 8: Tuck the left rim corner behind
Fold the small left overhanging corner backwards around the sloping left edge of the roof. Move only this corner of the raised front strip.
Orientation: The back lower strip remains down.
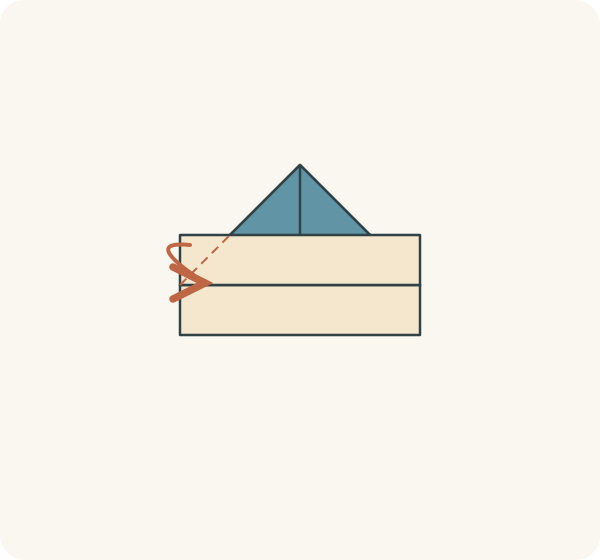
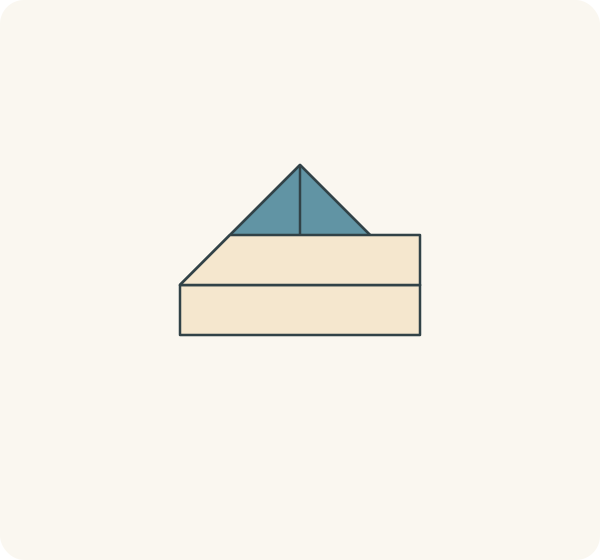
The raised front strip follows the left slope without a projecting corner.
Step 9: Tuck the right rim corner behind
Fold the small right overhanging corner backwards around the sloping right edge of the roof. Move only this corner of the raised front strip.
Orientation: Keep the point at the top and the remaining strip at the bottom.
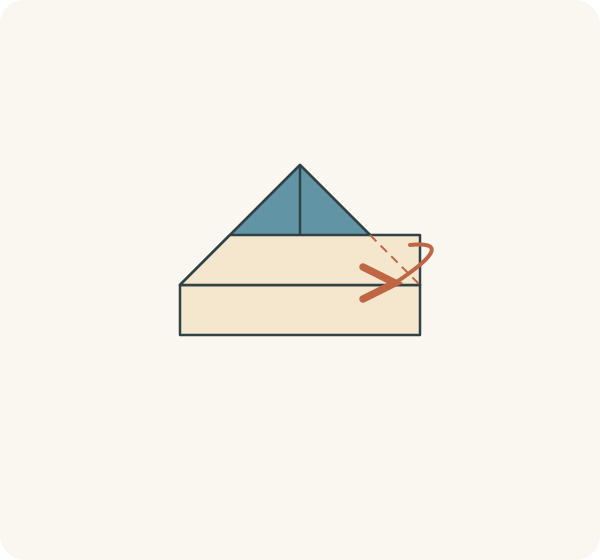
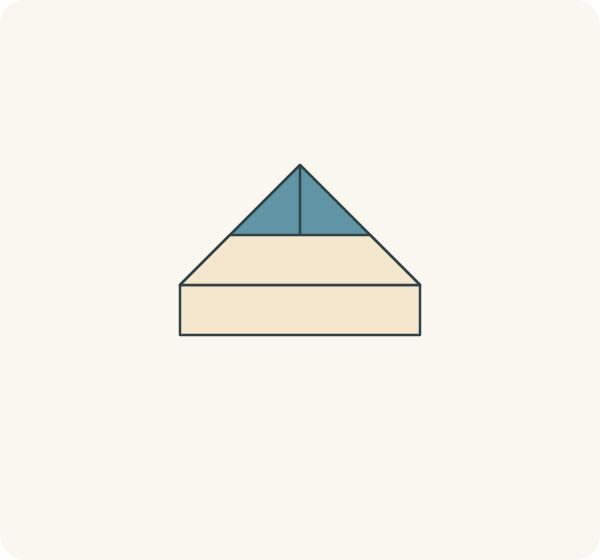
Both ends of the front rim now follow the roof edges.
Step 10: Turn the model over
Turn the whole model over from left to right like a page. Do not rotate it on the table.
Orientation: The point remains at the top; the unraised strip now faces you.
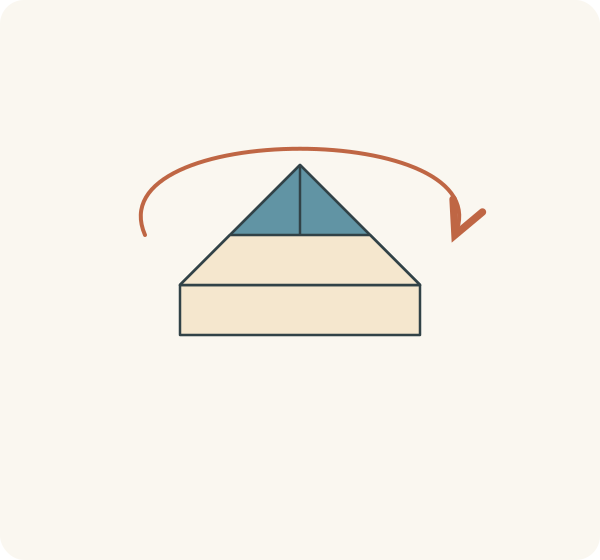
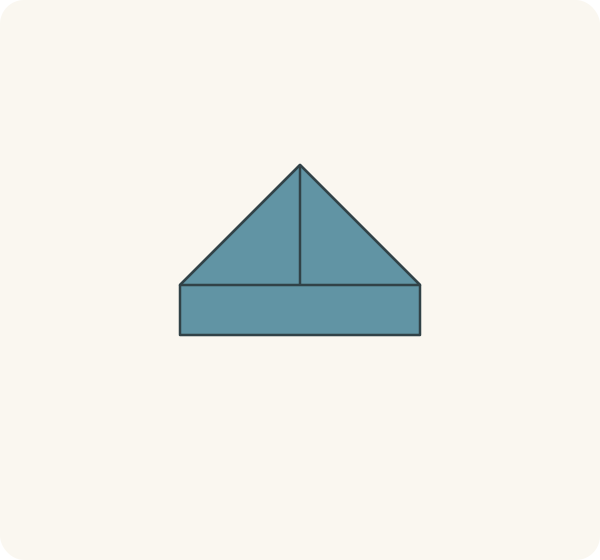
The remaining lower strip is accessible on the front. The first raised rim is behind.
Step 11: Lift the second lower strip
Fold the remaining lower strip up along the base of the roof. The two small corners tucked in steps 8 and 9 stay behind this strip. Press the horizontal fold.
Orientation: Keep the point at the top; move the remaining single strip.
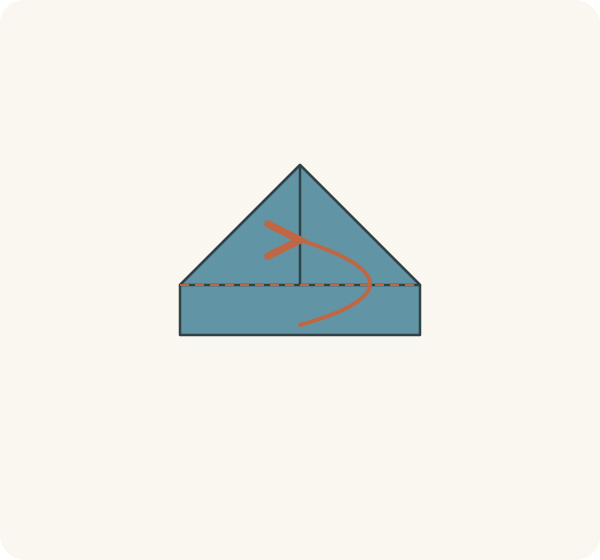
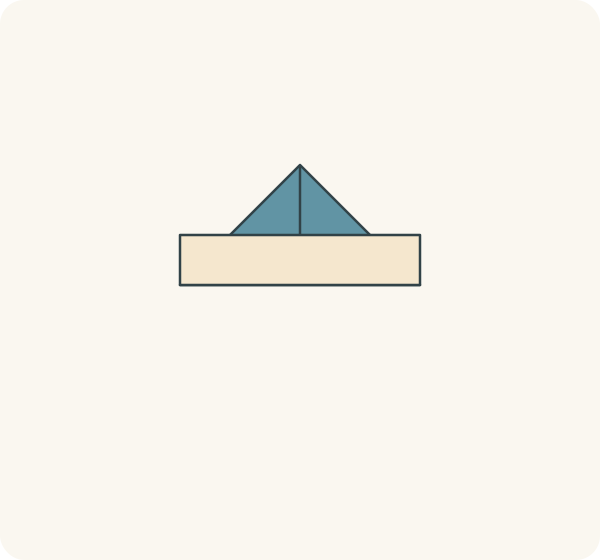
The second rim is raised, with a small projecting corner at each end. The lower edge is open between the rims.
Step 12: Tuck the second rim’s left corner behind
Fold the left corner projecting from the second raised strip backwards around the sloping left edge. Keep the first rim folded in place.
Orientation: The second rim faces you; the point remains at the top.
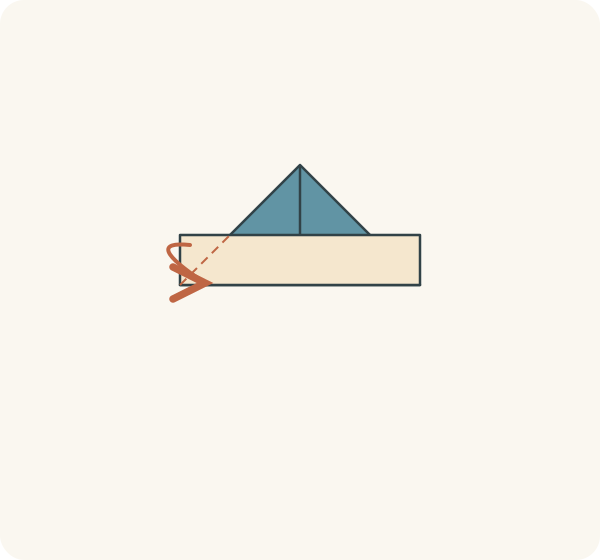
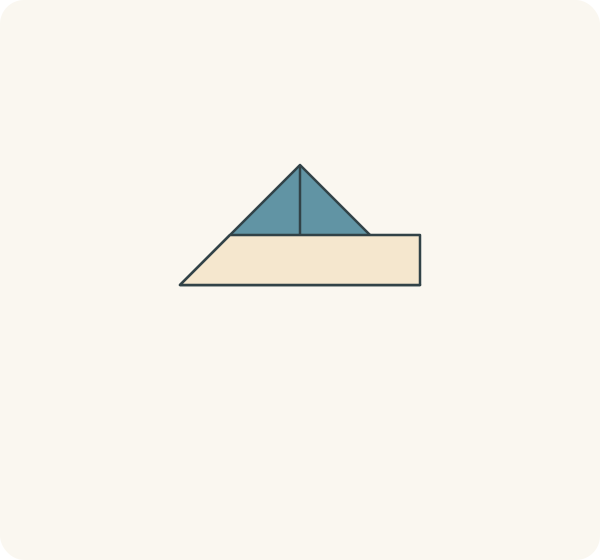
The left end of both rims follows the sloping side of the hat.
Step 13: Tuck the second rim’s right corner behind
Fold the right projecting corner backwards around the sloping right edge. Leave the middle of the lower edge open between the front and back rims.
Orientation: The point stays at the top; do not flatten the two rims into each other.
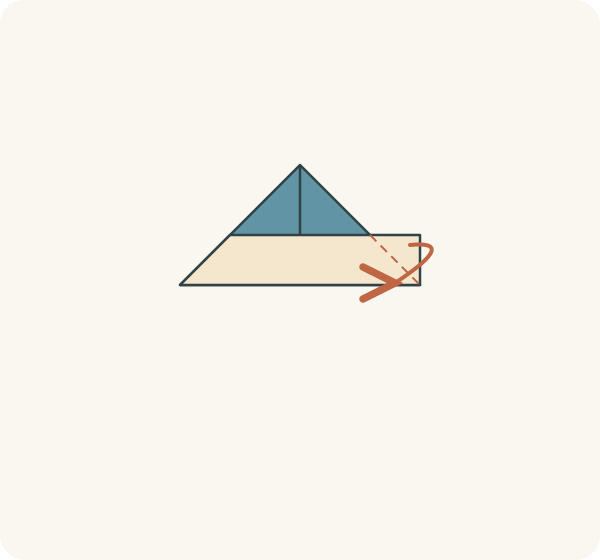
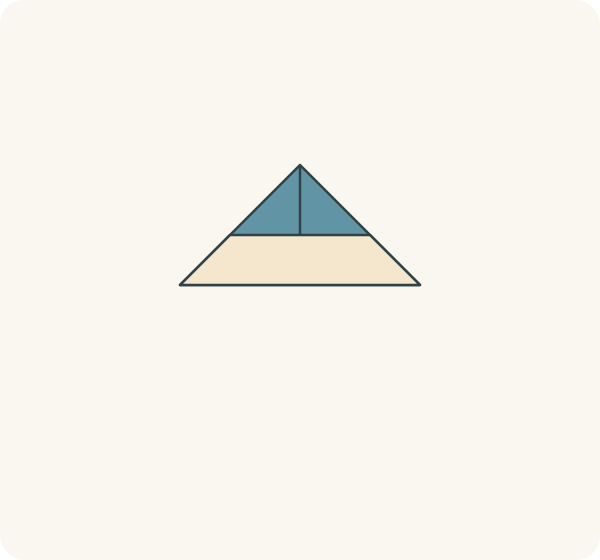
The hat has triangular sides and a pocket accessible from below.
Step 14: Open the hat from underneath
Slide a finger between the two rims at the middle of the bottom opening. Pull the front and back faces apart gently. Leave the top point folded.
Orientation: Lift the model slightly; the drawing now shows an oblique view of the opening.
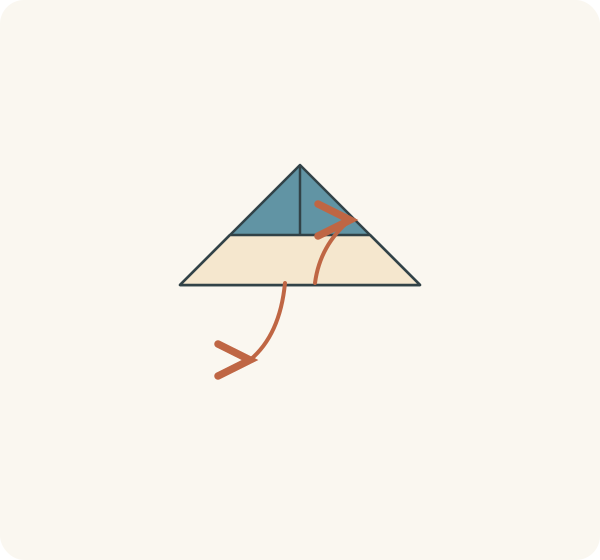
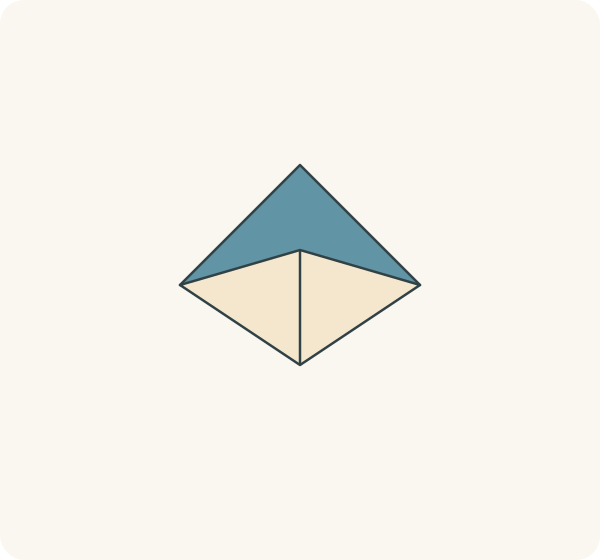
The hat opens into a pocket. Its two lower side corners can move towards each other.
Step 15: Flatten the pocket into a diamond
Bring the hat’s left and right lower corners together. Let the front and back faces flatten in the opposite direction. Place the resulting square flat with one point at the top and one at the bottom. Keep the rim layers overlapped rather than bunching them up.
Orientation: This is a change of flattening direction; do not unfold the roof corners.
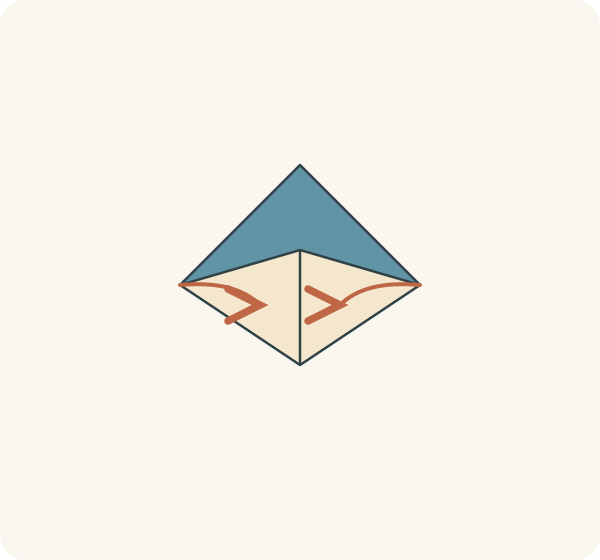
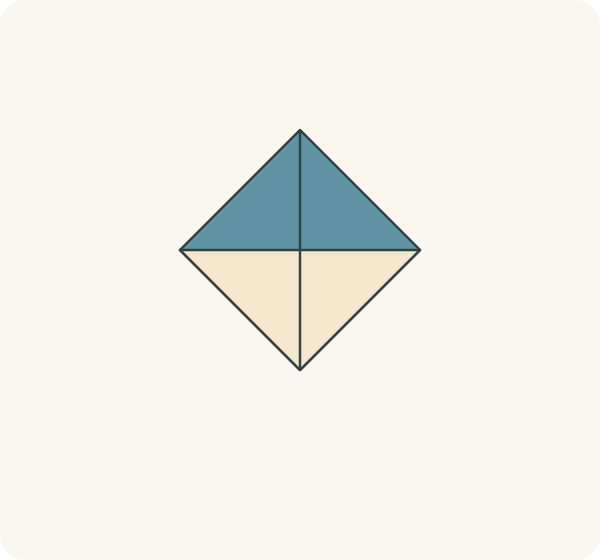
A diamond lies flat. The lower point has separate front and back flaps.
Step 16: Bring the front bottom point to the top
Lift only the front flap at the bottom point. Bring its tip to the top point and press the fold across the horizontal middle of the diamond. Leave the back bottom flap down.
Orientation: Diamond flat; move only its front lower flap.
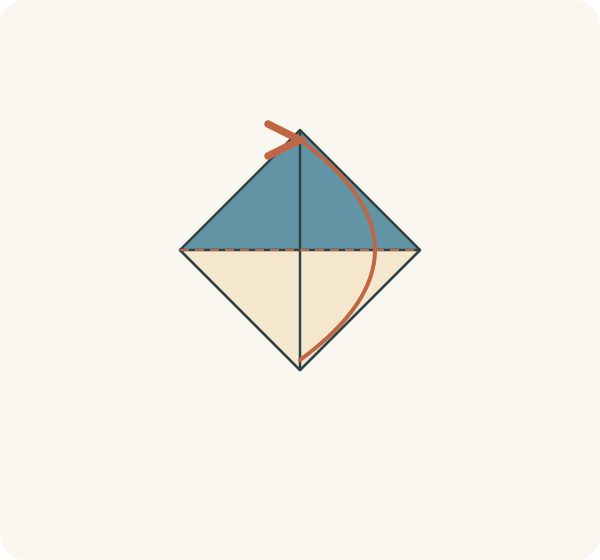
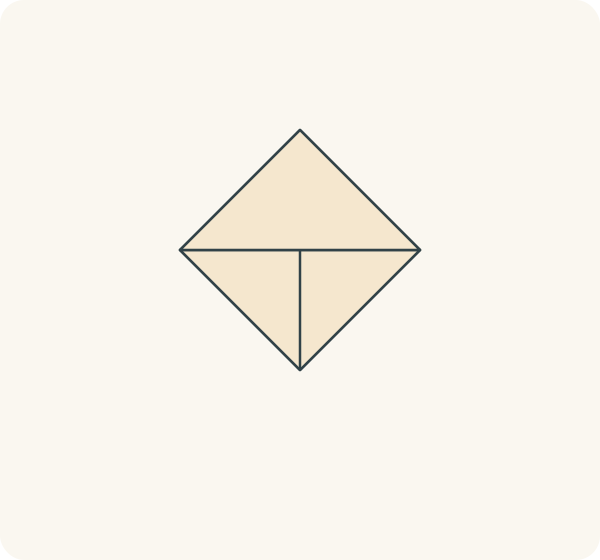
A triangle covers the upper half. One bottom point remains below on the back.
Step 17: Turn the diamond over
Turn the whole model over from left to right, keeping its top and bottom points in the same positions.
Orientation: The unfolded lower flap now faces you.
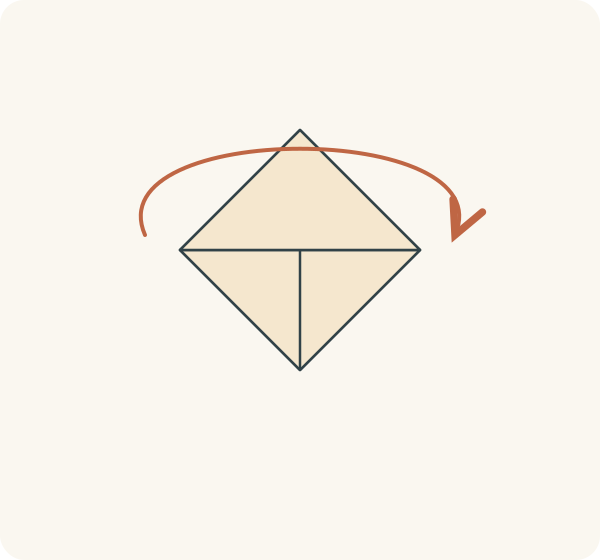
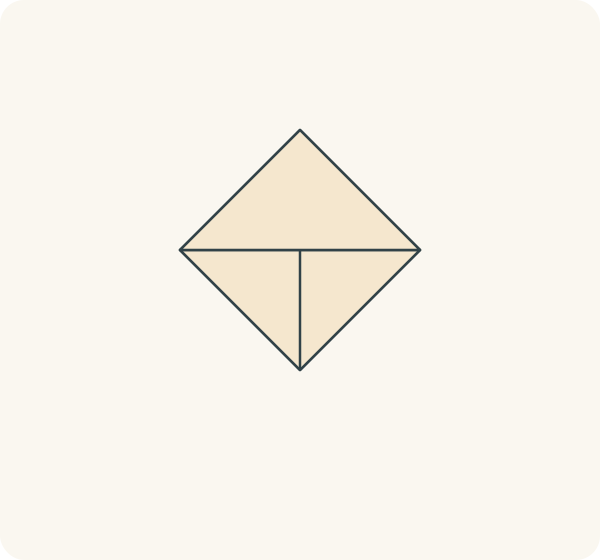
The remaining bottom point is accessible on the front.
Step 18: Bring the second bottom point to the top
Fold the remaining bottom flap up until its tip meets the top point. Press the horizontal fold, matching the first raised flap.
Orientation: Keep the top point away from you.
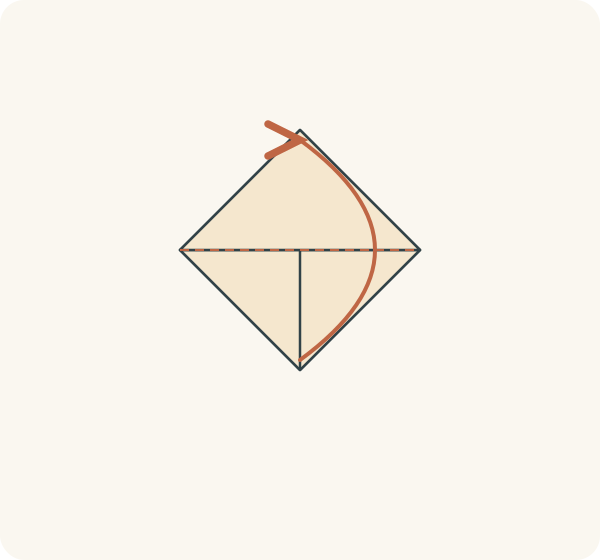
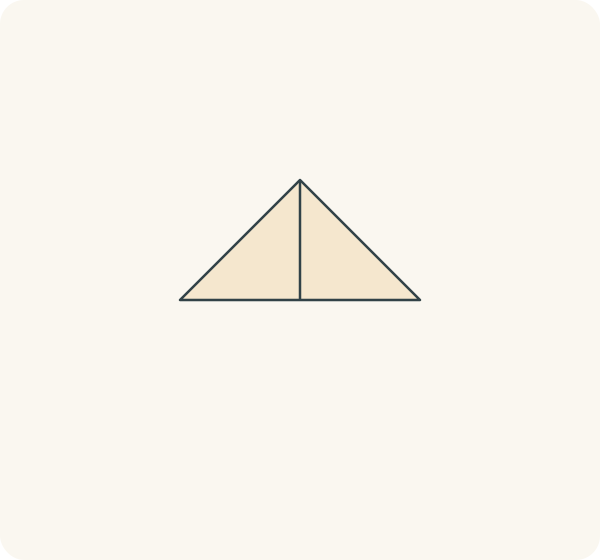
The model is a flat triangle with an opening along its lower edge.
Step 19: Open the triangle from below
Separate the front and back layers at the middle of the lower opening, as you did with the hat. Keep both top flaps together while the pocket opens.
Orientation: Lift the triangle; an oblique view shows the opened pocket.
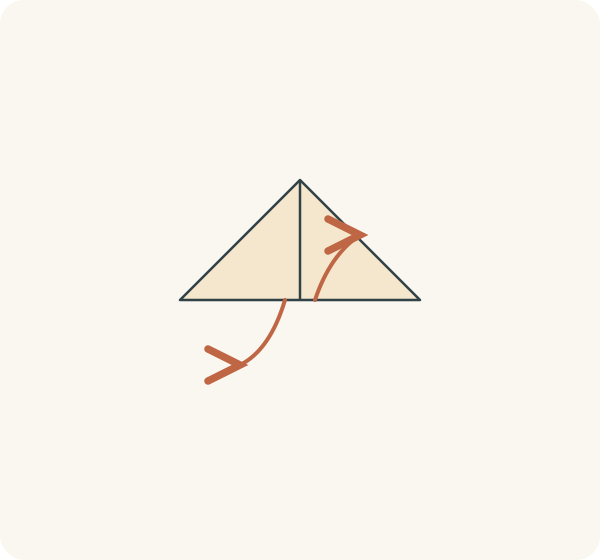
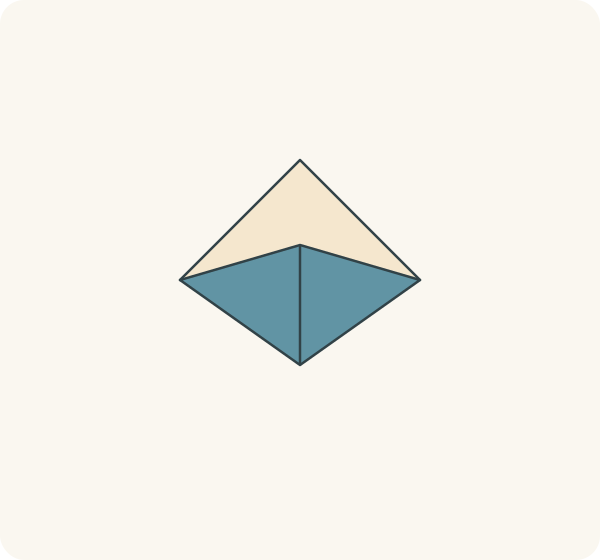
The triangle has depth and its two bottom side corners can approach each other.
Step 20: Flatten the pocket into a smaller diamond
Bring the left and right bottom corners together and flatten the pocket in the opposite direction. Place it with a point at the top. Do not glue or fold the two separate top tips together.
Orientation: Diamond flat on the table; top tips remain separate layers.
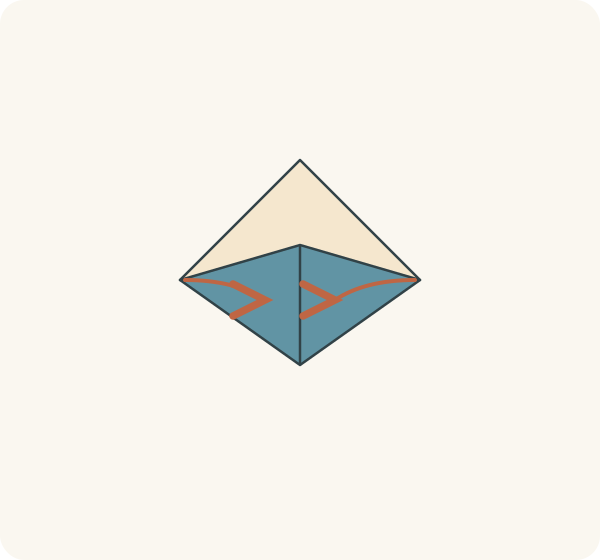
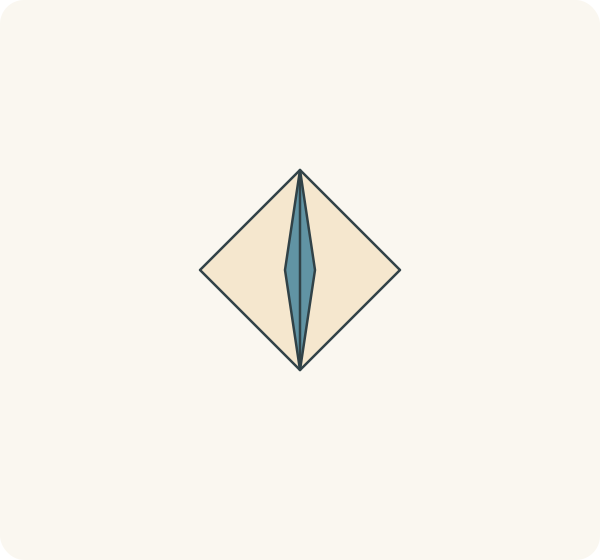
A smaller diamond has two free tips meeting at the top and a closed point at the bottom.
Step 21: Pull the two top tips apart
Hold one free top tip in each hand. Pull one towards your left and the other towards your right. Let the central layers open and the lower point spread as you pull. Stop when the hull has opened; do not flatten the centre point.
Orientation: Lift the model off the table; both hands move outwards.
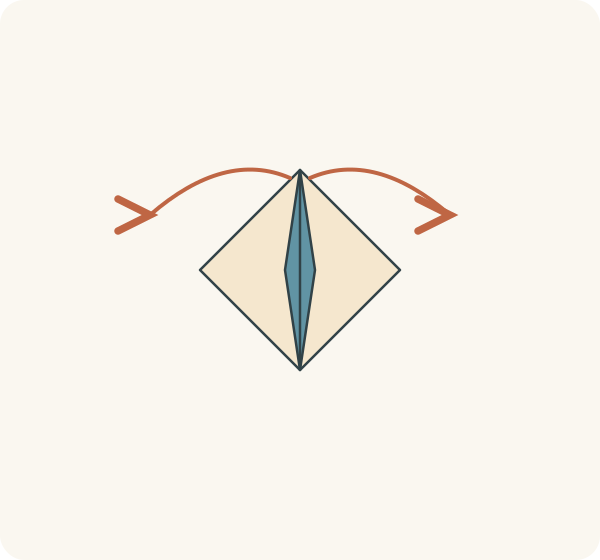
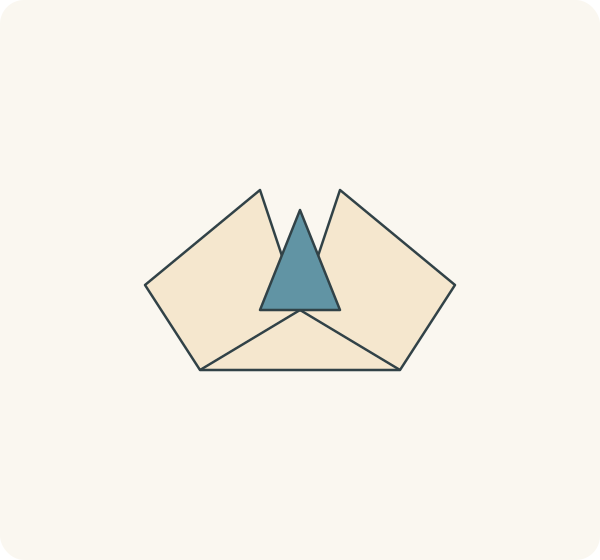
Two ends extend to either side of a raised central triangle. The lower layers form a hollow hull.
Step 22: Open the base and set down the boat
Ease the front and back sides of the hull apart at the middle until the boat can rest on a dry, flat surface. Keep the central triangle upright and the two ends level. This step opens existing folds; it adds no new crease.
Orientation: Oblique view; the raised triangle remains between the two sides of the hull.
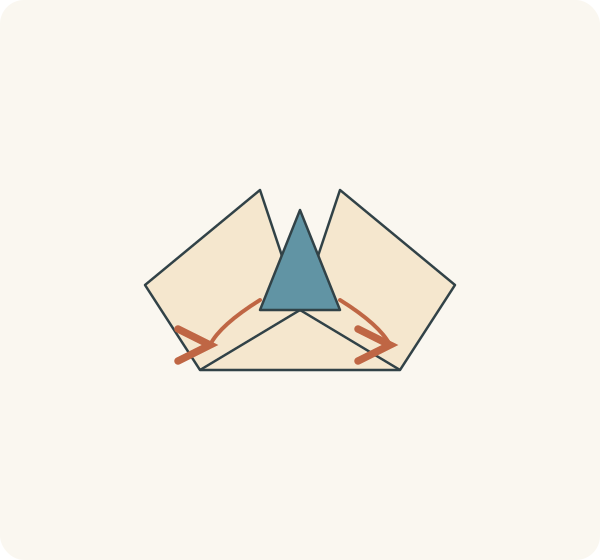

The finished boat has two pointed ends, an open hull and a central triangle.
Check the folds and layers
- At step 2, put the closed edge at the top. Folding the upper corners from an open edge does not make the same hat.
- At steps 7 and 11, move one lower strip at a time. Lifting both together closes the opening needed in step 14.
- When flattening either pocket, bring the two old side corners together. Keep the existing folds and allow the front and back faces to flatten in their new direction.
- At step 20, find two separate free tips at the top. If there is only one closed point, check the orientation before pulling.
- If layers resist an opening, stop and separate the pocket at its middle. Do not force a point or create a tear. These are sequence checks, not observations from a completed physical test.
The finished paper boat
The hull surrounds a raised central triangle, with one pointed end on each side. Keep it on a dry surface. No claim about floating, carrying weight or finished dimensions has been verified for this draft.
Printable version pending the physical folding test.
Source and diagram licence
Sequence redrawn from “Origami boat.svg”, Ftiercel (2011; numbered revision 2012), Wikimedia Commons. The source illustrator released that diagram under PD-self. OrigamiLove adds original text, separate actions, layer notes and new diagrams under CC BY 4.0. The individual inventor of this traditional boat is not identified in the source; the diagram licence does not establish rights in every boat model.
