Prepare your paper
Paper and preparation
- One square sheet measuring 15 × 15 cm. This is a proposed size awaiting a physical folding test.
- A ruler and pencil for the reference marks described below.
- A clean, flat surface for pressing the folds.
- Dashed line: Make the new fold here
- Thin line: Existing crease or visible layer edge
- Curved arrow: Move this part towards the marked destination
- A and B: Reference points described in the text
All diagrams are viewed from above. Left and right refer to your own sides. Keep the top of the diagram pointing away from you; turn the paper over only when the instruction says so.
Read the complete paper & materials guide ↗Folding instructions
Step 1: Position the square
Place the reverse side up. Set the square as a diamond, with one corner at the top and one at the bottom.
Orientation: Cream side up; one unfolded layer.
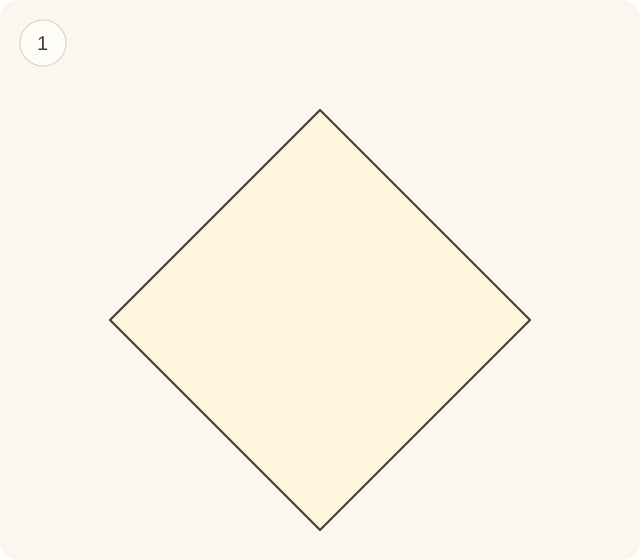
The sheet has a vertical pair and a horizontal pair of opposite corners.
Step 2: Fold left to right
Bring the left corner to the right corner and press the vertical fold.
Orientation: Move only the left half; its coral side turns upwards.
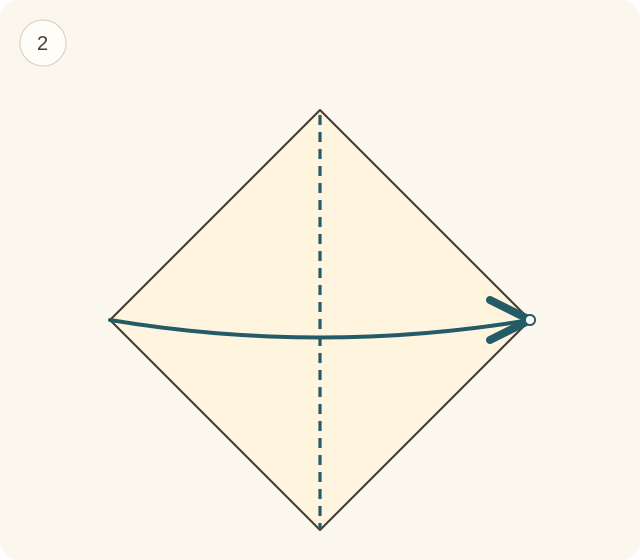
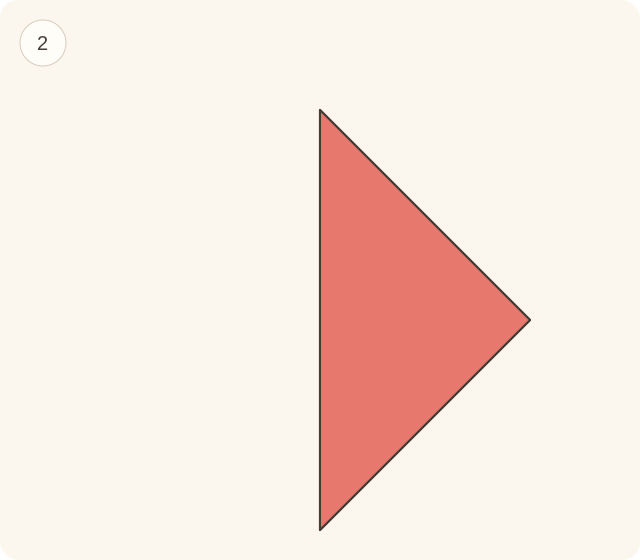
A triangle lies to the right of the vertical folded edge.
Step 3: Open the first fold
Return the upper half to the left until the square lies flat.
Orientation: Cream side up again; keep the original top corner away from you.
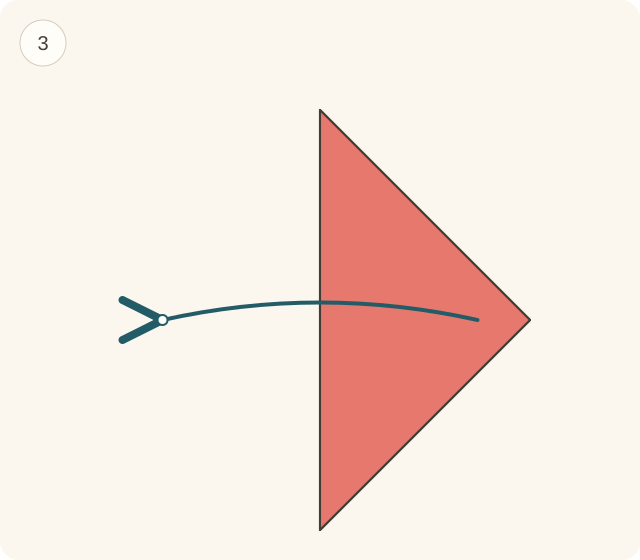
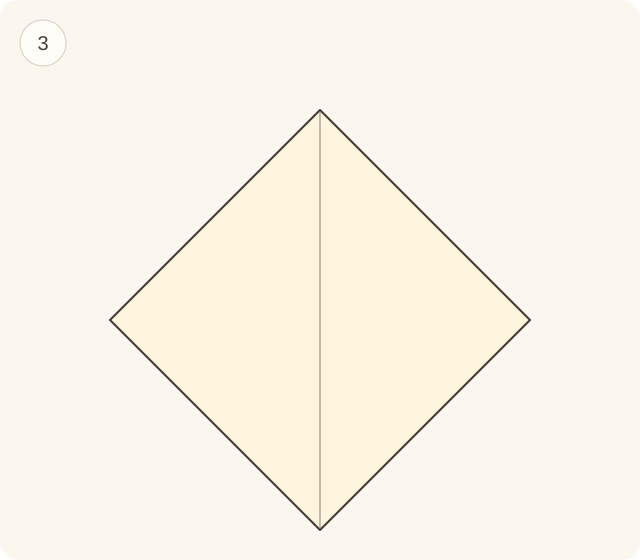
A vertical crease joins the top and bottom corners.
Step 4: Fold top to bottom
Bring the top corner down to the bottom corner. Align the two sloping edges and press the horizontal fold.
Orientation: Move the upper half; its coral side faces up.
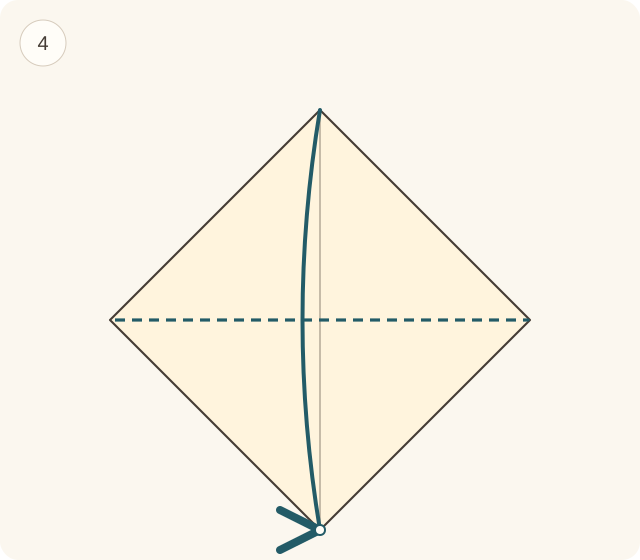
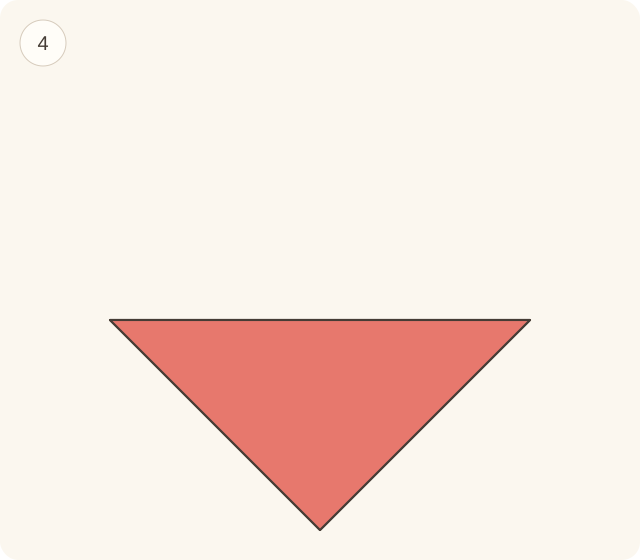
A triangle points down with a horizontal folded edge above it.
Step 5: Open the second fold
Return the upper layer towards the top until the square lies flat again.
Orientation: Cream side up; the diamond has not been rotated.
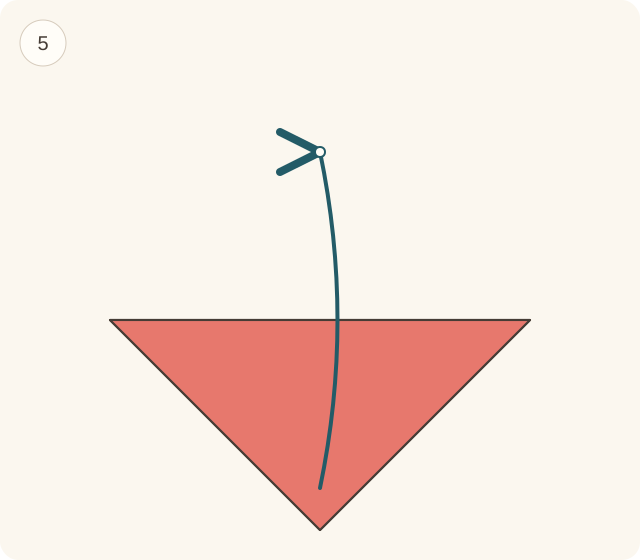
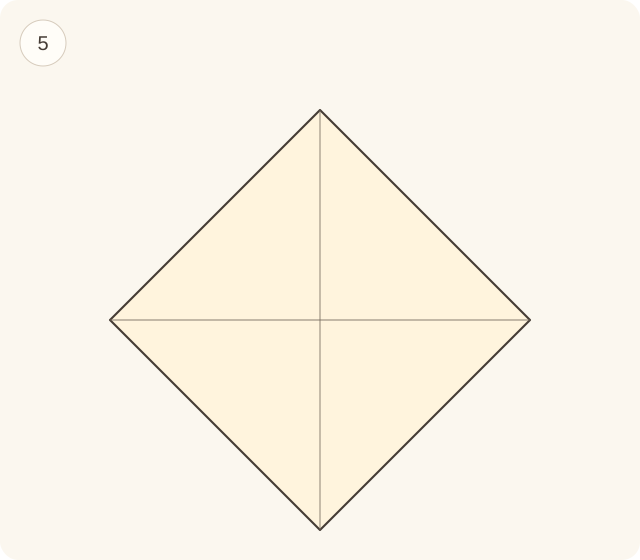
The two diagonal creases cross at the centre of the original square.
Step 6: Bring the top corner to the centre
Fold the top corner down to the intersection of the two creases. Press the horizontal fold.
Orientation: Cream remains visible at the sides; one upper triangular flap moves.
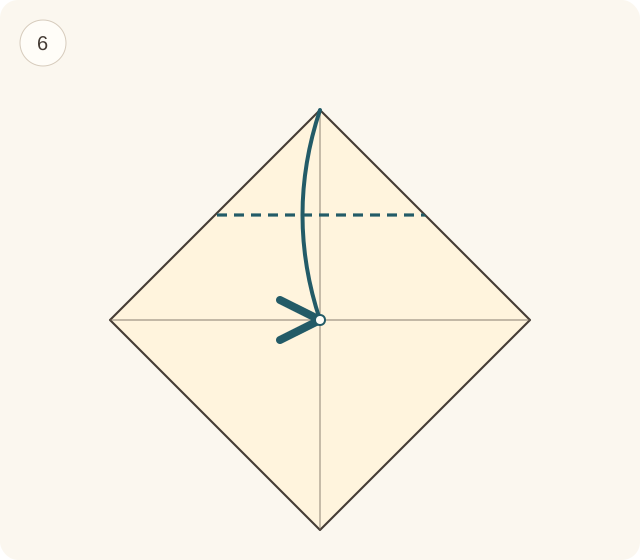
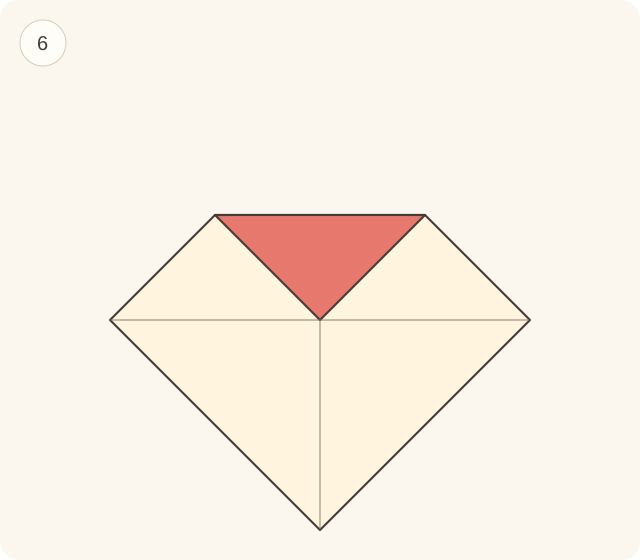
A coral triangle lies on the upper part, with its point at the square centre. A new horizontal edge is above it.
Step 7: Bring the bottom corner to the new top edge
Lift the bottom corner to the midpoint of the horizontal top edge created in step 6. Align it with the vertical centre crease and press the fold.
Orientation: Move the lower triangular portion as one layer; leave the top flap in place.
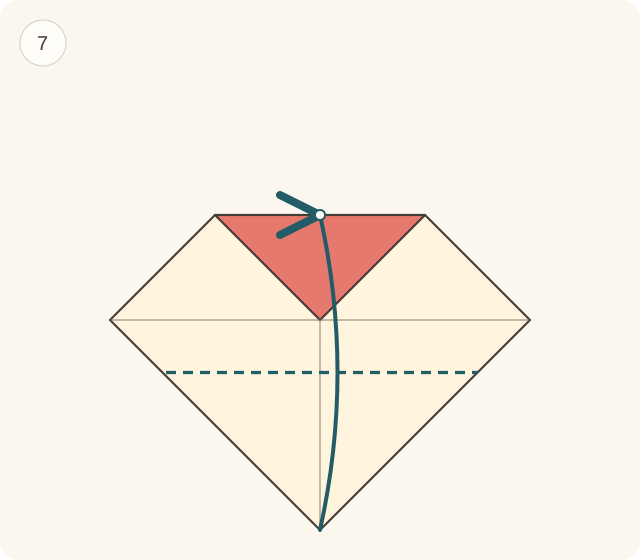
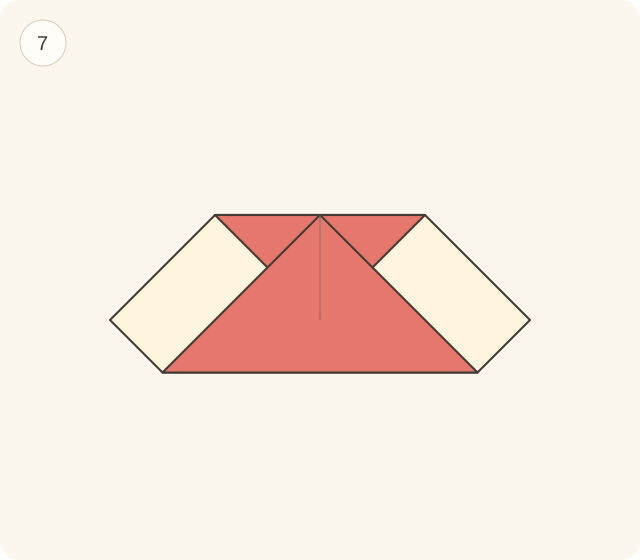
A broad coral triangle covers the middle. Its upper point touches the midpoint of the top edge.
Step 8: Raise the right half
Fold the entire right-hand portion up and left so that the right half of the lower horizontal edge lies on the vertical centre crease. The fold starts at the lower-edge midpoint.
Orientation: Move every layer on the right of the dashed diagonal together. Keep the left half flat.
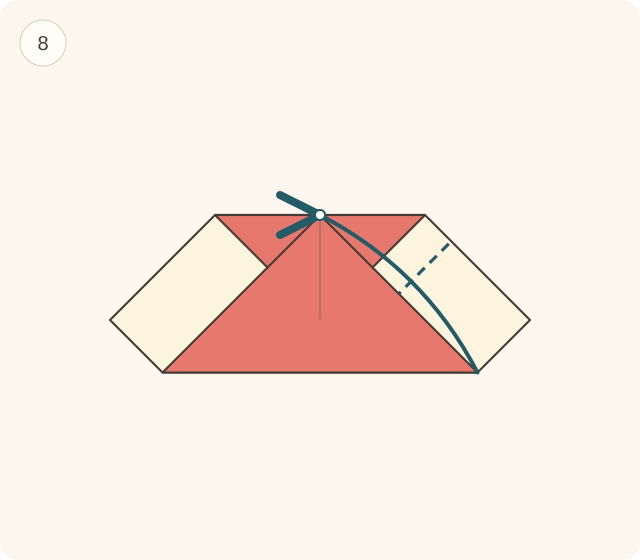
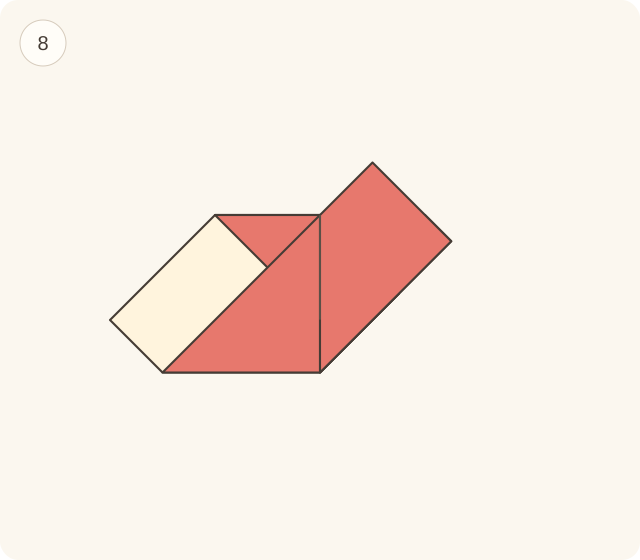
The right side forms one upward lobe; the former right half of the bottom edge is vertical at the centre.
Step 9: Raise the left half
Fold the entire left-hand portion up and right until the left half of the lower edge meets the same vertical centre line. Match it to the folded right half.
Orientation: Move all layers on the left of the dashed diagonal together; keep the bottom centre in place.
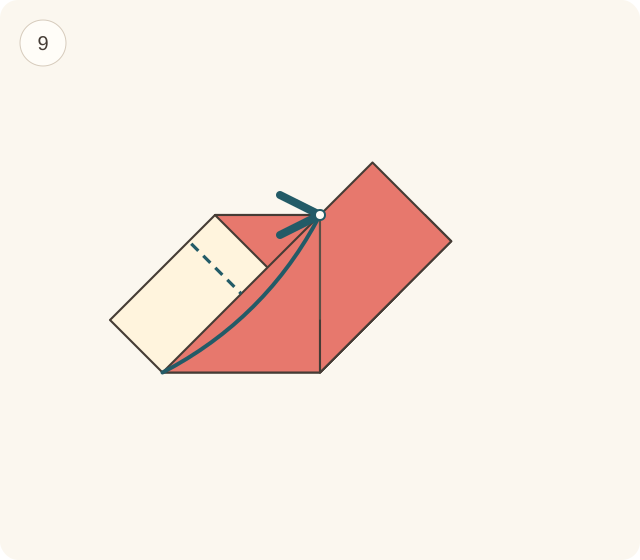
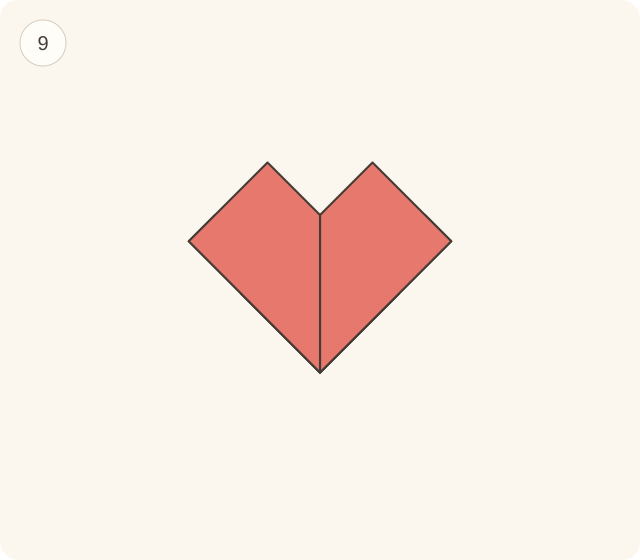
A pointed heart outline appears, with a central notch between two top points and one point below.
Step 10: Turn the heart over
Turn the complete packet over from left to right like a page. Keep the two upper points at the top.
Orientation: The back faces you; all layers remain folded.
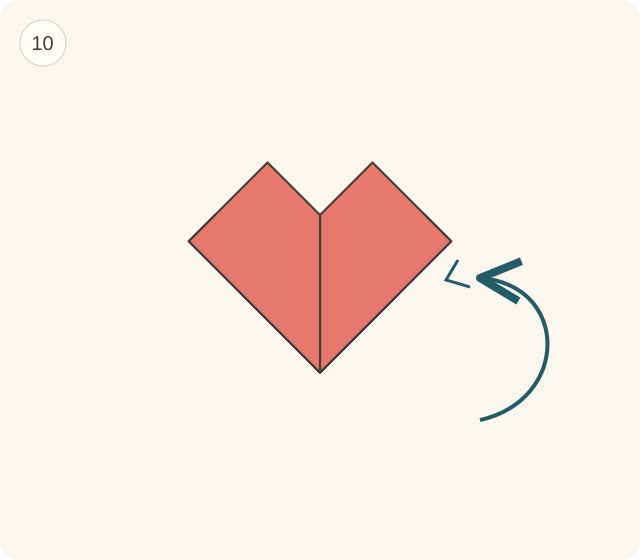
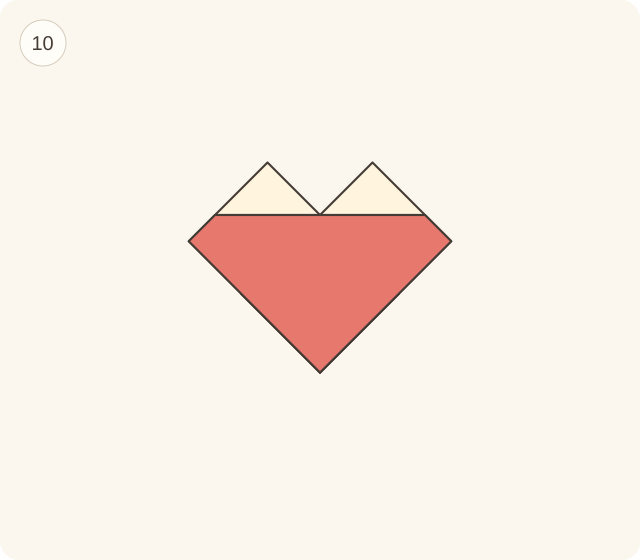
The same heart outline is visible from its back. This side receives the finishing folds.
Step 11: Fold the upper-right tip down
On the back, make a horizontal fold about 1.3 cm below the upper-right tip on the proposed 15 cm sheet. This is halfway between the tip and the level of the central notch. Fold the tip down along this line.
Orientation: Move all layers of this small right tip only. Leave the left tip open.
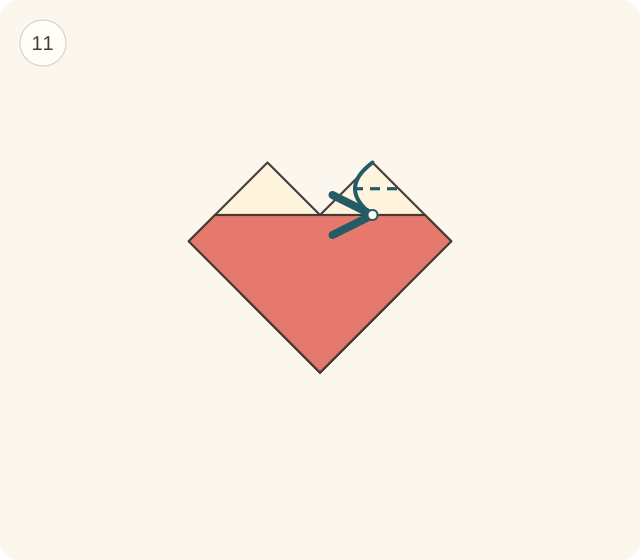
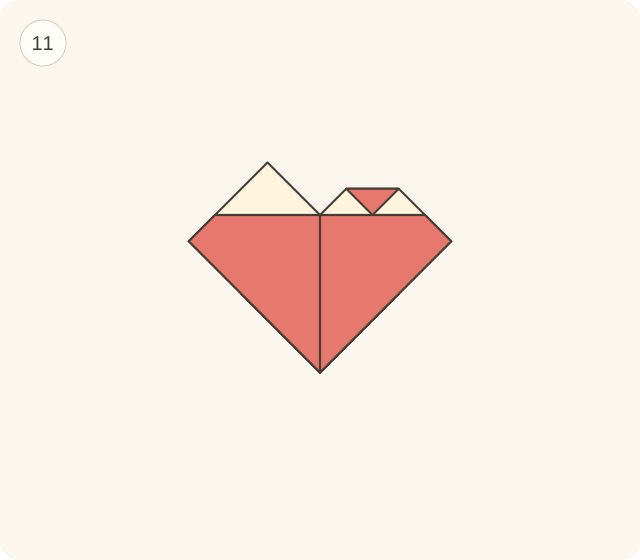
The right top becomes a short horizontal edge, with a small triangular tab on the back.
Step 12: Fold the upper-left tip down
Fold the upper-left tip down using a horizontal crease at the same height as the right-hand fold.
Orientation: Work on the back; move the complete small left tip.
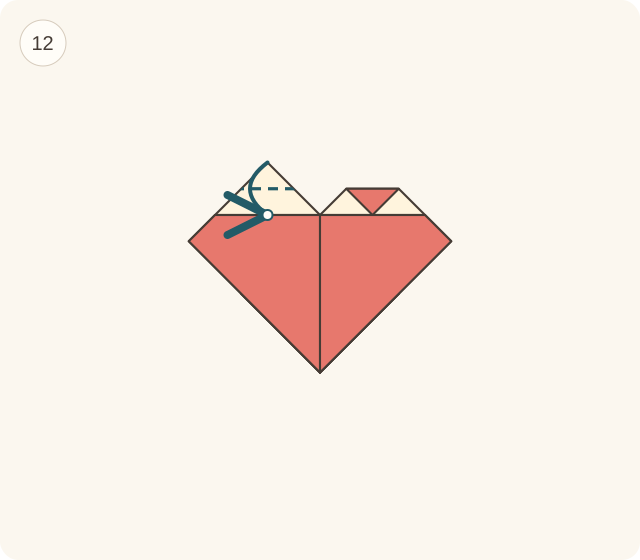
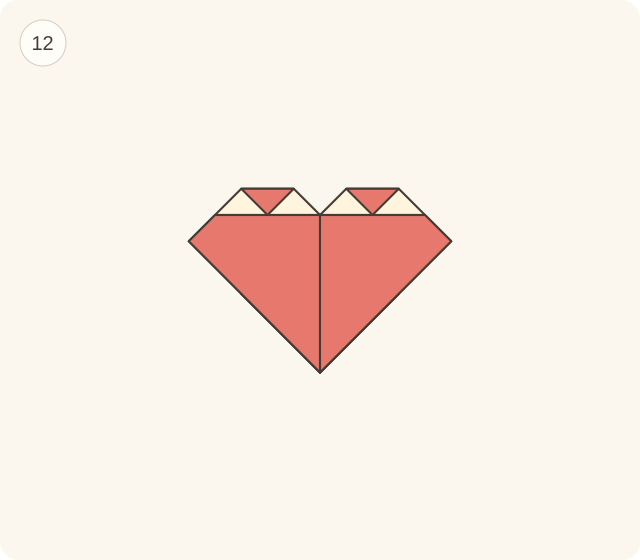
Both top lobes have matching flat tops, with two small tabs visible on the back.
Step 13: Fold the right side point inward
Fold the outer right point towards the centre, using a vertical fold about 1 cm in from that point on the proposed 15 cm square. Keep the bottom point unfolded.
Orientation: Back facing up; move every layer of the small side triangle together.
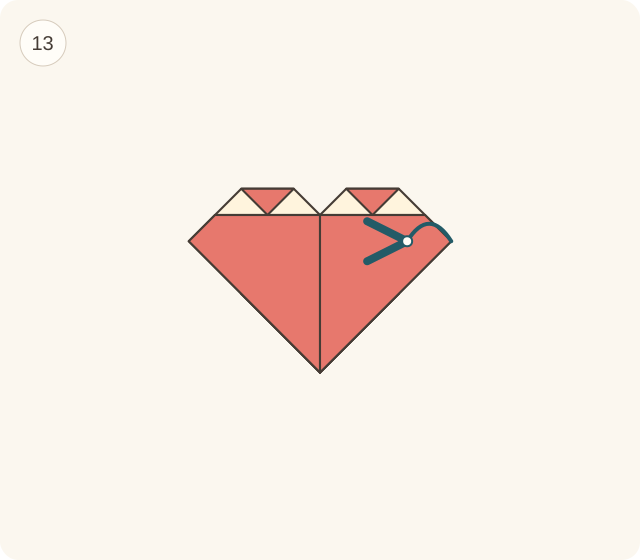
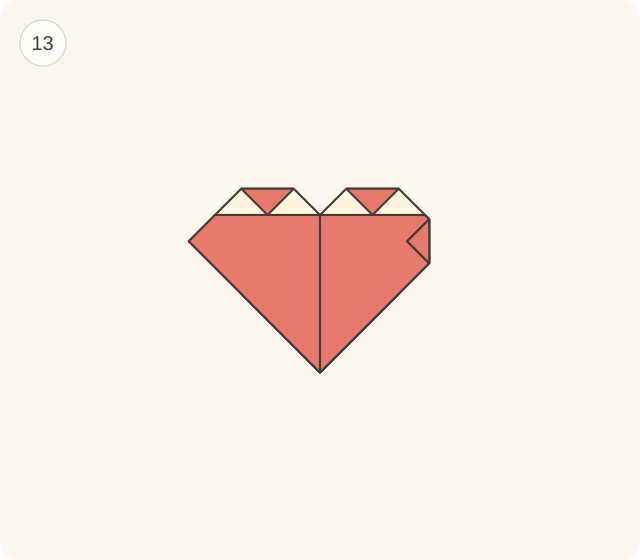
The right outer corner becomes a short vertical edge and its tab rests on the back.
Step 14: Fold the left side point inward
Fold the outer left point inwards with a vertical fold matching the right side. Compare the widths of both lobes before pressing.
Orientation: Keep the back up; move the small left side triangle as one packet.
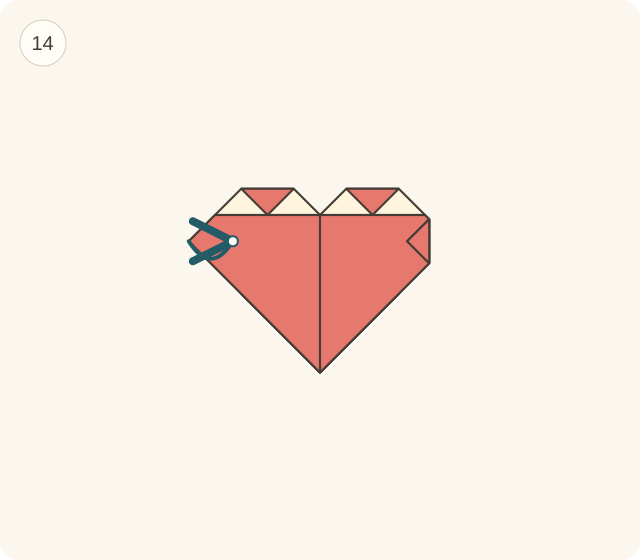
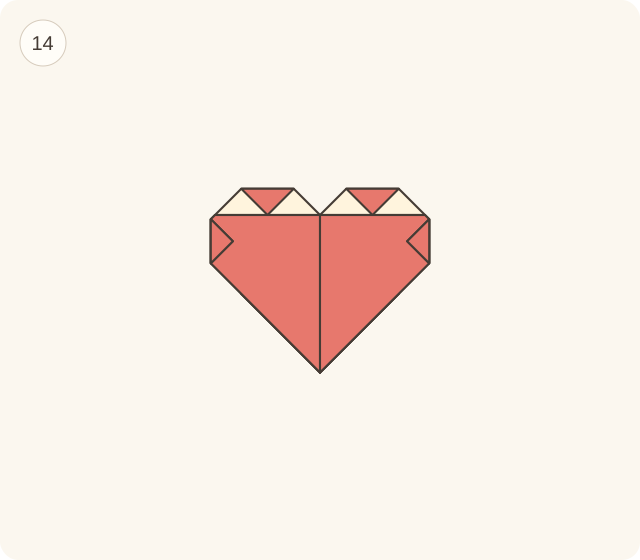
The sides match, and four small finishing tabs lie on the back.
Step 15: Turn the finished heart to the front
Turn the whole model over once more, keeping the central notch above the bottom point. Leave the small tabs folded behind.
Orientation: The front faces up; the finishing tabs are underneath.
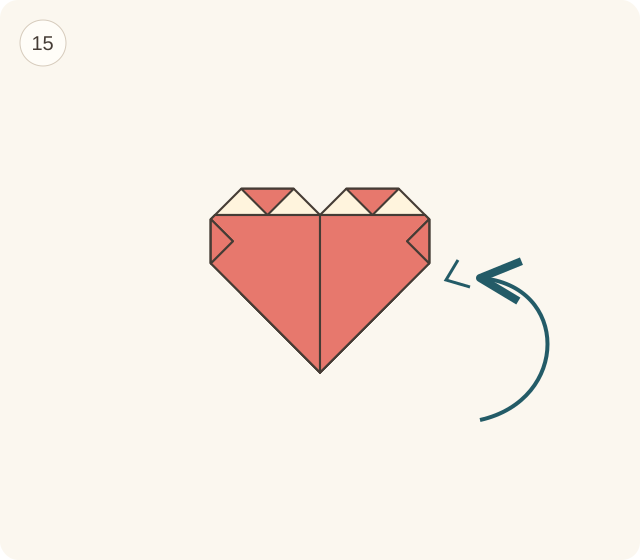
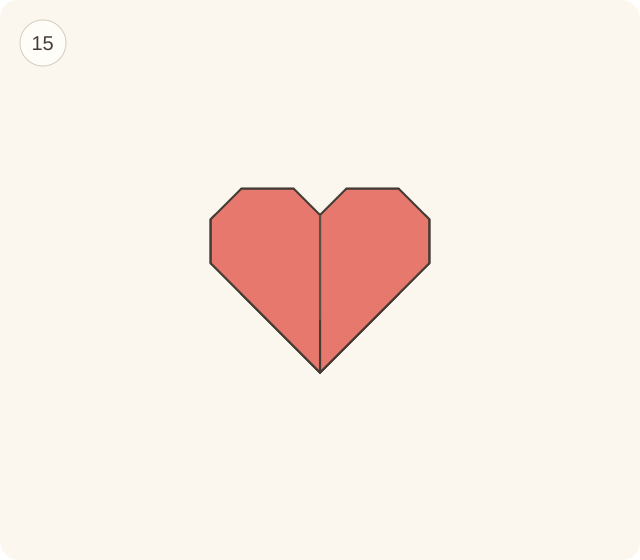
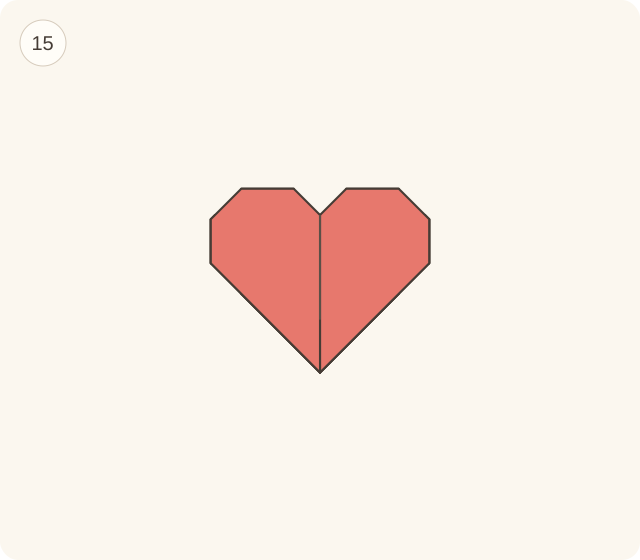
Two shaped upper lobes meet at a notch and taper down to one point.
Reviewed checks before continuing
- After step 5, both diagonal creases must cross at the original square centre. Open only the preparation folds before bringing the top corner to the centre.
- In step 7, the bottom corner touches the midpoint of the new top edge from step 6. It does not stop at the square centre.
- In steps 8 and 9, move every layer on the chosen side together. Each half of the lower horizontal edge becomes vertical along the centre.
- Steps 11–14 are worked on the back. The small folded tabs should be hidden after the last turnover. These are diagram-review checks; the physical sequence remains untested.
Your finished folded heart
The front has two top lobes separated by a notch, sloping sides and one downward point. The four small finishing folds sit on the back. The final illustration shows the same polygonal outline produced by this sequence, rather than a different decorative heart.
Printable version pending the physical folding test.
Model reference and illustration licence
Traditional paper-heart model, identified by Stéphane Gigandet (Origami.plus) and independently described as traditional by Russell (Origami Expressions). OrigamiLove created the bilingual text and geometric SVG illustrations in 2026; no source photos, diagrams or wording are reproduced. Our text and illustrations are licensed CC BY-SA 4.0. These references do not identify the original inventor.